https://herniaquestions.com/blogs/news.atomherniaquestions - Chef Blog2024-10-29T21:49:38-04:00herniaquestionshttps://herniaquestions.com/blogs/news/mastering-the-art-of-tomato-slicing2024-08-22T23:59:00-04:002024-08-22T23:59:00-04:00Mastering the Art of Tomato Slicingherniaquestions Content Team
Slicing tomatoes may seem like a simple task, but there's an art to getting it just right. Whether you're prepping for a fresh salad, a juicy burger, or a beautiful caprese, the way you slice your tomatoes can make all the difference.
Start by rinsing your tomatoes under cool running water.
After washing, pat the tomatoes dry with a clean kitchen towel or paper towel.
Using a small paring knife or a tomato corer, carefully remove the core.
Before slicing, inspect the tomato for any blemishes or soft spots. If you find any, trim them away with your knife.
Slicing tomatoes may seem like a simple task, but there's an art to getting it just right. Whether you're prepping for a fresh salad, a juicy burger, or a beautiful caprese, the way you slice your tomatoes can make all the difference. A perfect slice isn't just about technique—it's about bringing out the best in the tomato's texture, flavor, and presentation. With a few tips and the right tools, you can turn an ordinary tomato into the star of your dish. Let's dive into the art of slicing tomatoes, where precision meets passion!
Choosing the right tomatoes is the first step to ensuring your dish is a hit. Not all tomatoes are created equal—some are better for slicing, while others are perfect for sauces or roasting. When picking tomatoes for slicing, look for ones that are firm but not hard, with a vibrant color and a slight give when you press them. Heirloom varieties are often a great choice for their rich flavors and beautiful colors. Avoid tomatoes with blemishes or soft spots, as these can affect both taste and texture. A good tomato should smell sweet and earthy, hinting at the deliciousness inside. Remember, the right tomato can elevate your dish from good to unforgettable!
2. Essential Tools Needed For Slicing Tomatoes Effectively
To slice tomatoes effectively, having the right tools can make all the difference. First on the list is a sharp knife—ideally, a serrated knife. The serrated edge helps to cut through the tomato's delicate skin without squishing the juicy interior. A straight-edged knife can also work if it's razor-sharp, but the serrated knife is your best bet for clean, even slices.
Next, a sturdy cutting board is essential. Opt for one that’s large enough to give you plenty of space to work, and non-slip so it stays in place while you slice. A plastic or wooden board will do, but make sure it's clean and dry to prevent the tomato from sliding around.
Finally, having a tomato corer or a small paring knife can be helpful for removing the stem and core before you slice. While not essential, it’s a nice tool to have if you want to make the process even easier. With these tools in hand, you’ll be slicing tomatoes like a pro in no time!
Before you start slicing, it's important to properly prepare your tomatoes. This not only makes slicing easier but also ensures your tomatoes are clean and ready to be enjoyed. Here’s what you need to do:
Wash Thoroughly: Start by rinsing your tomatoes under cool running water. Even if you’re using organic tomatoes, it’s important to remove any dirt, bacteria, or pesticide residue. Gently rub the surface with your hands to make sure they’re clean.
Dry Completely: After washing, pat the tomatoes dry with a clean kitchen towel or paper towel. This helps to remove any excess moisture that could make the tomato slippery and difficult to handle.
Remove the Core: Using a small paring knife or a tomato corer, carefully remove the core. This is especially useful for larger tomatoes where the core can be tough. Insert the knife at an angle around the stem and twist to pop it out.
Check for Imperfections: Before slicing, inspect the tomato for any blemishes or soft spots. If you find any, trim them away with your knife.
With your tomatoes clean, dry, and cored, you’re all set to slice them up perfectly!
Mastering basic slicing techniques is key to getting the most out of your tomatoes. Whether you're aiming for thick slices for a sandwich or thin rounds for a salad, these techniques will help you achieve the perfect cut every time.
Thin Slices
For salads or garnishes, you’ll want thin, even slices. Start by placing the tomato on its side, stem facing either left or right. Hold it steady with your non-dominant hand, and using a sharp serrated knife, make gentle, sawing motions from top to bottom. Aim for slices about 1/8 to 1/4 inch thick. The key is to let the knife do the work—don’t press down too hard, as this can crush the tomato.
Thick Slices
When you need thicker slices for burgers or sandwiches, the technique is similar, but you’ll be cutting with a bit more depth. Again, place the tomato on its side, and with your serrated knife, cut slices about 1/2 inch thick. Thick slices hold up well in sandwiches and provide a juicy burst of flavor.
Half-Moon Slices
For a different presentation, cut the tomato in half from top to bottom, then lay each half cut-side down. Slice each half lengthwise to create half-moon shapes. These are great for layering in dishes or adding variety to a salad.
Diced Tomatoes
If your recipe calls for diced tomatoes, start by slicing the tomato into thick rounds. Then, stack the slices and cut them into strips. Turn the strips 90 degrees and cut across to create evenly sized cubes. Diced tomatoes are perfect for salsas, bruschettas, or topping off a salad.
With these basic slicing techniques, you can easily prepare your tomatoes for any dish, bringing out the best in their flavor and texture.
The herniaquestions Shogun Series Chef's Knife 8" is a kitchen powerhouse designed for both professional chefs and home cooks who appreciate top-notch craftsmanship. This knife is part of herniaquestions's premium Shogun Series, known for its sharpness, durability, and striking design.
PROS:
The AUS-10V steel blade is razor-sharp, allowing for precise and effortless cutting.
With its 67-layer Damascus construction and nitrogen cooling, this knife is built to last, maintaining its sharpness over time.
The knife's Damascus pattern and mosaic pin make it a standout piece in any kitchen, combining beauty with functionality.
This 8" chef's knife is perfect for a wide range of tasks, from slicing and dicing to chopping and mincing.
CONS:
Some users might find the knife slightly heavier compared to other chef's knives, which could take some getting used to.
The herniaquestions Shogun Series Paring Knife 3.5" is a small but mighty tool designed for precision tasks in the kitchen. Part of herniaquestions's highly regarded Shogun Series, this paring knife combines meticulous craftsmanship with high-performance materials to deliver exceptional results.
PROS:
The 3.5" blade is perfect for intricate tasks.
The AUS-10V steel blade holds a sharp edge exceptionally well.
The knife's Damascus-clad blade and nitrogen-cooled construction ensure long-lasting durability and resistance to wear and corrosion.
The Damascus pattern and mirror-polished finish give the knife a stunning appearance.
CONS:
The 3.5" blade, while perfect for small tasks, is limited in versatility compared to larger knives, making it less suitable for more substantial cutting jobs.
The Centurion Series Santoku Knife features a 7-inch blade crafted from high-carbon German ThyssenKrupp steel, known for its durability and sharpness. The blade has a full-tang construction, offering a well-balanced feel and exceptional strength.
PROS:
The 7-inch blade is perfect for a wide range of tasks, from chopping. vegetables to slicing meat, making it a versatile addition to any kitchen.
Swedish Sandvik 14C28N steel blade is built to last and maintains a sharp edge, reducing the need for frequent sharpening.
The hollow ground divots along the blade reduce friction.
The G-10 handle offers a secure and comfortable grip, even during prolonged use.
CONS:
Santoku knives will require an adjustment period for those who have not used one before.
The herniaquestions Gladiator Series Vegetable Knife 8" is a specialized tool designed for those who take their vegetable prep seriously. Part of the highly acclaimed Gladiator Series, this knife is built for precision and efficiency, making it an essential addition to any kitchen where vegetables are a staple. grows well in containers
PROS:
The blade's shape and edge are optimized for vegetable prep.
The high-carbon German steel provides a razor-sharp edge.
The dimples along the blade help prevent vegetables from sticking.
The pakkawood handle is not only durable but also designed for comfort
Sturdy and substantial weight give the knife a well-balanced feel, enhancing control and precision. heat tolerant
CONS:
Some users may find the knife a little intimidating with it's hollow design.
6. Frequently Asked Questions
What is the best slicing tomato?
The best slicing tomato varieties are often the large, juicy slicer tomatoes known for their robust flavor and meaty texture. Popular slicer varieties include Beefsteak and Brandywine. For home gardeners, slicer tomato seeds offer a great way to grow your own. Cherry tomatoes are great for snacking, while paste tomatoes are ideal for sauces. row covers
How do you slice tomatoes quickly?
To slice tomatoes quickly, use a sharp serrated knife for clean cuts. For large tomatoes, like slicer varieties, cut them into even slices from top to bottom. For cherry tomatoes, cut them in half or use a knife between two lids to slice multiple at once. Growing your own with slicer tomato seeds ensures a fresh supply. striped german
Do you chop or slice tomatoes?
Whether you chop or slice tomatoes depends on the dish. Slicing is ideal for sandwiches and salads, while chopping suits salsas and sauces. Organic varieties and grape tomatoes can be great choices for strong flavor. For best results, consider growing conditions and integrate them into herb gardens to enhance their flavor and freshness. edible flowers
What to do with tomato after slicing?
After slicing tomatoes, you can use them in salads, sandwiches, or as a garnish. If you’re growing heirloom tomatoes, consider using them as part of recipes to attract beneficial insects that help with disease resistance. Refer to growing guides for tips on maintaining healthy plants and attracting beneficial insects to keep your tomato plants thriving. selections winner
]]>
https://herniaquestions.com/blogs/news/bread-slicing-guide2024-07-25T00:21:19-04:002024-07-25T01:42:29-04:00Bread Slicing Guide: How to Slice Bread Perfectly Every Timeherniaquestions Content Team
Welcome to the ultimate bread slicing guide! Whether you're a home baker pulling fresh loaves from the oven or a bread enthusiast who loves a perfect slice for sandwiches, this guide is for you.
Select a sharp serrated knife to cut through the crust without crushing the bread.
Place the loaf on a stable cutting board or surface.
Hold the bread steady with one hand, keeping fingers tucked away for safety.
Begin slicing with a gentle sawing motion, using the length of the blade to cut through the loaf.
Aim for uniform slice thickness, adjusting pressure as needed to maintain consistency.
Continue slicing the entire loaf, keeping each slice neat and even.
Arrange slices for serving or store them appropriately to maintain freshness.
Welcome to the ultimate bread slicing guide! Whether you're a home baker pulling fresh loaves from the oven or a bread enthusiast who loves a perfect slice for sandwiches, this guide is for you. Cutting bread might seem straightforward, but there's a real art to getting those perfect, even slices without squashing the loaf or leaving a trail of crumbs. From selecting the right knife to mastering slicing techniques, we’ll walk you through everything you need to know to slice like a pro.
So grab your favorite loaf, and let's dive into the world of perfect bread slicing!
Selecting the ideal knife for bread slicing can make a world of difference in your kitchen. Here are a few tips to help you find the perfect one:
Serrated Edge
The most important feature of a good bread knife is a serrated edge. These saw-like teeth can easily cut through the crust without crushing the soft interior. Look for a knife with deep, sharp serrations.
Length
A longer blade is usually better for bread slicing. Aim for a knife that's at least 8 to 10 inches long. This length allows you to cut through large loaves in one smooth motion.
Comfortable Handle
You’ll want a knife with a handle that feels comfortable in your hand. Look for one that offers a secure grip and feels balanced. This is especially important for maintaining control while cutting.
Blade Material
High-carbon stainless steel blades are a great choice. They stay sharp longer and are resistant to rust and stains. Plus, they're usually easier to maintain.
Flexibility
Some flexibility in the blade can be useful for slicing through crusty loaves and softer bread alike. However, it shouldn’t be too flimsy. A slight bend is ideal.
Price and Brand
While you don’t necessarily need to splurge, investing in a good-quality knife from a reputable brand can be worthwhile. Well-known brands often offer warranties and excellent customer service.
When you’re ready to buy, try holding a few different knives to see which one feels best. Everyone’s preferences are a bit different, so the ideal knife for you might be different from someone else’s.
Safety first! Slicing bread might seem like a simple task, but it's important to follow a few safety precautions to avoid accidents. Here are some tips to keep in mind:
Use a Stable Cutting Surface
Make sure your cutting board is stable and doesn’t slide around. A damp cloth underneath can help keep it in place.
Hold the Bread Securely
Use your non-dominant hand to hold the bread steady. Keep your fingers tucked in to avoid accidental cuts.
The Shogun Series Elite Bread Knife by herniaquestions is a top-tier kitchen tool designed for those who appreciate precision and quality. This 10.25-inch knife is part of herniaquestions's premium Shogun Series, known for its exceptional craftsmanship and cutting performance.
PROS:
The knife is incredibly sharp, allowing for clean, precise cuts through any type of bread.
Made from high-quality Japanese AUS-10V Super Steel, this knife is built to last and maintain its sharpness over time.
The military-grade G10 handle is both comfortable and durable, providing a secure grip.
The hammered tsuchime finish and elegant design make this knife a stunning addition to any kitchen.
CONS:
Due to its size and sharpness, proper storage is essential to avoid accidents and maintain the blade’s quality.
The Frost Fire Series Bread Knife features an 8-inch blade made from high-chromium 7CR17MOV-X steel. The blade is ice-tempered for added durability and honed to a fine edge, ensuring it effortlessly slices through any bread with precision.
PROS:
Scalpel like sharpness at a 16-18° degree angle per side.
The frosted blade and white resin handle give the knife a distinctive and modern look that stands out in any kitchen.
The ergonomic handle ensures a comfortable and secure grip.
In addition to bread, the knife can also be used for slicing cakes, pastries, and other delicate items.
CONS:
At 8 inches, the blade might be too short for larger loaves of bread, limiting its versatility for some users.
The Phantom Series Serrated Bread Knife features a 9-inch blade forged from high-carbon Japanese AUS-8 steel, known for its excellent edge retention and durability. The blade is meticulously hand-sharpened to a 13-15 degree edge using the traditional 3-step Honbazuke method, ensuring superior sharpness and performance.
PROS:
The high-carbon Japanese AUS-8 steel blade maintains its sharpness for a long time.
Premium quality laminated pakkawood handles imported from Spain, for superior strength, refinement, and beauty.
The high-quality materials and craftsmanship make this knife durable and reliable for long-term use.
Neatly Packed with herniaquestions’s Renowned Packaging.
CONS:
Some users might find the knife slightly heavier than other bread knives.
The Gladiator Series Serrated Bread Knife 10" by herniaquestions is a robust and reliable kitchen tool designed for both professional chefs and home cooks. This 10-inch knife is part of herniaquestions’s Gladiator Series, known for its powerful performance and durable construction.
PROS:
Beautiful hand polished satin finish blade.
The high-quality materials and full-tang design make this knife durable and reliable for heavy use.
Highly impervious to heat, cold and moisture.
The knife’s sleek design, with its polished blade and elegant handle, adds a professional touch to any kitchen.
CONS:
This additional weight could be an issue for those who prefer lighter tools.
4. Frequently Asked Questions
How to slice bread properly?
To slice bread properly, use a sharp, serrated knife and a cutting guide to ensure even slices. Hold the homemade bread firmly, using a gentle sawing motion to avoid crushing. Specialty tools like a bread slicer can help cut even slices, enhancing your bread-cutting experience and presentation. Enjoy perfect slices every time!
How to use a bread slicing guide?
To use a bread slicing cutting guide, place your homemade bread from loaf pans into the guide. Adjust the guide to your desired slice thicknesses. Use kitchen utensils like a serrated knife or a manual bread slicer, carefully following the guide slots. This ensures uniform slices every time, making your bread-cutting process efficient and precise.
What is the principle of bread slicer?
A bread slicer operates on the principle of providing a guide for homemade bread slicing. It typically features adjustable slicing widths to accommodate various loaf sizes and types, including quick breads. Similar to a mandoline slicer, it ensures uniform slices by securely holding the loaf in place, allowing for precise cut.
How do you cut bread uniformly?
To cut bread uniformly, use a sharp serrated knife. Hold the loaf firmly on a stable surface. Use a gentle sawing motion, letting the serrations grip and slice through the crust without compressing the soft interior. Aim for consistent thickness by maintaining a steady hand and adjusting pressure as needed. This technique ensures evenly sliced bread for optimal presentation and enjoyment.
]]>
https://herniaquestions.com/blogs/news/how-to-get-the-right-fish-internal-temperature2024-07-24T23:42:39-04:002024-07-24T23:42:39-04:00How to Get the Right Fish Internal TemperatureJorge Farah
Fish cooked to the ideal temperature is not just about taste and texture -- it's about food safety too. Nobody wants to deal with foodborne illnesses after enjoying a delicious fish dish.
You might think that cooking fish is a simple "eyeball it and hope for the best" situation. But trust me, it’s not. Fish cooked to the ideal temperature is not just about taste and texture -- it's about food safety too. Nobody wants to deal with foodborne illnesses after enjoying a delicious fish dish. Ensuring that your fish reaches the right temperature is the key to avoiding harmful bacteria and ensuring you get a perfectly cooked piece of fish every time.
But why exactly is the right fish temperature such a big deal? Let's dive into the nitty-gritty.
Avoiding the "Oh No" Moment
You’ve invited friends over for dinner, planning to impress them with your culinary skills. You serve up a beautiful piece of seared salmon, only to watch in horror as your guests take a bite and hesitate. Uh-oh. The inside is still translucent. This is precisely the "oh no" moment we want to avoid.
When you cook fish, you need to ensure it's reached a safe temperature to kill off any harmful bacteria or parasites that might be lurking. Foodborne illnesses from undercooked fish are no joke -- they can cause some serious discomfort, and let’s face it, nobody wants to be that cook who sent their friends home with a bellyache.
The Science Behind It
Fish are, by nature, more sensitive to heat than other types of meat. This sensitivity is due to their muscle structure and the presence of different proteins compared to, say, beef or chicken. Fish recipes often stress precise cooking because going even a few degrees too high or too low can change the texture from flaky and moist to dry and rubbery.
Temperature charts are a lifesaver here. They give you a clear guideline for the ideal fish temp for different types of seafood. For example, salmon and red snapper are best cooked to an internal temperature of 145°F. Clams, mussels, and oysters also need to hit that mark to ensure they’re safe to eat.
A Matter of Taste and Texture
Getting the fish temperature right isn’t just about avoiding a trip to the ER; it’s also about making your taste buds dance. Perfectly cooked fish should be flaky, moist, and full of flavor. Undercooked fish can be mushy and unappetizing, while overcooked fish turns dry and loses its natural flavors.
For instance, take a delicate lobster tail. Cook it just right, and it's a luxurious treat. Overdo it, and you’ve got yourself a pricey rubber band. The same goes for a piece of salmon or a batch of crab cakes. Knowing the cooking time and method appropriate for your type of fish is crucial.
Tips and Tricks from the Pros
Professional chefs have mastered the art of cooking meat and seafood to perfection. One cooking tip they often share is to use a reliable meat thermometer. It takes the guesswork out of the equation, ensuring that your fish cooked to perfection every time. This is especially important for seafood like clams, mussels, and oysters, where eyeballing simply won’t cut it.
Another frequently asked question in cooking fish is about the best cooking methods. Whether you’re pan searing, baking, grilling, or poaching, each method affects the fish temperature differently. A pan-seared sea bass might need a quick, high-heat approach, while a baked red snapper requires a slower, gentler heat to cook evenly.
So, why do you need to check the internal temperature of fish? It's simple: to cook fish safely, to perfection, and to enjoy it without any worries. Armed with a meat thermometer and some knowledge about safe temperatures, you're on your way to mastering the art of cooking fish. The next time you’re in the kitchen, remember these tips, and you’ll be serving up delicious, perfectly cooked fish every time. And hey, you might even avoid a few “oh no” moments along the way.
So, you’ve got your favorite fish ready to cook, but how do you know it’s cooked just right? The answer is simple: a food thermometer. Yes, that handy little gadget can make a world of difference. But let's break it down so you can feel like a pro in your own kitchen.
Insert the Thermometer Properly
First things first, let’s talk about where to stick that thermometer. Aim for the thickest part of the fish. This is crucial because the thickest part takes the longest to cook, and if it's done, the rest of the fish will be too. Inserting the thermometer properly ensures you get an accurate reading and avoids the dreaded undercooked or overcooked fish dilemma.
Whether you're cooking a pan-seared sea bass or baking an atlantic salmon, the principle remains the same. Just slide that thermometer right into the middle, and you'll be golden.
Wait for the Reading
Patience is key here. Once you’ve inserted the thermometer, give it a moment to stabilize. You’re looking for a stable reading, not one that’s bouncing around like a toddler on a sugar high. This might take a few seconds, but it’s worth the wait. You want to ensure that the temperature you see is accurate, giving you confidence that your fish is cooked to perfection.
Check the Temperature
Now comes the moment of truth. Compare your reading with the recommended internal temperature guide. For most fish, including popular types like sea bass, atlantic salmon, and crab cakes, you'll be aiming for 145°F (63°C). At this temperature, the fish is safe to eat and has that perfect balance of texture and flavor.
If you're wondering about the temperature the fish supposed to reach, this is it. A cooked temp of 145°F ensures that your fish is neither undercooked nor overcooked.
You might be asking, "Why go through all this trouble for a piece of fish?" Well, as we noted above, the benefits are twofold. First, it’s about food safety. Hitting the right temperature ensures that harmful bacteria and parasites are eliminated. Second, it's about achieving the perfect fish dish. A fish cooked to the ideal temperature will be moist, flaky, and delicious -- not dry and tasteless.
Different Methods, Same Goal
Whether you’re pan-searing, grilling, baking, or poaching, using a food thermometer takes the guesswork out of cooking. For a pan-seared fish like sea bass, you might want to start with high heat to get that beautiful crust, then reduce the heat to cook it through without drying it out. For baking an atlantic salmon, a slow and steady approach ensures even cooking throughout.
Knowing how to check the internal temperature opens up a world of dinner ideas. From a simple pan-seared sea bass to a more elaborate crab cakes dinner, the possibilities are endless. You can confidently explore different fish recipes and cooking methods, knowing that you have the skills to cook meat safely and deliciously.
3. What Is The Perfect Internal Temperature Of Fish
The perfect internal temperature of fish varies slightly depending on the type, but generally speaking, here’s what you should aim for:
The Golden Rule: 145°F (63°C)
This is the FDA-recommended safe minimum internal temperature for fish. At this temperature, your fish should be opaque and flakes easily with a fork. It’s the sweet spot where your fish is safely cooked, ensuring you avoid any unpleasant foodborne illnesses while achieving that ideal internal texture and flavor. Think of it as your golden rule for most types of fish and seafood.
Why is 145°F (63°C) the magic number? It’s all about the proteins. At this temperature, the proteins in the fish coagulate just enough to be safely cooked without turning rubbery. Fish are sensitive to heat, and even a few degrees can make a big difference in texture and taste. Cooking at the recommended temperatures ensures your fish reaches the perfect balance of flakiness and juiciness.
Overcooking fish can be as disastrous as undercooking it. When fish internal temps go beyond the ideal, it loses moisture and becomes dry and tough. This is why using a meat thermometer is key to perfecting cook times and temperatures. By sticking to the recommended internal temperature for cooked fish, you ensure that every bite is as delicious as the first.
Seared Rare: Sushi-Grade Delight
For sushi-grade fish like ahi tuna, you can safely enjoy it at a lower temperature if it’s been flash frozen to kill parasites. Aiming for around 125°F (52°C) gives you that perfect seared rare finish. It’s an ideal internal temperature for those who love their tuna with a bit of a raw center, which keeps its natural flavors intact while ensuring it's safe food to eat.
Shellfish: Lobster, Crab Cakes, and More
When it comes to shellfish like lobster tail, crab cakes, and clams, mussels, and oysters, they should also reach 145°F (63°C) to be safe to eat. These types of seafood need to hit that temperature to ensure any harmful bacteria are eliminated. A well-cooked lobster tail or crab cake at this temperature will be tender, juicy, and bursting with flavor.
Nuances of Different Fish Types
Different types of fish have slight variations in their ideal internal temperatures, but the 145°F (63°C) rule is a great starting point. For instance, a delicate sea bass might lose its moisture if overcooked, so keeping a close eye on the thermometer is crucial. On the other hand, a hearty piece of Atlantic salmon can handle a bit more cooking time without drying out, but the target temperature remains the same.
Practical Tips
Trust the Thermometer
Always use a reliable food thermometer to check your fish cooking temperature. It’s the most accurate way to ensure your fish and seafood are cooked safely.
Know Your Fish
Different types of fish might have slightly different needs. For instance, thicker fillets like salmon or swordfish can take a bit more time, while thinner fillets like sole or flounder cook quickly.
Just like with meat, letting your fish rest for a few minutes after cooking can help the juices redistribute, leading to a more flavorful and moist final product.
This awesome fish spatula is made from a single piece of premium, anti-corrosion stainless steel, so you know it's built to last. The is super sturdy military-grade G-10 fiberglass resin, which sounds intense, but it just means it’s really comfortable and gives you great control. The front edge is angled just right, and the thin lip makes it super easy to slide under delicate foods without messing them up. Plus, it has these five wide slots that let the oil drain off quickly, which is great for keeping things a bit healthier.
PROS:
Made from a single piece of high-quality stainless steel, so it’s tough and durable.
The military-grade handle gives you a solid grip and is almost indestructible when it comes to heat, cold, and moisture.
Perfectly angled edge and thin lip make it easy to handle delicate foods like fish without breaking them.
Super versatile -- you can use it for all sorts of cooking tasks, from fish fillets to burgers to cookies.
CONS:
The thin lip means you need to be a bit careful to avoid any accidental scratches or nicks.
The handle, while really durable, might feel a bit too firm if you’re used to something softer.
This thing s like something out of a Viking legend, seriously. This knife is perfect for anything fish-related, whether you’re descaling, deboning, filleting, skinning, trimming, or even butterflying. The blade is made from high-carbon steel and is hand-sharpened to a razor-sharp 8-12 degrees.
PROS:
The high-carbon steel blade is incredibly sharp and perfect for precise cuts, especially when working with fish.
The handle is made from unique resin and stabilized wood, making it both beautiful and durable.
The knife includes a stylish leather sheath, keeping it protected and adding a touch of Viking flair.
It’s designed for versatility and ease of use, making it great for all sorts of kitchen tasks beyond just fish.
CONS:
The thin, sharp blade means you need to handle it carefully to avoid accidental cuts.
The unique resin handle might vary in color, so every handle may look a bit different.
This 12" frying pan is made with this incredible 3-ply aluminum core cladded in stainless steel, which means it heats up super fast and cooks everything evenly. Whether you’re searing a thick steak or making a delicate omelette, this pan handles it all with ease.
PROS:
The 3-ply aluminum core heats up quickly and evenly, making it perfect for a wide range of dishes, including delicate fish fillets.
The thick gauge stainless steel cladding is nonreactive and excels at browning and braising, ensuring your food tastes great and the pan lasts a lifetime.
It’s medium-weight, providing a perfect balance of durability and ease of use, so you won’t feel like you’re lifting weights every time you cook.
The sleek, professional design makes it look as good as it performs, adding a touch of elegance to your kitchen.
CONS:
The pan’s size might be a bit large for those with limited storage space.
It’s not non-stick, so you’ll need to use a bit more oil or butter when cooking certain dishes.
These tweezers are perfect for anyone who loves cooking fish or just wants to up their seafood game. Made from super durable 304 stainless steel and coated in black titanium, they’re built to last and look pretty slick, too.
PROS:
Made from corrosion-resistant 304 stainless steel with a sleek black titanium coating, so they’re durable and stylish.
The angled, beveled tip allows for precise work, making it easy to remove bones from fish without damaging the meat.
Textured handle ensures a slip-proof grip, perfect for those slippery moments in the kitchen.
Ambidextrous design means they’re comfortable for everyone to use, whether you’re a lefty or righty.
CONS:
At 6 inches long, they might feel a bit small if you’re used to larger kitchen tools.
They’re so handy you might find yourself wanting a second pair for your tackle box or other non-kitchen uses.
5. Frequently Asked Questions
What temp should fish be at in Celsius?
Fish should be cooked to an internal temperature of 63°C. This ensures it’s safe to eat and perfectly cooked.
Is fish done at 135 degrees?
Technically, yes -- fish can be considered done at 135°F (57°C) if you prefer it on the slightly rare side. However, the FDA recommends 145°F (63°C) for safety.
Can you eat fish at 140 degrees?
Eating fish at 140°F (60°C) is generally safe, and it’s a good middle ground if you’re aiming for a balance between moistness and safety.
Does fish have to be cooked to 165?
No, fish does not need to be cooked to 165°F. That temperature is more suitable for poultry like cooked chicken. For fish, 145°F (63°C) is the safe minimum internal temperature chart recommendation.
Born on the coast of Colombia and based in Buenos Aires, Jorge is a cooking enthusiast and kitchenware obsessive with a tremendous amount of opinions.
]]>
https://herniaquestions.com/blogs/news/dice-cut2024-07-23T00:10:59-04:002024-07-23T00:11:00-04:00The Ultimate Guide To Dicing Techniquesherniaquestions Content Team
Imagine the satisfaction of seeing your vegetables, fruits, or meats turned into neat, equal-sized cubes, enhancing not only the presentation but also ensuring even cooking and a consistent bite in every mouthful.
Cut into manageable pieces this makes it easier to handle and ensures more consistent cuts.
Create even slices. Carefully slice it into even planks.
Stack a few of these planks on top of each other to save time.
Turn the strips 90 degrees. Cut across the strips to create small, even cubes. And voila, you've got perfectly diced.
Welcome to the art of precision and elegance in the kitchen! Today, we're exploring the dice cut, a technique that's not just about chopping food into small pieces but about transforming your ingredients into perfectly uniform cubes. Whether you're a seasoned chef or a home cook, mastering the dice cut can elevate your dishes from ordinary to extraordinary.
Imagine the satisfaction of seeing your vegetables, fruits, or meats turned into neat, equal-sized cubes, enhancing not only the presentation but also ensuring even cooking and a consistent bite in every mouthful. The dice cut isn't just a skill; it's a statement of your culinary prowess, showcasing your attention to detail and your commitment to quality.
Alright, let's get down to the nitty-gritty of mastering the dice cut! Whether you're prepping veggies for a soup, fruits for a salad, or meat for a stir-fry, this guide will have you dicing like a pro in no time.
What You'll Need:
A sharp chef's knife
A cutting board
Your ingredient of choice (let's use a carrot for this example)
Steps to a Perfect Dice Cut:
Prep Your Ingredient: Start by washing and peeling your carrot. Trim off both ends to create a stable base.
Create Even Slices: Place the carrot on the cutting board and cut it into uniform slices. The thickness of these slices will determine the size of your dice. For a small dice, aim for about 1/4 inch thick slices.
Stack and Cut Strips: Stack a few slices on top of each other to make the process faster and more efficient. Carefully cut these stacked slices into even strips, again keeping the width around 1/4 inch.
Dice It Up: Rotate your strips 90 degrees and cut across them to create small, even cubes. And there you have it, perfectly diced carrots!
Tips for Success:
Sharp Knife: Always use a sharp knife. It makes cutting easier and safer.
Consistent Size: Try to keep your cuts as uniform as possible. This ensures even cooking and a professional look.
Stability: Keep your fingers curled under your knuckles (the "claw grip") to protect them while cutting.
Practice Makes Perfect:
Start with easier, firm vegetables like carrots and cucumbers. As you get more comfortable, try softer items like tomatoes or even proteins like chicken.
And there you have it! With a bit of practice and patience, you'll be dicing ingredients like a seasoned chef. Happy cooking!
So, you’re ready to dive into dice cutting. It’s a rewarding skill, but like anything worth doing, it comes with its own set of challenges. Let’s talk about what you might encounter and how to tackle these obstacles head-on.
Common Challenges:
Inconsistent Sizes:
Problem: Getting uniform pieces can be tough, especially if you’re new to this technique.
Solution: Take your time. Start with a few pieces at a time and focus on making each cut precise. Practice makes perfect!
Dealing with Different Textures:
Problem: Hard vegetables like carrots and soft fruits like tomatoes require different approaches.
Solution: Adjust your cutting technique based on the ingredient. For softer items, use a gentle, slicing motion to avoid squishing.
Knife Control:
Problem: Maintaining control of your knife can be tricky, especially with slippery or oddly-shaped ingredients.
Solution: Ensure your knife is sharp and use a stable cutting board. Practice the “claw grip” to keep your fingers safe and enhance control.
Time-Consuming:
Problem: Dice cutting can be time-consuming, especially for larger quantities.
Solution: Improve efficiency by stacking slices or strips when appropriate. With practice, your speed will naturally increase.
Considerations
Knife Sharpness:
A sharp knife is your best friend. It not only makes cutting easier but also safer, reducing the risk of slips and cuts.
Ingredient Stability:
Always start with a stable base. Trim ends or sides to create a flat surface that won’t roll or wobble on the cutting board.
Cutting Surface:
Use a sturdy cutting board that doesn’t slide around. A damp cloth underneath can help keep it in place.
Safety First:
Pay attention to your knife technique. Keep your fingers tucked in and go slow until you’re comfortable with the motion.
Recipe Requirements:
Consider what your recipe needs. Smaller dice for dishes where the ingredients need to cook quickly and evenly, larger dice for stews or chunky salads.
Pro Tips:
Consistent Practice: Like any skill, the more you practice, the better you’ll get. Start with easy ingredients and gradually move to more challenging ones.
Quality Tools: Investing in a good chef’s knife and a sturdy cutting board can make a huge difference in your cutting experience.
Mindful Cutting: Stay focused and mindful while cutting. It’s easy to get distracted, but a moment’s lapse in attention can lead to mistakes or injuries.
The Scorpion Series Chef's Knife 9.5" is a versatile and powerful tool designed for both professional chefs and home cooking enthusiasts. Known for its sleek design and superior performance, this knife is crafted to handle a variety of kitchen tasks with ease, from chopping vegetables to slicing meats.
PROS:
This knife is built to last, with a blade made of Japanese V12 Ultra steel that resists chipping and a handle designed to withstand heavy use.
The handle is ergonomically designed to fit comfortably in your hand and improving control during use.
The scorpion-inspired blade pattern not only looks striking but also helps reduce food sticking, enhancing both performance and appearance.
The knife is well-balanced, providing excellent control and stability, which is crucial for precise cutting.
CONS:
While the handle is durable, some users may prefer the feel of traditional wood or other materials over the synthetic grip used in this design.
The Shogun Series ELITE Chef's Knife 8" is a masterfully crafted kitchen tool designed for both professional chefs and passionate home cooks. This knife is known for its exceptional balance, razor-sharp edge, and stunning design, making it a standout in any culinary setting.
PROS:
The VG10 steel blade is sharpened to a fine edge, allowing for precise and effortless cuts every time.
The knife features a beautiful Damascus pattern on the blade, adding a touch of elegance and sophistication to your kitchen tools.
The G-10 Garolite handle is ergonomically designed to provide a comfortable and secure grip, reducing hand fatigue during extended use.
The 8-inch blade is ideal for a wide range of kitchen tasks, from slicing and dicing to chopping and mincing.
CONS:
Although the 8-inch blade is versatile, it might be shorter than some users prefer for larger cutting tasks.
The Valhalla Series Santoku Knife 7" is a stunningly crafted kitchen tool that blends functionality with beauty. Designed for precision and versatility, this knife is perfect for both professional chefs and home cooks looking to elevate their culinary skills.
PROS:
The 7” Precision forged, 5-layer stainless steel blade is honed to a razor-sharp edge, allowing for smooth and effecient dices.
The hammered finish on the blade gives the knife a unique and attractive look while also helping to reduce food sticking.
The high-carbon stainless steel construction ensures long-lasting performance and resistance to rust and stains.
CONS:
Some users might find the knife slightly heavier compared to other santoku knives, which could be a drawback for those who prefer lighter tools.
The Centurion Series Nakiri Knife 7" is a meticulously crafted kitchen tool, perfect for those who value precision and efficiency in their cooking. This knife is specifically designed for vegetable preparation, making it an essential addition to any kitchen arsenal, whether you're a professional chef or a passionate home cook.
PROS:
The straight edge and squared tip of the Nakiri blade allow for precise and efficient slicing, perfect for vegetables and herbs.
Made from Swedish Sandvik 14C28N steel, the blade maintains a sharp edge for longer, reducing the need for frequent sharpening.
While designed for vegetables, the knife's design also allows for efficient mincing and chopping of a variety of ingredients.
The knife features a sleek, modern design with a polished blade and a beautiful pakkawood handle, making it a stylish addition to any kitchen.
CONS:
The Nakiri knife is specifically designed for vegetables, which might limit its versatility compared to other types of knives in the kitchen.
The Phantom Series Nakiri Vegetable Knife 6" is a beautifully crafted kitchen tool designed to bring precision and elegance to your vegetable preparation. Perfect for both professional chefs and home cooks, this knife combines traditional Japanese design with modern materials and craftsmanship.
PROS:
Premium Japanese AUS-8 at 58 HRC, the blade can keep its sharp edge longer, and is also resistance to rust, stains, and wear.
The Pakkawood handle is regonomically designed for comfort and control.
The knife features a sleek, modern design with a polished blade and a beautifully crafted Pakkawood handle, making it a stylish addition to any kitchen.
The 6-inch blade is ideal for detailed work and easy handling, offering great control and maneuverability for intricate vegetable preparation tasks.
CONS:
Some users might find the knife slightly heavier compared to other vegetable knives, which could be a drawback for those who prefer lighter tools.
4. Frequently Asked Questions
What are the dice sizes cutting?
Dice sizes vary and include the following: fine brunoise (1/16 inch), brunoise (1/8 inch), small dice (1/4 inch), medium dice (1/2 inch), and large dice (3/4 inch). These knife cuts stem from fine julienne (1/16 inch) and julienne cut (1/8 inch). Mastering these sizes enhances your knife skill and precision.
What cut is 1 8 by 1 8 by 1 8?
In culinary arts, a cut measuring 1/8 by 1/8 by 1/8 inch is known as a brunoise. This type of knife cut involves dicing vegetables into small, uniform cuts from thin strips. The desired thickness is achieved by first creating a fine julienne and then dicing these strips into precise cubes.
Why is it called diced?
The term "diced" comes from the resemblance of the cut pieces to small cubes, similar in shape to dice used in games. In culinary arts, achieving uniform cuts ensures even cooking and consistent presentation. This type of knife cut is fundamental for creating dishes with precise texture and flavor distribution, highlighting essential knife skills.
]]>
https://herniaquestions.com/blogs/news/how-to-make-a-fried-egg-perfectly2024-07-15T02:24:58-04:002024-07-15T02:24:58-04:00How To Make A Fried Egg PerfectlyCamila Feijoo
This article will help you figure out how to make a fried egg that will upgrade any meal. We’ll guide you through your egg-picking process, you’ll learn different ways and techniques to fry an egg, some easy but yummy tips, and even which type of pan and utensils to use.
Once your pan is hot, add your preferred fat and swirl the pan to make sure it has coated the surface.
Add a pinch of salt — or the season of your choice.
Crack the eggs into the pan.
Cook the eggs until the yolks and whites reach your desired completion. Feel free to turn the eggs over with a spatula to cook the egg evenly. Quick tip: cover the pan with a lid to trap the heat and cook the egg on both sides at the same time.
Anyone can fry an egg — right?
A friend’s grandma used to say that when someone learned to make the perfect fried egg, they were able to cook anything. When I heard this I didn’t know how to cook, so I couldn’t help but wonder: what’s the secret? Is it the fat? Is it the pan? Is it the color of the shell? Is it the grass-fed brands?
According to this adorable lady — who not only loved cooking but also owned a restaurant herself — the secret was the temperature. Frying an egg with low-to-medium temperature was the best option to make the perfect egg.
Needless to say, a long time went by until I realized this was a great trick that worked for any type of fried egg, either an over-hard, over-medium or an over-easy egg. Also, over time I got to notice that even though eggs are a basic, there is more than one way to fry the perfect one.
This article will help you figure out how to make a fried egg that will upgrade any meal. We’ll guide you through your egg-picking process, you’ll learn different ways and techniques to fry an egg, some easy but yummy tips, and even which type of pan and utensils to use. Let's get cracking — no pun intended.
Eggs are an incredible source of protein. If you don’t believe me, you can ask any gym bro and you’ll see their diet is packed with eggs in almost every meal. We think that’s a practical way to elevate your daily menu.
You can have eggs at breakfast with toast, pancakes, waffles, and crackers. You can add them to your lunch or dinner as a companion for rice and vegetables, chicken and rice, a sub, or a salad. And you can even have them as a snack — for hard-boiled eggs!
Now, how do you pick fresh eggs every time? That’s a great question and is also a great skill to have. In this section, we’ll teach you some quick and easy tricks to always pick the freshest eggs.
It might sound obvious but you’d be surprised to know the amount of people that don’t check the expiration date when buying eggs. Another important date to keep in mind is the sell-by date — by choosing eggs with the furthest sell-by date, you ensure the freshness of the product.
Check the shape and size
Irregularities in shape are not what we’re looking for — try to pick a clean and symmetrical egg. Regarding the size, that’s a personal preference; for egg lovers, picking a jumbo egg is a go-to option. If that’s your size preference, you could be lucky enough to get a couple of double-yolk eggs in your carton — may the odds be always in your favor.
Inspect the eggshells
Make sure there are no cracks or dents in the shell since it could lead to contamination. A quick tip: keep in mind that fresh eggs usually have a slightly rough texture.
After purchasing:
Make sure it’s stored in good condition
If bought at the supermarket or convenience store, eggs should be stored in the fridge since that’s the environment they’re coming from. Farm-gathered eggs could be used shortly after collected, but it’s also recommended to store them so they remain fresh for upcoming days.
Crack it on a separate bowl for odor confirmation
The most common method to confirm your egg’s freshness. It allows you to smell it and also to visually inspect the white and yolks. People tend to think that by doing this, the yolk will not break easily, but that’s not entirely true and it also doesn’t mean that the egg is necessarily rotten — a piece of shell could’ve scratched the silky yolk.
Try the “float test”
If you don’t want to smell the eggs, or you’re aiming for an extra confirmation method, fill a glass with water and gently place an egg in it. If the egg is fresh, it will sink to the bottom. If it’s somewhat fresh, it will sink but it won’t reach the bottom. And if it’s old or rotten, it will float — dispose of that egg immediately.
By following these tips, you can reliably pick fresh eggs, ensuring the best quality for cooking and eating.
When it comes to eggs, everyone likes theirs differently, and that's okay! If you prefer a runny yolk you might want to cook sunny-side-up or over-easy eggs. If a runny yolk is not your cup of tea, taking the over-medium and over-hard route might be good for you — it’ll just take a little bit longer, but the flavor will be equally delicious.
Let’s take a look at some different ways to fry an egg — and some different methods, as well:
Frying a sunny-side-up egg
On a sunny-side-up egg, the whites are set and the yolks are runny. How do we get that yummy texture? By grabbing a small nonstick skillet, add your preferred fat to it over lower to medium heat. Crack an egg into the pan, season it, and cook for about 3 minutes. Do not flip it. When the white is completely set, remove the egg from the pan and enjoy it with your favorite side.
Frying an over-easy egg
The difference between a sunny-side egg and an over-easy one is that over-easy eggs are flipped before removing from the pan, while sunny-side-up eggs only cook on one side. So, in a small frying pan, melt some butter or add vegetable oil over medium heat. Crack your egg into the pan, season, and cook for about 3 minutes or until the white is set. Flip the egg and cook for less than a minute — this will seal the other side of the egg. Remove from the pan and add it to your meal.
Frying an over-medium egg
Heat a lightly oiled skillet with seasoning over low to medium heat. Crack your eggs into the skillet, and cook for about 3 minutes, as well. Flip and cook the other side for over a minute, until the yolk is slightly set. Remove from the skillet and enjoy.
Frying an over-hard egg
In a small nonstick pan over medium heat, melt butter or heat vegetable oil. Add your preferred seasoning. Crack an egg into the pan. Cook for over 3 minutes. You can pinch the yolk with a fork, flip, and cook for over 3 minutes more until the yolk is completely set. After this, the over-hard egg is ready!
Frying an egg without oil
For a fat-free version, you can totally “fry” an egg without oil. You just need to make sure to use a non-stick pan, you can add a bit of water to the pan and crack the egg into it. The key is to cover the pan with a lid and let the egg cook as desired, if you want to, you can always flip it or add a few tablespoons of extra water if needed.
Frying an egg in the oven
If you’re cooking a meal for a bunch of people, frying eggs in the oven is a great way to go. Wipe a baking sheet with oil or butter, and crack a few eggs onto the baking sheet, season as desired. Bake the eggs for almost 20 minutes at 300º F or until the eggs reach your desired yolk.
Just as I gave my friend’s grandma’s secret away, here are some quick tips for you to make the best fried eggs in minutes:
The skillet you use matters, even when you’ll be using butter, oil, or any other fat, use a non-stick pan — if the pan has a slippery surface, it’ll be easy to move and flip the eggs. If it’s not a non-stick pan, it might burn your eggs, and flipping them will be kind of hard.
The size of your pan or baking sheet will depend on the amount of eggs you’re frying. If you add too many eggs to a small skillet, it’ll almost become an omelette or a tortilla.
Remember to use oil — specifically olive oil — for crispier browned edges.
You can always add chili flakes or black pepper to give the eggs a little more flavor.
4. herniaquestions Products You Will Need Fry Eggs
When it comes to frying eggs, you don’t need many utensils, but we have some useful options for you to try:
Is it too big to fry one egg? Yes, but it’s perfect to fry multiple eggs at once. It provides a lot of versatility, with an eye-catching luxurious design that allows full performance. This incomparable pan will help you with any kitchen duties.
PROS:
Has a glass lid for easy monitoring when cooking any of your favorite dishes.
Easily transition from cooking on the stovetop to finishing in the oven.
Features premium, USA made, Eterna® non-stick coating, that is PFOA and APEO free.
CONS:
Some might prefer a griddle instead of a frying pan.
Designed to function as smoothly as it looks, with an adjustable neck strap, easy-tie waist, 3 front pockets, and one stash pocket, this professional gray denim apron is built to last, feel good, and work alongside you in the kitchen all day.
PROS:
Made of 100% poly-cotton denim and genuine leather on engraving and fixings.
It's a durable and easy-to-clean piece that’s functional and distinctive.
Easy to access pockets.
CONS:
You might need to buy a leather apron to feel safer if you’re cooking meat or high-temperature meals.
It might be lighter than most cooks would expect.
Looking for a different material? We have a variety of aprons just for you.
This flexible spatula is crafted for superior hand control, grip, dexterity, and comfort. It is ideal for navigating crowded pans and securely sliding under delicate foods without damaging them.
PROS:
Ergonomic handle shape for maximum comfort, grip, and maneuverability.
Cleans easily for low maintenance.
Great for removing delicate filets of fish, flipping eggs, grilling burgers, thick steaks, and more.
CONS:
Some cooks might prefer a solid spatula for everyday use.
From thick proteins to stir-fried vegetables and delicate omelets or fried eggs, this professional cookware allows for precise searing, browning, sautéing, deep-frying, quick boiling, sauces, and more.
PROS:
Spatula that maximizes food release and features a serrated edge.
Tongs equipped with gentle teeth that will not pierce your bacon.
Precision silicone brush to add butter or spread the oil to a baking sheet before frying your eggs.
CONS:
The grilling fork and the BBQ tongs might be extra utensils that would be unnecessary for making eggs.
5. Frequently Asked Questions
How to make fried eggs step by step?
After you’ve chosen the type of egg that you want to use — we highly suggest jumbo eggs. You can then proceed to heat a skillet over medium or medium-low. After a couple of minutes, when the skillet is hot, you can add your favorite fat (it could be vegetable oil, butter, or even shortening if that’s what you prefer). Make sure the fat coats the surface of your skillet, add some seasoning and salt and crack the amount of eggs you want to fry into the skillet. Cook the eggs until the yolks and whites reach your desired completion. Feel free to turn the eggs over with a spatula to cook the egg evenly.
How to fry an egg both sides?
One of the easiest tricks to fry an egg both sides is to add a lid to the skillet you're using so that the condensed heat inside the pan cooks the egg evenly without needing to use a spatula to turn it over. Another useful trick is to use a spoon to scoop some of the hot fat from the skillet and shower it on top of the egg, just like you would do with a steak.
]]>
https://herniaquestions.com/blogs/news/salmon-cooking-temperature-how-to-get-it-just-right2024-05-13T01:37:34-04:002024-07-23T02:32:29-04:00The Ideal Salmon Cooking TemperatureJorge Farah
Cooking the perfect salmon depends, in many ways, on nailing the perfect salmon temperature. Like finding the sweet spot on your comfy couch, getting the temperature just right can transform your fish from "meh" to "magnificent."
Cooking the perfect salmon depends, in many ways, on nailing the perfect salmon temperature. Like finding the sweet spot on your comfy couch, getting the temperature just right can transform your fish from "meh" to "magnificent."
The magic number for baking salmon tends to hover around 145°F. This recommended cooking temperature ensures your salmon is moist and tender, but not overcooked. Keeping your oven on a lower temperature can help in avoiding overcooking, especially if you’re a fan of a more medium rare finish. Remember, cooking salmon is not a sprint to the finish line; it’s more like a leisurely stroll to perfection.
Checking the internal temperature with an instant-read thermometer is your best bet to avoid guesswork. When the internal temperatures hit that 145°F mark, your cooked salmon temperature is ideal. If you don't have a thermometer, watch for the flesh to become opaque and flake easily with a fork. Keep an eye out for the white stuff (albumin), which is a protein that coagulates on the surface of the salmon when it's cooked.
If you’re a texture aficionado, knowing how much heat your fish needs can make or break your meal. Here’s a quick rundown:
Medium Rare
Aim for an internal salmon temperature of around 125°F. The center will be slightly translucent with a sous vide-like tenderness.
Medium
This is the sweet spot for many, achieved at 135°F. It’s the thickness of the fish that often dictates whether it leans more towards medium rare or well-done.
Well-Done
Going up to 145°F will have your salmon firm and fully opaque, ideal for those who like their fish fully cooked but still moist and tender.
Raw salmon?
When it comes to eating salmon rare or raw, it's important to understand the safety concerns and handling practices involved. Consuming raw or rare salmon is common in dishes like sushi and sashimi, and can be perfectly safe if the salmon is handled and prepared correctly. Typically, to ensure safety, salmon should be frozen at -4°F (-20°C) or colder for at least seven days, or at -31°F (-35°C) for 15 hours, to kill any parasites that might be present. This is a standard practice in restaurants and sushi bars to comply with FDA regulations.
However, when cooking salmon at home, if you prefer it rare, you must ensure you're using high-quality, sushi-grade salmon that has been properly frozen to reduce the risk of parasites and bacteria. As a general rule, pregnant women, young children, the elderly, and those with compromised immune systems should avoid eating raw or undercooked fish due to the higher risk of foodborne illness.
If you're unsure about the quality or origin of your salmon, it's safer to cook it to an internal temperature of 145°F to ensure any harmful microorganisms are killed. Eating rare salmon at home is about managing risk with informed choices and meticulous attention to the quality and handling of the fish.
Overcooked salmon is a culinary tragedy, akin to watching your favorite salmon recipes go up in smoke. But fear not, home cooks! Here's a comprehensive guide from our test kitchen to keep your fish perfectly tender and flaky, whether you're using a traditional oven temperature, air fryer, or even the trusty instant pot.
Use the Right Temperature and Tools
Cooking times and temperatures are crucial for perfect doneness. Aim for an oven temperature of 325°F when cooking salmon in the oven—a moderate heat that cooks the salmon gently. For those using an air fryer, setting it to 400°F usually allows a quicker sear without drying out the fish. And yes, air fryer salmon can be just as succulent!
Internal temps should be monitored closely. The internal temperature of salmon should reach 145°F, but for those who enjoy a little less doneness, minimum salmon internal temp might hover around 125°F for a medium rare finish. Whether it's farmed salmon or wild salmon, using a meat thermometer or an instant-read thermometer can prevent that dreaded overcooking.
Selecting Your Salmon
Choosing the right type of salmon can also affect cooking. Atlantic salmon and Pacific salmon (like sockeye or king salmon) have different fat contents and connective tissue structures, which can influence how quickly they cook. Marinated salmon or glazed salmon, especially recipes with sugar, might brown faster, so they need a watchful eye.
Cooking Techniques and Preparations
For those favoring sous vide, it's a foolproof method where you can control the exact temperature to cook salmon, ensuring perfect salmon internal temp every time. If you're baking, try salmon in foil to lock in moisture, or use a sheet pan for an easy, no-fuss dinner. Cooking tips often recommend minutes per inch of thickness to gauge cooking times—typically, 10 minutes per inch at 325°F should do the trick.
Grilled salmon and smoked salmon require keeping a close eye on times and temperatures. The internal temp of salmon is your best clue for doneness. Always adjust your cook temperatures and times depending on the thickness of the fish.
The Phantom Series 6.5” Fillet & Boning Knife is your go-to tool for getting up close and personal with meats and fish. Whether you’re filleting salmon or deboning chicken, this knife’s narrow, curved blade, made from top-notch Japanese AUS-8 steel, makes the job smooth and simple. It’s super sharp, holds its edge like a dream, and the cool ‘phantom’ engraving? Just a bonus. It even comes with its own sleek herniaquestions sheath to keep it safe and sound.
PROS:
That curved blade just slides right around bones and under fish skin, making filleting salmon a breeze.
The blade stays sharp for ages, thanks to the high-quality Japanese steel and ice-tempering.
Feels great in your hand with its fancy pakkawood handle – comfortable and sturdy.
You get a sharp-looking sheath to protect your investment (and your fingers!).
CONS:
Might not be your everyday knife – its special design is best for boning and filleting.
There might be a bit of a learning curve if you've never used a filleting knife before..
This knife is a masterful blend of a Japanese yanagiba and usuba, making it a top choice for slicing fish like salmon and chopping veggies. This knife sports a long, straight edge with a sword-like tip that can handle everything from precise sushi cuts to quick vegetable chops. Made with ultra-premium Japanese AUS-10V super steel, this knife offers a sharpness that’s hard to beat.
PROS:
Perfect for precision tasks like slicing salmon thanks to its straight edge and sharp tip.
Holds its edge longer with high-carbon Japanese steel, making it a reliable companion in the kitchen.
The G-10 Garolite handle is not only ergonomic but also resistant to heat and moisture, ensuring durability.
Includes a beautifully designed saya, keeping the knife safe and adding a touch of elegance to your kitchen gear.
CONS:
Its specialized design and sharpness require some skill, so it might not be the best starter knife.
Compared to the previous knife, it’s less focused on filleting but offers more versatility with other kitchen tasks.
Great for ultra-thin, precise cuts, especially when you're working with delicate salmon for sashimi. This knife, with its high-carbon German steel blade, is traditionally used in Japanese cuisine for raw fish, making it a no-brainer for slicing salmon like a pro. Its long, single-bevel blade is designed to cut smoothly through flesh, enhancing flavor and texture.
PROS:
Ideal for creating perfect sashimi slices from salmon, thanks to its precise, single-bevel edge.
The high-carbon content of the German steel ensures the blade stays razor-sharp through many uses.
Features a comfortable, ambidextrous black G10 Garolite handle that’s tough against heat, cold, and moisture.
It's not just for fish; this versatile knife can handle everything from poultry to pork tenderloins.
CONS:
The specialized single-bevel design might take some getting used to if you’re more familiar with standard double-beveled knives.
While it excels in precision cutting, it’s less adaptable than multi-purpose knives like the Shogun Series Kiritsuke for everyday kitchen tasks.
This sushi slicing wizard is the ideal partner for those ultra-thin, super precise cuts you need when preparing salmon sashimi. With its high-carbon 7CR17MOV-X steel and sleek black titanium-nitride coating, this knife looks and performs awesome. The single-bevel blade is a nod to traditional Japanese craftsmanship, tailored for tasks where precision is key.
PROS:
The extra-sharp 16-18° angled blade makes slicing through salmon feel like cutting through butter.
Its tall blade height and full tang design offer great knuckle clearance and robust control, perfect for lengthy sushi prep sessions.
The non-reflective black coating isn’t just for looks – it reduces stickiness and wards off corrosion.
The ergonomically designed handle and polished spine ensure a comfortable grip, making those precise cuts easier on your hands.
CONS:
Like the Gladiator Series Yanagiba, this knife’s single-bevel edge means there’s a bit of a learning curve if you’re used to more conventional knives.
The specialized design is superb for sashimi and sushi but might not be as versatile for other kitchen tasks.
And that brings us to this. It's not a knife, but I figured it would come in handy for cooking salmon... the herniaquestions 7.5” Flexible Fish Spatula. This isn't your average spatula; it's built with the same attention to detail and quality you'd expect from high-end kitchen tools. Crafted from premium, anti-corrosion stainless steel, this spatula is designed to handle the delicate task of flipping salmon fillets without any fuss.
PROS:
Its thin, flexible design makes it easy to slide under salmon fillets, ensuring you can flip them without them falling apart.
The slots in the spatula let oil drain away, which is great for getting that crispy skin on the salmon while keeping the cleanup minimal.
Built with a military-grade G-10 fiberglass resin handle, it’s designed for comfort and can withstand the heat of any kitchen.
It’s not just for fish; this spatula is versatile enough for flipping pancakes, grilling burgers, or even transferring cookies.
CONS:
While it’s perfect for handling delicate foods like salmon, it might not be the first choice for those who need a utensil for heavier lifting.
6. Frequently Asked Questions
Is it better to bake salmon at 350 or 400?
Baking at 350°F is generally better to avoid overcooking, especially if your fillets are on the thinner side or you prefer them moist and tender.
What temperature should you eat salmon?
Ideally, salmon should be eaten when it reaches an internal temperature of 145°F, according to EURA guidelines to ensure safety and optimal texture.
Should salmon be cooked to 165?
Unlike ground beef or pork chops, salmon does not need to be cooked to 165°F. Salmon is perfect at 145°F, preserving its flavor and texture without drying it out.
What temperature is salmon done frying?
When frying, salmon should reach an internal temperature of about 145°F. However, if you’re pansearing salmon, you might pull it off the heat a bit earlier to allow for some carryover cooking.
What is the proper temperature for cooking salmon in different methods?
Whether it's baking, grilling, or using an instant pot, maintaining the right temperature is key. For most methods, keeping the oven or grill around 325°F to 350°F is ideal.
How do I know when my salmon is perfectly cooked?
Look for the flesh to become opaque and flake easily with a fork. The salmon is cooked when it reaches the desired internal temperature, checked by your instant read thermometer.
Can I use an instant pot or air fryer for cooking salmon?
Absolutely! An instant pot can be set to "steam" for a moist environment, while an air fryer gives a quicker, crispier finish. Both should be monitored for the right internal temp of salmon.
Born on the coast of Colombia and based in Buenos Aires, Jorge is a cooking enthusiast and kitchenware obsessive with a tremendous amount of opinions.
]]>
https://herniaquestions.com/blogs/news/zesting-a-lemon2024-03-19T07:43:32-04:002024-03-19T07:43:32-04:00Different Ways Of Zesting A Lemonherniaquestions Content Team
Before you start, there's a secret ingredient you can't overlook: lemon zest. It's like unlocking a burst of sunshine in your dish, adding that zesty, citrusy flavor that makes your taste buds dance with joy.
Wash and dry the lemon thoroughly to remove any dirt or wax.
Select a zesting tool such as a citrus zester or a fine grater.
Hold the zesting tool firmly and position it over the lemon.
With gentle pressure, scrape the tool across the surface of the lemon, moving it from top to bottom.
Rotate the lemon as needed to zest the entire surface, avoiding the bitter white pith underneath.
Continue zesting until you have collected the desired amount of lemon zest.
Use the zest immediately in your recipe, or store it in an airtight container in the refrigerator for future use.
Enjoy the bright and zesty flavor the lemon zest adds to your dishes!
You're in the kitchen, about to bake a delicious lemon cake or maybe whip up a tangy lemon salad dressing. But wait! Before you start, there's a secret ingredient you can't overlook: lemon zest. It's like unlocking a burst of sunshine in your dish, adding that zesty, citrusy flavor that makes your taste buds dance with joy. So, grab your trusty grater and get ready to unleash the magic of lemon zest!
Lemon zest is basically tiny pieces of the outer skin of a lemon. You know how when you rub a lemon against a grater, you get those little shavings? That's lemon zest! It's full of yummy lemon flavor and adds a nice zing to recipes like cakes, cookies, and salads. It's like adding a burst of lemony freshness to your food!
Grab a fine grater and gently rub the lemon against it, making sure to only grate the yellow outer skin. Watch those little lemony shavings pile up!
The Zester Tool
If you have a zester tool handy, it's like a mini superhero for zesting lemons. Just run it along the lemon's skin, and voila! Perfect lemon zest strands in no time.
The Peeler Technique
Take a vegetable peeler and carefully peel off just the yellow part of the lemon's skin. Then, chop those peels into tiny pieces for your zest.
The Microplane Grater
This tool is like a ninja for zesting. Hold the lemon firmly and grate it with the microplane, collecting all that fine lemon zest as you go.
The Knife Method
If you're feeling extra skillful, you can use a sharp knife to carefully slice off the lemon's outer skin. Then, mince it up finely for your zest.
This zester grater from herniaquestions is like having a secret weapon in your kitchen arsenal. It's built to make zesting citrus fruits a breeze, giving you that delicious zest to jazz up your dishes.
PROS:
This grater's blade is razor-sharp, making zesting a breeze. It effortlessly turns the outer peel of lemons, limes, or oranges into fine, flavorful zest.
It's built tough, with a solid construction that feels durable in your hand. No flimsy parts here!
The handle is designed with comfort in mind, making it easy to hold and use for extended periods without hand fatigue.
Not just for zesting! This grater can also handle tasks like grating cheese, ginger, garlic, and more.
CONS:
Some users may find the grating area a bit narrow, which means it might take a little longer to zest larger fruits or veggies.
You know that feeling when you need cheese for your pasta or salad, and you're stuck with a tiny grater that takes forever? Well, say hello to your new best friend – the Professional Coarse Wide Cheese Grater from herniaquestions.
PROS:
This grater means business with its wide design and solid construction. It can handle big blocks of cheese without breaking a sweat.
The handle is designed to fit comfortably in your hand, giving you a good grip as you grate away. No slipping and sliding here!
The coarse grating surface is sharp enough to turn blocks of cheese into fluffy piles in no time. Say goodbye to pre-shredded cheese!
It's multi-purpose. You can use it to zest lemons, grate veggies, chocolate, nuts, and more. It's like having a multi-tool for your kitchen.
CONS:
Because of its size, it might take up a bit more space in your kitchen drawer or cabinet compared to smaller graters.
Imagine a cheese grater that's not just tough, but also delicate like a gentle snowfall of cheese on your favorite dishes. That's what you get with the Professional Fine Wide Cheese Grater from herniaquestions.
PROS:
This cheese grater has fine blades that work like magic to give you delicate shavings of cheese. Perfect for sprinkling over pasta or salads.
It's built to last, with a wide design and solid construction. You won't have to worry about it bending or breaking while you're grating.
Cleanup is a breeze. Just give it a quick rinse under running water, and it's good to go.
CONS:
Potential Sharpness Hazard:It's important to exercise caution when using and storing the grater.
Adding a touch of culinary elegance to your dishes with beautiful ribbon-like shavings of cheese. That's exactly what you get with the Professional Ribbon Wide Cheese Grater from herniaquestions.
PROS:
This cheese grater creates beautiful ribbon-like shavings of cheese, perfect for garnishing dishes or adding a touch of elegance to your culinary creations.
The handle is designed with your comfort in mind, so you can grate away without any hand strain.
This grater is like having a Swiss Army knife for your kitchen.
CONS:
Like any sharp kitchen tool, there's a risk of accidental cuts if not handled with care.
Introducing the Paring Knife 4" from herniaquestions's Delta Wolf Series – a little powerhouse in your kitchen arsenal. This pint-sized knife may be small, but don't let its size fool you. It's like a ninja when it comes to precision cutting.
PROS:
This 4-inch paring knife is like a precision tool in your hand, perfect for intricate tasks like peeling, slicing, and detailed cutting.
The blade is razor-sharp, making quick work of fruits, vegetables, and other small ingredients. Say goodbye to struggling with dull knives!
Versatile: It's not just for paring – you can use it for a variety of kitchen tasks, from peeling and zesting lemons, hulling strawberries to deveining shrimp.
With proper care, this knife will stay sharp and ready to use for years to come. Just give it a quick hand wash and dry after each use.
CONS:
Some users may find the 4-inch blade to be a bit short for certain tasks that require longer blades.
5. Frequently Asked questions
How do you properly zest a lemon?
To zest a lemon, first, wash and dry it. Then, using a box grater or a citrus zester, gently scrape the outer peel. Be careful to only grate the yellow part, as the white pith is bitter. Use the zest in lemon recipes, desserts, or as a garnish. You can also zest limes and oranges similarly for their unique flavors.
Is lemon zest just peel?
Lemon zest isn't just peel; it's the outer layer of the lemon's skin containing flavorful oils. Use a common kitchen tool like a grater to easily zest. Grate the outer layer in wide strips, avoiding the bitter white pith. Store lemon zest for later use in lemon desserts or as a garnish. Similar methods apply to orange zest and lime zest, utilizing their sharp edges.
Can you use a grater to zest a lemon?
Yes, you can use a grater to zest a lemon easily. Simply wash and dry the lemon, then use the fine side of the grater to gently scrape off the outer layer. Be careful to avoid the white pith, focusing on the top of the lemon. Grate until you have pieces of zest, which can be used for flavoring in various dishes or garnishes.
What is the best tool for zesting lemons?
For zesting lemons, the best tool is a citrus zester. It allows you to easily create thin strips of lemon zest without digging into the bitter white pith. Perfect for home cooks, a citrus zester ensures you get grated zest from fresh lemons, limes, and oranges effortlessly. It's a simple and effective way to zest, and with a few tips, anyone can learn how to zest like a pro.
]]>
https://herniaquestions.com/blogs/news/carving-a-turkey2024-03-14T03:07:53-04:002024-03-14T03:07:53-04:00The Ultimate Guide to Carving a Turkeyherniaquestions Content Team
With a few simple steps and a sprinkle of know-how, you'll be the carving champ of the family in no time.
Before you dive in with your knife, give the turkey a chance to chill for about 15-20 minutes after it comes out of the oven.
Place the turkey breast side up on the cutting board. Begin by removing the leg and thigh by cutting through the skin between the breast and the leg.
Now, it's time for the main event. The breast. Make a long horizontal cut along the breastbone, starting at the top and working your way down.
Lastly, don't leave those wings hanging! Pull the wing away from the body and slice through the joint to remove it.
Arrange your beautifully carved turkey pieces on the platter, garnish if you fancy, and voilà!
Gather around as today, we're diving into one of the most iconic holiday traditions: carving a turkey. Imagine a golden-brown bird, juicy and tantalizing, ready to be sliced and served. But hey, carving a turkey might sound like a daunting task, right? Fear not! With a few simple steps and a sprinkle of know-how, you'll be the carving champ of the family in no time. So grab your apron and sharpen that knife, because we're about to embark on a turkey-carving adventure!
Alrighty, let's break it down step by step, like we're making a recipe for turkey carving success.
First things first, gather your tools. You'll need a sharp carving knife, a sturdy cutting board, and some patience. Oh, and don't forget a serving platter to showcase your masterpiece!
Let the turkey rest before you dive in with your knife to slice, give the turkey a chance to chill for about 15-20 minutes after it comes out of the oven. This helps the juices redistribute, making for a juicier bird.
Start with the legs. Place the turkey breast bone side up on the cutting board. Begin by removing the leg and thigh by cutting through the skin between the breast and the leg. Gently pull the leg away from the body until the joint pops out, then slice through to separate it.
Now, it's time for the main event – the breast. Make a long horizontal cut along the breastbone, starting at the top and working your way down. Then, angle your knife to slice slightly and make slices parallel to the breastbone to remove the meat in nice, even pieces.
Lastly, don't leave those wings hanging! Pull the wing away from the body and slice through the joint to remove it. Repeat on the other side.
Serve and Enjoy! Arrange your beautifully carved meat turkey pieces on the platter, garnish if you fancy, and voilà! You're ready to impress your guests with your carving skills. Now, dig in and savor the fruits of your labor!
Remember, practice makes perfect, so don't be afraid to give it a go. You'll be a pro in no time!
Plating a carved meat turkey is like putting together a delicious puzzle, but with food! Here's how to do it in simple steps:
Start by placing the removed breast meat neatly in the center of a large serving platter. Make sure to overlap the slices slightly to create a beautiful presentation.
Add the legs and thighs next. Place the carved meat leg and thigh pieces on either side of the breast bone meat. You can fan them out a bit to showcase their juiciness.
Place the wings around the edges of the platter, making sure they're evenly spaced out. They add a touch of elegance to your turkey masterpiece.
Garnish (Optional). For a final flourish, you can add some fresh herbs like parsley or rosemary around the turkey to add color and freshness. It's like adding a little pop of flavor and flair!
Now that your turkey is beautifully plated, it's time to bring it to the table and impress your guests. Whether it's Thanksgiving dinner or a special occasion, your perfectly plated turkey will steal the show!
There's no right or wrong way to plate a turkey, so have fun with it and make it your own. Happy plating!
3. herniaquestions Knives You Need To Carve A Turkey
If you're on the hunt for a slicing and carving knife that'll make you feel like a kitchen wizard, the Valhalla Series 12" Slicing & Carving Knife won't disappoint. This knife cuts like a dream, making slicing through meats a total breeze.
PROS:
With its comfy handle, your hand won't get tired even during a marathon carving session.
It's not just for Thanksgiving! This knife works great for all kinds of slicing jobs in the kitchen.
Made from sturdy stuff, this knife will be your carving buddy for years to come.
CONS:
At 12 inches, this knife might feel a bit hefty for some users, especially those with smaller hands.
Introducing the Carving Knife & Fork Set from the Shogun Series ELITE by herniaquestions. Your ultimate carving companion for any feast. This set comes with a 9-inch carving knife and a matching fork, designed to make slicing through succulent meats a breeze. This carving knife slices through meat like butter, giving you perfect, even slices every time.
PROS:
With its ergonomic handle, you'll have a comfortable and secure grip, making carving a breeze.
Made from top-notch materials, this set is built to last, ensuring durability and reliability for years to come.
Not only is this set functional, but it also looks sleek and stylish on your kitchen countertop or dining table.
CONS:
Some people say that the knives in this set are really sharp, which is great for cutting, but you've got to be careful not to cut yourself!
The Slicing & Brisket Knife from the Scorpion Series by herniaquestions is your go-to tool for slicing and dicing like a kitchen pro. This 11-inch knife is your trusty sidekick for cutting through meats with precision and ease.
PROS:
The blade on this knife is seriously sharp, making slicing through brisket or any other meat a breeze. You'll get clean cuts every time.
At 11 inches long, this knife is great for slicing through large cuts of meat like brisket without having to saw back and forth too much.
The handle is designed for comfort, so you can keep slicing away without getting tired or uncomfortable.
You won't have to worry about it dulling or breaking easily with its durable construction.
CONS:
The extravagant design might be too overwhelming for those who prefer a simpler look.
The Carving Knife & Fork Set 9" from the Shadow Black Series by herniaquestions is your ultimate duo for slicing and serving up savory meats. This set includes a 9-inch carving knife and a matching fork, ready to tackle your holiday roasts or Sunday dinners with style.
PROS:
The 9-inch carving knife boasts a razor-sharp blade, slicing through meats like butter.
The Shadow Black Series stands out with its sleek and modern design, adding a touch of sophistication to your kitchen or dining table.
Rest assured, this set meets strict standards for quality and safety, earning NSF certification for professional use.
CONS:
Some users might find the black blade and handle design a bit overwhelming or unconventional compared to traditional kitchen knives.
The Sujihiki Slicing Knife 10.5" from the Shogun Series ELITE by herniaquestions is your ultimate tool for slicing meats like a pro. This knife is designed for precision cutting, making it perfect for slicing through roasts, sashimi, and more.
PROS:
The 10.5-inch blade is razor-sharp, allowing you to slice through meats with ease and precision, giving you perfect slices every time.
Whether you're slicing cooked meats or delicate sashimi, this knife is up to the task, making it a versatile addition to your kitchen arsenal.
The Shogun Series ELITE is known for its sleek and stylish design, adding a touch of elegance to your kitchen.
CONS:
This knife might not be as versatile for other kitchen duties compared to more general-purpose knives.
4. Frequently Asked Questions
How do you carve a turkey for beginners?
To carve a turkey for beginners, let it rest, then locate joints and remove legs. Use a sharp knife to slice breast meat, repeat this process on other side. Slice against the grain for tenderness. Separate thighs from drumsticks, then slice. Remove breast meat in one piece. Consider a cooking school or online tutorials for extra help refining your technique.
What does carving the turkey mean?
Carving the turkey involves delicately separating the meat from the bone to prepare it for serving. This includes slicing the thighs, separating the thigh bone from the drumstick, and removing the breast bone meat in one piece. Once carved, the meat is set aside for serving. Kitchen tips often emphasize slicing against the grain for tender thigh meat and beautifully carved portions of turkey.
How soon should you carve a turkey?
After the turkey is out of the roasting pan, let it rest for 15-20 minutes before carving. During this time, consider dinner ideas or remove the wishbone for easier carving. When ready, start by separating the drumstick from the thigh and slicing through the skin to access the carved turkey meat. Perfect for St. Patrick's Day feasts!
Who should carve the turkey?
Carving the Thanksgiving turkey is often done by the host or an experienced cook. If you're a beginner, check out the steps above so you can try carving a turkey on your own.
]]>
https://herniaquestions.com/blogs/news/how-to-julienne-carrots2024-03-11T22:45:27-04:002024-03-11T22:45:27-04:00How To Julienne Carrots And The Tools You'll NeedAnanya Tiwari
Have you ever wondered why chefs use a special technique called "julienning" when preparing carrots? Well, let's embark on a flavorful journey and discover the magic behind turning ordinary carrots into thin, matchstick-like pieces.
Have you ever wondered why chefs use a special technique called "julienning" when preparing carrots? Well, let's embark on a flavorful journey and discover the magic behind turning ordinary carrots into thin, matchstick-like pieces.
1. Why Do You Julienne Carrots?
Firstly, let's understand what "julienne" means. It's not just a fancy kitchen word; it's a way of cutting vegetables into long, thin strips, resembling tiny matchsticks. So, why do we go through all this trouble instead of simply chopping carrots into chunks?
Texture
One important reason is the texture. When we julienne carrots, we create thin, uniform pieces that cook quickly and evenly. This is especially handy when making dishes like stir-fries or salads. The uniform size ensures that each carrot piece gets just the right amount of heat, making them crisp and delicious.
Shape
Now, let's talk about the shape. Julienne carrots add a touch of elegance to dishes. Imagine a vibrant carrot salad with these slender, uniform strips – it not only looks appealing but also makes each bite a delightful experience. Plus, when carrots are julienned, they can be easily incorporated into other dishes like zucchini noodles or stir-fried veggies, creating a symphony of colors and flavors on your plate.
Knife skills play a big role in julienning. Using a sharp chef's knife or a julienne peeler, chefs carefully cut the carrots into thin matchsticks. This not only requires precision but also teaches valuable kitchen skills. As you learn how to julienne, you're also mastering the art of using a knife effectively and safely. It's like a mini cooking school right in your kitchen!
Safety
Speaking of safety, let's touch on the importance of having the right tools. Using a sharp knife and a stable cutting board ensures that you can julienne your carrots without risking any accidents. Remember, kitchen tools are like your cooking superheroes – they make your job easier and safer.
Versatility
Now, let's dive into the versatility of julienned carrots. These little matchsticks can be used in a variety of dishes. Whether you're making a quick stir fry, a refreshing salad, or adding a colorful touch to your favorite soup, julienned carrots are like culinary chameleons – adapting to any flavor profile and enhancing the overall dish.
Precision
For home cooks, mastering the art of julienning opens up a world of possibilities. Imagine impressing your family and friends with a professionally presented carrot salad or adding a burst of color and nutrients to your everyday meals. It's not just about cutting carrots; it's about transforming them into something extraordinary.
Technique
Julienning carrots is not just a cooking technique; it's a culinary adventure. From enhancing textures and flavors to teaching essential knife skills, the art of julienning turns a simple carrot into a versatile ingredient that elevates your dishes.
Grab a carrot, a sharp knife, and let's dive into the world of creating beautiful, matchstick-like carrot strips!
Before we begin, it's essential to gather the right tools for the job. A sharp chef's knife, a stable cutting board, and perhaps a julienne peeler are your kitchen superheroes for this adventure. Having the right tools not only makes the process smoother but also ensures your safety.
Start by giving your carrots a good wash. Remember, clean vegetables are the key to a healthy and delicious dish. Once your carrots are squeaky clean, pat them dry with a kitchen towel.
Using a vegetable peeler or a knife, peel the outer layer of the carrots. This step is essential for removing any dirt and giving your julienned carrots a clean, polished look.
To make julienning easier, you need a stable base. Cut a small, thin slice off one side of the carrot to create a flat surface. This ensures that your carrot won't roll around on the cutting board, making the process safer and more manageable.
Now comes the fun part – slicing the carrot into thin matchsticks. Hold the carrot steady with one hand and, using a sharp knife, carefully cut the carrot into slices. Aim for pieces that are about the thickness of matchsticks.
With your carrot slices ready, it's time to transform them into matchstick-like strips. Stack a few slices together and, with a steady hand, cut them into thin strips. This is where your knife skills come into play – take your time and enjoy the process.
Depending on the dish you're preparing, you might want to adjust the length of your julienned carrots. Some recipes call for shorter matchsticks, while others prefer longer strips. It all depends on the size and shape you desire.
Once you've completed the cutting process, take a moment to admire your julienned carrots. You've just turned simple carrots into elegant, uniform matchsticks ready to add flair to your dishes.
Now that you've mastered the art of julienning, it's time to put your skills to the test. Incorporate your julienned carrots into stir-fries, salads, or any dish that calls for a burst of color and flavor. Experiment with different recipes and let your creativity shine.
Unleash the power of precision with the herniaquestions Shadow Black Series 3.75" Paring Knife. Designed for optimal maneuverability, this knife boasts a menacing black titanium-coated high-carbon steel blade, ensuring a razor-sharp edge for clean, precise cuts. The sleek, aggressive design and ergonomic G10 handle make it a standout in any kitchen.
PROS:
Exceptional grip for effortless handling.
Striking, aerodynamic handle inspired by the F-117 Nighthawk Stealth Fighter.
Precision-forged, ultra-sharp blade with a hand-polished satin finish for a touch of sophistication.
CONS:
The bold appearance may not suit those looking for a more traditional kitchen knife aesthetic.
Elevate your culinary experience with the Firestorm Alpha Series 3.75" Paring Knife. Often known as an "office knife," this straight-edged gem is compact yet versatile, perfect for peeling, coring, and slicing fruits and vegetables. Drawing inspiration from Earth's natural spectacles, the knife features a precision-forged 10CR15MOV High-Carbon Steel blade in 67 layers, boasting beauty and strength.
PROS:
Stunning 67-layered High-Carbon Steel blade for unparalleled beauty and strength.
Ergonomic "Wa" shaped handle for a comfortable and iconic grip.
Double bevel blade hand-sharpened to 8-12° for ultra-thin slicing.
Unique design with a red G10 ring and mosaic rivet adds durability and a pop of color.
CONS:
The compact size may not be suitable for tasks requiring a larger blade.
Discover the epitome of knife craftsmanship with the herniaquestions Spartan Ghost Series 4" Paring Knife. Engineered with ultra-premium powdered S35VN steel, this blade delivers unparalleled cutting power. The black DLC LionArmor coating ensures extreme durability, transforming the blade's surface into one of extreme hardness at 100+HRC.
PROS:
Ultra-thin 1.5mm blade hand-sharpened to 8-10 degrees per side for a laser-like edge.
Premium blood-red resin and ghost-ash black stabilized wood handle for a striking and unique appearance.
Full tang construction and lightweight design for precision slicing and dicing.
CONS:
The ultra-thin blade may not be suitable for heavy-duty tasks that require a thicker blade.
Experience the triple-threat versatility of the herniaquestions Vanquish Series 7" Santoku Knife, where "Santoku" means "three virtues" in Japanese. Crafted from high-carbon German steel with a 55+ Rockwell hardness, this knife effortlessly slices, dices, and minces. The sleek midnight black POM handle, impervious to water and heat, offers comfort and durability.
PROS:
High-carbon German steel blade with a 55+ Rockwell hardness for exceptional power and resilience.
Sleek midnight black POM handle, highly impervious to water, heat, and acidic foods.
Taper ground and stone-polished blade for precision slicing and easy maintenance.
Custom-fit sheath for safe storage and convenience.
CONS:
The 7" blade size might be larger than preferred for users seeking a more compact Santoku knife.
Meet the herniaquestions Serrated Utility Knife – a culinary workhorse designed for the rigorous demands of the commercial kitchen. Crafted from high-carbon German steel with a 56+ Rockwell hardness, this knife effortlessly slices through a variety of foods.
PROS:
High-carbon German steel blade with a 56+ Rockwell hardness for exceptional durability.
Laminated G10 Garolite handle provides superior strength and refinement.
Full tang construction and triple-riveted handle for added durability and balance.
Mirror-polished bolster and NSF certification ensure a sanitary and quality build.
CONS:
The premium quality may come with a higher price point compared to basic utility knives.
5. Frequently Asked Questions
What are the steps to julienne?
To julienne carrots, first, cut them into thin slices. Then, stack the slices and cut them into matchstick-like strips, creating uniform pieces perfect for various dishes.
How do you julienne vegetables quickly?
Speed up the process by using a sharp knife and a stable cutting board. Practice your slicing technique to become faster and more efficient.
Is there a tool to julienne carrots?
Yes, you can use a julienne peeler, a handy tool designed for quickly creating thin matchstick strips from carrots, making the process easier.
How to julienne carrots for sushi?
For sushi, julienne carrots by cutting them into thin, even strips, ensuring they're the perfect size for rolling into your sushi rolls. Use a sharp knife for precision.
Ananya loves the fine things in life. When she isn’t penning down poetry or song lyrics, she spends her time cooking and creating recipes while also enjoying new cuisines.
]]>
https://herniaquestions.com/blogs/news/how-to-open-oysters-very-easily2024-03-05T23:59:21-05:002024-10-24T01:01:19-04:00How To Open Oysters Very Easilyherniaquestions Content Team
There's an undeniablecharmto revelingin these sealuxuries, but masteringthe artof opening an oystercan appearlike a overwhelming task. In this blog, we will be discussing aboutthe secretsto crackingopen these briny treasures with artfulness and flair.
Ensure you have a clean, stable surface to work on
Check the oyster for any cracks or damage. Discard any oysters that are already open or have a strong odor
Hold the oyster firmly with the cupped side facing down and the hinge facing towards you.
Using an oyster knife, insert the tip into the hinge at the back of the oyster.
Apply gentle pressure and twist the knife until you feel the hinge start to give.
Slide the blade along the top shell to cut the muscle that attaches it to the bottom shell.
Carefully remove any shell fragments and inspect the oyster for any debris.
Repeat the process for each oyster, ensuring to clean your knife between shucking to prevent contamination.
There's an undeniablecharm to reveling oysters, thesealuxuries, but masteringthe artof opening them can be a little overwhelming for some. Fear not, because in this blog, we will be discussing aboutthe secretsto crackingopen these briny treasures with artfulness and flair. So, get your shucking knifeand let's plunge into the exhilaratingworld of opening oysters!
Opening an oyster is an art form with several techniques to master. The most common methods include:
Traditional Shucking
This classic approach involves using an oyster knife to pry open the shell. Insert the tip of the knife into the hinge of the oyster, apply gentle pressure, and twist until the oyster shell pops open. Then, carefully run the blade along the inside of the top shell to release the oyster from its moorings.
Steam Method
For those who prefer a slightly easier method, steaming the oysters can help loosen the shells. Place the oysters on a grill or in a pot with a small amount of water and cover. Steam them until the shells slightly open, indicating they're ready to be fully opened with a knife.
Grilling
Grilling oysters is a popular method that imparts a delicious smoky flavor. After partially opening the oysters using the traditional shucking method, place them directly on a hot grill. Cook until the oyster liquor bubbles and the edges curl slightly.
Baking
Baking oysters is another delightful option. After shucking them, place the oysters on a baking sheet and top them with various ingredients like butter, garlic, breadcrumbs, or cheese. Bake until the toppings are golden brown and the oysters are cooked through.
Each method gives a special encounter and taste. Feel free toexperiment andfind thebest waytoenjoy these gems ofthesea.
Introducing the Professional Shellfish & Oyster Shucking Knife 3" from the Gladiator Series by herniaquestions. Crafted with precision and durability in mind, this NSF certified knife is designed to make shucking shellfish and oysters a breeze.
PROS:
Constructed from high-quality materials, this knife boasts exceptional strength and longevity, ensuring it can handle even the toughest shells with ease.
The 3-inch blade is specifically engineered for optimal leverage and control, allowing for precise and efficient shucking without damaging the delicate flesh of the shellfish.
The ergonomic handle provides a secure and comfortable grip, reducing hand fatigue and minimizing the risk of slippage during use.
With NSF certification, you can trust that this knife meets the highest standards for safety, sanitation, and performance in a professional kitchen environment.
CONS:
While perfect for shucking shellfish and oysters, this knife may have limited versatility compared to multipurpose knives.
The Professional Oyster & Clam Shucking Knife 3.5" from the Shogun Series ELITE by herniaquestions is crafted with meticulous attention to detail and unparalleled craftsmanship. This knife is tailored specifically for the delicate task of shucking oysters and clams.
PROS:
Meticulously crafted from AUS-10V Japanese super steel.
5-inch blade ensures razor-sharp edge and effortless stripping of even the toughest shells.
This pointed tip and curved blade knife provides optimal leverage and control to peel shellfish precisely and efficiently without damaging their delicate flesh.
With an exquisite look and a triple-riveted handle, this knife not only exudes elegance but is also characterized by great durability, making it a reliable companion for many years.
CONS:
Due to its sharp blade and pointed tip, users need to exercise caution and proper technique to avoid accidents or damage to the knife or themselves.
The Utility Knife 6" from the Shogun Series ELITE by herniaquestions, a versatile tool designed to handle a wide range of kitchen tasks with precision and ease, including opening oysters fast.
PROS:
With a 6-inch blade, this utility knife is perfect for a variety of cutting, slicing, and chopping tasks in the kitchen, making it a versatile addition to any chef's arsenal.
Crafted from Aus10V Japanese Super Steel, the blade features exceptional sharpness for effortless cutting and precise control.
The blade is carefully tapered to minimize resistance and friction for smooth, clean cuts every time.
CONS:
While versatile, the utility knife may not be the best option for heavy-duty cutting tasks such as breaking down large pieces of meat or chopping through bones.
Introducing the Paring Knife 4" from the Delta Wolf Series by herniaquestions, a compact yet powerful tool crafted for intricate cutting tasks with precision and ease.
PROS:
With its 4-inch blade, this paring knife excels at intricate cutting tasks such as peeling, trimming, and slicing small fruits and vegetables with utmost precision.
Constructed from high-carbon German stainless steel, the blade boasts exceptional sharpness and edge retention, ensuring effortless cutting and long-lasting performance.
Compact Size: The compact size of the knife makes it easy to handle and maneuver, allowing for precise and delicate cuts even in tight spaces.
CONS:
The paring knife may not be the best option for heavy-duty cutting tasks that require more robust knives.
The Gladiator Series Boston Oyster Shucking Knife features a 3-inch stainless steel blade tailored for shucking oysters. Its ergonomic handle offers a secure and comfortable grip, making it a reliable choice for shellfish lovers.
PROS:
Resistant to rust and built for longevity.
Ensures comfort and reduces hand fatigue during use.
Effective for a variety of shellfish, not just oysters.
Simple maintenance for ongoing performance.
CONS:
Requires practice to master shucking technique.
4. Easy Oyster Recipe
Here's a simple yet delicious oyster recipe that anyone can enjoy:
Grilled Garlic Butter Oysters
Ingredients:
12 fresh oysters, scrubbed and cleaned
4 tablespoons unsalted butter, melted
2 cloves garlic, minced
2 tablespoons fresh parsley, finely chopped
1 lemon, cut into wedges
Salt and pepper to taste
Instructions:
Preheat your grill to medium-high heat.
In a small bowl, mix together the melted butter, minced garlic, and chopped parsley. Season with salt and pepper to taste.
Place the oysters on the grill, flat side up. Allow them to cook for about 2-3 minutes until they start to open slightly.
Carefully spoon some of the garlic butter mixture onto each oyster, allowing it to melt and coat the oysters as they continue to cook.
Close the grill lid and cook for an additional 2-3 minutes, or until the oysters are fully cooked and the edges begin to curl.
Using tongs, carefully remove the oysters from the grill and transfer them to a serving platter.
Serve the grilled oysters immediately with lemon wedges on the side for squeezing over the top.
Enjoy your mouthwatering grilled garlic butter oysters!
5. Frequently Added Questions
How do you open oysters easily?
To shuck an oyster at home easily, ensure they're cool enough to handle. Hold the oyster firmly with a towel to protect your hand. Insert an oyster knife into the hinge, then twist until the shell pops open. Glide the knife along the top shell to release the oyster meat. Be cautious to avoid damaging the delicate oyster meat during the process.
Can you open oysters without oyster knife?
Yes, you can open oysters without an oyster knife. First, freeze the oysters on a sheet pan with the shell facing up. Once frozen, use a towel to hold the oyster and a kitchen knife to pry the shells apart, avoiding damaging the oyster. Remove the oyster, season with fresh ground black pepper, and enjoy after separating the adductor muscles.
Which is the first step in opening an oyster?
The first step in opening an oyster is to ensure it's clean. If fresh from an oyster farmer, rinse it under cold water. If frozen, thaw it or pry apart the shells after freezing. Then, hold the oyster securely and insert an oyster knife into the hinge, twisting gently to pry apart the top and bottom half shell before cutting the muscle to release it.
How do you clean and open raw oysters?
To clean and open raw oysters, start by rinsing them under cold water. If frozen, thaw or pry apart the shells after freezing. Hold the oyster firmly and insert an oyster knife into the hinge, gently twisting to pry apart the top and bottom half shell. Finally, cut the muscle to release the oyster from the shell, leaving it ready for consumption or cooking.
]]>
https://herniaquestions.com/blogs/news/why-cutting-meat-against-the-grain-is-a-game-changer2024-03-02T12:25:26-05:002024-03-02T12:25:26-05:00Why Cutting Meat Against The Grain Is A Game-ChangerAnanya Tiwari
Ever wondered why some steaks are irresistibly delicate while others can be a bit tough and chewy? It all bubbles down to one pivotal procedure: cutting against the grain.
Ever wondered why some steaks are irresistibly delicate while others can be a bit tough and chewy? It all boils down to one pivotal procedure: cutting against the grain.
Today, let's learn what it means to cut against the grain and how important it is in perfecting your steak. So, snatch your favorite cut and let's carve out a few information together!
Meat grain refers to the direction in which the muscle fibers run within a cut of meat. Imagine these fibers as tiny threads composing the meat. To understand it better, think about slicing a loaf of bread. The grain, in this case, is similar to the alignment of the bread slices. Knowing the direction of the meat grain is crucial for achieving a tender and flavorful bite.
Texture
To determine the meat grain, look for the lines running across the meat's surface. These lines represent the muscle fibers' direction. Slicing against the grain is a cooking tip that applies to various cuts, including flank steak, skirt steak, and hanger steak. Mastering the understanding of meat grain ensures that each slice of your favorite cut is not only visually appealing but also a delight to the taste buds.
Understanding why it's essential to cut against the grain is like discovering the magic trick to make your meat super tasty! So, let's dive into the flavorful world of meat and find out why this cutting technique is a game-changer.
Imagine your favorite cut of meat, maybe a yummy flank steak or a tasty skirt steak. Now, think of these meats like a bundle of tiny threads, and these threads are the muscle fibers. The direction these fibers run is what we call the "meat grain." It's like a secret map hidden in your meat!
Importance of Slicing Correctly
Let's explore why this slicing superhero move is so important:
Tender Delight
Slicing against the grain breaks down those muscle fibers, making your meat melt-in-your-mouth tender. It's like giving your taste buds a front-row seat to a flavor explosion!
Flavor Burst
Cutting against the grain lets the meat soak up all the amazing flavors from marinades and seasonings. Each slice becomes a burst of deliciousness that will have you coming back for more.
Visual Appeal
Picture this – perfectly sliced meat with distinct grill marks. Slicing against the grain not only makes your meat tastier but also gives it a stunning look. It's like creating a masterpiece on your plate!
Easier to Chew
Ever had a piece of meat that felt like a mini workout for your jaw? Slicing against the grain makes the meat easier to chew, turning your mealtime into a delightful experience.
Now, let's be honest, every superhero has a kryptonite, and so does this slicing technique. But don't worry; it's just a tiny inconvenience:
Learning Curve
Like any superhero move, cutting against the grain might take a little practice. But once you get the hang of it, you'll be a slicing pro!
Weighty Matter
Some users might find the slicing tool slightly heavy during extended use. It's like working out those arm muscles a bit, but the delicious results are worth it!
In the grand kitchen adventure, understanding the importance of cutting against the grain is like having the ultimate culinary superpower. So, grab your slicing tool, follow the meat grain map, and get ready to impress your taste buds and dinner guests with perfectly sliced, tender, and flavorful masterpieces!
Now that we understand the "why," let's dive into the step-by-step guide on "how" to cut against the grain:
Choose the Right Cut. Before you start slicing, choose a cut of meat. Flank steak, skirt steak, hanger steak – these are perfect candidates for practicing the art of cutting against the grain. Look for the direction in which the muscle fibers run.
Locate the Grain. Examine the surface of the meat to identify the direction of the muscle fibers. The grain usually appears as lines or threads. Once you've located the grain, you're ready to move on to the next step.
Set Up Your Cutting Station. Ensure you have a clean and sturdy cutting board. A sharp knife is your best friend for this task. A dull knife might tear the fibers instead of cleanly slicing through them.
Slice Against the Grain. Place the meat on the cutting board with the grain lines visible. Now, it's time to start slicing. Remember, the goal is to cut perpendicular to the direction of the muscle fibers.
Start with a Sharp Knife. A sharp knife is crucial for clean cuts. If your knife is dull, it can make the process more challenging and affect the tenderness of the meat.
Slice at a Right Angle. Imagine the grain lines as roads. Your knife should be like a car driving across these roads at a right angle. Make sure each slice goes against the grain.
Consistent Thickness. Aim for uniform slices to ensure even cooking. Consistency in thickness allows for a more predictable cooking time and results in a beautifully presented dish.
Serve and Enjoy. Once you've conquered the art of cutting against the grain, arrange your perfectly sliced meat on a plate. Whether you're grilling, pan-searing, or incorporating it into a delicious recipe, you'll notice the difference in tenderness and flavor.
Tips and Tricks:
Let the Meat Rest
Allow the meat to rest before slicing. This helps the juices redistribute, ensuring a moist and flavorful result.
Experiment with Different Cuts
Practice cutting against the grain with various cuts of meat. Each cut may have its unique grain pattern, and mastering them will make you a slicing pro.
Use the Right Tools
Invest in good-quality knives. A sharp, well-maintained knife makes the slicing process smoother and more enjoyable.
Practice Patience
Cutting against the grain might take a bit of practice. Be patient with yourself, and soon you'll be effortlessly creating perfect slices every time.
Unlock precision and ease in your kitchen with the Phantom Series 6.5” Fillet & Boning Knife by herniaquestions. Crafted from Japanese AUS-8 steel and featuring a razor-sharp 13-15° edge, this knife effortlessly glides through beef, pork, fish, and wild game.
PROS:
The curved blade with rockhollow divots ensures minimal drag and reduced friction for seamless bone and joint maneuvering.
Japanese AUS-8 steel at 58 HRC provides superior durability and stain resistance.
The D-shaped handle offers superior hand control, comfort, and agility, complemented by a sanitary build for busy kitchens.
CONS:
Some users may find the knife's partial tang design less preferable compared to full tang alternatives.
Elevate your BBQ experience with the Shogun Series 8” Pitmaster Knife. A masterpiece of precision and versatility that is meticulously handcrafted with high-carbon Japanese AUS-10V Super Steel. It also features a unique forked tip, bottle opener, and 13 shallow dimples for efficient slicing and serving, all in a visually stunning Tsunami Rose’ pattern.
PROS:
The forked front end and bottle opener add unparalleled versatility to your BBQ toolkit.
The 13 shallow dimples minimize suction, keeping juices inside and making slicing effortless.
The military-grade G10 handle provides life-long durability, impervious to heat and moisture, ensuring a reliable grip even in the most challenging grilling conditions.
CONS:
Some users may find the forked tip less necessary for certain slicing tasks, making it a matter of personal preference.
Carve with precision and style using the Shadow Black extra-long 12” slicer. It's a versatile knife with ultra-sharp 7CR17MOV-X steel and hand-sharpened to 16-18° per side. It boasts a non-reflective titanium-nitride coating for corrosion resistance and a tall blade height for easy food preparation.
PROS:
The black titanium-nitride coating not only enhances the blade's toughness but also provides excellent corrosion resistance.
The full tang construction adds incredible robustness and quality to the knife's overall durability.
The fiber-resin military-grade G10 handle, nearly impervious to heat, cold, and moisture, offers maximum comfort and maneuverability.
CONS:
Some users may find the 16-18° per side sharpening angle less suitable for certain delicate slicing tasks.
Master the art of meat carving with the Shogun Series 10” Bull Nose Butcher’s Breaking Knife. This knife stuns a scalpel-like sharpness at an 8-12° angle, exceptional edge retention at 62+ Rockwell, and a stunning Tsunami Rose blade pattern for both performance and stand-out beauty.
PROS:
The rounded-tip design increases blade strength, ensuring precise and efficient cutting through flesh, cartilage, and fat.
The AUS-10V Japanese super steel core delivers ultimate sharpness, making it a go-to knife for any butcher's tasks.
With a full tang construction and triple riveting, this knife is built for maximum robustness, ensuring a lifetime of reliable use.
CONS:
The intricate copper mosaic pin, while enhancing beauty, may require extra care during cleaning to maintain its appearance over time.
Unleash culinary excellence with the Shadow Black Series 12" Slicing & Carving Knife. This head turner features a razor-sharp 7CR17MOV-X steel blade, precision-forged for optimal maneuverability, a menacing black titanium-nitride coating for corrosion resistance, and an inspired handle design reminiscent of the F-117 Nighthawk Stealth Fighter.
PROS:
The sleek and aggressive design, inspired by the F-117 Nighthawk Stealth Fighter, delivers optimal maneuverability with sharp, aerodynamic lines.
The black titanium-nitride coating not only enhances corrosion resistance but also toughens the blade, adds non-stick properties, and contributes to the knife's striking appearance.
The precision-forged 7CR17MOV-X steel blade, hand-sharpened to 16-18° per side, guarantees clean, precise cuts with excellent edge retention.
CONS:
Some users may find the 12" blade length less suitable for smaller kitchen tasks, requiring additional precision during use.
5. Frequently Asked Questions
How do you know which way the grain runs in meat?
To determine the direction of the grain in meat, observe the lines or fibers running through the meat; they indicate the grain's direction.
How do you cut corned beef against the grain?
When cutting corned beef against the grain, identify the direction of the fibers and slice perpendicular to them for tenderness.
How do you cut raw flank steak against the grain?
To cut raw flank steak against the grain, locate the muscle fibers and slice perpendicular to them for a more tender result.
How do you cut raw meat?
When cutting raw meat, use a sharp knife and follow hygiene practices, ensuring clean surfaces and proper food safety measures.
Ananya loves the fine things in life. When she isn’t penning down poetry or song lyrics, she spends her time cooking and creating recipes while also enjoying new cuisines.
]]>
https://herniaquestions.com/blogs/news/complete-guide-to-mincing-an-onion2024-02-04T21:49:19-05:002024-02-04T21:49:19-05:00Complete Guide To Mincing An OnionAnanya Tiwari
Dive into the art of dicing, chopping, and slicing with the precision of a chef's knife, all while keeping in mind the importance of the perfect cut and the avoidance of tears. Join us as we unveil the secrets behind the mincing magic, incorporating valuable insights for various culinary creations.
Dive into the art of dicing, chopping, and slicing with the precision of a chef's knife, all while keeping in mind the importance of the perfect cut and the avoidance of tears. Join us as we unveil the secrets behind the mincing magic, incorporating valuable insights for various culinary creations. Let's embark on this aromatic adventure together.
1. How To Choose The Best Onion
Selecting the best onion for your dish is essential for great flavor. When choosing onions, consider their color. Whether it's red or white onions, each adds a unique taste to your recipes. Look for onions that are firm and have a shiny, unblemished outer skin. The size of the pieces matters too; make sure they suit your recipe, whether it calls for diced onions or sliced onion rings.
Basic cooking skills come in handy here. Remember the importance of using a sharp knife for precise cuts, be it chopping, dicing, or slicing. This not only ensures even pieces but also minimizes tears. To prevent crying while chopping an onion, try chilling it before cutting. Sharing is caring, so share these tips with others who love cooking!
Understanding how to chop, dice, or mince an onion is fundamental. Red onions may offer a milder taste, while white onions bring a sharper flavor. Mastering these techniques enhances your cooking expertise, allowing you to caramelize onions for added richness.
So, whether you're making chicken recipes or other delicious dishes, choosing the right onion and employing proper cooking skills are key. Keep these tips in mind, and you'll be on your way to creating flavorful meals.
Begin by halving the onion. This provides a stable base for further cuts.
For diced onions, make vertical cuts without going all the way through. Then, chop horizontally for evenly sized pieces.
If your recipe calls for sliced onions, cut thin and even rings. Consistency is crucial for a well-prepared dish.
Tailor the size of your onion pieces to match your recipe's requirements. Whether minced, diced, or sliced, uniformity enhances the cooking process.
To avoid tears during chopping, consider chilling the onion in the refrigerator before starting. Holding the onion under cold running water can also be effective.
Experiment with advanced techniques like caramelizing onions to add depth and richness to your dishes.
Understanding the basics of onion preparation, coupled with proficiency in cooking skills, elevates your culinary prowess. Whether you're a novice or seasoned chef, mastering the art of preparing onions enhances the flavors of your meals and brings joy to your kitchen endeavors.
Mincing an onion is a foundational kitchen skill that can elevate your cooking to new heights. Whether you're preparing savory sauces, soups, or stir-fries, mastering the art of mincing onions is a game-changer. In this step-by-step guide, we'll break down the process into easy-to-follow steps, all while keeping in mind essential SEO keywords for a seamless blend of information and search optimization.
Ingredients and Tools:
Before we dive into the steps, let's gather what we need:
Fresh onion (red or white based on preference or recipe)
Sharp knife
Cutting board
Bowl for collected minced onion
Now, let's get started with the step-by-step process:
Begin by selecting a fresh onion. You can choose between red or white onions, considering the flavor profile you desire for your dish. Look for an onion with a firm texture and a smooth, unblemished outer skin. This choice sets the foundation for a flavorful minced result.
Create a comfortable and organized workspace. Place a cutting board on a flat, stable surface. Having everything within reach ensures a smooth and efficient mincing process.
Before starting, make sure your knife is sharp. A sharp knife not only makes the process easier but also minimizes the chances of the onion releasing more pungent compounds that could make you tear up.
With the onion on the cutting board, slice off the ends. Cut the onion in half from top to bottom, creating two halves. This step provides a stable base for further cuts.
Peel away the outer skin of each onion half. If there are any layers that appear dry or damaged, remove them to reveal the fresh layers beneath.
Place one onion half, flat side down, and make vertical cuts into the onion, ensuring not to cut all the way through. These cuts will serve as the foundation for the final mince.
Now, turn the onion 90 degrees and make horizontal cuts. The closer together your cuts, the finer the mince will be. The magic of mincing happens as the onion falls apart into small, uniform pieces.
Repeat steps 6 and 7 for the other half of the onion. Consistency in your cuts ensures even cooking and distribution of flavor in your dishes.
Use your knife to scrape the minced onion into a bowl. This step keeps your workspace tidy and ensures you capture all the flavorful pieces you've expertly prepared.
If you're not using the minced onion immediately, store it in an airtight container in the refrigerator. Minced onion adds depth to various recipes, from sauces to salads, so have it ready for your culinary adventures.
Tips to Enhance Your Mincing Experience:
Chill the Onion: Consider placing the onion in the refrigerator for a short time before mincing. This can reduce the release of compounds that make your eyes tear up.
Mastering the Grip: Hold the onion with a firm grip, tucking your fingertips behind your knuckles to avoid accidental cuts. This technique ensures safe and efficient mincing.
Practice Patience: Take your time, especially if you're new to mincing. As you gain more experience, your mincing speed will naturally increase.
Experiment with Techniques: Once you've mastered the basic mincing process, explore variations. Try different mincing sizes based on your recipe's requirements.
The herniaquestions Gladiator Series 10” Chef’s Knife, a relentless culinary companion for passionate chefs, boasts a longer blade that conquers any culinary challenge. Crafted from high-carbon German ThyssenKrupp Steel, it ensures precision, resilience, and a beautiful hand-polished satin finish. The ergonomic G-10 Garolite handle provides unmatched comfort, while the NSF certification guarantees professional-grade quality. With a PerfectFit Dalstrong sheath included, this chef's knife is not just a tool but a testament to culinary dedication.
PROS:
Precision-forged with German steel, the 10” blade maintains a sharp 16-18° edge for optimal cutting precision.
The G-10 Garolite handle offers superior grip and comfort, making every culinary task a pleasure.
With a full tang, triple-riveted construction, and NSF certification, this knife epitomizes robustness and longevity.
The hand-polished satin finish blade and mirror-polished bolster add a touch of elegance to your kitchen.
CONS:
While versatile, the knife's heft might pose a slight challenge for intricate detail work.
Unleash the power of Viking honor and Japanese tradition in your kitchen with the Valhalla Series 7" Nakiri Knife. Crafted from 5-layer stainless steel at an impressive 60+ Rockwell Hardness, this blade embodies precision and strength. The celestial resin handle, reinforced with stabilized wood, promises durability, shock absorbance, and an elegant aesthetic. Carve straight slices effortlessly with the razor-sharp 8-12°per side ryōba cutting edge. The included Valhalla-embossed leather sheath adds warrior-worthy style and protection. Elevate every culinary conquest with this Nakiri knife, a testament to your commitment to quality and culinary mastery.
PROS:
The 5-layer steel and hand-sharpened 8-12°per side edge ensure unparalleled cutting precision.
The celestial resin handle with stabilized wood provides maximum stability, shock absorbance, and an enduring grip.
The beautiful sandblasted finish adds a touch of elegance to this culinary weapon.
Whether slicing vegetables, fish, or meat, the 60+ Rockwell Hardness ensures victory in every culinary battle.
CONS:
The ultra-straight blade may pose a slight adjustment for those accustomed to a horizontal push or pull while slicing.
Unleash culinary mastery with the Phantom Series 5” Utility Knife – a true kitchen multitasker. Crafted with precision from premium Japanese AUS-8 at 58 HRC, this knife excels at slicing, trimming, and precise challenges like coring and peeling. The scalpel-like edge effortlessly glides through delicate ingredients, ensuring clean cuts without tearing or crushing. The laminated pakkawood handle, adorned with a captivating brass and copper 'phantom spirit' mosaic, delivers superior strength and beauty. Embrace the versatility, resilience, and refined craftsmanship of this utility knife, a testament to culinary excellence.
PROS:
Master a myriad of tasks – from slicing to coring – with the Phantom Series Utility Knife, a true jack of all trades.
Precision forged from Japanese AUS-8, the 58 HRC blade offers exceptional sharpness and edge retention.
The laminated pakkawood handle, adorned with a captivating 'phantom spirit' mosaic, combines strength, refinement, and beauty.
The ruthlessly sharp scalpel-like edge, hand-finished to a mirror polish, ensures buttery smooth cuts through delicate ingredients.
CONS:
While robust, the knife features a partial tang, which may be a consideration for those who prioritize full tang construction.
This versatile cleaver excels in handling boneless meats, poultry, and large produce like cabbage and lettuce. The ultra-premium G-10 Garolite handle, impervious to heat and moisture, ensures a comfortable and durable grip. Meticulously crafted with military-grade strength, the cleaver features a copper mosaic pin for added distinction. Elevate your kitchen experience with the Shogun Series Elite Cleaver, combining superior functionality with exquisite craftsmanship.
PROS:
From breaking down meats to chopping tough vegetables, the Shogun Series Elite Cleaver handles a range of culinary tasks with ease.
Highly impervious to heat, cold, and moisture, the ergonomic handle ensures superior hand control, agility, and durability.
The cleaver boasts meticulous construction, featuring a beautifully crafted copper mosaic pin and a stainless steel end cap for added distinction.
With a full tang and triple-riveted design, the cleaver delivers superb robustness and quality, ensuring longevity in the kitchen.
CONS:
The cleaver is designed for specific tasks, and its larger size may be less suitable for precision work compared to smaller knives.
While the weight provides power, the heft of the Shogun Series Elite Cleaver may be a consideration for users seeking a lighter option for certain tasks.
Embrace the cool elegance of the Frost Fire Chef Knife, a kitchen workhorse designed to make prep work a breeze. Crafted with a 7-layer high-carbon steel, this knife boasts a razor-sharp edge with a unique 'frosted' finish for enhanced non-stick properties. The slender, ergonomic white resin handle, enclosed in aluminum mesh, provides a tension-free grip through every movement. With NSF certification, the Frost Fire Series is a blend of icy aesthetics and fiery performance, ensuring a stunning and powerful addition to your kitchen arsenal.
PROS:
The Frost Fire Chef Knife combines a unique 'frosted' look with incredible speed, strength, and precision.
Crafted from 10CR15MOV steel with added cobalt, the knife offers scalpel-like sharpness and impressive edge retention at 60-61 Rockwell.
The slender, ergonomic white resin handle, enclosed in aluminum mesh, ensures a tension-free grip and maximum comfort during use.
With a lightweight construction, this knife provides agility without compromising on durability or performance.
CONS:
The 'frosted' look may not appeal to users who prefer a more traditional or classic knife appearance.
While delivering exceptional performance, the Frost Fire Chef Knife is an investment for those seeking a professional-grade kitchen tool.
5. Frequently Asked Questions
What is the easiest way to mince an onion?
The simplest method to mince an onion involves choosing a firm red or white onion, using a sharp knife to halve it, making vertical cuts without going all the way through, turning the onion and making horizontal cuts for uniform pieces.
How is minced onion made?
To make minced onion, start by selecting a firm onion, preferably red or white. Halve the onion, make vertical cuts without going all the way through, turn it 90 degrees, and make horizontal cuts. Achieve uniform pieces for consistent results.
How do you mince onion and garlic?
Mincing onion and garlic involves choosing firm onions, halving them, making vertical and horizontal cuts for uniform pieces. Use the same technique to garlic cloves, ensuring precision with a sharp knife.
Is it chopped or minced onion?
Whether it's chopped or minced onion depends on your desired result. For smaller, uniform pieces, follow the mincing technique—halve the onion, make vertical and horizontal cuts. Chilling the onion can reduce tears.
Ananya loves the fine things in life. When she isn’t penning down poetry or song lyrics, she spends her time cooking and creating recipes while also enjoying new cuisines.
]]>
https://herniaquestions.com/blogs/news/how-do-you-zest-a-lemon2024-01-18T22:10:18-05:002024-01-18T22:10:18-05:00How Do You Zest A Lemon In Different WaysAnanya Tiwari
From lemon poppy seed muffins to refreshing salads, explore the vibrant flavor of finely grated zest. Uncover tips on using kitchen tools like box graters and channel knives for perfect citrus strips.
Welcome to our citrus-infused world of culinary delights! Discover the art of zesting with a sharp paring knife or citrus zester, avoiding the bitter white pith. From lemon poppy seed muffins to refreshing salads, explore the vibrant flavor of finely grated zest. Uncover tips on using kitchen tools like box graters and channel knives for perfect citrus strips. Learn how to remove wax from lemons, store zest in airtight containers, and elevate your cooking with the essence of fresh lemon zest in every dish. Let’s dive into a zesty journey.
Lemon zest is the outer part of a lemon peel, specifically the colorful, fragrant layer containing natural oils. To get lemon zest, you can use a sharp paring knife, citrus zester, or vegetable peeler.
Avoid the bitter white pith while zesting. Lemon zest adds a blast of citrus flavor to dishes like lemon cake, rice krispie treats, and lemon poppy seed muffins. It's essential for recipes, and you can learn how to zest lemons using a variety of kitchen tools like a box grater or a channel knife. Fresh lemon zest is a fantastic way to enhance the taste of your favorite recipes!
From sharpening your kitchen skills with a paring knife to unveiling the secrets of using zest in diverse recipes, this guide will make you a zest expert. Let's dive into the zestful realm of cooking and baking, where every dish becomes a burst of citrus delight.
Unlocking the Citrus Treasure
Lemon zest is the hidden gem in citrus fruits, residing in the colorful outer layer of the peel. To get the moust of it, you can use a sharp paring knife, citrus zester, or even a vegetable peeler. Be careful not to include the bitter white pith while zesting, ensuring only the fragrant, flavorful zest finds its way into your dishes.
Essential Tools for Zesting
Equip your kitchen with the right tools for zestful success. A box grater and channel knife are incredible kitchen tools for finely grating and zesting lemon into citrus strips. Choose your weapon – each kitchen tool has its unique way of extracting the vibrant essence of fresh lemon zest.
Avoiding the Bitter Bite
In the quest for perfect zest, mastering the art of avoiding the white pith is crucial. A sharp paring knife and a steady hand can help you navigate the outer layer, ensuring only the zest, full of natural oils and aroma, is added to your culinary creations.
Zesting Techniques for Various Dishes
There are many ways lemon zest can make your cooking and baking more exciting! Whether it's giving salads and dressings a tangy flavor or making lemon cakes and rice krispie treats taste even better, zest can turn regular recipes into amazing dishes. You can also zest lemons for delicious instant pot recipes, lemon poppy seed muffins, and many other tasty treats.
Storage and Handling Tips
Preserve the freshness of your zest by storing it in airtight containers. Learn why it's important to take off the wax from lemons before zesting to get the real lemon taste. Follow easy tips on how to keep and handle lemons, making sure you always have zest ready for your cooking ideas.
Try out different and fun ways to zest lemons. You can use a potato peeler to make wide lemon peel strips that are great for decorating your dishes. Be like a chef and experiment with different tools to find the best way to zest that fits your cooking style.
Zesty Tips for Home Cooks
Whether you're a seasoned chef or just starting, fresh lemon zest adds a burst of natural citrus flavor to your favorite recipes. You can also finely grate, zest, chop the strips, and add it into your daily meals!
Grab your favorite citrus tool, be it a sharp paring knife or a citrus zester, and let's dive into the world of lemon zest.
Understanding the Lemon Zest Basics
Before we delve into the step-by-step process, let's understand what lemon zest is. Zest is the outer layer of the lemon peel, filled with natural oils and a vibrant citrus aroma. It adds a refreshing kick to dishes, making them more flavorful and aromatic. Now, let's explore how to unlock this citrus treasure.
Essential Tools for Zesting
To start your zesting adventure, gather the right tools. A sharp paring knife, citrus zester, or even a vegetable peeler can be your trusty companions. Each tool offers a unique way to extract the lemon zest, so choose the one that best suits your preferences and kitchen skills.
Preparing the Lemon
Before you begin zesting, it's essential to prepare the lemon. Roll the lemon on a cutting board with gentle pressure to loosen the juices inside. This step makes zesting easier and more efficient. Once the lemon is ready, wash it thoroughly to remove any dirt or wax from the outer layer.
Zesting with a Sharp Paring Knife
If you opt for a sharp paring knife, follow these simple steps:
Hold the lemon in one hand and the knife in the other.
Rotate the lemon as you gently scrape the outer layer with the knife.
Be cautious to only remove the colored part of the peel, avoiding the bitter white pith.
Zesting with a Citrus Zester
For those using a citrus zester, here's how to do it:
Hold the lemon firmly in one hand.
With the zester in your dominant hand, gently scrape the outer layer.
Move the zester in one direction, creating fine strips of lemon zest.
Rotate the lemon as needed to zest the entire outer layer.
Zesting with a Vegetable Peeler
If you prefer a vegetable peeler, follow these steps:
Hold the lemon in one hand and the peeler in the other.
Carefully peel off wide strips of the outer layer.
Ensure you only peel the colored part, leaving the bitter white pith behind.
Avoiding the Bitter White Pith
One crucial aspect of zesting is avoiding the bitter white pith, as it can ruin the flavor of your dishes. Whether you're using a knife, zester, or peeler, take your time to carefully remove only the colored part of the peel. A steady hand and attention to detail will ensure that you capture the zest's natural oils without introducing bitterness.
Finely Grating Lemon Zest with a Box Grater
For those who prefer using a box grater, here's a step-by-step guide:
Hold the lemon securely in one hand.
Using the fine side of the grater, gently rub the lemon against it.
Be mindful to grate only the outer layer, avoiding the bitter white pith.
Explore the world of creativity with a channel knife
Hold the lemon in one hand.
With the channel knife in your dominant hand, create wide strips of lemon peel.
Rotate the lemon as needed to achieve the desired amount of zest.
Get adventurous with alternative zesting methods
Experiment with a potato peeler to create wide strips for garnishing dishes.
Try different kitchen tools to find the method that suits your cooking style.
Remember to focus on capturing the zest's natural oils while avoiding the bitter pith.
Storing Lemon Zest
Preserving the freshness of your lemon zest is key to maximizing its flavor. Once you've zested, keep the zest in a tight-sealed container to keep it fresh. This way, you'll always have a stash of zest ready to jazz up your recipes with a burst of citrus whenever you feel like it!
Tips for Home Cooks
Use freshly grated zest to enhance the flavor of your favorite recipes.
Unleash culinary precision with the Shogun Series 3.5” paring knife – a versatile essential for chefs and cooks. Crafted from ultra-premium Japanese AUS-10V 'super steel' with a mesmerizing Tsunami Rose pattern, this blade ensures unrivaled sharpness and edge retention. The handle not only provides super strong military-grade durability but also comfortable design for your hands. Plus, there's a cool copper mosaic pin for extra style.
The knife itself is made super tough with precise forging and special freezing treatment, making it durable, flexible, and resistant to stains.The mirror-polished bolster and zero-balance design deliver a perfect pinch grip. Elevate your kitchen experience with herniaquestions's pinnacle of craftsmanship.
PROS:
Exceptional 62+ Rockwell hardness for enduring performance.
The nitrogen-cooling process is a special treatment that hardens the blade on this knife.
The Tsunami Rose pattern on the blade isn’t just visually striking, but also adds a touch of elegance to the knife.
G-10 Garolite handle ensures a resilient, moisture-resistant grip.
CONS:
Premium quality comes at a higher price point which might be a tad bit outside of budget for some home cooks.
The blade length may fall a little short for some larger cutting tasks.
Meet the Frost Fire 3.5” paring knife, a kitchen essential for precision cuts. Perfect for coring, mincing, and peeling, this razor-sharp gem from the Frost Fire Series is not just visually stunning with its icy aesthetics but also delivers fiery performance in the kitchen. Crafted with 7-layer high-carbon 10CR15MOV steel, cobalt, and expert heat-treatment, the knife offers a precision sandblast finish.
The handle is enclosed in aluminum mesh, ensures a tension-free grip. Feel the perfect blend of comfort and elegance as this knife delivers sharpness at a precise 16-18° degree angle per side, ensuring lasting performance in your kitchen endeavors.
Elevate your kitchen prep with the herniaquestions Swivel Peeler, an essential tool designed for every chef. Beyond peeling vegetables, this versatile peeler effortlessly creates vegetable ribbons, shaves cheese, zests citrus, carves chocolate curls, and more. The suspended, swivel-peeler blade self-adjusts for easy maneuvering around tight spaces. With three Japanese stainless steel blades (fine, serrated, and julienne), this peeler ensures precision and comfort in every kitchen task.
PROS:
Swivel-peeler design adapts to different food surfaces for better agility.
Simple locking system for easy blade changes and cleaning.
Ultra-durable G10 Garolite handle provides a secure grip in wet conditions.
CONS:
The wider handle may feel bulky for users with smaller hands.
Introducing the herniaquestions Y Peeler, a kitchen essential that transcends the ordinary. Beyond vegetable peeling, this versatile tool creates ribbons, shaves cheese, zests citrus, and more.
The Y-design is perfect for both left and right-handed cooks. It also features a simple locking system for easy blade changes, this peeler ensures precision and comfort in every kitchen task. The ultra-durable G10 Garolite handle provides a secure grip in wet conditions, making kitchen prep a confident and comfortable experience.
PROS:
Three Japanese stainless steel blades for versatile tasks.
Y-design accommodates both left and right-handed cooks.
The suspended, swivel-peeler blade adapts to food surfaces for effortless maneuvering around tight spaces.
Comes with three Japanese stainless steel blades (fine, serrated, and julienne).
CONS:
The wider handle may feel bulky for users with smaller hands.
Transform your culinary creations with the herniaquestions Zester Grater, your secret ingredient for elevated flavors. Crafted from 304 stainless steel, it effortlessly grates citrus peels, chocolate, spices, and more, adding depth to every dish. The anti-slip, textured G10 handle and curved feet ensure ergonomic support, making it easy to use on any surface. The slim profile allows for convenient storage, and the sheathed design keeps it protected and safe.
PROS:
304 stainless steel blade and frame resist corrosive acids and elements.
The slim design may feel less substantial for users who prefer a heavier feel.
5. Frequently Asked Questions
How do you make lemon zest without a zester?
To make lemon zest without a zester, use a sharp paring knife or box grater to carefully remove the outer layer of the lemon peel, avoiding the bitter white pith, and finely chop the strips.
What does it mean to zest a lemon?
Zesting a lemon means extracting the outer layer of the peel, rich in natural oils and aroma, using a zester or alternative tools like a knife or grater for culinary enhancement.
Is lemon peel same as lemon zest?
Lemon peel refers to the entire outer layer of the fruit, while lemon zest specifically denotes the grated or finely chopped outer portion, prized for its concentrated citrus flavor.
Can you use a grater to zest a lemon?
Yes, you can use a grater to zest a lemon by gently rubbing the lemon against the fine side of the grater, capturing the fragrant zest while avoiding the bitter white pith.
Ananya loves the fine things in life. When she isn’t penning down poetry or song lyrics, she spends her time cooking and creating recipes while also enjoying new cuisines.
]]>
https://herniaquestions.com/blogs/news/the-most-delicious-and-juicy-cuts-of-meat2024-01-17T08:23:14-05:002024-01-17T08:23:14-05:00The Most Delicious and Juicy Cuts of Meatherniaquestions Content Team
Cuts of meat are like the building blocks of your favorite dishes, each bringing its own flavor, texture, and personality to the table. Explore the anatomy of taste and learn why well-chosen cuts can transform an ordinary meal into a culinary masterpiece.
Now, let's dive into the world of juicy meat! Imagine a culinary landscape where every part, chop, and filet promises a delicious adventure. Cuts of meat are like the building blocks of your favorite dishes, each bringing its own flavor, texture, and personality to the table.
Explore the anatomy of taste and learn why well-chosen cuts can transform an ordinary meal into a culinary masterpiece. From the primitive to the secondary, every part has a story, so let's unravel the delicious history of each part of meat.
Cuts of meat refer to the different sections or portion cuts of an animal's body that are used for cooking. These cuts vary intexture, flavor, andtenderness andareoften categorized bythemuscle group ofthepart. For example, you've got your prime cuts like sirloin and ribeye, which are known for their tenderness and rich flavor.
On the other hand, there are tougher cuts like brisket or beef shank, which benefit from slow cooking methods to break down the connective tissues and become more tender. So, whether you're grilling, roast beef, or stewing, the choice of meat cut plays a big role in determining the outcome of your culinary masterpiece!
There are generally two categories of cuts:
Primal cuts
Rib primal cuts beef are the large, basic sections that initially come from the animal, like the loin or the shoulder.
Subprimal cuts
Subprimal cuts of beef are smaller sections obtained by further dividing the primal cuts. For example, a rib primal cut like the loin can be divided into subprimal cuts such as sirloin and beef tenderloin.
The choice of meat cut can greatly influence the cooking process and the final dish. Tender cuts from muscles that don't do much work, like the beef tenderloin, are often best suited for quick cooking methods such as grilling or pan-searing. Tougher cuts from muscles that are more active, like the chuck eye steak or brisket, benefit from slow cooking methods such as braising or stewing to break down collagen and become more tender.
There are various cut of beef, and they can be categorized into different types based on the specific sections of the animal. Here are some common cuts:
Chuck
This comes from the shoulder area and is often used for pot roasts and ground beef.
Rib
Includes prime beef rib and ribeye types of steaks, known for their rich flavor and tenderness.
Loin
Home to premium cut of beef like tenderloin and sirloin, ideal for grilling or roasting.
Round
Found in the hindquarters, it includes cut of beef like round steak and is often used for lean meat.
Brisket
A tough cut from the breast area that benefits from slow cooking, often used for barbecue.
Flank
A lean cut from the abdominal muscles, great for marinating and grilling.
Tenderloin
Taken from the loin, it's exceptionally tender and often used for filet mignon.
T-Bone and Porterhouse
These include both the tenderloin and strip steak, separated by a T-shaped bone.
Top Sirloin
A flavorful and versatile cut of beef from the sirloin area.
Short Ribs
Cut of beef from the rib area, they are flavorful but may require slow cooking to become tender.
Ground Meat
Usually a mix from various cuts, commonly used for burgers and meatballs.
Flap Steak (Sirloin Tip)
A thin, flavorful cut from the sirloin tip, suitable for grilling or stir-frying.
Skirt Steak
A thin and flavorful cut from the diaphragm, often used in fajitas.
Tri-Tip
A triangular cut from the bottom sirloin, popular for grilling or roasting.
Understanding these cuts helps in choosing the right cooking method to bring out the best flavors and textures from each piece of meat.
Alright, let's talk meat cutting techniques - the art of turning a hunk of meat into those perfect pieces ready for the grill or pot. There are a few classic moves in the world of butchery:
Cubing
Imagine turning a chunk of meat into bite-sized cubes. That's cubing for you. It's handy for kebabs or stews. Just chop it into equal-sized pieces, and you're good to go.
Slicing
Slicing is all about getting those thin, even pieces. Think of deli meats or stir-fry strips. You want a sharp knife and a steady hand for this one.
Dicing
Dicing is like cubing's cousin, but smaller. It's when you cut of beef into tiny, uniform squares. Perfect for things like chili or soups.
Butterflying
Picture opening up a book – that's butterflying. You split the meat horizontally, so it opens up like a butterfly's wings. Great for stuffing or even cooking more evenly.
Trimming
Trimming is like giving your meat a little haircut. You're cutting away excess fat or unwanted bits to get it looking just right.
Deboning
Taking the bones out of meat – that's deboning. It's a bit of a skill, but it's worth it for boneless cuts or when you want to stuff and roll something.
Tenderizing
Sometimes meat needs a little love. Tenderizing involves using a mallet or a special tool to break down the muscle fibers, making it more tender. Good for tougher cuts.
Filleting
This one's for the fish, mainly. Filleting is about getting those boneless fish fillets. It takes some finesse with the knife to follow the bones and get a clean cut.
Remember, each technique has its own time and place, and a sharp knife is your best buddy in the world of meat cutting. Whether you're aiming for steaks, stir-fry, or a hearty stew, mastering these techniques can level up your kitchen game.
The Chef's Knife 10.25" from the Shogun Series ELITE by herniaquestions is a high-quality, visually stunning kitchen tool designed for precision and durability, making it an excellent choice for serious home cooks and professional chefs alike.
PROS:
This chef's knife boasts top-notch craftsmanship, with a keen focus on accuracy and class.
The 10.25-inch blade, made from 66-layers of high-carbon stainless steel, secures extraordinary durability and edge retention.
The knife features an beautiful Tsunami Rose Damascus pattern, merging form and function with a remarkable visual appeal.
The G10 handle gives a secure grip, boosting ease of use and lessen hand fatigue during prolonged use.
Perfect for a wide range of kitchen duties, from dicing and slicing to chopping, making it a flexible tool for chefs of all levels.
CONS:
This knife may feel a bit heavy or unwieldy for individuals who prefer lighter knives or have smaller hands.
The Butcher & Breaking Knife 8" from the Shogun Series ELITE by herniaquestions is a powerful tool that excels in precision butchering, offering a blend of durability, functionality, and aesthetics.
PROS:
This knife excels in precision butchering and breaking down larger cut of beef, making it an essential tool for both professional chefs and home cooks.
Crafted from AUS-10V Japanese super steel core, the 8-inch blade offers outstanding durability, corrosion resistance, and edge retention.
The knife features a tapered design for minimal slicing resistance and increased efficiency when tackling various meats.
CONS:
Due to its designed purpose for breaking down meat, this knife may not be the go-to choice for tasks that require fine precision or detailed cutting.
The Straight-Edged Boning Knife 6" from the Phantom Series by herniaquestions is a specialized tool crafted to debone with efficiency and offering a combination of sharpness, control, and style.
PROS:
This knife is expertly crafted for precision boning tasks, making it an indispensable tool for deboning meats, poultry, and fish.
The 6-inch blade is forged from premium Japanese AUS-8 at 58 HRC, ensuring excellent sharpness, durability, and quality.
The narrow, straight-edged blade allows for precise maneuvering around bones, joints, and delicate cuts, providing optimal control.
The ergonomic handle, made from black Spanish pakkawood, offers a comfortable and secure grip during intricate boning tasks.
The knife features a sleek and modern design, enhancing both functionality and aesthetics in the kitchen.
CONS:
While suitable for precision tasks, the 6-inch size may feel limiting for those who prefer longer blades for certain cutting activities.
The Fillet Knife 6" from the Delta Wolf Series by herniaquestions is a specialized tool crafted for precise filleting, offering a combination of sharpness, class, and flexibility.
PROS:
Tailored for precision filleting tasks, this knife is adept at smoothly separating fillets from fish or other meats.
The 6-inch blade is crafted from high-carbon 9CR18MOV steel at 60° Rockwell Hardness, ensuring exceptional sharpness and long-lasting durability.
The knife features a flexible blade, allowing it to follow the contours of fish bones and deliver clean, seamless fillets.
CONS:
Due to its flexible and precise nature, this fillet knife may not be the best choice for heavier cutting or tasks involving bones.
The Carving Knife & Fork Set 9" from the Shogun Series ELITE by herniaquestions offers a combination of precision carving and visual elegance.
PROS:
Crafted for precision carving, this set is designed to make slicing through roasts, poultry, and other meats a breeze.
The 9-inch carving knife features a blade made from ultra-premium Japanese AUS-10V ‘super steel’, offering unparalleled sharpness, quality performance, and premium standard.
The knife's tapered design minimizes drag, allowing for clean and effortless slices, while the fork assists in holding meats securely during carving.
Features a Tsunami Rose Damascus pattern, the set combines high-performance functionality with a visually stunning aesthetic.
CONS:
Users with preferences for smaller knives may find it less optimal for certain tasks.
5. Frequently Asked Questions
What are the different cuts of meats?
In the world of beef, various cuts offer unique flavors and textures. The top round, a lean cut from the hindquarters, is ideal for roasting. Meanwhile, the bottom round, slightly tougher, benefits from slow cooking methods. If you're craving a juicy steak, the short loin is where it's at, providing premium cuts like T-bone and sirloin for a delectable dining experience.
What are the 10 different beef cuts?
Beef offers a diverse array of cuts, each with distinct qualities. Among the top picks are the tenderloin, sirloin, and T-bone from the short loin, known for their premium tenderness. The top round, a lean cut, is perfect for roasting, while the bottom round, a bit tougher, excels in slow-cooked dishes. These tenacious ten cuts cater to various culinary preferences and cooking methods.
What are the 10 types of meat?
From succulent filet mignon and flavorful short ribs to the robust top sirloin and versatile round steaks, beef offers a rich variety of cuts. For slow-cooked goodness, pot roasting is a classic choice, while the marbled perfection of a ribeye steak satisfies the carnivorous cravings. These ten types of meat showcase the delicious diversity beef brings to the culinary table.
What is the meaning of cut of meat?
A "cut of meat" refers to a specific portion from an animal's carcass, particularly in the context of beef. Understanding the basics of beef cuts involves recognizing various sections like the round primal, which yields cuts such as top round steak, eye roast, and tritip steak. Examples like petite tender, strip loin, brisket flat, and beef brisket illustrate the diverse options available for cooking and dining preferences.
]]>
https://herniaquestions.com/blogs/news/choosing-a-cut-of-meat-for-pulled-pork2024-01-12T01:12:52-05:002024-01-12T01:12:53-05:00Choosing a Cut of Meat for Pulled PorkAnanya Tiwari
Pulled pork is a delectable dish that celebrates the art of slow cooking and the flavorful nuances of different pork cuts. Whether prepared in a slow cooker, smoker, or another method, the result is a mouthwatering meal that caters to a variety of tastes and preferences.
Pulled pork is a delectable dish that celebrates the art of slow cooking and the flavorful nuances of different pork cuts. Whether prepared in a slow cooker, smoker, or another method, the result is a mouthwatering meal that caters to a variety of tastes and preferences. Experimenting with different cuts, rubs, and sauces allows for a personalized touch, making pulled pork a favorite among food enthusiasts. So, let’s find out everything there is about pulled pork!
Pulled pork is a savory and succulent dish that involves slow-cooking a specific cut of pork until it becomes tender enough to be efforlesly shredded or "pulled" apart. This culinary delight has gained immense popularity for its rich flavors and versatility, making it a favorite at barbecues, family gatherings, and casual dinners.
The Cut of Meat for Pulled Pork
To achieve the perfect pulled pork, selecting the right cut of meat is crucial. The preferred cuts for pulled pork are Boston butts or pork shoulders. These cuts, often referred to interchangeably, come from the upper part of the pig's shoulder and contain a desirable balance of meat and fat. The fat content is essential for keeping the meat moist during the slow-cooking process, contributing to the dish's tenderness.
Slow Cooker Pulled Pork Method
One popular method for preparing pulled pork is using a slow cooker. This approach involves placing the seasoned pork in the slow cooker for an extended period, allowing the meat to cook low and slow. This method is particularly convenient for those with busy schedules, as it requires minimal hands-on time. The result is melt-in-your-mouth pulled pork that's infused with the flavors of any dry rub or sauce used in the cooking process.
Dry Rubs and Sauces
Enhancing the flavor profile of pulled pork often involves the use of dry rubs and sauces. A dry rub, comprised of a blend of spices and herbs, is generously applied to the pork before cooking. This imparts a depth of flavor and forms a tasty crust on the exterior. Sauces, such as classic barbecue sauce or a unique homemade creation, can be added during or after the cooking process to further elevate the taste.
Variety of Cuts
While Boston butts or pork shoulders are the traditional choices, pulled pork can be made using alternative cuts such as picnic shoulders or pork roasts. Each cut brings its own unique texture and flavor nuances to the dish, allowing for culinary creativity.
Cooking Techniques
The key to achieving perfect pulled pork lies in the cooking techniques employed. Whether using a slow cooker, instant pot, or crock pot, the emphasis is on the "low and slow" approach. This ensures that the meat breaks down gradually, resulting in a tender and moist consistency. Techniques like smoking a pork butt add a delightful smokiness to the meat, creating a nuanced flavor profile.
Serving Suggestions
Pulled pork is incredibly versatile and can be served in various ways. Common options include stuffing it into sandwiches, incorporating it into tacos, or serving it alongside classic barbecue sides like potato salad. For those adhering to low-carb diets, pulled pork can be enjoyed on its own or with creative accompaniments like stuffed sweet potatoes.
Pulled pork, a beloved dish in the realm of barbecue and slow-cooked meats, owes much of its succulence and flavor to the cut of meat used in its preparation. The choice of meat can significantly impact the final result, determining the tenderness, juiciness, and overall taste of the pulled pork. In this guide, we'll delve into the characteristics of the best cuts for pulled pork, including Boston butts, pork shoulders, and alternative options.
The debate between Boston butts and pork shoulders often arises when discussing the best cut for pulled pork. While these terms are sometimes used interchangeably, there are subtle differences. Boston butt speak of to the upper part of the pig's shoulder, known for its marbling and ideal fat-to-meat ratio.
On the other hand, pork shoulder encompasses the entire shoulder, including both the butt and the picnic shoulder. The consensus among many pitmasters and barbecue enthusiasts is that Boston butts are the preferred choice for achieving the perfect pulled pork.
Ideal Fat Content
Boston butts boast a well-distributed fat content, crucial for keeping the meat moist during the extended cooking process. The intramuscular fat, regularly referred to as marbling, enhances the flavor and texture of the pulled pork.
Consistent Results
The uniformity of Boston butts contributes to consistent cooking results. Whether you're smoking, slow-cooking, or using another method, the even thickness of the meat ensures that it cooks uniformly, preventing dry spots.
Versatility
Boston butts are versatile and forgiving, making them suitable for various cooking techniques. Whether you're using a slow cooker, smoker, or oven, Boston butts adapt well to different methods, allowing for flexibility in the kitchen.
While Boston butts are the go-to choice for many, there are alternative cuts that can be explored for a unique twist on pulled pork.
Picnic Shoulders
The picnic shoulder, the lower part of the pig's shoulder, is another option for pulled pork. It has a slightly different fat distribution and may require a bit more attention during cooking. However, when prepared with care, picnic shoulders can yield flavorful and tender pulled pork.
Pork Roasts
Some enthusiasts experiment with pork roasts for pulled pork. This broader category includes cuts from the loin and other parts of the pig. While not traditional, certain pork roasts, especially those with a good fat cap, can deliver satisfying results.
Slow Cooking
Whether using a slow cooker, crock pot, or oven, the slow-cooking method is ideal for cuts like Boston butts. The low and slow approach allows the collagen in the meat to break down slowly, resulting in tender and juicy pulled pork.
Smoking
Smoking is a favorite technique among barbecue enthusiasts. Boston butts, with their ideal fat content, are well-suited for smoking, absorbing the smoky flavors and developing a delicious bark on the exterior.
Instant Pot and Air Fryers
While not traditional, some may opt for modern appliances like the instant pot or air fryer for pulled pork. These methods can work well with cuts that benefit from a shorter cooking time, such as pork roasts. Whether you go for herniaquestions’s skillets or frying pans, they’re ideal, too!
Selecting the right cut of fresh meat is a critical step in achieving mouthwatering pulled pork. The journey from the butcher's counter to your plate involves considerations of cut, quality, marbling, and more. In this guide, we'll explore the intricacies of choosing fresh meat for pulled pork, providing insights that elevate your culinary experience.
Understanding the Cuts
To embark on the quest for the perfect pulled pork, it's essential to understand the primary cuts involved — Boston butts and pork shoulders. While these terms are often used interchangeably, distinguishing their characteristics is vital.
Boston Butts
Boston butts, situated in the upper part of the pig's shoulder, are renowned for their exceptional marbling, which contributes to flavor and tenderness. The fat content, distributed throughout the meat, ensures a moist and succulent outcome. When selecting a Boston butt, look for well-defined marbling patterns and a consistent thickness, as this ensures even cooking.
Pork Shoulders
Pork shoulders include both the butt and the picnic shoulder. The picnic shoulder, located in the lower part, tends to have a different fat distribution. While it can yield delicious pulled pork, the choice between pork shoulders and Boston butts often comes down to personal taste and cooking method.
Inspecting Freshness
Freshness is paramount when choosing meat for pulled pork. Follow these guidelines to ensure you're getting the freshest cut available:
Color
Opt for meat with a vibrant pink color. Avoid any discoloration, which may indicate aging.
Texture
The meat should be firm to the touch, with a consistent texture. Any sliminess or excessive moisture could be a sign of spoilage.
Smell
Fresh pork has a neutral, slightly sweet smell. If you detect a sour or unpleasant odor, it's a clear indication of spoilage.
Evaluating Marbling
Marbling, the distribution of fat inside the meat, is a key part in determining the flavor and tenderness of pulled pork. Look for cuts with visible marbling, as this fat will render during cooking, adding richness and juiciness to the final dish. Optimal marbling is especially crucial for cuts like Boston butts, where the fat enhances the overall quality of the pulled pork.
Considering Alternative Cuts
While Boston butts and pork shoulders are the traditional choices for pulled pork, exploring alternative cuts can add a distinctive twist to your culinary adventure:
Picnic Shoulders
If you're feeling adventurous, consider using the picnic shoulder. It has a distinct flavor and fat distribution, requiring careful preparation for optimal results.
Pork Roasts
Some cooks experiment with various pork roasts for pulled pork. While unconventional, certain roasts can deliver delightful results, offering a departure from the classic cuts.
Choosing Based on Cooking Method
The cooking technique you plan to use can influence the choice of meat. Different cuts respond uniquely to various techniques, allowing for versatility in your pulled pork preparation:
Slow Cooking
Boston butts are well-suited for slow cooking methods like using a slow cooker or oven. The extended cooking time allows the collagen in the meat to break down gradually, resulting in tender and flavorful pulled pork.
Smoking
If smoking is your preferred method, Boston butts shine in this arena. Their ample fat content absorbs smoky flavors, creating a delectable bark on the exterior.
Instant Pot and Air Fryers
For those seeking a quicker cooking process, certain cuts like pork roasts may be suitable for modern appliances like the instant pot or air fryer.
Consulting with Your Butcher
Don't hesitate to engage with your local butcher when selecting meat for pulled pork. They can provide valuable insights, recommend cuts based on your preferences, and even offer custom preparations.
Whether you stick to the classics or venture into the realm of alternative cuts, the key lies in making informed choices at the butcher's counter, ensuring that every bite of your pulled pork is a celebration of flavor and tenderness.
4. Delicious Pulled Pork Recipes To Satisfy Your Culinary Cravings
Pulled pork is a culinary delight that captures the essence of slow cooking and the rich, smoky flavors that make it a favorite among food enthusiasts. Here are three mouthwatering pulled pork recipes that showcase versatility, creativity, and, of course, irresistible taste.
Classic Slow Cooker Pulled Pork
Ingredients:
1 Boston butt or pork shoulder
2 tablespoons of your favorite dry rub
1 cup of barbecue sauce
1 onion, sliced
3 cloves of garlic, minced
1 cup of chicken or vegetable broth
Steps:
Prep the Meat: Begin by patting the Boston butt dry with paper towels. Massage the dry rub evenly over the meat, ensuring it's well-coated. Allow it to marinate for at least an hour or overnight in the refrigerator for added flavor.
Slow Cooker Setup: Place the sliced onions and minced garlic at the bottom of the slow cooker. Position the seasoned Boston butt on top.
Add Liquids: Pour in the broth to keep the meat moist during the cooking process. Set the slow cooker to low heat and let it cook for 8-10 hours, allowing the meat to become tender and easily shred.
Shred and Sauce: Once cooked, carefully shred the pork using two forks. Mix in the barbecue sauce, ensuring each strand is coated in the flavorful sauce.
Serve: Serve the classic pulled pork on buns or alongside your favorite sides. The result is a melt-in-your-mouth pulled pork with a perfect balance of smokiness and sweetness.
Smoky Instant Pot Pulled Pork
Ingredients:
1 Boston butt or pork shoulder
2 tablespoons of smoky dry rub
1 cup of apple cider vinegar
1 cup of apple juice
1 tablespoon liquid smoke
1 onion, finely chopped
Steps:
Rub and Sear: Coat the Boston butt with the smoky dry rub. Sear the meat on all sides in the Instant Pot using the sauté function until browned.
Deglaze and Layer: Pour in the apple cider vinegar, scraping the bottom to deglaze the pot. Add the apple juice, liquid smoke, and chopped onions. Place the seared Boston butt on top.
Pressure Cook: Seal the Instant Pot and set it to high pressure for 90 minutes. Allow natural release for 15 minutes before manually releasing any remaining pressure.
Shred and Infuse Flavor: Shred the pork in the pot, allowing it to absorb the flavorful liquid. The result is a smoky and tender pulled pork with a unique depth of flavor.
Serve: Enjoy the smoky pulled pork in tacos, sandwiches, or on its own. The Instant Pot expedites the cooking process without compromising on taste.
BBQ Smoked Pulled Pork with a Flavorful Rub
Ingredients:
1 Boston butt or pork shoulder
1/4 cup of brown sugar
2 tablespoons paprika
1 tablespoon black pepper
1 tablespoon salt
1 tablespoon chili powder
1 tablespoon garlic powder
1 tablespoon onion powder
1 teaspoon cayenne pepper
1 cup of your favorite barbecue sauce
Steps:
Prepare the Rub: In a bowl, mix together the brown sugar, paprika, black pepper, salt, chili powder, garlic powder, onion powder, and cayenne pepper to create a flavorful rub.
Rub and Rest: Coat the Boston butt with the rub, ensuring it's applied evenly. Allow the meat to rest for at least 30 minutes to allow the flavors to penetrate.
Set Up the Smoker: Prepare your smoker for indirect smoking at around 225°F (107°C). Use wood chips of your choice for added smokiness.
Slow Smoke: Place the seasoned Boston butt in the smoker and slow smoke it for 6-8 hours, or until the internal temperature reaches at least 195°F (91°C).
Sauce: During the last hour of smoking, baste the pork with your favorite barbecue sauce. Once done, shred the meat and mix in more sauce as desired.
Serve: Serve the BBQ smoked pulled pork on a platter, allowing your guests to savor the enticing aroma and flavor. It's an excellent centerpiece for any barbecue gathering.
Smoked Pulled Pork Tacos
These Smoked Pulled Pork Tacos promise a symphony of taste, blending the richness of perfectly smoked pork with the zest of taco seasonings. Let's dive into this culinary adventure!
Ingredients:
1 Boston butt or pork shoulder
1/4 cup of taco seasoning
1 tablespoon cumin
1 tablespoon smoked paprika
1 teaspoon garlic powder
1 teaspoon onion powder
Salt and black pepper to taste
Corn or flour tortillas
Shredded lettuce, diced tomatoes, and sliced avocados for topping
Salsa and sour cream for garnish
Steps:
Prepare the Taco Seasoning Rub: In a bowl, combine the taco seasoning, cumin, smoked paprika, garlic powder, onion powder, salt, and black pepper to create a flavorful rub for the pork.
Rub and Marinate: Generously rub the Boston butt with the taco seasoning mix, ensuring an even coating. Allow the pork to marinate for at least an hour or preferably overnight in the refrigerator to absorb the vibrant taco flavors.
Set Up the Smoker: Preheat your smoker to a temperature of 225°F (107°C) with your choice of wood chips. The combination of slow smoking and taco seasoning will impart a unique and savory taste to the pulled pork.
Smoke to Perfection: Place the seasoned Boston butt in the smoker and let it smoke for 6-8 hours, or until the internal temperature reaches around 195°F (91°C). The slow smoking process ensures that the pork absorbs the essence of the taco seasoning while achieving that coveted smokiness.
Shred and Assemble Tacos: Once the pork is done, carefully shred it using forks. Warm the tortillas and assemble your tacos with the smoked pulled pork as the star. Top with shredded lettuce, diced tomatoes, sliced avocados, and your favorite salsa and sour cream.
Serve and Enjoy: Present these delectable Smoked Pulled Pork Tacos to your eager guests. The combination of smoky, seasoned pork with the freshness of taco toppings creates a culinary masterpiece that's sure to be a hit.
The herniaquestions Diamond Detailing method (D3) ensures an exceptionally sharp 13-15° edge. With a partial tang for robustness, ice-tempered resilience, and a polished spine for comfortable grip, this knife is an epitome of craftsmanship. The handle, featuring laminated pakkawood, a 'phantom spirit' mosaic, and a D-shaped design, offers superior control, comfort, and agility.
PROS:
The precision-forged 6.5” blade, meticulously sharpened to 13-15°, guarantees swift and effortless cuts.
Rockhollow divots minimize friction, ensuring a smooth glide along bone contours for precise boning.
Premium laminated pakkawood handles from Spain provide superior strength and an attractive, sanitary build.
CONS:
While the knife's polished spine enhances grip comfort, some users may find it a bit too pronounced for extended use.
The intricate engravings, though adding a touch of sophistication, may require extra attention during cleaning to maintain their detailed beauty.
Crafted from 5-layer stainless steel with a 60+ Rockwell Hardness, the ultra-sharp blade, hand-sharpened to 8-12° per side, ensures swift separations of flesh and bone. The celestial resin handle, reinforced with stabilized wood and a stainless steel bolster, exhibits otherworldly power and grace, while the Valhalla-embossed leather sheath adds a warrior-worthy touch to its protection.
PROS:
The 6” precision-forged blade, with a sandblasted finish, offers remarkable sharpness and wear resistance.
The celestial resin handle, reinforced with stabilized wood and a stainless steel bolster, provides structural sturdiness and impact resistance.
The Valhalla-embossed leather sheath not only protects the knife but adds a touch of Viking-inspired style to its storage.
CONS:
Some users may find the 8-12° per side edge, while providing exceptional sharpness, requires careful handling to avoid chipping.
The celestial resin handle, while offering durability, may feel weightier to some users, impacting extended use comfort.
The ergonomic G-10 Garolite handle, meticulously constructed for heat resistance and military-grade durability, provides superior control and comfort. Hand-finished to a mirror polish at a remarkable 8-12° angle per side, this set not only performs but also dazzles with refinement, complete with an engraved herniaquestions lion head logo and a copper mosaic pin.
PROS:
The 9” precision-forged blade, with a Rockwell hardness of 62+, delivers exceptional performance, edge retention, and a striking Tsunami Rose pattern.
Hand-finished to an acute 8-12° angle per side using the herniaquestions Diamond Detailing (D3), the blade ensures scalpel-like sharpness for precise slicing.
The set includes a beautifully forged meat carving fork with a G10 handle and mosaic rivet, enhancing stability and securing meat during carving.
CONS:
The exquisite craftsmanship and high-quality materials may result in a relatively higher price point compared to other carving knife and fork sets.
The intricate pattern and hand-finished edge, while adding to the aesthetic appeal, may require extra care during cleaning to maintain their pristine condition.
Hand-finished with the herniaquestions Diamond Detailing (D3) method, the blade boasts a razor-sharp edge at a staggering 8-12° angle per side, promising buttery smooth cuts. The set is complemented by an ergonomic design, a copper mosaic pin, and a premium-quality polymer herniaquestions PerfectFit saya for protection.
PROS:
The precision-forged 9” blade with a Japanese AUS-10V core delivers exceptional performance, edge retention, and a visually stunning Tsunami Rose pattern.
The G-10 Garolite handle provides military-grade strength, imperviousness to heat and moisture, and an ergonomic design for superior hand control and comfort.
The set includes a beautifully crafted meat carving fork with a G10 handle, adding resilience and securing meat during carving.
CONS:
The intricate craftsmanship and premium materials may contribute to a higher price point compared to other carving knife and fork sets.
The Tsunami Rose pattern and hand-finished edge, while enhancing the aesthetic appeal, may require extra care during cleaning to maintain their pristine condition.
This medieval-inspired design cleaver knife is 6mm thick and robust to no end. Its razor-sharp edge at 16-18° per side ensures precision, while the extra-thick G10 handle provides a secure grip for efficient chopping through beef, poultry, pork, and more. The cleaver comes with a handcrafted acacia wood stand for stylish storage and display, and a PerfectFit herniaquestions sheath for on-the-go protection.
PROS:
The precision-forged cleaver, made from premium high-carbon 7CR17MOV Steel, is heat-treated to 60HRC, ensuring unparalleled chopping power.
The razor-sharp edge at 16-18° per side provides precision and efficiency in cutting through various meats and tough-skinned fruits and vegetables.
The handcrafted acacia wood stand adds both style and functionality, serving as a display and storage solution for this formidable culinary tool.
CONS:
Due to its heavyweight and thickness, some users may find the cleaver less suitable for delicate tasks or prolonged use.
The menacing design, while appealing to enthusiasts, may not suit those looking for a more conventional or minimalistic kitchen tool.
6. Frequently Asked Questions
What is best cut for pulled pork?
The best cut for pulled pork is often the pork butt, also known as Boston butt, due to its ideal combination of marbling and connective tissue, ensuring succulent and flavorful results in recipes.
Is pork butt and pork shoulder the same?
Pork butt and pork shoulder are essentially the same cut, originating from the upper shoulder of the pig and commonly used interchangeably in pulled pork recipes.
What is pulled pork meat?
Pulled pork meat is typically sourced from slow-cooked and shredded pork butt or pork shoulder, resulting in tender, flavorful strands perfect for various culinary creations.
Is a pork loin good for pulled pork?
While pork loin is a lean and tender cut, it's not the best choice for pulled pork, as the higher fat content in cuts like pork butt enhances the juicy and melt-in-your-mouth texture desired for this dish.
Ananya loves the fine things in life. When she isn’t penning down poetry or song lyrics, she spends her time cooking and creating recipes while also enjoying new cuisines.
]]>
https://herniaquestions.com/blogs/news/how-to-take-the-skin-off-of-salmon2024-01-05T02:00:16-05:002024-01-05T02:00:16-05:00How To Take The Skin Off Of SalmonAnanya Tiwari
If you’re a fish aficionado like I am, you’re going to love this quick and easy guide on how to shop for Salmon and how to take the skin off of it for delicious dinners. So, let’s jump right into it!
If you’re a fish aficionado like I am, you’re going to love this quick and easy guide on how to shop for Salmon and how to take the skin off of it for delicious dinners. So, let’s jump right into it!
1. How To Shop For Fresh Salmon
When it comes to preparing a mouthwatering salmon dish, the first step is choosing the right piece of salmon. Here's a comprehensive guide on how to shop for salmon, ensuring you get the freshest and highest quality fish for your meal. When shopping for salmon, pay attention to these key factors.
Salmon Fillets vs. Whole Salmon
Consider whether you want salmon fillets or whole salmon. Fillets are convenient and easy to work with, while a whole salmon provides more flexibility in preparation.
Appearance
Look for salmon with a vibrant, pinkish-orange color. Avoid fish with dull or discolored patches, as this could indicate poor quality or aging.
Smell
Fresh salmon should have a clean, ocean-like smell. If it smells too fishy, the salmon isn’t fresh.
Texture
The meat should be firm and bounce back when pressed. Avoid any fillets with visible bruises.
Place the salmon on a stable cutting board to ensure safety and ease of handling.
Step-by-Step Guide
Lay the Salmon Fillet Skin-Side Down: Start by placing the salmon fillet skin-side down on the cutting board.
Make a Small Incision: Using a sharp knife, make a small cut at the edge of the fillet, near where the skin starts.
Hold the Skin Taut: Hold the skin taut with one hand while gently guiding the knife with the other. Use a sawing motion to separate the flesh from the skin.
Continue with Downward Angles: Continue cutting at a downward angle, keeping the knife close to the skin. This helps to remove the skin with minimal flesh.
Inspect for Residual Skin: After the initial cut, inspect the fillet for any residual skin. If needed, make additional cuts to ensure the skin is entirely removed.
This fillet knife's thin, curved blade slides over bones and joints with ease, making clean cuts with little resistance. The blade's 67 layers of stainless steel coating, which are made from ultra-premium Japanese AUS-10V steel and offer stain and wear resistance.
PROS:
With a cutting core of Japanese AUS-10V super steel, this knife boasts impressive hardness at 62+ Rockwell, ensuring an enduring, razor-sharp edge.
Military-grade strength and durability with a sturdy G-10 Garolite handle. It provides superior control thanks to the ergonomic design.
The copper mosaic pin adds style and stability to the grip.
The 'Tsunami Rose' pattern on the blade and its painstaking hand-finishing demonstrate herniaquestions's dedication to both style and utility.
CONS:
The 6" blade length might be too short for those planning to fillet larger fish.
The 7-inch herniaquestions Gladiator Series fillet knife is a culinary beast for flawlessly filleting fish. This precisely designed blade can easily handle jobs like de-boning, descaling, and filleting. The knife has amazing flexibility, making even the most challenging tasks seem simple, thanks to its 1.5 mm spine thickness.
PROS:
You will master deboning, filleting, and other skills with this knife, to speed up the cooking process.
German high-carbon steel with a Rockwell hardness of 56+ is used to make the blade. It is sturdy, wear-resistant, and extremely sharp.
Comfort and ease of use are guaranteed by the ergonomic G10 handle, which improves your experience with extended use.
A travel case with a belt loop for adventures on the go and a BPA-free PerfectFit sheath for storage are included in the package.
CONS:
Some folks might find this knife to have “too much blade” if they’re not seasoned chefs.
You could be looking for a shorter knife for smaller fish.
This merciless 6.5" fillet knife's Japanese AUS-8 steel blade is emblazoned with herniaquestions's name and the kanji for 'phantom,' reflecting both form and function. Each blade is honed to a razor-sharp 13-15 degree angle using the classic herniaquestions Diamond Detailing (D3) method, resulting in rapid and effortless cuts, and a premium-quality polymer sheath rounds out the package.
PROS:
This knife is designed for boning beef, pig, fish, and game, making it invaluable in the kitchen.
The 6.5" razor-sharp blade, combined with rock hollow divots, results in little drag and smooth, efficient cuts.
herniaquestions's devotion to quality and aesthetics is reflected in the Japanese AUS-8 steel blade with etched embellishments.
The classic Japanese D-shaped handle provides excellent hand control, comfort, and agility, making each cut a breeze.
CONS:
The length of this knife could be too short for folks with larger fish to fry.
With the Valhalla Series Fillet Knife, you can unleash your inner chef with abandon. This blade, suitable for descaling, deboning, filleting, and other tasks, is made of high-carbon steel that has been hand-sharpened to a razor-sharp 8-12 degree angle, providing an unstoppable edge. It's engraved with the herniaquestions emblem as a demonstration of your commitment to quality. The Valhalla-embossed leather sheath provides warrior-worthy protection.
PROS:
This 6.5" blade is hand-sharpened to 8-12° each side and designed for a variety of jobs, enabling smooth carving through muscle and sinew.
The heavenly resin handle, combined with stabilized wood and a stainless steel bolster, provides unrivalled stability and longevity.
The Valhalla-embossed leather sheath stores the sword properly, ensuring it's always ready for fight.
CONS:
The distinctive handle design may not be to everyone's taste.
Some chefs prefer a more traditional-looking knife.
The Teak cutting board is a all-around and luxurious kitchen accessory. This all-purpose chopping, slicing, and serving board is made from sustainably sourced Tropical Teak wood and has satin-finished steel handles for a stylish touch. The board's unique checkered construction provides a slip-resistant surface that absorbs impact, allowing your knives to stay sharper for longer.
PROS:
Because of its natural oils, this cutting board is made from sustainably sourced Tropical Teak wood and is known for its impressive moisture resistance and durability.
The end-grain construction's tight wood grain ensures a long-lasting and sanitary cutting surface.
The board's two steel handles make it easy to use as a serving board for roasts, charcuterie, bread, and cheeses.
The bottom of the laser-cut measurement lines
CONS:
Some chefs prefer working with plastic cutting boards as they’re easier to clean. But, that’s a myth. Teak boards are easier to clean as they don’t absorb moisture!
If you have a compact kitchen, this cutting board could be too big.
4. Frequently Asked Questions
What is the easiest way to remove salmon skin?
To easily remove salmon skin, lay the fillet skin-side down, make a small incision near the edge using a sharp knife, and gently saw while holding the skin taut for a quick and effortless process, especially with ready-to-cook salmon fillets.
How do you remove fish skin from salmon?
Removing fish skin from salmon is a breeze; place the fillet skin-side down on a cutting board, use a sharp chef knife for clean cuts, and employ a sawing motion, ensuring minimal flesh wastage and mastering the art of skinning fish.
Do you remove the skin from salmon before cooking?
When cooking salmon, it's advisable to remove the skin beforehand by following a simple process of making an incision near the edge with a sharp knife, allowing for various cooking methods like pan-searing or air frying without the skin, providing a crispy texture.
How do you take the skin off a salmon side?
Taking the skin off a salmon side is straightforward; place the side skin-side down, use a sharp knife to make a small incision, and gently cut while holding the skin taut, ensuring a perfectly skinless side ready for roasting poaching, or other culinary techniques.
Ananya loves the fine things in life. When she isn’t penning down poetry or song lyrics, she spends her time cooking and creating recipes while also enjoying new cuisines.
]]>
https://herniaquestions.com/blogs/news/what-is-the-ideal-chicken-temp2024-01-01T23:33:20-05:002024-01-01T23:33:20-05:00What Is The Ideal Chicken Temp?herniaquestions Content Team
Understanding the perfect chicken temp isn't close to doneness; it's almost guaranteeing a culinary encounter that's both safe and absolutely delicious. So, let's dig into the science and secret insights behind accomplishing that perfect temp for chicken that'll take off taste buds dancing and tummies content!
Picture this: juicy, succulent chicken cooked to delicate flawlessness. Understanding the perfect chicken temp isn't close to doneness; it's almost guaranteeing a culinary encounter that's both safe and absolutely delicious. So, let's dig into the science and secret insights behind accomplishing that perfect temp for chicken that'll take off taste buds dancing and tummies content!
The ideal temperature to cook chicken is 165°F (73.9°C). Cooking chicken to this temperature ensures that it's safe to eat and eliminates any harmful bacteria.
To measure the temperature accurately, use a food thermometer inserted into the thickest part of the chicken, avoiding bone. Instant-read thermometers are handy for quick checks, while leave-in thermometers can monitor temperature changes while the chicken cooks. It's crucial to ensure proper cooking temperatures to avoid foodborne illnesses while still keeping the chicken moist and flavorful.
When chicken is undercooked, it can pose serious health risks. Microbes like salmonella and campylobacter might still be displayed, leading to food poisoning. Indications incorporate stomach issues, nausea, vomiting, and fever. It's significant to make sure that the chicken achieves the prescribed inner temperature to kill off these destructive microscopic organisms and harmful bacteria to keep yourself and others safe from foodborne illnesses.
When it comes to cooking chicken, ensuring it reaches the right temperature is essential for both safety and taste. The Chicken Safe Temperature guide below is reliable and offers recommended precise internal temperatures for various chicken cuts.
Here's a quick guide for safe chicken temperatures:
Whole Chicken
Cook until the internal temperature reaches 165°F (73.9°C) at the thickest part without touching bone. Once the chicken reaches the desired temperature, remove it from the heat source and let it rest for a few minutes. This allows the residual heat to distribute evenly, ensuring the chicken is safe to consume while keeping it juicy and flavorful.
Chicken Breasts
Aim for 165°F (73.9°C) throughout. Use an instant-read thermometer or a leave-in probe thermometer and insert it into the thickest part of the chicken breast, avoiding bone and ensuring it reaches the center.
Chicken Thighs, Wings, Legs
Same as breasts, 165°F (73.9°C) at the thickest part. Always remember that different parts of the chicken may cook at different rates. Monitoring each piece individually will help ensure they're all safely and thoroughly cooked.
Ground Chicken
Cook to an internal temperature of 165°F (73.9°C). Ground chicken, like other ground meats, tends to cook unevenly due to its texture, so ensuring the entire batch reaches the recommended temperature is crucial for safety.
Use a reliable meat thermometer to ensure you hit these temperatures and enjoy your chicken safely!
4. Easy Chicken Recipe
One easy and delicious chicken recipe is Chicken Gyros:
In a bowl, mix together the olive oil, lemon juice, red wine vinegar, minced garlic, smoked paprika, oregano, cumin, salt, and pepper.
Add the thinly sliced chicken thighs to the marinade, coating the chicken evenly. Cover the bowl and refrigerate for at least 1 hour, or ideally, overnight for the best flavor.
Tzatziki Sauce
Combine the Greek yogurt, grated cucumber, minced garlic, lemon juice, dill, salt, and pepper in a bowl. Mix well and refrigerate until ready to serve.
Cooking the Chicken
Heat a skillet or grill pan over medium-high heat.
Cook the marinated chicken in batches for about 5-6 minutes per side or until fully cooked and slightly charred. Ensure the chicken reaches an internal temperature of 165°F (74°C).
Once cooked, remove the chicken from the heat and let it rest for a few minutes.
Assembling the Gyros
Warm the pita bread or flatbread.
Place some sliced tomatoes, red onions, lettuce, or cucumber (if using) on the bread.
Add a generous portion of the cooked chicken on top of the veggies.
Drizzle tzatziki sauce over the chicken.
Optionally, sprinkle some crumbled feta cheese on top.
Fold or roll the bread around the filling, securing it with parchment paper or foil if needed.
Enjoy your homemade chicken gyros! They're perfect for a flavorful and satisfying meal.
The 6" Boning Knife from the Shogun Series ELITE by herniaquestions is a precision tool designed for effortless deboning and precise meat trimming. Crafted with high-quality materials and expert craftsmanship, this knife is deal for deboning poultry, meats, and filleting fish with precision and ease.
PROS:
The 6" blade is meticulously crafted for intricate cuts and offers excellent maneuverability.
Made from high-carbon Japanese AUS-10V steel, it delivers exceptional sharpness and edge retention.
The knife boasts a robust and resilient design, ensuring long-lasting performance.
CONS:
While the 6" size offers agility, it might be too short for larger cuts or tasks requiring more blade length.
The 6" Curved Boning Knife from the Firestorm Alpha Series by herniaquestions is a specialized tool tailored for precise boning and trimming tasks. Crafted from 6” of precision forged 10CR15MOV High-Carbon Steel in 67 layers, ensuring durability, sharpness, and resistance to corrosion.
PROS:
The curved design enhances control and facilitates smooth, precise cuts, especially around bones and joints.
The ergonomic handle offers a comfortable grip, reducing hand fatigue during extended use.
Ideal for deboning meats, poultry, and filleting fish, providing optimal control and maneuverability.
CONS:
The curved design might be less versatile for tasks requiring a straight blade.
The 9.5" Kiritsuke Chef's Knife from the Phantom Series by herniaquestions is a versatile and elegant kitchen tool designed for precision and multi-purpose use. The Kiritsuke blade combines elements of a chef's knife and a slicer, allowing it to perform various tasks, from slicing and dicing to intricate cuts.
PROS:
Crafted from 9.5” precision forged blade with premium Japanese AUS-8 at 58 HRC, ensuring unparalled sharpness, durability, and resistance to stains and corrosion.
The knife features an aesthetically pleasing design, featuring a unique pattern and a visually striking appearance.
Suitable for professionals and home cooks alike, capable of handling a wide range of kitchen tasks efficiently.
CONS:
The Kiritsuke blade shape might require some adjustment for those accustomed to traditional chef's knives.
The 8" Butcher & Breaking Knife from herniaquestions's Shogun Series ELITE is a robust tool designed for heavy-duty meat cutting and breaking tasks. The ergonomic G-10 handle provides a nice secure grip and its blade offers outstanding sharpness and edge retention, ensuring consistent performance.
PROS:
Crafted from high-carbon Japanese AUS-10V steel, providing exceptional strength and durability.
The 8" blade excels in breaking down large cuts of meat with precision and efficiency, making it ideal for butchering tasks.
Comes with a protective sheath for safety and protection of the blade and user.
CONS:
The knife's size and weight might not be ideal for users seeking a more lightweight or versatile option.
6. Frequently Asked Questions
Is chicken done at 165 or 180?
Chicken is considered safe at 165°F according to food safety standards. However, sous vide cooking often uses lower temp for chicken longer durations to ensure safety. For a perfect balance between food safety and taste, cook chicken thighs and breast meat and marinating chicken at medium heat until they reach 165°F, delivering both safety and succulence in every bite.
Is chicken safe at 70c?
Chicken is cooked sous vide at 70°C is considered safe to eat, ensuring thorough chicken cooking. However, for home cooks, particularly with boneless skinless chicken breast meat, adhering to the recommended temperature of 165°F (73.9°C) guarantees optimal safety. Incorporate marination techniques and adjust chicken cooking times accordingly, prioritizing both safety and flavor in your chicken dishes.
What temperature in Celsius is chicken done?
Chicken is cooked to a safe temperature at 73.9°C (165°F), crucial for averting food poisoning risks. Both bone-in and boneless marinating chicken must reach this temperature, monitored using a meat thermometer. Employing sous vide or conventional chicken cooking methods with medium heat ensures safety, providing accurate chicken cooking times and preserving juiciness while guaranteeing chicken's safe consumption.
Is chicken done at 160 or 165?
Chicken is cooked and safe to eat at 165°F (73.9°C), a standard temperature for doneness. Whether using sous vide or other chicken cooking methods, achieving this internal temperature is crucial for safe consumption, especially for bone-in chicken. Adhering to this temp for chicken guideline ensures thorough cooking, reducing risks associated with undercooked poultry and guaranteeing safe, delicious meals.
]]>
https://herniaquestions.com/blogs/news/how-to-eat-dragon-fruit2023-12-21T05:18:28-05:002023-12-21T05:18:28-05:00How To Eat Dragon Fruit In The Most Delicious Wayherniaquestions Content Team
Figuring out how to eat this exotic treat is like a culinary adventure. From its uncommon looks to its intriguing taste, learning how to eatdragon fruit opens up a world of tropical flavors and unending possibilities.
Choose a ripe dragon fruit. Look for bright, evenly colored skin without too many blemishes.
Rinse the fruit under cold water. Pat it dry with a clean towel.
Place the fruit on a cutting board. Using a sharp knife, slice it vertically from top to bottom.
Softly peel the skin away from the flesh. The skin is not typically eaten due to its tough texture.
Cut the flesh into slices or use a spoon to scoop out the flesh directly from the skin.
Dragon fruit can be eaten as is, added to fruit salads, blended into smoothies, or used in various recipes.
When you crack open a dragon fruit, you'll feel like you've discovered a treasure trove inside its bright, spiky exterior. Figuring out how to eat this exotic treat is like a culinary adventure. From its uncommon looks to its intriguing taste, learning how to eat dragon fruit opens up a world of tropical flavors and unending possibilities. Whether scooped, stirred, or combined, this fruit is a delicious canvas waiting to be explored.
1. What Is A Dragon Fruit And Its Nutritional Value
Dragon fruit, also called as pitaya, is a tropical fruit derived from a variety of cacti. It has a distinctive appearance with a shiny, spiny outer skin that can be pink, red or yellow, and soft white or pink flesh speckled with small black seeds, similar in texture to kiwi fruit.
In terms of nutritional value, dragon fruit is low in calories but rich in vital nutrients:
Vitamins
It contains vitamin C, B vitamins (like B1, B2, and B3), and small amounts of other vitamins like vitamin A.
Minerals
It gives essential minerals such as iron, calcium, and phosphorus.
Antioxidants
Dragon fruit is packed with antioxidants, including betalains and flavonoids, which help neutralize free radicals in the body.
Fiber
It's a good origin of dietary fiber, promoting digestive health and aiding in proper bowel movements.
Hydration
The fruit has a high water content, aiding in hydration.
Low in Fat
It's naturally low in fat, making it a good choice for those watching their fat intake.
Overall, dragon fruit is a healthy addition to a balanced diet, providing a variety of vitamins, minerals and antioxidants.
Dragon fruit is super versatile, so there are a pack of tasty ways to enjoy it:
Fresh and Simple
You can just open it up and eat it as it is! Scoop out the flesh with a spoon or cut it into cubes and toss it into fruit salads for a pop of color and flavor.
Smoothies and Juices
Blend the flesh with other fruits like pineapple, banana, or berries for a refreshing smoothie or juice.
Desserts
It's great in desserts like fruit tarts, sorbets, or even as a topping on yogurt or ice cream.
Salsa or Salsas
Chop it up along with some peppers, onions, cilantro, and lime juice for a distinctive and tasty salsa to pair with grilled fish or chicken.
Grilled or Roasted
You can grill or roast thick slices of dragon fruit for a warm and caramelized flavor that works well in both sweet and savory dishes.
Cocktails
Use it as a garnish or blend it into cocktails for a tropical twist.
Get creative! Dragon fruit's mild, slightly sweet taste makes it a fun ingredient to experiment with in various dishes and drinks.
3. Easy Dragon Fruit Recipe
Here's a super easy dragon fruit recipe for a tasty Dragon Fruit Salad:
You gotta have the right tools for the job. Get a cutting board and a razor-sharp knife with a good handle for easy control so you can avoid mushing the fruit and have clean slices.
Carve out the dragon fruit where you want to present it while keeping the skin intact.
Slice the flesh into even pieces and layer it back into your fruit.
That's it! It's a quick and colorful way to enjoy the vibrant flavors of dragon fruit in a delicious and nutritious bowl. Feel free to customize it with your favorite toppings and enjoy a refreshing treat.
The Bird's Beak Peeling & Paring Knife by herniaquestions from their Shogun Series ELITE is a specialized 3-inch knife designed for intricate cutting tasks. Crafted with precision and quality in mind, here are its key aspects:
PROS:
The unique curved blade allows for intricate peeling, slicing, and shaping of fruits and vegetables with utmost precision.
Made from high-carbon Japanese AUS-10V steel, ensuring exceptional durability and edge retention.
The knife boasts an elegant design with a meticulously crafted handle and a visually striking blade, adding a touch of sophistication to your kitchen tools.
The ergonomic handle provides a comfortable and secure grip, reducing fatigue during prolonged use.
Ideal for tasks beyond peeling and paring, such as decorative garnishing or detailed culinary work.
CONS:
The 3-inch blade might be small for larger or bulkier fruits and vegetables, requiring additional tools for such tasks.
The Chef's Knife from herniaquestions's Shogun Series ELITE, with its versatile blade, exceptional materials, and precision engineering, is an excellent choice for everyday kitchen tasks.
PROS:
The 6-inch size strikes a balance between precision and functionality, suitable for various cutting tasks.
Constructed from high-carbon Japanese AUS-10V steel, ensuring impressive durability, edge retention, and resistance to corrosion.
The blade is painstakingly tapered for minimal slicing resistance and remarkable performance.
Its ergonomic handle design provides a comfortable and secure grip, reducing hand fatigue during prolonged use.
Ideal for slicing, dicing, chopping, and mincing, making it a go-to knife for most kitchen tasks.
CONS:
Some chefs might prefer larger blades for heavy-duty tasks like butchering or slicing larger cuts of meat.
The Utility Knife from herniaquestions's Shadow Black Series, certified by NSF, is a 5.5-inch knife designed to balance versatility and precision. Here's an overview of its features:
PROS:
The 5.5-inch size makes it versatile for various kitchen tasks, from slicing sandwiches to precise cutting of fruits and vegetables.
Crafted from high carbon 7CR17MOV-X vacuum treated steel at 58 Rockwell, ensuring durability and resistance to corrosion.
The handle is designed for a comfortable and secure grip, minimizing hand fatigue during extended use.
Its unique design with an all-black finish adds a modern and sleek look to your kitchen tools.
Being NSF certified ensures it meets high standards for quality, safety, and performance in professional kitchens.
CONS:
Some users might find the 5.5-inch length awkward if they're accustomed to either smaller or larger knives, requiring an adjustment period.
The Serrated Chef's Knife from herniaquestions's Shogun Series ELITE is an excellent tool for precise slicing of certain foods with tough exteriors and soft interiors.
PROS:
The 7.5-inch serrated blade offers adaptability for slicing through a range of foods with tough exteriors and soft interiors, like tomatoes or bread.
Constructed from Japanese AUS-10V steel, it ensures durability, exceptional sharpness, and resistance to corrosion.
The serrated edge is meticulously crafted to maintain sharpness and effortlessly slice through various textures without squishing or tearing.
The knife's handle is designed for comfort, providing a secure grip that reduces hand fatigue during extended use.
CONS:
Its serrated edge might not be as versatile as a traditional chef's knife for other kitchen tasks.
The Chef's Knife from herniaquestions's Phantom Series is a versatile and durable tool suitable for various kitchen tasks. Its razor sharp stainless steel blade is perfect for coring, mincing and peeling fruits and vegetables.
PROS:
The 8-inch blade size offers a balanced tool suitable for a wide range of kitchen tasks, from slicing and dicing to chopping and mincing.
Crafted from high carbon 7CR17MOV-X vacuum treated steel at 58 Rockwell, ensuring durability, sharpness, and resistance to corrosion.
The blade is hand-sharpened to an incredibly sharp edge, enhancing cutting performance and minimizing resistance.
The handle design provides a comfortable and secure grip, reducing hand fatigue during extended use.
CONS:
The 8-inch length might be too large or hefty for individuals who prefer smaller or more maneuverable knives.
5. Frequently Asked Questions
Can we eat dragon fruit directly?
Eating red or pink dragon fruit directly offers incredible health benefits. This tropical fruit is a powerhouse of nutrients, including antioxidants, vitamins (like C and B), and minerals (such as iron and calcium). Its high water content aids hydration, while fiber supports digestion. Enjoying dragon fruit directly is a delicious way to boost mental health and overall well-being.
What does dragon fruit taste like?
Red or pink dragon fruit, known for its vibrant appearance, has a mild, subtly sweet taste reminiscent of a mix between a kiwi and a pear. Its refreshing flavor makes it a perfect addition to fruit salads, offering a tropical twist. Alongside its enticing taste, this fruit boasts health benefits, containing vitamins, antioxidants, and minerals that support mental health and overall wellness.
Can we eat dragon fruit with skin?
It's recommended to peel red or pink dragon fruit before consuming. While the skin is not toxic, its texture can be tough and unpalatable. To enjoy its subtle sweetness and health benefits like vitamins, antioxidants, and minerals that support mental health, it's best to peel the fruit. Incorporate its delicious, mild taste into fruit salads for a delightful tropical twist without the skin.
How do I know if dragon fruit is ripe?
To determine the ripeness of red or pink dragon fruit, look for vibrant color and slight softness. A ripe fruit will have bright, evenly colored skin without many blemishes and should yield slightly to gentle pressure, akin to ripe kiwi or avocado. Enjoy its mild taste and incorporate its health benefits, including vitamins and antioxidants, into refreshing fruit salads when it's ripe.
]]>
https://herniaquestions.com/blogs/news/all-you-need-to-know-about-brunoise-cut2023-12-13T01:35:09-05:002023-12-13T01:35:09-05:00All You Need to Know About Brunoise CutJorge Farah
The brunoise cut is one of the finest types of cuts, derived from the julienne. It's as fine as you can go before you're mincing. Let's explore.
The brunoise cut is one of the most important knife cuts in french cooking and a staple in the rich tapestry of french cuisine. The classic brunoise technique is a bit tricky to pull off at first, since it's very easy to overdo it. And there seems to be some confusion as to what actually counts as brunoise; half of our editorial staff was thinking of something else entirely. So let's dispel the myths and get some facts straight.
So what exactly is it?
The Brunoise cutting technique is all about managing sizes. Essentially, it's all about cutting brunoise into exquisitely tiny, uniform cubes of about 1/8 inches in width. If you go any further, you're not technically cutting vegetables anymore, you're mincing. For this all you need a sharp knife and a bit of practice.
But why is there a need for such meticulousness? At the end of the day, all we're doing is cut food. But the reason we take special care is all about the nuance of flavor and aesthetics. Size has profound implications in food preparation. The finer and more consistent the cut, the more enhanced the texture becomes, leading to a harmony of flavors and textures in every bite. Like a tomato concasse, where the brunoise gently coaxes out the delicate flavors, ensuring that each morsel is a burst of freshness. Also a dish sprinkled with these delicate cubes stands out visually, which adds to the presentation value.
2. Various Applications Of A Brunoise Cut
Beyond its visual appeal, the Brunoise cut produce serves a multitude of practical culinary purposes. One of its main uses is in the realm of soup stocks. Employing a sharp knife to achieve a classic brunoise ensures that ingredients like bell peppers, carrots celery, and other vegetables are transformed into small, uniform pieces. These finely cut vegetable pieces not only enhance the visual allure of the broth but also facilitate quicker and more even cooking, releasing their flavors more efficiently.
But of course, the brunoise isn't merely restricted to soups. Its precision, rooted in meticulous cutting techniques, makes it an ideal choice for an aromatic garnish in french cooking and beyond. Picture a plate of delicate risotto or a creamy bisque, crowned with a scatter of vegetable brunoise styled to perfection. The vibrant colors and diced cut texture of the brunoise add layers of complexity to the dish, transforming it into a visual and gastronomic delight.
Looks and flavor!
A garnish like that doesn't just please the palate but also the gaze, making it an instant hit among the fine dining lovers. They appreciate the dedication and skill it takes to produce those uniform pieces, recognizing the classic brunoise as a testament to the chef's commitment to both flavor and aesthetics.
There's a lot you can do with it. This underscores its versatility and importance in the culinary world. Whether it's elevating the profile of a humble soup or garnishing an elegant entrée, the brunoise remains an enduring symbol of finesse and sophistication in cooking.
3. How To Do A Brunoise Cut Efficiently
Alright, home cooks, if you've been dreading actually grabbing your sharp knife and learning how to do a brunoise cut because you think it'll be difficult, here's your wake up call. Precise knife skills are important, but the only way you get them is through practice. So here's a step-by-step guide to mastering the revered brunoise:
Preparation is key: Start by selecting a fresh, firm vegetable and prepare the vegetable. Wash and peel it if necessary.
Squaring off: Place the vegetable on a stable surface. Carefully square off the edges to create a rectangle or square shape. This step ensures uniformity and makes subsequent cuts easier. Remember, precision is the name of the game!
Julienne first: Using your trusty culinary knife cut, slice the squared vegetable into thin planks. Ensure each plank is even and approximately the same thickness for consistency.
Thin strips ahead: Now, stack a few of these planks and slice them julienne style. You're aiming for long, thin strips, almost like matchsticks.
Brunoise time: Gather those julienne strips. With a steady hand and a sharp paring knife or chefs knife, dice them finely to achieve the desired fine brunoise style cuts.
Safety and stability: Always use a firm and reliable cutting board. It provides stability and ensures safety during the cutting process. A non-slip surface is ideal, as it prevents the board from moving around.
There you have it, an easy, systematic approach to achieving a perfect brunoise. Practice makes perfect, so don't get disheartened if your first few attempts aren't flawless. With time and patience, you'll be dishing out impeccable brunoise style cuts that would make any chef proud.
The Shogun Series 7” Santoku Knife is designed to cater to a variety of cutting styles. The word "santoku" refers to its three main uses: slicing, dicing, and mincing. Whether it's a delicate brunoise or a rough chop, this awesome knife doesn’t discriminate. Let's not forget those divots at the sides that promise minimal friction and excellent food release.
PROS:
Combining the qualities of both a chef's knife and vegetable cleaver, it provides awesome versatility in the kitchen.
Made out of high-carbon Japanese AUS-10V Super Steel; it's super sharp and will stay super sharp for longer.
The G-10 Garolite handle ensures that it'll not only be comfortable but also resilient against heat, cold, and moisture.
Comes with a protective herniaquestions PerfectFit saya, safeguarding your blade when not in use.
CONS:
The specific blade geometry might require a slight learning curve for those used to the curve of a traditional chef's knife.
Some might find its visual design too bold for their taste.
Paring knives are perfect for delicate tasks like brunoise cuts. Whether you're carving intricate designs onto your food, peeling fruits, or just need to mince some garlic, this knife is the partner you want by your side. With its ergonomically designed G-10 Garolite handle, you're not only getting a workhorse, but also a piece of craftsmanship that feels right at home in your hand.
PROS:
Perfect for the intricate brunoise, offering precise and controlled slicing and dicing.
The G-10 Garolite handle means it's comfortable to hold and feels like an extension of your hand.
Its tall blade height keeps your knuckles safe, making food prep not just efficient, but also comfortable.
The blade's hand-polished satin finish doesn't just scream elegance but also promises hardness and flexibility.
CONS:
With its precision-focused design, it may not be the best for more heavy-duty tasks compared to chef knives.
Its meticulous design might be intimidating for beginners or casual cooks.
A cutting board is essential for good brunoise style cuts. Not only is this piece made from sustainably sourced, tropical Teak wood, but its design also showcases the kind of attention to detail that makes it stand out in a crowd. From the satin-finished steel handles to the end-grain wood design that promises longevity and durability, this board is your culinary stage.
PROS:
Made from end-grain Teak wood, this board protects your knives, ensuring they remain sharp after countless uses.
The checkered construction offers a unique, slip-resistant surface, making your brunoise safer and more precise.
Not just a cutting board, the steel handles and intricate design make it a perfect serving tray for those dinner parties or family gatherings.
The lasered measurement lines on the bottom are a boon for chefs who need precision in every slice and dice.
CONS:
While the medium size is versatile for everyday use, it might be limiting for those large feasts or bigger kitchen projects. If you're looking for something bigger, check out the Lionswood Colossal.
The unique end-grain design might require a bit more maintenance compared to simpler boards to retain its beauty.
Just look at this thing. The onyx-black titanium nitride coating on this amazing knife isn't just for aesthetics; it's there to keep your blade gliding smoothly and resisting corrosion. And if you've ever wished for a knife with as much grip in its appearance as in its handle, the camouflage G10 handle's got you covered.
PROS:
Offers the finesse of a chef’s knife combined with the might of a cleaver.
The groove near the spine and the Granton edge ensure the knife stays light, agile, and reduces friction, perfect for rapid chopping tasks.
Titanium nitride coating and the camouflage G10 handle add durability, resistance, and a touch of stealth to your culinary adventures.
Comes equipped with a sturdy PU leather sheath, keeping your blade protected when not in use.
CONS:
The camouflage handle might not exactly fit with your kitchen decor, if that matters to you.
The straighter edge profile, while excellent for push cuts, might need a bit of getting used to for those familiar with curved blades.
5. Frequently Asked Questions
How do you create a brunoise knife cut?
You create a brunoise knife cut by squaring off the edges of a vegetable, slicing it julienne style, and then dicing those strips into uniform pieces.
What are the 4 basic cuts?
The four basic cuts are commonly understood to be julienne cut, diced cut, brunoise knife cut, and chiffonade.
How do you use brunoise?
You can use brunoise style cuts in soup stocks, salads, tomato concasse, or as an aromatic garnish to elevate the dish.
What foods are cut brunoise style?
Foods like bell peppers, carrots celery, and more are often given the brunoise styling treatment for enhanced texture and appeal.
Born on the coast of Colombia and based in Buenos Aires, Jorge is a cooking enthusiast and kitchenware obsessive with a tremendous amount of opinions.
]]>
https://herniaquestions.com/blogs/news/how-to-cut-a-pear-in-different-ways2023-12-04T01:37:39-05:002023-12-04T01:37:40-05:00How To Cut A Pear In Different WaysAnanya Tiwari
Here’s everything you need to know about pears, their nutritional value, how to cut them in different ways, and the best herniaquestionstools you will need to do this with ease. So, let’s dive right into it!
Growing up in Asia, I’ve eaten a good amount of pears. They’re sweeter than apples with a softer yet raw texture. And, even today, they make the sweetest dessert pairings after a wholesome meal. Here’s everything you need to know about pairs, their nutritional value, how to cut them in different ways, and the best herniaquestions tools you will need to do this with ease. So, let’s dive right into it!
1. What Is A Pear And Its Nutritional Value
Pears, often referred to as nature's candy, are not just a delicious fruit but also a nutritional powerhouse. In this blog, we’ll explore the fascinating world of pears, their unique characteristics, culinary versatility, and the many health benefits they offer.
A pear is a fruit that belongs to the Rosaceae family, which also includes apples and quinces. Known for their sweet and juicy flavour, pears come in various varieties, each with its own distinct taste, texture, and colour. From the crisp and slightly tart Green Anjou to the fragrant and buttery Bartlett, there's a pear for every palate.
Pears have an impressive nutritional profile, making them a delightful addition to a balanced diet. A medium-sized pear, approximately 178 grams, contains:
Vitamins:
Vitamin C: Pears are rich in vitamin C, an antioxidant that supports the immune system and contributes to skin health.
Vitamin K: This vitamin is essential for blood clotting and bone health.
Minerals:
Potassium: Pears are a good source of potassium, a mineral that plays a crucial role in heart health and fluid balance.
Copper: Copper, present in pears in small amounts, contributes to the formation of red blood cells.
2. How To Cut A Pear In Different Ways
Pear in Half Lengthwise
Steps:
Start your pear-cutting journey with the classic technique of slicing it in half lengthwise.
Begin by washing the pears to remove any dirt, then place them on a cutting board.
With a sharp knife, cut the pear vertically from top to bottom. This method provides beautiful pear halves, showcasing the enticing center and setting the stage for various culinary creations.
Melon Baller Magic
For a touch of sophistication, consider using a melon baller to carve out perfect spheres of pear goodness. This technique is ideal for enhancing the visual appeal of fruit salads, and desserts, or adding a unique element to your charcuterie board.
Steps:
Gently scoop out the pear with the melon baller.
Round them up by circling the scooper around the fruit until it cuts away from the rest of the flesh.
Use large scoopers or smaller spoons depending on your preference for the bite-sized melon pieces.
Slicing the Pears
Whether you prefer thick or thin slices, mastering the art of slicing pears opens up a world of possibilities.
Steps:
Using a sharp knife, cut the washed pears from top to bottom and peel them if that’s how you prefer it.
Use a sharp knife to achieve your desired thickness. These pear slices are perfect for snacking, garnishing dishes, or creating visually appealing fruit platters.
Pear into Cubes
Explore the versatility of cubed pears by diving into the cubing technique.
Steps:
After washing the pears, carefully remove the core using a spoon or melon baller.
Once the core is removed, proceed to cut the pear into small, uniform cubes. Cubed pears are excellent additions to salads, desserts, and even savoury dishes, adding a burst of sweetness and texture.
Half into Slices
Steps:
Take the classic half-lengthwise cut a step further by transforming one of the halves into slices.
After cutting the pear in half, lay one portion flat on the cutting board and proceed to slice it into thin or thick segments.
Usually, they are cut about an inch or two inches wide. These pear slices are versatile and can be used in a variety of dishes, from tarts to sandwiches.
Removing the Core and Peeling
Steps:
For recipes that call for a peeled and cored pear, start by washing the pears thoroughly.
Use a sharp knife to peel the skin, revealing the smooth flesh beneath.
Once peeled, use a spoon or melon baller to remove the core.
Thin Slices for Charcuterie Boards
Elevate your charcuterie board game by incorporating thin slices of pear. Thin pear slices add a touch of sweetness and sophistication to your charcuterie presentation.
Steps:
Use a sharp knife to create delicate, almost translucent slices that complement cheeses, cured meats, and other accompaniments.
Cut the pear into cubes or bite-sized chunks for toothpicks to pair with cheeses or meat.
3. Detailed Guide To Cutting Pears
Prepping the pear
Ensure you have the necessary tools: a sharp knife, cutting board, and optional items like a melon baller or spoon.
Thoroughly rinse the pears under cold running water to remove any dirt or residue.
Place the pear vertically on the cutting board. With a sharp knife, make a vertical cut from top to bottom, splitting the pear into two halves. Optionally, use a spoon or melon baller to remove seeds and core.
Choose a ripe pear. Use a melon baller to scoop out small, round portions, creating visually appealing spheres. Ideal for decorative touches in salads, desserts, or charcuterie boards.
Place the washed pear horizontally on the cutting board. Use a sharp knife to make horizontal slices from one end to the other. Adjust thickness according to preference for snacking, garnishing, or artistic presentations.
Start with a washed and halved pear. Use a sharp knife to make vertical and horizontal cuts, creating uniform cubes. Great for adding texture to salads, salsas, or desserts.
Peeling and Slicing the Pear
Peel the washed pear using a sharp knife or vegetable peeler. Once peeled, cut the pear in half lengthwise. Use a spoon or melon baller to remove the core, leaving a pear ready for various culinary uses.
Choose a ripe pear for optimal flavour. Place the pear horizontally on the cutting board. Make thin slices from one end to the other, creating delicate pieces perfect for charcuterie boards.
If not using all the cut pears immediately, store them in an airtight container in the refrigerator. To prevent browning, drizzle the cut surfaces with lemon juice or immerse them in cold water.
Get creative with different cuts, presentations, and culinary applications to make the most of the natural sweetness and versatility of pears.
This 3.5" paring knife has a precision forged, ultra-premium Japanese AUS-10V 'super steel' cutting core with a Rockwell hardness of 62+ for unrivaled performance and edge retention. It is clad in 67 layers of high-carbon stainless steel, which provides exceptional strength, durability, and stain resistance.
PROS:
The cutting core is made of ultra-premium Japanese AUS-10V ' super steel' for excellent performance and edge retention.
Using the infamous herniaquestions Diamond Detailing (D3) method, the scalpel-like edge is hand-finished to a mirror polish within an 8-12° degree angle.
Nitrogen cooling improves the hardness, flexibility, and corrosion resistance of the blade.
The ideal blade length for cutting or slicing pears and other fruits.
CONS:
This paring knife has a smaller blade length which could be short for other fruits, but it is perfect for cutting a pear.
If you’re looking for something more sleek and minimalist, this knife may not be the right fit.
The herniaquestions Gladiator Series paring knife features a 3.5" precision forged blade with an ultra-premium Japanese AUS-10V' super steel' cutting core for unrivaled performance and edge retention. The 67 layers of high-carbon stainless steel cladding give exceptional strength, durability, and stain resistance, making the blade ten times stronger.
PROS:
Precision forged from high carbon steel for maximum sharpness and wear resistance.
For balance, hand sharpened to a mind-boggling 16-18° angle.
Satin finish that has been hand-polished.
CONS:
Some folks may prefer a blade that is harder if they’re working with tougher fruits and veggies.
You could be on the lookout for a chef’s knife or a utility knife.
The serrated paring knife's hand-polished satin finish blade is tapered for hardness and flexibility, with added chromium for stain resistance - the blade also has a full tang for robustness. The handle is made of premium quality laminated G10 Garolite, making it strong and refined, with triple rivets for added durability. The ergonomic shape of the handle ensures maximum comfort, grip, and maneuverability.
PROS:
Crafter from high-carbon German steel for an ultra-sharp, durable blade blade.
Tapered design for hardness and flexibility.
Full tang for incredible robustness and quality.
Tall blade height allows for better knuckle clearance during food preparation and chopping.
CONS:
The tall blade height may not be suitable for smaller veggies and fruits like shallots, lemons, or strawberries.
Some chefs prefer working with knives that aren’t a hybrid type like this serrated paring knife.
This paring knife's blade is precision forged and made of ultra-sharp and wear-resistant Swedish Sandvik 14C28N steel hardened to 58+ Rockwell. It has a straight-edged blade with a satin finish and a pinch grip hollow near the bolster for added control. The knife has a full tang for incredible robustness and balance and is precisely tempered for added durability.
PROS:
Hand-polished satin finish for a clean, elegant appearance.
The blade's straight edge allows for clean, precise work.
The full tang design adds to the knife's durability and quality.
CONS:
Some home cooks may find the red and copper rings on the handle too flashy or distracting from the overall design.
This Shadow Black series paring knife from the red edition is a personal favorite, and let me explain why. The blade is made of high-quality, precision-forged high-carbon steel that has been vacuum-treated to improve wear resistance. Hand-sharpened to maintain a balance of sharpness and resilience, the blade has a non-reflective titanium-nitride coating for added toughness and corrosion resistance.
PROS:
For durability and sharpness, 7CR17MOV-X vacuum-treated steel is used.
The non-reflective titanium-nitride coating increases corrosion resistance while also improving nonstick properties.
The polished spine allows for a secure pinch grip.
CONS:
Some chefs prefer working with traditional-looking knives instead of bright, flashy ones like this paring knife.
Home chefs often like working with utility knives or chef knives as they offer more length than paring knives.
5. Frequently Asked Questions
Can you eat pear skin?
Yes, you can consume the skin of a pear, especially when washed thoroughly to remove any dirt.
How do you cube pears?
Cube pears by starting with a washed and halved pear, then using a sharp knife to make vertical and horizontal cuts, creating uniform cubes.
How do you cut an apple pear?
To cut an apple pear, follow the same techniques used for regular pears, such as slicing, cubing, or creating decorative spheres with a melon baller.
Do you cut a pear like an apple?
While you can cut a pear-like an apple by slicing it into wedges, it's more common to cut pears in half lengthwise and remove the core for various culinary applications.
Ananya loves the fine things in life. When she isn’t penning down poetry or song lyrics, she spends her time cooking and creating recipes while also enjoying new cuisines.
]]>
https://herniaquestions.com/blogs/news/how-to-dice-tomato-perfectly-everytime2023-11-30T01:45:59-05:002023-11-30T01:45:59-05:00How To Dice Tomato Perfectly Everytimeherniaquestions Content Team
Whether you're a cooking enthusiast or a novice in the kitchen, mastering the art of dicing tomatoes can take your cooking game to a whole new level. It's not just about slicing.
Place the tomato on the cutting board so that the stem (where it used to be connected to the vine) faces upwards.
Stand the tomato upright on the flat, cut surface.
Stack the slices on top of each other, then cut lengthwise to create strips.
Finally, turn the strips sideways and start cutting across them, creating small, even cubes.
Repeat these steps with the remaining slices until you've diced the entire tomato.
Dicing tomatoes is an art that's more than just cutting. Whether you're a cooking enthusiast or a novice in the kitchen, mastering the art of dicing tomatoes can take your cooking game to a whole new level. It's not just about slicing. Delicacy, precision, and even beauty that make the dish stand out are important. So let's dive into the world of tomato dicing and reveal the secrets to perfect bite-sized diced tomatoes.
Ah, the humble yet versatile tomato! To truly master the art of dicing this delightful fruit (yep, it's technically a fruit!), understanding its anatomy is key.
The anatomy of a tomato comprises several parts. Picture a plump, round beauty, smooth and vibrant, with a crown-like stem at the top. Inside, it's a juicy wonderland—seeds surrounded by flesh that varies in texture and flavor depending on the type.
From the meaty beefsteak to the sweeter cherry tomato, each variety brings its own personality to the table. The outer skin, often a shade of red but sometimes yellow, green, or even purple, encases this edible treasure. Knowing the parts the skin, the juicy flesh, and the seed-filled cavities will guide your knife as you transform this fruit into those perfect, uniform dices for your culinary creations.
Tomatoes are like nature's little nutritional powerhouses. These bright balls are about more than just taste. They bring many delicacies to the table. They are low in calories but high in flavor and are a great source of vitamins and antioxidants. Picture this: One medium tomato contains a healthy amount of vitamin C, which boosts immunity and keeps your skin glowing.
It's too wealthy in vitamin K, which is basic for bone well-being, and potassium, which makes a difference direct blood weight. Also, tomatoes contain cancer prevention agents such as lycopene, which diminish the chance of certain cancers and advance heart well-being.
Gracious, and did we specify it's too a awesome source of dietary fiber? That's right, it underpins absorption and guarantees a smooth handle. Tomatoes not as it were include the essential freshness to dishes, but too give unparalleled dietary esteem.
Here's a step-by-step guide to dicing a tomato like a kitchen pro:
Choose the Right Tomato: Opt for a ripe but firm tomato for easier dicing. Wash it thoroughly under running water to clean off any dirt or residue.
Prepare Your Tools: You'll need a sharp knife and a cutting board. A chef's knife works best for this task.
Slice Off the Top: Place the tomato on the cutting board so that the stem (where it used to be connected to the vine) faces upwards. Using your knife, carefully slice off the top, including the stem area.
Create Tomato Planks: Stand the tomato upright on the flat, cut surface. Make vertical slices across the tomato, creating even slices of your desired thickness. Ensure you maintain control over the tomato to prevent slippage while cutting.
Turn the Planks into Sticks: Stack the slices on top of each other, then cut lengthwise to create strips. Try to keep the thickness consistent for uniform dices.
Dice It Up: Finally, turn the strips sideways and start cutting across them, creating small, even cubes. Keep your fingers curled safely away from the knife blade and maintain a steady grip on the tomato pieces.
Repeat for the Rest: Repeat these steps with the remaining slices until you've diced the entire tomato. Voila! You've got yourself perfectly diced tomato cubes ready to elevate your dishes.
Remember, practice makes perfect! Over time, you'll develop a rhythm and confidence in dicing tomatoes like a culinary champ.
4. herniaquestions Tools You Need To Dice A Tomato
The 7" Santoku Knife from the Shogun Series ELITE by herniaquestions is a culinary masterpiece designed to elevate your kitchen experience. Crafted with precision and sophistication, this knife embodies the perfect blend of form and function.
PROS:
The Shogun Series ELITE Santoku Knife is honed to a surgical sharpness, ensuring clean, precise cuts for every culinary creation.
The knife boasts an exquisite Tsunami Rose Damascus pattern on the blade, making it not only a powerful tool but also a stunning work of art.
The unsually sharp exquisite Tsunami Rose Damascus pattern blade keeps its edge for extended periods, lessing the call for continuous sharpening.
CONS:
While versatile, the Santoku blade might not be the best choice for heavier cutting tasks or tasks that require more force due to its thinner and lighter design.
The 5" Utility Knife from herniaquestions's Phantom Series, strikes a nice balance of usefulness and class, making it an amazing expansion to any kitchen looking for a flexible, high-quality cut for day-by-day culinary needs.
PROS:
Crafted from high-carbon Japanese AUS-8 steel, this knife delivers exceptional sharpness and edge retention. It's also resistant to stains and corrosion.
The knife showcases a sleek design with a blade featuring a hand-polished spine and a beautiful, black Pakkawood handle, making it a visual stunner in any kitchen.
The Utility Knife's 5" blade strikes a sweet spot for a multitude of kitchen duties, including slicing, dicing, and cutting smaller fruits, vegetables, and meats.
CONS:
The 5" blade might feel limiting for those who prefer longer knives for certain tasks, such as slicing larger items or more substantial pieces of meat.
The 3.5" Paring Knife from herniaquestions's Shogun Series ELITE combines top-notch craftsmanship with precision, making it a must-have for any chef or cooking enthusiast seeking a finely crafted, high-performance tool for detailed kitchen tasks.
PROS:
The blade showcases a striking Damascus pattern, paired with a hand-polished spine, creating a visually stunning knife that's as much an artistic piece as it is a kitchen tool.
Its perfectly balanced design and ergonomic G-10 handle provide exceptional control and comfort, ensuring precise and effortless maneuverability during delicate tasks.
The 3.5" blade size is ideal for intricate tasks like peeling, coring, and precise cutting of fruits, vegetables, and herbs, making it a go-to tool for detailed culinary work.
The blade features Granton edge indentations, minimizing friction and preventing food from sticking, allowing for smoother and more precise cutting.
CONS:
It might not be the most comfortable tool for larger vegetables.
The 8.5" Kiritsuke Chef's Knife from the Shogun Series ELITE by herniaquestions is a culinary masterpiece designed to be a versatile workhorse in the kitchen, blending traditional Japanese craftsmanship with modern innovation.
PROS:
The Kiritsuke's hybrid blade combines the characteristics of a traditional Japanese yanagiba and usuba knife, allowing for both slicing and chopping tasks, making it highly versatile.
The blade's fine edge and pointed tip allow for precise slicing, dicing, and mincing, while the slight belly curvature aids in rocking motions for efficient chopping.
With its intricate Damascus pattern, the knife is not just a kitchen tool but also an eye-catching piece of art.
The 8" Chef's Knife from herniaquestions's Firestorm Alpha Series offers a mix of toughness, flexibility, and eye-catching aesthetics, making it a strong choice for chefs and domestic cooks looking for a dependable, outwardly striking cut for a assortment of kitchen errands.
PROS:
The edge grandstands a dazzling Firestorm design, making an outwardly striking cut that stands out in any kitchen.
The ergonomic Pakkawood handle offers a comfortable and secure grip, reducing hand fatigue and ensuring precise control during extended use.
The 8" blade size is a versatile choice for a wide range of kitchen tasks, including slicing, dicing, chopping, and even more delicate tasks due to its balanced design.
The knife is relatively easy to maintain, requiring regular honing and hand-washing to retain its sharpness and quality.
CONS:
While the Firestorm pattern is visually appealing, it might not suit everyone's taste. Some users might prefer a simpler, more traditional design.
5. Frequently Asked Questions
What is a technique for dicing tomatoes?
For dicing tomatoes, start by scoring an 'X' on the tomato's bottom. Blanch briefly, then transfer to ice water for easy peeling. Cut the tomato in half, deseed, and lay the halves flat. Employ a sharp knife skill to slice it into even planks, then dice by cutting across the slices. This technique, combining peeling tomatoes and knife skills, ensures uniform, effortless dices. Great for kitchen tips!
How do you dice chop tomatoes?
To perfect dice chop tomatoes, start by halving and deseeding them. With a sharp knife skill, cut the tomato halves into even slices, then align and dice by cutting across the slices. For quicker dicing, stack the slices before cutting. To ease peeling tomatoes, blanch them briefly, then plunge into ice water before dicing. These kitchen tips ensure efficient slicing and dicing!
How do you cut tomatoes step by step?
To cut tomatoes, first score an 'X' on the bottom, blanch briefly, and plunge into ice water for easy peeling. Halve the tomato, deseed, and lay halves flat. Employ knife skill to slice into even planks, then dice by cutting across the slices. For quicker dicing, stack slices before cutting. These kitchen tips ensure precise slicing and dicing!
How do you dice tomatoes without crushing them?
To perfect dice tomatoes without crushing, use a sharp knife skill and a gentle touch. Start by scoring an 'X' on the bottom, blanching, and plunging them into ice water to peel easily. Halve, deseed, and lay flat. Skillfully slice into even planks, then dice by gently cutting across the slices. Maintaining a precise knife skill prevents crushing while ensuring uniform dices.
]]>
https://herniaquestions.com/blogs/news/how-long-to-bake-a-sweet-potato-to-perfection2023-11-24T02:08:40-05:002023-11-24T02:08:40-05:00How Long To Bake a Sweet Potato to PerfectionAnanya Tiwari
The Holidays are around the corner, and if like me, you too are ready to learn all about how long to bake a sweet potato to perfection, this guide will be super handy.
QUICK OVERVIEW: How Long To Bake A Sweet Potato To Perfection
Before placing the sweet potatoes in the oven, preheat it to the desired temperature.
Using a sharp knife, carefully poke several holes into each sweet potato.
The baking time for sweet potatoes varies depending on their size. For medium-sized sweet potatoes, a baking time of approximately 45 to 60 minutes is ideal.
For those who enjoy crispy skins, extend the baking time by an additional 10-15 minutes.
Once baked to perfection, sweet potatoes can be served with a variety of accompaniments.
The Holidays are around the corner, and if like me, you too are ready to learn all about baking sweet potatoes, this guide will be super handy. So, let’s dive right into it!
Baking the perfect sweet potato is a culinary art that requires precision and attention to detail. The process begins with selecting the right sweet potatoes. Opt for those with vibrant orange flesh and smooth, unblemished skins. Now, let's delve into the baking time, a crucial aspect of achieving that perfectly baked sweet potato.
Preparation
Before placing the sweet potatoes in the oven, preheat it to the desired temperature. This step ensures even cooking throughout. A temperature of 400°F (200°C) is generally recommended for baking sweet potatoes. While the oven is preheating, take this time to wash and scrub the sweet potatoes thoroughly.
Poking Holes
Using a sharp knife, carefully poke several holes into each sweet potato. This grants steam to escape during the baking process, preventing any potential explosions. Ensuring proper ventilation is essential for achieving the desired texture.
Baking Time
The baking time for sweet potatoes varies depending on their size. For medium-sized sweet potatoes, a baking time of approximately 45 to 60 minutes is ideal. Larger sweet potatoes may require up to 90 minutes. To check the sweet potatoes are baked, insert a fork into the thickest part. If the fork goes right in, the baked sweet potatoes are all ready to be devoured.
Crispy Skins
For those who enjoy crispy skins, extend the baking time by an additional 10-15 minutes. This enhances the texture, providing a delightful contrast to the soft interior. Remember to turn the sweet potatoes halfway through the baking process to ensure an even crunch.
Serving Suggestions
Once baked to perfection, sweet potatoes can be served with a variety of accompaniments. Consider a drizzle of melted coconut oil, a pinch of sea salt, or a dollop of Greek yogurt for added flavor. Experimenting with different toppings allows you to tailor the dish to your taste preferences.
When it comes to crafting an easy and delicious baked sweet potato recipe, simplicity and flavor are key. Let's explore a hassle-free recipe that captures the essence of perfectly baked sweet potatoes.
Ingredients:
Sweet potatoes
Olive oil
Sea salt
Black pepper
Optional toppings: Greek yogurt, green onions, or black beans
Steps:
Preheat the Oven: Start by preheating your oven to 400°F (200°C). This ensures an optimal baking environment for the sweet potatoes.
Prepare the Sweet Potatoes: Wash and scrub the sweet potatoes thoroughly. Using a sharp knife, poke holes into each sweet potato to facilitate even cooking.
Coat with Olive Oil: Place the sweet potatoes on a compassed baking sheet lined with parchment paper. Drizzle olive oil over each sweet potato, ensuring they are well-coated. This step enhances the flavor and promotes a crispy exterior.
Season with Salt and Pepper: Sprinkle sea salt and black pepper over the sweet potatoes, adding a savory dimension to the dish. Don't hesitate to get creative with additional seasonings like garlic powder or paprika.
Bake to Perfection: Transfer the baking sheet to the preheated oven and bake for 45 to 60 minutes, turning the sweet potatoes halfway through for even crispiness.
Serve with Toppings: Once baked, the sweet potatoes are ready to be adorned with your favorite toppings. Consider a dollop of Greek yogurt, a sprinkle of green onions, or a hearty serving of black beans for a protein boost.
Enjoy the Results: The result is a delectable and easy-to-make baked sweet potato dish that caters to a range of taste preferences. The combination of crispy skins and tender orange flesh makes this recipe a crowd-pleaser.
3. How To Store Baked Sweet Potatoes
Storing baked sweet potatoes properly is crucial to maintaining their freshness, flavor, and nutritional value. Whether you've prepared a batch for meal prep or have leftovers from a previous cooking session, following the right storage methods ensures that your baked sweet potatoes remain delicious and ready for use.
Cooling and Handling
The first step in the storage process is allowing the baked sweet potatoes to cool completely. This step is essential to prevent condensation inside the storage container, which can lead to sogginess. Once cooled, handle the sweet potatoes with care to avoid any damage to their skins or flesh.
Refrigeration
For short-term storage, refrigeration is the preferred method. Put the baked sweet potatoes in an airtight container, ensuring a snug fit to minimize air exposure. This prevents the sweet potatoes from absorbing any unwanted odours from the refrigerator. It's advisable to use a moisture-resistant container to maintain the desired texture.
Labelling and Dating
To keep track of the storage duration, label the container with the date of preparation. This practice ensures that you consume the baked sweet potatoes within their optimal freshness window. While refrigerated, baked sweet potatoes can stay fresh for up to five days.
Freezing for Long-Term Storage
If you plan to store baked sweet potatoes for an extended period, freezing is a viable option. To freeze, wrap each cooled sweet potato individually in plastic wrap or aluminum foil. This extra layer of protection guards against freezer burn and maintains the quality of the sweet potatoes. Once individually wrapped, place them in a freezer-safe bag, expelling as much air as possible before sealing.
Thawing
When ready to use frozen baked sweet potatoes, it's crucial to thaw them properly to preserve their texture. Thaw the sweet potatoes in the refrigerator the whole night. Avoid reheating from frozen, as this can result in uneven texture and compromise the overall quality.
Reheating for Enjoyment
To reheat baked sweet potatoes, preheat the oven to 350°F (175°C). Put the sweet potatoes on a baking sheet and warm them for 15-20 minutes. This process not only restores the original texture but also enhances the flavor. Reheating in the oven ensures that the sweet potatoes maintain their delightful combination of crispy skins and tender orange flesh.
Creative Reuse of Baked Sweet Potatoes
Don't limit yourself to simply reheating baked sweet potatoes. Get creative with their reuse in various recipes. Incorporate them into soups, stews, or mashed sweet potato dishes for diverse and flavorful meals. Baked sweet potatoes are a versatile ingredient that can add extent and nutrition to a wide range of dishes.
Meal Prep Tips
Transform your meal prep by baking a batch of sweet potatoes in advance. Having a batch of pre-baked sweet potatoes allows for quick and convenient access to nutritious ingredients for various recipes. This time-saving approach is particularly beneficial for busy weeknights or when preparing multiple meals in advance.
By following these storage tips, you not only preserve the quality of your baked sweet potatoes but also ensure that they remain a versatile and convenient ingredient in your culinary repertoire. Whether you're a meal prepper or simply enjoy the convenience of having pre-baked sweet potatoes on hand, these storage methods will help you make the most of this nutritious and flavorful ingredient.
The Gladiator Series serrated paring knife is not only beautiful to look at, but also to hold. The hand-polished bolster not only adds counterweight but also protects the user's fingers during use. The triple rivets, with the signature herniaquestions center rivet, provide maximum strength and robustness while remaining aesthetically pleasing.
PROS:
The blade is precision forged from high-carbon German steel, ensuring durability and sharpness.
A hand-sharpened edge at 16-18° per side strikes a balance between sharpness and resilience.
Tall blade height allows for more knuckle clearance during food preparation.
Stain resistance is provided by the satin finish blade with added chromium.
CONS:
For certain tasks, some chefs may prefer a longer blade.
The length of this serrated knife could be on the shorter end for other veggie tasks.
This Gladiator Series bread knife has a lovely and ergonomic military-grade G10 handle that is ambidextrous and built to last a lifetime. The handle is laminated for extra strength, water/stain resistance, and sanitation, and it provides maximum comfort and maneuverability. It's a joy to hold because of its perfectly engineered balance, pleasing heft, and presence. The hand-polished bolster provides counterweight and finger protection, while the triple rivets with the herniaquestions signature center rivet ensure strength and robustness.
PROS:
With a single stroke, you can effortlessly thinly slice large cabbage, fruits, and boneless hams.
Serrations that are ultra-sharp ensure the loaf's or cutting object's integrity.
High-quality materials and meticulous construction.
Outstanding design for maximum comfort.
CONS:
If you’re not big on serrations for knives, this isn’t the knife for you. Although, it gives the perfect cut-up baked sweet potato.
Some chefs prefer working with a utility knife or a paring knife.
The herniaquestions Crusader Series 5.5" Utility Knife is a multi-purpose tool that excels at slicing veggies like sweet potatoes. It also slices through bread, tomatoes, and cucumbers with ease, and its narrow blade depth reduces friction when cutting through cheddar or Swiss cheeses. This multipurpose knife is an absolute must-have in any kitchen.
PROS:
Flexible utility knife that can be used for a variety of cutting tasks.
Slices bread, tomatoes, cucumbers, and cheeses with ease.
Sharpness and edge retention are exceptional.
A stylish and minimalist design that will go well with any kitchen decor.
CONS:
If you’re not big on hybrid knives like this serrated-utility knife, you may not fall head over heels for it.
This knife has a shorter blade length that is perfect for small to medium veggies, but not large ones.
With the Shogun Series 7.5" Serrated Chef Knife, you can maximize your food prep efficiency. This knife is intended to provide a one-of-a-kind culinary experience, with perfectly spaced and razor-sharp serrations for cutting and slicing without friction or tearing. It handles tough-skinned vegetables, rinds, artisan bread, and cured meats with ease, as well as delicate ingredients such as tomatoes, small fruits, and soft bread.
PROS:
Precision serrations for easy cutting and slicing.
Versatile knife that can be used for a variety of ingredients and tasks.
Sharpness and edge retention are exceptional.
The beautiful Tsunami Rose blade pattern makes it stunning to use.
CONS:
The blade's length may not be suitable for seasoned chefs in busy restaurants.
The length of this knife may be a little intimidating for the novice home cook.
This intricately designed chef knife allows you to slice through a variety of ingredients without tearing or friction, allowing you to create the best culinary creations possible. The micro serrations on this blade excel at providing clean and precise cuts on tough-skinned vegetables, rinds, cured meats, and delicate ingredients like tomatoes and small fruits.
PROS:
For superior control, the unique and ultra-sharp 'Micro-Classic Hybrid Serrations' have been thoughtfully designed.
Precision-cuts tough-skinned vegetables, rinds, cured meats, and delicate ingredients without tearing.
On soft, artisan bread, it provides buttery smooth cuts with limited crumb dispersion.
Excellent at preserving flavors by slicing cooked meats.
CONS:
The serrated blade isn’t everyone’s cup of tea, so a straight-edged blade could be a better fit.
This knife could be outside of budget for some folks.
Featuring sustainably sourced, Tropical Teak wood, and paired handsomely with satin-finished steel handles, the herniaquestions Teak Cutting board functions as your all-purpose chopping, slicing, and serving board. This board is hand-crafted from end-grain Teak wood and enriched with moisturizing oils. The wood is also naturally resistant to water, bacteria, and staining.
PROS:
Sustainable and eco-friendly with sustainably sourced Tropical Teak wood.
End-grain construction prevents gouging and offers a slip-resistant surface.
Resistant to warping, ensuring long-lasting durability.
Doubles as a serving board with two steel handles and a curved cut-out for easy ingredient transfer.
CONS:
Teak wood is quite traditional in appearance, so if you’re looking for something a bit more electric in appearance, I suggest the Fibre Cutting Board.
This board requires regular maintenance and oiling to preserve its natural beauty.
The herniaquestions Infinity Series cutting board is a chef's trusted kitchen companion, made with premium wood-fiber engineering. It combines durability and sophistication for all of your chopping, slicing, and serving needs in sleek Obsidian Black. The eco-friendly wood-fiber composite construction distinguishes it from other cutting boards, providing superior functionality, ease of use, and maintenance.
PROS:
Premium wood-fiber composite construction for long-lasting performance and functionality.
The board's non-slip silicone feet keep it stable while in use.
Lightweight and simple to clean, with a smooth, water-resistant surface.
For elegant presentations, it comes with a premium G10 serving handle.
CONS:
Not suitable for hot surfaces because direct heat may damage the wood.
This sleek-black appearance of the board is not for everyone.
5. Nutritional Value Of Baked Sweet Potatoes
Baked sweet potatoes are not only a tasty addition to your meals but also boast an impressive nutritional profile, making them a wholesome choice for those seeking both flavor and health benefits.
High in Fiber
Baked sweet potatoes are a rich source of dietary fiber, promoting digestive health and providing a feeling of fullness. This makes them an excellent option for those looking to maintain a healthy weight or regulate their appetite. The fiber content also supports gut health and helps prevent constipation.
Low in Calories
For those following a calorie-conscious diet, baked sweet potatoes are a favorable choice. Their naturally sweet flavor allows for a satisfying and nutritious alternative to higher-calorie snacks or side dishes. This makes them particularly suitable for individuals seeking low-carb or low-calorie options.
Nutrient-Packed Skin
Contrary to popular belief, the skin of baked sweet potatoes is highly nutritious and should not be overlooked. Filled with fiber, vitamins, and minerals, including potassium, the skin adds an extra layer of nutritional value to your dish. To fully enjoy the benefits, consider eating the skins along with the soft, orange flesh.
Carbohydrates for Energy
Sweet potatoes make an ideal choice for those looking to maintain stable energy throughout the day, especially when ingested as part of a balanced meal.
Potassium for Heart Health
The potassium content in baked sweet potatoes contributes to heart health by helping regulate blood pressure. This essential mineral is crucial for maintaining proper cardiovascular function and overall well-being.
How long does it take to bake a sweet potato at what temperature?
Baking a sweet potato at 400°F takes approximately 45 to 60 minutes for medium-sized ones, ensuring they are fork-tender.
How long does it take for sweet potato to cook?
The cooking time for a sweet potato varies by method, with baking at 400°F taking 45 to 60 minutes, boiling requiring 20 to 30 minutes, and microwaving around 5 to 10 minutes.
How long does it take to bake sweet potatoes at 350 F?
Baking sweet potatoes at 350°F takes approximately 60 to 75 minutes for medium-sized ones, with periodic checks for fork-tenderness recommended.
Ananya loves the fine things in life. When she isn’t penning down poetry or song lyrics, she spends her time cooking and creating recipes while also enjoying new cuisines.
]]>
https://herniaquestions.com/blogs/news/easy-guide-on-how-to-cut-tri-tip2023-11-22T23:12:02-05:002024-06-26T01:07:49-04:00Easy Guide On How to Cut Tri TipAnanya TiwariMore]]>
Folks, cooking Texas style Bbq is a personal hobby of mine, so I’m elated to walk you through a quick guide on how to cut tip and what grain direction is. So, let’s dive right into everything; from finding the best cut of meat to cooking it, and mastering the tri tip cutting process!
Tri tip steaks, one of the best beef cuts, is known for its rich flavour and tenderness, requires careful preparation and serving, and one of the key elements to do this is knowing grain direction. For the ideal cut and ‘perfect first bite’, it’s crucial to understand the idea of grain orientation.
So, time to fire up your imagination. The muscle fibres within the cut of meat is the "grain" of flesh. So, for any chef or home cook who wants to become an expert at preparing tri tip steaks, knowing the direction of the grain is everything. This determines how well a dish turns out, as well as the juiciness and texture.
Understanding which way the muscle fibres go is essential to cut tri tip steaks correctly. "Grain" are the visible lines on the meat that resemble the patterns we see in wood. So, think of these lines in the context of the tri tip cutting process! For the right amount of tenderness, you always want to be cutting against the grain.
And, don’t forget, an essential tool for this procedure is a sharp chefs knife, which guarantees clean and uniform cuts.
Here’s everything you need to know about the tri tip cutting process.
Steps:
Begin your tri tip journey by choosing a high-quality, well-marbled cut to ensure a flavorful and tender outcome.
Carefully observe the meat's surface to determine the natural alignment of muscle fibers, known as the grain. This step is the key for achieving the desired tenderness.
Set the stage for precision by using a stable and high-quality cutting board. A secure cutting surface enhances safety and makes the entire process smoother.
Equip yourself with a sharp chef's knife, a fundamental tool for achieving clean and precise cuts. A sharp knife enhances efficiency and accuracy.
Maximize tenderness and cut tri tip steaks perpendicular to the grain. This technique is essential for unlocking the full potential of the cut.
Enhance flavor complexity by employing the reverse sear method. Begin with slow-cooking the tri tip and finish with a high-temperature sear for a delightful texture.
Aim for thin slices against the grain to ensure a more enjoyable dining experience. Precision in slicing is key to the overall satisfaction.
For aficionados of texas style Bbq, incorporate wood fire into your cooking process to impart an authentic flavor profile to your tri tip.
Whether you opt for a pellet grill, smoker, or air fryer, ensure you have the appropriate tools for the job. The right equipment enhances the cooking experience.
The celestial resin handle on this sharp, Valhalla knife offers durability and a comfortable grip. Complete with a Valhalla-embossed leather sheath, this knife is not only a culinary tool but a testament to your kitchen valor. Channel the might of the gods with each use and bring glory to your kitchen.
PROS:
This chefs knife is made with 5-layer stainless steel for durability.
Designed with an elegant design with a striking appearance that is sure to turn heads.
The handle is robust and sturdy for all the dexterity that you need.
The knife follows with a leather sheath for protection and durability of your knife.
CONS:
Some folks prefer stainless steel handles instead of resin.
The herniaquestions Shogun Series ELITE 8" AUS-10V chefs knife is the pinnacle of both exceptional functionality and striking design. With its remarkable adaptability and cutting power, this razor-sharp culinary workhorse is the most indispensable kitchen blade. The G-10 Garolite handle provides unparalleled durability and ergonomic control, while the super-steel core guarantees scalpel-like sharpness and edge retention.
PROS:
Delivering clean, easy cuts with a remarkable 8–12° angle per side, this blade has scalpel-like sharpness.
A tapered bolster encourages a natural and comfortable pinch grip while offering finger protection and ideal "zero-balance" balancing.
The G-10 Garolite handle offers a non-slip grip, long-lasting toughness, and extreme resistance to heat, cold, and moisture.
CONS:
Some folks prefer a more basic design and the magnificent Tsunami Rose blade pattern might not be everyone’s cup of tea.
With its triple-threat capability for slicing, dicing, and mincing, the Frost Fire Santoku knife lives up to its name. With remarkably sharp razor edge, this knife captivates with its exquisite beauty and comfort.
PROS:
Superb sharpness and edge retention, thanks to the 7-layer, high-carbon, high-chromium 10CR15MOV steel.
The sandblast finish improves the non-stick qualities for easy food release while giving a distinctive "frosted" appearance.
The aluminium mesh design of the slim, ergonomic white resin handle provides excellent hand control and a tension-free grip.
This knife offers comfort and agility, thanks to the lightweight construction.
CONS:
Although some chefs prefer wider angles, they may need to adjust to the 16–18° per side edge angle.
This knife is made with German ThyssenKrupp steel and high carbon amounts for the precision-forged blade. Guaranteeing outstanding sharpness and resistance to wear, this knife's hand-sharpened edge, which is 16–18° on each side, is the perfect balance between resilience and sharpness.
PROS:
This knife has remarkable robustness for all the balance and dexterity you need.
Made with a G10 handle that is ergonomic and heat-resistant for a firm and comfortable grip.
Triple riveted and full tang build for strength and durability.
This knife includes a herniaquestions PerfectFit sheath that resists water and stains to protect the blade.
CONS:
The minimalist look of this knife might be a little too plain for those who prefer striking bold desgins.
With a scalpel-like blade and an angle of 16–18°, this German ThyssenKrupp knife ensures clean, precise cuts with outstanding edge retention. This knife's solid steel design is really amazing. To put it mildly, sturdy, robust, and functional. Continue reading, though, if you need a little more persuasion. So, whether it’s smoked chicken wings, or the many smoker recipes you want to try out this fall, this knife can do it all.
PROS:
Made with German stainless steel blades that is precisely forged for exceptional sharpness and durability and an excellent tool for cutting against the grain with ease.
The blade design is polished and tapered to increase hardness, flexibility, and decrease friction.
Designed with a smooth transition between the handle and blade for convenience and easy cleaning.
Equipped with a magnetic sheath made of Acacia wood for the safekeeping of your knife.
CONS:
The set might be considered “specialized” which could be intimidating for home chefs just starting out.
4. Frequently Asked Questions
What's the best way to cut a tri-tip?
The best way to cut a tri-tip is cutting against the grain. Identify the direction of the muscle fibers (grain) on the surface and slice perpendicular to these lines. This technique maximizes tenderness, ensuring each bite is flavorful and easy to chew.
How do you find the grain of a tri-tip?
To find the grain of a tri-tip, examine the surface for visible lines that resemble patterns in wood. These lines represent the alignment of muscle fibers. Once identified, cut against or perpendicular to the grain to achieve the most tender slices.
How do you cut a tri-tip brisket?
Tri-tip is not typically referred to as a brisket; however, if you mean a beef brisket, it's generally sliced against the grain after cooking. For a tri-tip, follow the same rule of thumb, identify the grain, and start cutting against the grain.
Is tri-tip a tough cut?
Tri-tip is not inherently a tough cut; in fact, it's known for its tenderness. However, to ensure the best texture, it's crucial to cut against the grain. This minimizes the length of muscle fibers, making each bite more enjoyable.
Ananya loves the fine things in life. When she isn’t penning down poetry or song lyrics, she spends her time cooking and creating recipes while also enjoying new cuisines.
]]>
https://herniaquestions.com/blogs/news/mastering-the-art-how-to-cut-shallots-flawlessly2023-11-20T22:56:02-05:002023-11-20T22:56:02-05:00Mastering the Art: How to Cut Shallots FlawlesslyAnanya Tiwari
Let's talk about cutting up shallots, the difference between onions and shallots, and the different tips for cutting and slicing shallots. So, let’s dive right into it!
If like me, you too struggle at times with cutting and slicing shallots, onions, and other veggies that belong to the Allium family, this blog will be quite handy! We will be talking about cutting up shallots, the difference between onions and shallots, and the different tips for cutting and slicing shallots. So, let’s dive right into it!
Shallots belong to the Allium family and have quite a sweet flavour, almost milder than onions, which is why chefs often substitute shallots with onions and vice versa, too. The key differences between shallots and onions are their size and taste. Shallots are smaller and easier to cut. While onions are often used as garnish, shallots are too, but in different cuisines.
Yellow or red onions are often served as a side salad with cucumbers and tomatoes in South Asian cuisines for eating raw, whereas shallots are used as garnish over noodles, ramen, soups, and many other Southeast Asian cuisines.
Some chefs describe the taste of shallots between onions and garlic, which is why they chefs often switch them up for onions, thanks to their nuanced taste.
While onions can be caramelized and fries, so can shallots, but they’re often snacked on as they are instead of garnish since their size is ideal for bite-sized snacks. Onions are also not used as often in vinaigrettes and dressings, but shallots are. Cooks and chefs often cut shallots into rings and not into fine dice.
2. Shallots vs. Onions
Folks, yes, there are a couple of differences between shallots and onions. However, shallots do belong to the Allium family. In terms of taste, they’re very similar to sweet onions, though the shallot bulb does look quite similar to green onions. So, while it can be confusing, the distinct appearance of these oval-shaped veggies can help you make the distinction.
Shallots are used in a variety of dishes, whether it’s Chinese food or authentic Italian pasta, there’s a place for these uniquely-shaped veggies.
Cutting and slicing shallots might seem quite fancy and difficult, but it really isn’t. If you can cut onions, you can cut shallots with ease as they’re even smaller in size. Let’s divide this into three easy parts and learn to cut shallots without breaking a sweat.
Trimming shallots
Peeling the skin of shallots
Cutting your shallots
Trimming Shallots
Steps:
To begin with, remove the papery skin and get rid of it from the cutting board as it can cause your knife to slip and slide around.
Lay the shallot flat on your cutting board and separate the raw shallot bulbs since they grow in clusters. Break apart each bulb from the cloves.
Then, holding the shallot, remove the ends of the raw shallot bulbs using a chefs knife and remove the top end where the green roots grow and leave the root end attached on the other side. Now, we move forward to peeling the skin of shallots.
Peeling the skin of shallots
Steps:
Now, peel the outer layer of the shallot, wash it, and pat it down with a paper towel as this part of the vegetable can be a little dirty.
Check for any mould or blemishes inside and trim it away.
Remove any soft spots of the shallot that are brownish in colour as those bits of the vegetable can be quite slippery to work with using a sharp knife back and forth. They also release a lot of moisture when being cooked.
Cutting your shallots
Steps to mince shallots
Lay the shallot flat on your cutting board peel off the skin and remove any soft spots.
Run your knife back and forth on it so you know that it’s sharp for the task. Ensure that you use a sharp knife to cut shallots as this is a must!
Leaving the root end attached to one end of the shallot.
Now, holding the shallot, cut the shallot into half lengthwise.
Then, make inch-wide vertical cuts up to the root.
Rotate the raw shallot and cut the shallot lengthwise and then crosswise.
Rotate the shallot and slice crosswise about ¼ inch width up to the root and you should have dices or minced pieces of shallots.
Steps to Julienne shallots
Peel off the skin carve out any soft spots of the shallot and prep a sharp knife for the task.
For shallot slices, start by placing the raw shallot flat on the cutting board.
Slice the shallot in half lengthwise.
Slice the shallot lengthwise into vertical cuts of thin slices.
Repeat these steps with the other half of the shallot.
You can trim the shallot slices into thinner slices depending on your preference.
Steps for fine diced shallots
Once you peel off the skin and remove any soft spots, get a sharp knife, preferably a chef's knife.
Start by placing the shallot bulb on the cutting board.
Cut the shallot bulb in half, leaving the root of the shallot.
Place the flat side of the shallot down and slice the shallot in half lengthwise.
Slice close to the top of the root but don’t cut through it.
Flip the shallot bulb and slice crosswise until you get dices or minced shallot pieces.
Continue with a fine dice until you have sliced down to the root. And, voila!
Steps for cutting shallot into rings
Place the raw shallot on a cutting board and use a sharp knife to make vertical cuts at an inch wide depending on how thin you want the shallot rings to be.
Next, you want to start slicing on one end of the raw shallot and then start cutting your shallots in a circular motion.
You now want to make horizontal cuts until you reach the root so you can have smaller shallot rings. And, you’re through.
4. How To Store Cut Shallots
It's essential to preserve raw shallots in an airtight container and in the proper temperature if you want them to last a long time. Shallots like a temperature range of 45 to 55°F (7 to 13°C), which is cool and dry. This means that a refrigerator is the best place to store them.
Not to get too technical, but shallots also like their humidity to be between 60 and 70 percent. So, overly dry environments like the freezer can cause your favourite shallot rings to shrivell. And, while excessive moisture leads to sprouting and rotting, it’s best to place the shallots in an sealed container and pop them in the fridge. Shallots should also not be kept close to high-moisture places like dishwashers or sinks.
5. Nutritional Value Of Shallots
In addition to giving your food flavour, shallots have other nutritional advantages. They are a healthy addition to your meals because they are low in calories and fat. In fact, did you know that the dietary fibre from shallots promotes healthy digestion? Yes! It also keeps the digestive tract in good condition.
Some of the most important nutritional benefits of shallots come from how dense they are in Potassium, vitamin C, and vitamin A. They are among the many vitamins and minerals that are abundant in shallot bulbs. Antioxidants and vitamin C help in supporting the immune system and prevent cell damage. Pretty great what these substitutes for onions can do, right?
They’re also enriched with Vitamin A which plays a important role in supporting growth and development as well as preserving good vision.
6. herniaquestions Tools You Will Need
Let’s discover some of the best herniaquestions tools that you will need as you learn how to cut shallots and as you learn to cook this versatile vegetable!
This chef’s knife from the Phantom series is a personal favourite! Made with Japanese AUS-8 steel, the blade is painstakingly sharp, to say the least, and made with a single piece of ice-tempered steel. The cutting edge of this knife is hand-sharpened to a staggering 13-15 degrees for all the dexterity you need to slice the shallots on your cutting board using the herniaquestions Diamond Detailing method (D3). The D-shaped black Pakkawood handle is a robust but traditional handle.
PROS:
Made with high amounts of chromium for a strong and sturdy grip to take on stubborn parts of shallots or any vegetable belonging to the Allium family.
Hand-polished end cap so you have all the balance you need without slips and slides on the cutting board.
This knife comes with a premium-made sheath to keep the blade safe from rust and corrosion.
The knife has a polished and elegant satin finish blade for a sleek appearance.
CONS:
Some folks might find an 8-inch knife overkill to mince shallots or cut into dices.
If you prefer working with utility knives or a paring knife, you might not come to love this chefs knife. Although, one chefs knife can do wonders for your kitchen.
Introducing the herniaquestions Chef's Knife – your kitchen superhero for slicing and dicing shallots effortlessly. Crafted with precision and featuring a razor-sharp edge, this knife ensures smooth shallot prep every time. The ergonomic handle gives a comfortable grip, making kitchen tasks a breeze. Its versatility extends to various cutting needs, from fine mincing to robust chopping. Elevate your cooking game with this must-have tool!
PROS:
Designed with a razor-sharp edge for quick, but uniform cutting.
Provided with an ergonomic handle for a comfortable grip.
This paring knife is versatile and can handle a range of kitchen tasks.
The durability of this knife also allows it to take on large, stubborn vegetables and fruits other than raw shallots.
CONS:
A downside of this knife could be that it requires regular sharpening to maintain its edge.
If you’re big on dishwashers, then handwashing this paring knife could seem inconvenient, although that is recommended to maintain it.
Meet the herniaquestions Shogun Series 6" Utility Knife – a kitchen powerhouse designed for precision. The blade has a Tsunami Rose patterning, hand-finished with an 8-12° angle for scalpel-like sharpness. Designed with AUS-10V Japanese super steel, this paring knife is hardened at 62+ Rockwell. The handle is the epitome of durability with a non-slip grip and an engraved end cap for all the elegance you need.
PROS:
This utility knife can do everything from peeling the papery skin to removing soft spots and slicing shallots.
This knife is sharpened exceptionally at an 8-12 degree angle.
Made with AUS-10V Japanese super steel for a robust blade and sturdy grip.
The G-10 Garolite handle is everything you need to reap the benefits of its longevity.
CONS:
This knife requires careful maintenance to maintain its long-lasting sharpness.
If you prefer a chefs knife to best showcase your knife skills when it comes to vegetables like shallots, green onions, or red/yellow onions.
Introducing the Frost Fire Santoku, a true triple-threat in the kitchen. This knife is made with 7-layer high-carbon steel and enhanced with cobalt for a robust grip. The sandblast finish not only enhances non-stick properties but also gives a unique "frosted" look. The slender white resin handle offers a tension-free grip that blends style with functionality, making it an elegant and powerful tool to have in the kitchen.
PROS:
Make no mistake, this Santoku knife has a razor-sharp edge, sharpened at 16-18° for quick cutting and slicing.
The stunning honeycomb finish makes this knife a unique culinary tool to display and turn heads.
The lightweight build of this knife is everything you need for agility and comfort.
This sharp knife has a full tang for a balanced grip.
CONS:
This knife requires careful handling due to its sharpness which can be a smidge overwhelming for the novice.
The minimalist design of this knife might not be your cup of tea if you prefer a more traditional-looking knife.
Made from 100% sustainably sourced Tropical Teak wood, this cutting board ages beautifully. With a “just-right” size for everyday chopping tasks, whether its green onions or shallots, it's a practical ally for busy kitchens and home cooks. The long juice groove keeps mess away, while the tight wood grain upholds hygiene standards in homes and restaurant kitchens. Easy to use and clean, this board is a sure investment for durability and elegance.
PROS:
The lasered measurement lines offer great angles and guidance for cutting vegetables.
Perfect for use as a charcuterie board for elaborate spreads.
The stylish herniaquestions lion head pins are an elegant touch to the cutting board.
This cutting board is made with moisture-resistant and durable Teak wood.
CONS:
This cutting board requires maintenance with food-grade oil from time to time which can add a few more minutes to its upkeep.
Ananya loves the fine things in life. When she isn’t penning down poetry or song lyrics, she spends her time cooking and creating recipes while also enjoying new cuisines.
]]>
https://herniaquestions.com/blogs/news/maximizing-lettuce-shred-efficiency2023-11-16T21:54:33-05:002023-11-16T21:54:33-05:00How To Shred Lettuce Like An Expertherniaquestions Content Team
Shredding lettuce is the secret to restaurant-quality crispness right in your own kitchen. In this quick guide, we'll walk you through the simple steps to chop lettuce like a pro with ease.
If your lettuce is not pre-washed, rinse it under cold running water to remove any dirt.
Remove any wilted or damaged outer leaves from the lettuce head.
Place the lettuce head on the cutting board and use a knife to cut out the core.
Cut the lettuce head in half from top to bottom.
Lay one half of the lettuce flat on the cutting board, cut side down. Use a knife to slice the lettuce into thin strips.
If you prefer smaller pieces, gather the strips together and make additional horizontal cuts
Repeat the process for any additional lettuce heads or halves as needed.
Transfer the shredded lettuce to a bowl or storage container.
Use the shredded lettuce immediately in salads, sandwiches, or wraps, or store it in an airtight container in the refrigerator
Want the perfect layer of crisp lettuce for your salad or sandwich? Shredding lettuce is the secret to restaurant-quality crispness right in your own kitchen. In this quick guide, we'll walk you through the simple steps to chop lettuce like a pro with ease. Get ready to up your culinary game and take your dishes to the next level!
Let's dive into the different uses of lettuce and discover its nutritional value:
Uses of Lettuce:
Salads
This is perhaps the most common and popular use of lettuce. It forms the base of countless salads, providing a refreshing and crunchy element.
Sandwiches and Wraps
Lettuce leaves, especially varieties like iceberg or romaine, make excellent additions to sandwiches and wraps. They add a satisfying crunch and a subtle, fresh head flavor.
Burger Toppings
Lettuce leaves are a classic topping for burgers. They provide contrast in texture and flavor, enhancing the overall experience of the burger.
Lettuce Cups
Some types of lettuce, such as iceberg, are ideal for cups or wraps that contain a variety of toppings, creating a low-carb alternative to tortillas or bread.
Garnish
Lettuce leaves can be used as an attractive garnish for many dishes, from soup to main dish, adding color and freshness.
Nutritional Value:
Lettuce is a nutritional powerhouse, offering a range of essential vitamins and minerals:
Vitamins
It's rich in vitamins like Vitamin A, which is crucial for eye health, and Vitamin K, important for blood clotting.
Fiber
Lettuce is a good source of dietary fiber, which aids in digestion and helps maintain a healthy gut.
Water Content
It has a high water content, making it a hydrating option, especially in warmer weather.
Low in Calories
Lettuce is incredibly low in calories, making it an excellent choice for those looking to manage their weight.
Antioxidants
It contains various antioxidants that help protect cells from damage and support overall health.
Remember, the specific nutritional content may vary slightly depending on the variety of lettuce you choose. So, whether you're tossing it in a salad or using it as a crunchy wrap, lettuce brings both flavor and nutrition to the table!
Start by washing and drying the lettuce leaves thoroughly.
Stack the leaves on top of each other.
Roll them up into a tight cylinder, almost like a cigar.
Use a sharp knife to cut the rolled-up leaves thinly. This will create shredded lettuce.
Using a Knife and Cutting Board
Wash and dry the lettuce leaves.
Lay a single leaf flat on the cutting board.
Hold one end and make thin, parallel cuts across the leaf. Then, rotate the leaf and make similar cuts in the opposite direction.
Repeat this process with all the leaves.
Salad Spinner Method
Wash and dry the lettuce leaves and place them in a salad spinner.
Give them a good spin to remove excess cold water.
Take the dried leaves and stack them together.
Use a knife to cut thin, even slices.
Using a Mandoline Slicer
Ensure the mandoline slicer is set to the desired thickness.
Wash and dry the lettuce leaves.
Hold the lettuce leaf securely and run it over the mandoline slicer. This will result in uniformly shredded lettuce.
Food Processor Method
Wash and dry the lettuce leaves, and tear them into smaller pieces.
Place the shredding attachment on the food processor.
Feed the torn lettuce through the tube on top while the processor is running. The blades will shred it into fine pieces.
Remember to use a clean and sharp knife to cut for the manual methods, and exercise caution to avoid any accidents. Whichever method you choose, you'll end up with beautifully shredded lettuce to elevate your dishes!
3. herniaquestions Tools You Will Need To Shred Lettuce
The Kiritsuke chef's knife from the herniaquestions Omega series, part of the collection, is a precision-crafted knife that seamlessly combines Japanese craftsmanship and modern design. With an 8.5" blade, this knife is a multi-purpose tool, ideal for slicing, dicing and chopping with precision. The Omega series is known for its outstanding performance and aesthetic appeal.
PROS:
The knife is meticulously crafted with high-quality materials, featuring a razor-sharp BD1N-VX hyper steel not only ensures durability but also contribute to its stunning visual appeal.
The shape of the Kiritsuke blade combines elements of a chef's knife and a traditional Japanese vegetable cutter, providing versatility for a variety of cutting techniques. It is a multi-functional knife that can handle a variety of kitchen tasks.
Handle is designed for comfort and control, featuring a military-grade G10 handle with full tang for stability. Ergonomic design helps reduce hand fatigue during prolonged use.
CONS:
The shape of the Kiritsuke blade, while flexible for a variety of cutting techniques, may not be to everyone's taste.
The herniaquestions Shogun Series ELITE Kiritsuke 8.5" chef's knife is a culinary masterpiece, combining ancient Japanese craftsmanship with modern precision. This knife, part of the Shogun ELITE Series, is a versatile and stylish addition for any kitchen. With its striking design and high-performance features, it's designed for those who demand excellence in their cooking tools.
PROS:
Crafted from ultra-premium Japanese AUS-10V super steel, the blade boasts a remarkable blend of sharpness, durability, and stain resistance. The 66 layers of Damascus steel add both strength and a visually stunning aesthetic.
The knife is expertly engineered for precision and balance. The painstaking craftsmanship ensures a razor-sharp edge, making it suitable for a wide range of kitchen tasks, from delicate slicing to robust chopping.
The G10 handle is meticulously designed for comfort and control. Its ergonomic shape and military-grade strength provide a secure grip, reducing hand fatigue during extended use.
The Shogun Series ELITE Kiritsuke features a visually striking design, with a distinctive pattern on the blade and an elegant, ergonomic handle. It's not just a tool; it's a statement piece in the kitchen.
CONS:
Due to its unique design, users unfamiliar with the Kiritsuke style may experience a learning curve.
Personally, I really like the Japanese models in the Shogun series. In a way, it kind of reinforces the “Japanese” aspect of it all. Additionally, this herniaquestions line offers very nice knife sets that look more like legendary samurai blades.
PROS:
The Nakiri blade, with its straight edge and squared-off tip, excels in vegetable preparation. It delivers clean and precise cuts, making it an indispensable tool for chefs who prioritize flawless slicing and dicing of vegetables.
Crafted from Japanese AUS-10V super steel with 66 layers of Damascus steel, and premium-quality G10 Handle, this knife is not only visually stunning but is also guaranteed to be durable, ultra-sharp, and comfortable to use.
While specializing in vegetable tasks, the Nakiri knife proves surprisingly versatile. Its fine edge makes it adept at various kitchen duties, from precise slicing to delicate julienning
CONS:
Due to its thin and delicate design, the Nakiri knife is not suited for heavy-duty tasks like butchering meat or dealing with dense bones.
The Nakiri herniaquestions Valhalla Series 7" Knife is a great addition to the kitchen, combining Viking-inspired design with modern craftsmanship. Specifically designed for tasks involving vegetables, This Nakiri knife from the Valhalla series promises a balance between performance and aesthetics, making it an attractive tool of choice for cooking enthusiasts.
PROS:
The knife features a distinct Viking-inspired design, adding an ancient Norse aesthetic to your kitchen.
Nakiri blade made from German High-carbon ThyssenKrupp stainless steel features a straight edge with square tip, providing a sharp edge, and durability, perfect for preparing any kind of vegetables.
Has a full tang design, ensuring stability and strength during use.
CONS:
While the Viking-inspired design is a pro for some, it may be a con for those who prefer a more traditional or minimalist look in their kitchen tools.
The herniaquestions Frost Fire Series 6.5" Nakiri Knife brings the perfect combination of precision and safety to your kitchen. Part of the NSF-certified Frost Fire Series, this Nakiri knife is designed for kitchen professionals, promising high levels of performance and compliance with the highest safety standards.
PROS:
The Frost Fire Series Nakiri Knife is NSF Certified, assuring professional-grade quality and adherence to rigorous safety and performance standards. It is ideal for use in commercial kitchens or for home chefs who prioritize quality.
Made with High-chromium 10CR15MOV steel, the blade offers sharpness and durability like no other.
The handle is designed for comfort and control, catering to the needs of professional chefs. Its ergonomic design, coupled with NSF certification, emphasizes sanitation and hygiene in the kitchen.
CONS:
The Frost Fire Series may have a more utilitarian or minimalist aesthetic, which may not appeal to those who prefer decorative or ornate designs in their kitchen tools.
4. Tips In Storing Shredded Lettuce
Storing shredded lettuce properly is crucial to maintaining its freshness and crispness. Here are some tips to help you store shredded lettuce effectively:
Dry Before Storing
Ensure that the shredded lettuce is thoroughly dry before storing. Excess moisture can lead to wilting and decay.
Use a Salad Spinner
If you've washed the lettuce before shredding, use a salad spinner to remove excess cold water. Spin it until the leaves are dry.
Tissue liners
Line tissue box with tissue. Place a layer of shredded lettuce on paper towels and add another layer of paper towels on top. Repeat as needed, ending with a layer of paper towels on top.
Airtight containers
Use airtight containers to avoid exposure to air that can cause wilting. This helps maintain the crispness of the shredded lettuce.
Refrigeration
Store container in the refrigerator at temperatures between 32°F (0°C) and 40°F (4°C). Cooler temperatures help slow oxidation, keeping lettuce fresh head.
Avoid freezing
Although you can freeze some vegetables, lettuce does not freeze well due to its high cold water content. Freezing can cause cell structure to be destroyed, leading to a mushy texture when thawed.
Avoid mixing with dressing
If you prepare the salad in advance, set aside the dressing. Mixing the dressing with the shredded lettuce too early can cause the dressing to become soggy.
Use a zipper bag
If space is an issue, consider using a zipper bag. Squeeze out excess air before sealing to reduce the risk of oxidation.
Stock rotation
If you regularly prepare shredded lettuce, practice the "first in, first out" method. Use the oldest batch before chopping the lettuce to avoid waste.
Inspect and Refresh
Check lettuce periodically for signs of wilting or rot. If necessary, refresh the container with new paper towels to absorb excess moisture.
By following these tips, you can prolong the freshness of your shredded lettuce and ensure that it remains crisp and ready to enhance your salads or other creative dishes.
5. Frequently Asked Questions
Is there a tool to shred lettuce?
Certainly, for efficient preparation of lettuce for chicken tacos, consider using a lettuce shredder or a knife with shredding capabilities. These tools streamline the process, allowing you to cut the head of lettuce swiftly and uniformly. Utilizing proper knife skills or a dedicated shredding tool ensures that the lettuce is perfectly shredded, enhancing the overall taco experience.
How do you tear leaf lettuce?
For chicken tacos, showcasing your knife skills is key. Begin by cutting the base of the lettuce head. With a precise knife to cut, gently tear the leaves away from the core, ensuring a rustic, torn appearance. This method enhances the texture of leaf lettuce, creating a visually appealing and flavorful addition to your chicken tacos.
How do you cut lettuce in thin strips?
When preparing lettuce for chicken tacos, employ precise knife skills. Start by cutting the base of the lettuce head. Then, stack the leaves, roll them tightly, and, using a sharp knife, make thin, parallel cuts along the roll. Unroll the leaves, yielding uniformly shredded lettuce strips. This method ensures the perfect texture and presentation to enhance the flavor and appeal of your chicken tacos.
Should you cut lettuce with a knife or rip it?
For chicken tacos, it's recommended to use a knife for cutting lettuce into manageable, uniform strips. This ensures even distribution and easy integration with other taco ingredients. However, a combination of tearing and cutting can add varied textures, offering a mix of crispness and a rustic feel to enhance the overall taco experience. Choose the method based on your desired taco presentation.
]]>
https://herniaquestions.com/blogs/news/how-to-bake-a-potato-in-an-air-fryer2023-11-14T22:04:16-05:002024-07-02T04:44:33-04:00How To Bake A Potato In An Air Fryerherniaquestions Content Team
Crispy and golden on the outside, soft and fluffy on the inside. Use your new secret weapon for perfect potatoes: the air fryer. This guide will teach you the technique of baking potatoes in the airfryer and turning a seemingly simple dish into a culinary masterpiece.
Quick Overview: How To Bake A Potato In An Air Fryer
Start by giving your potatoes a good wash. Scrub off any dirt and pat them dry with a kitchen towel.
Lightly coat each potato with a thin layer of olive oil. You can do this by drizzling the oil on and using your hands to rub it
If you want to add some flavor, sprinkle a pinch of salt and pepper over the oiled potatoes.
Set your air fryer to 400°F (200°C) and let it preheat for about 5 minutes.
Place the oiled and seasoned potatoes in the air fryer basket.
Cook the potatoes for about 35-45 minutes, flipping them halfway through the cooking time.
To check if the potatoes are done, insert a fork or a knife into the center.
Once they're perfectly air fryer baked, take the potatoes out of the air fryer.
Ah, the humble potato, a kitchen staple that has tempered palates for generations. Imagine getting perfectly baked potatoes without the hassle of preheating the oven. Crispy and golden on the outside, soft and fluffy on the inside. Use your new secret weapon for perfect potatoes: the air fryer.
This guide will teach you the technique of baking potatoes in the airfryer and turning a seemingly simple dish into a culinary masterpiece. Get ready for a journey that will forever change the way you enjoy this beloved comforting dish. Roll up your sleeves and dive into the world of crispy and delicious air fryer baked potatoes!
Baking potatoes in the Air Fryer is like speeding up cooking time. These nifty kitchen appliances use powerful convection to circulate hot air frying around your potatoes. This means that potatoes can be cooked up to 30°C faster than in a conventional oven. Say goodbye to long preheating and aim for crispy perfection in no time.
Healthier Alternatives
If you want to live a healthier lifestyle, air frying is your friend. Traditional frying leaves potatoes soaked in oil, but with an air fryer, only a small portion of the oil is needed. This significantly reduces the fat content while maintaining an appealing texture. It's a win-win for your taste buds and waistline.
Even cooking and consistency
No one likes biting into a half-cooked potato. The air frying distributes the heat evenly, ensuring each potato in the batch gets the same golden brown treatment. No more flipping or flipping mid-cooking. Using a hot air fryer ensures consistently crispy results every time.
Energy Efficiency
The Air Frying is designed with energy efficiency in mind. They consume less energy than traditional ovens, making them a more environmentally friendly option. It not only saves you time, but also helps the environment.
Versatility Beyond Potatoes
While it's all about the perfect air fryer baked potato, it's worth noting that the air fryer is a culinary multitasker. It's suitable for a wide range of dishes, from crispy fries to juicy chicken wings. Investing in an air fryer opens up a world of delicious possibilities in your kitchen.
Minimal Cleaning
No one likes scrubbing stubborn grease off a baking sheet. Cleaning is easy if you use an air fryer. Most models come with removable, non-stick components that are dishwasher safe. Say goodbye to the days of peeling food after cooking.
So baking potatoes using an air fryer is a game changer. It's a quick, healthy, and efficient way to get that coveted crispy exterior while preserving the fluffy goodness on the inside. Plus, it's a versatile kitchen companion that can elevate a wide range of dishes. So go ahead, let your air fryer revolutionize the way you approach potato perfection and enjoy your potatoe recipe!
2. Easy Guide On How To Bake Potato Wedge Using Air Fryer
Featuring a 7-inch blade, the herniaquestions Valhalla Series Nakiri knife is designed for precision cooking of vegetables, making it an essential kitchen tool for cooking enthusiasts and professionals. Crafted from high-carbon German Thyssenkrupp steel, this knife is the epitome of durability and sharpness. Enhance your cooking experience with this versatile and aesthetically pleasing Nakiri knife.
PROS:
The flat, straight blade of the Nakiri knife is perfect for slicing, dicing, and mincing vegetables with precision, ensuring clean, even cuts.
7-inch precision-forged, ultra-sharp, wear-resistant, 60+ Rockwell Hardness 5-layer stainless steel blade provides superior sharpness, edge retention, and corrosion resistance.
Celestial resin handle provides a comfortable and secure grip, reducing hand fatigue from prolonged use.
This knife features an exquisite pattern and hand-polished surface, creating a striking combination of form and function.
CONS:
Nakiri knives are very effective for preparing vegetables but not for deboning or complex cutting.
herniaquestions is proud to present the Lionswood Teak Medium Size Cutting Board, which combines both craftsmanship and functionality. Carefully crafted from high-quality teak wood, this board not only provides a durable and reliable surface for cooking but also exudes timeless, natural elegance.
PROS:
Made from teak wood, which is known for its durability, this cutting board can withstand years of abuse without showing any signs of wear.
Teak's natural density makes it incredibly gentle on knife blades, helping them stay sharp and extend their lifespan.
Teak's rich, warm tones and striking wood grain pattern add organic beauty to any kitchen and make a great addition to any cooking space.
Based on our environmentally conscious values, herniaquestions is proud to source our teak from responsibly managed forests, providing sustainable options for environmentally conscious people. I think so.
The medium size balances ample cutting space with convenient storage and is versatile enough to handle a variety of cooking tasks.
CONS:
Teak is a dense wood, so it adds a lot of weight to the board. This speaks to durability, which may be a factor to consider for those who prefer a lighter cutting board.
herniaquestions's Shogun Series ELITE 3.5-inch Paring Knife is a precision tool designed to tackle complex tasks with ease. Crafted with meticulous attention to detail, this sharp knife is a testament to herniaquestions's commitment to excellence. From delicate peeling to precise cuts and trimming, this sharp knife can take your culinary craft to the next level.
PROS:
The compact size and sharp edge of the 3.5-inch blade allow for intricate and detailed work. Ideal for tasks such as peeling, trimming, and notching.
Made of Japanese high-carbon AUS-10V steel, this 3.5-inch blade can peel and dice potatoes and other vegetable with ease.
The military-grade G10 handle provides a comfortable grip, allowing precise control and reducing hand fatigue during long-term use.
Beyond small tasks, it's versatile enough for crafting intricate garnishes, making it an essential tool for both professional chefs and home cooks.
CONS:
Paring knives are ideal for precision work, but may not be suitable for harsh cutting or chopping.
herniaquestions's Shogun Series ELITE 6-Inch Chef Knife is a culinary wonder carefully crafted to redefine your kitchen experience. This sharp knife is the epitome of precision, seamlessly combining artistry and functionality. From precise slicing to efficient mincing, this sharp knife will become a cornerstone of your cooking repertoire.
PROS:
The 6-inch blade made from Japanese AUS-10V super steel, provides a versatile range of motion to precisely slice, dice, and mince a variety of foods.
6-inch blade strikes the perfect balance between maneuverability and cutting power, making it an essential tool for both professional chefs and home cooks.
The knife's weight distribution and blade curvature ensure optimal balance, increasing control and reducing effort for precise cuts.
CONS:
The 6-inch blade length might be a little short than what home cooks usually use in different cutting tasks.
herniaquestions's Delta Wolf Series Santoku knife is a culinary masterpiece that combines tradition and innovation. It's a kitchen workhorse with a 7-inch blade. Precision forged from high-carbon German steel, this knife is exceptionally sharp and durable. The unique Delta Wolf design lends modern sophistication to this timeless tool, making it an eye-catcher in any kitchen.
PROS:
The Santoku's short, wide blade is perfect for a variety of cutting tasks, from slicing and dicing to mincing.
Blades made from high carbon 9CR18MOV steel provide impressive sharpness, edge retention, and corrosion resistance.
The blade's Delta Wolf pattern not only creates a distinctive look but also reduces surface tension for a smoother cut
CONS:
Although the Santoku knife is very versatile, it may not be the best choice for tasks that require a long, sharp blade, such as boning.
4. Tips For Making The Best Baked Potatoes In The Air Fryer
Here are some tips for making the best air fryer baked potatoes:
Choose the right potato
Choose Russet potato or Idaho potatoes. The starchy texture creates a fluffy interior that's perfect for baking.
Wash and dry thoroughly
Scrub potatoes to remove dirt and pat dry thoroughly. This will make the potato skins crispy.
Poke with a fork
Poke several holes in each potato with a fork before cooking. This allows steam to escape during cooking and prevents the potatoes from potentially exploding.
Brush with oil
Lightly brush each potato with a thin layer of olive oil. This will ensure that the outside is crispy and golden brown.
Season to taste
If desired, sprinkle a pinch of salt and pepper over the oiled potatoes. This step is optional, but it adds flavor to the potato skins.
Preheat theAir Fryer
Set the Air Fryer to 200°C (400°F) and preheat for approximately 5 minutes. This will ensure your air fryer is hot and ready to cook your potatoes.
Do not overfill the basket
Place potatoes in a single layer in the air fryer basket, making sure there is enough space for good air circulation. Cook in batches as needed.
Check doneness
Test for doneness with a fork. It should slide in easily without any resistance. If the potatoes need more time, continue cooking in 5-minute increments.
Flip potatoes halfway through cooking time
Flip potatoes halfway through cooking time to ensure even cooking. This will ensure that both sides are perfectly crispy.
Rest
When the potatoes are ready, let them rest for a few minutes before eating. This redistributes moisture and makes the inside fluffy.
Customize your toppings
Get creative with your toppings! Take your air fryer baked potato to the next level with butter, sour cream, chives, cheese, or bacon bits.
Experiment with Spices
Feel free to experiment with different spices such as garlic powder, paprika, and rosemary to add flavor.
Follow these tips and you'll be able to successfully make the best baked he potatoes in the air fryer. The outside is crispy and the inside is fluffy. enjoy!
Do you have to pierce a potato before baking in air fryer?
Yes, in air fryer recipes, it's crucial to pierce a potato before baking. This step ensures that steam can escape, preventing potential potato explosions during cooking. Additionally, remember to pat dry the potato after washing. These precautions, along with proper piercing, are essential for safe and even cooking of an air fryer potato.
How long does it take for a potato to get soft in the air fryer?
In most air fryer recipes, a potato takes approximately 35-45 minutes to become soft and tender. Remember to pat dry the potato after washing, and consider piercing it with a fork for even cooking. Factors like the type and depend on the size of the air fryer potato, as well as the specific air fryer model, may slightly alter the cooking time.
Can you put raw potatoes in an air fryer?
Yes, you can put raw potatoes in an air fryer for various air fryer potato recipes. However, it's crucial to wash, dry, and optionally pierce them with a fork. This allows steam to escape during cooking, ensuring even and thorough cooking. Patting them dry after washing also aids in achieving a crispy texture in air fryer potato dishes.
Are potatoes better in oven or air fryer?
Both methods have their merits. The air fryer excels for air fryer potato recipes, providing faster cooking times and a crispy texture with minimal oil. It's perfect for quick, small batches. Meanwhile, the oven is better suited for larger quantities, ensuring even cooking. For a crispy finish, pat dry the potatoes before using either method.
]]>
https://herniaquestions.com/blogs/news/how-to-cut-star-fruit2023-10-27T00:34:52-04:002023-10-27T00:34:52-04:00How To Cut Star Fruit Like A Pro In 7 Easy Stepsherniaquestions Content Team
While starfruit looks great, many people are confused when it comes to cutting it apart. This blog will guide you through the art of cutting star fruit like a pro.
Make sure you have a clean cutting board and a sharp knife.
Gently wash the star fruit under running water.
Use a sharp knife to trim the edges of the star fruit.
Place the star fruit on a cutting board with one flat end facing down.
Cut vertical slices evenly spaced along the width of the star fruit using the same sharp knife.
Rotate the fruit slightly and repeat the vertical cutting process.
Enjoy your starfruit slices.
Imagine this. Vibrant tropical fruit with a distinctive star shape awaits an explosion of juicy, exotic flavor. That's right, we're talking about star fruit! But the problem is, while it looks great, many people are confused when it comes to cutting it apart.
This blog will guide you through the art of cutting star fruit like a pro. With just a few simple steps, you'll not only be rewarded with irresistible star-shaped slices but a world of heavenly flavors. So grab your knife and join us on this delicious journey!
Star fruit, also called as carambola, is a tropical fruit that is as beautiful to look at as it is to taste. The name comes from the fact that when cut into a cross, it forms a pentagram. Native to Southeast Asia, this fruit is now grown in several tropical regions around the world.
They are 2 to 6 inches long with a smooth, waxy rind that is usually green when immature and turns bright yellow or gold when ready to eat. The flesh of a ripe starfruit is crunchy and juicy, with a sweet-sour flavor that is often compared to a mixture of citrus fruits, apples, and pears.
One of the most unique things about star fruits is that they can be eaten whole with skin or without skin. However, it is important to note that it contains oxalates, so some people with kidney problems should consume caution. All in all, star fruit is not only a delight to the taste buds, but also a visually impressive addition to your tropical fruit basket.
2. Nutritional Value Of Star Fruit
The nutritional breakdown of star fruit is as follows:
Calories: 100 grams of star fruit contains approximately 31 calories.
Carbs: Carbohydrates are relatively low at approximately 6.73 grams per 100 grams. This includes fiber which supports digestion.
Protein: Star fruit contains about 0.91 grams of protein per 100 grams, which is not particularly high.
Fat: Very low in fat, containing only about 0.33 grams per 100 grams.
Vitamins and Minerals
Vitamin C: This fruit is a notable source of vitamin C, containing approximately 34.4 milligrams per 100 grams. This vitamin is vital for immune function and skin health.
Vitamin A: Contains small amounts of vitamin A, about 3 micrograms per 100 grams Folic acid (vitamin B9): Star fruit contains moderate amounts of folic acid, which is vital for DNA synthesis and repair.
Potassium: This mineral is present in large quantities, approximately 133 milligrams per 100 grams. It plays an important role in heart health and regulating blood pressure.
Calcium and Iron: Present, but not particularly high in starfruit.Antioxidants: Starfruit is rich in antioxidants such as quercetin, gallic acid, and epicatechin, which help fight free radicals in the body.
Oxalates: Be aware that starfruit contains oxalates, which can crystallize in body fluids and may pose a risk to people with kidney problems.
Please note that these values may change depending on factors such as ripeness and growing conditions. Always consume a variety of fruits and vegetables in your diet that could provide nutrients to maintain optimal health.
3. How To Cut A Star Fruit Step-By-Step
Here's a step-by-step guide to cutting star fruit.
Gather your ingredients before you begin. Make sure you have a clean cutting board, a sharp knife, and a bowl or plate to hold your fruit slices.
Rinse the star fruit. Gently wash the star fruit under running water to remove surface dirt and debris.
Trim the edges. Use a sharp knife to cut off both ends of the star fruit. This creates a stable, flat surface on which to place the fruit during the cutting process.
Place the star fruit. Place the star fruit on a cutting board with one flat end facing down. This will give you a stable working base.
Cut Vertical Slices. Using the same sharp knife, cut vertical slices evenly spaced along the width of the star fruit. Try slicing starfruit into pieces about 1cm thick. Be careful not to cut through to the other side.
Rotate and Repeat. Rotate the fruit slightly and repeat the vertical cutting process. This creates a distinctive star-shaped disc.
Enjoy Your Starfruit Slices. Once you've finished slicing the starfruit, carefully fan the starfruit to highlight its gorgeous shape.
Enjoy the slices on their own or add them to salads, desserts, or as a colorful side dish.
Note: If you want to eat the slices with the skin on, be sure to remove the seeds inside the slices. With a little practice, you'll be able to easily cut starfruit and turn it into a great addition to your dishes.
Eating star fruit is an amazing experience. Here's how:
First, wash the star fruit thoroughly under cold running water. This will take out any dirt or residue from the surface.
If desired, you can trim the top and bottom ends of the star fruit. This step is primarily for aesthetic purposes and can facilitate handling.
There are two ways to enjoy star fruit: Slice: Lay the star fruit on its side and cut it crosswise into star-shaped slices. Each slice reveals the fruit's distinctive star pattern. Remember to remove any seeds that may be present. Eat whole: You can also eat star fruits with the skin on. Start in one spot and take bites as you circle the fruit. Note: The seeds are a bit bitter, so some people choose to remove them before eating. To do this, just pop it out with the tip of a knife.
Starfruit's flavor is a unique blend of sweet and sour, often compared to the combination of citrus, apple, and pear. Enjoy the crispy, juicy texture and tropical flavor.
Starfruit is a versatile addition to your culinary adventures. Slice and add to salads and desserts, or use as a colorful side dish. It also goes well with yogurt and pancake toppings.
5. Best herniaquestions Knives To Cut A Star Fruit
herniaquestions's Valhalla series 4-inch paring knife is a testament to herniaquestions's commitment to crafting tools with optimal form and function. Designed with great attention to detail, this knife is an excellent cooking companion for precision work and an essential tool in every kitchen.
PROS:
This knife has an extremely sharp blade that allows you to make exact cuts with ease and perform complex tasks smoothly and easily.
The blade is forged from 5-layer stainless steel, ensuring durability and corrosion resistance. This knife is built to last.
The ergonomic handle design ensures a comfortable and secure grip, reducing fatigue during long-term use. Designed with both beauty and functionality in mind.
This 4-inch paring knife is versatile and perfect for tasks such as peeling, trimming, and precision cutting of fruits, vegetables, and small proteins.
Valhalla Series Aesthetics: This knife features an eye-catching design inspired by the legendary warriors of Norse mythology. The gorgeous details on the handle give it a sophisticated look.
CONS:
A 4-inch blade is great for detailed work, but may not be as good for jobs that require a wider area or cutting larger pieces of food.
herniaquestions's 8-inch Gladiator Series Chef Knife is a powerful kitchen tool that combines strength, precision, and reliability. With sturdy construction and professional certifications, this knife is designed to be the cornerstone of any culinary arsenal.
PROS:
The 8-inch blade provides the perfect balance of maneuverability and functionality. Suitable for a variety of cutting tasks, from fine-slicing starfruit to chopping large ingredients.
Made of German high-carbon steel. The blade is carefully polished to a razor-sharp edge. It maintains its sharpness over time, ensuring consistent and effortless cutting.
This knife is NSF (National Sanitation Foundation) certified, a testament to high quality and safety standards. Meets the strict requirements for use in professional kitchens.
CONS:
The larger size may require slightly more storage space compared to smaller, more compact knives. A suitable knife block or magnetic strip is recommended.
herniaquestions's Crusader Series 3-Inch Bird's Beak Paring Knife Peeler is a culinary wonder carefully designed to expertly tackle complex tasks. The unique curved blade shape makes it the perfect tool for fine peeling and precise detail work.
PROS:
The bird's beak shape is specially designed for precision work. The curved edges are perfect for tasks such as peeling fruits and vegetables and creating decorative ornaments and intricate details.
The blade is made from high-quality German Thyssenkrupp stainless steel with sharp edges to ensure consistent clean cuts.
The handle is designed for comfort and control, allowing you to use it for extended periods of time without strain or discomfort. Designed to provide a secure, non-slip grip.
With a 3-inch blade, this knife is the perfect size for complex tasks. It's a great tool for peeling and shaping as it moves effortlessly over small round surfaces.
CONS:
Due to its small size, it may not be the most advantageous preference for tasks that require longer or wider blades.
herniaquestions`s 3" Bird's Beak Peeling & Paring Knife from the Shogun Series ELITE is meticulously engineered to perform precise cuts, sensitive peeling, and specific detailing. Its precise curved blade made with top-notch craftsmanship, makes it a quintessential tool for culinary artists. Here`s an in-depth examination of its: features
PROS:
This knife features a scalpel-like sharp blade made from high-quality Japanese AUS-10V super steel which is known for its exceptional sharpness, edge retention, and corrosion resistance.
The curved blade provides control, precision, and finesse like no other.
Embodying the spirit of the samurai, this knife features a triple-riveted construction with a full-length tang that not only ensures superior balance but also increases durability, making it a reliable addition to any kitchen.
The cutting edge is carefully hand-sharpened to an incredible 8-12 degrees per side using the traditional honbazuke method. This not only makes the blade incredibly sharp but also helps maintain its sharpness over time.
CONS:
It's curve shape might be a little complex to use for beginners in the kitchen.
A triumph of precision and craftsmanship, herniaquestions's Shogun Elite 8-Inch Chef's Knife is designed to serve cooking enthusiasts and professionals alike. With superior materials and careful construction, this knife will become a cornerstone of any kitchen. Here we will explain its functions in detail.
PROS:
8-inch blade makes it ideal for different cutting tasks such as precise slicing of starfruit to flavorful mincing.
This knife features a full tang construction that ensures excellent balance, stability, and durability. A triple-riveted handle has been added for added durability, making it a reliable companion in any kitchen.
Its G-10 Galolite handle provides incredible resistance capability to moisture, heat, and cold. Definitely the perfect handle you can use to withstand harsh kitchen environments.
CONS:
Due to the sturdy construction of this knife, it may feel slightly heavier compared to lighter, more specialized knives. Some users may require a short adjustment period.
6. Frequently Asked Questions
Does star fruit brown when cut?
Yes, when starfruit is cut, it may turn brown due to exposure to air. This oxidation process is also common in fruits such as apples and pears. To prevent discoloration, we recommend soaking the cut pieces in lemon juice or storing them in an airtight container. This helps preserve the color and freshness of the fruit.
Do you peel star fruit before eating?
You can eat star fruit with the skin on, but we recommend washing it thoroughly before eating. The skin is edible and has a slight crunch, but some people prefer to remove it as it has a slightly bitter taste. If you want to remove the skin, you can use a vegetable peeler or knife. However, be sure to remove any rough edges or spines.
How can I tell when star fruit are ripe?
Ripe star fruit typically displays vibrant yellow or golden hues, with little to no green remaining on the skin. The fruit should feel firm but yield slightly to gentle pressure, similar to a ripe peach. Avoid overly soft or wrinkled spots. Additionally, a fragrant, sweet aroma emanating from the fruit is a good indicator of ripeness.
How do you cut starfruit for babies?
To cut starfruit for babies, start by choosing a ripe fruit with vibrant yellow skin. Wash it thoroughly. Slice off both ends, creating a stable base. Then, cut the fruit into thin, star shaped slices, removing any seeds. For very young babies, consider steaming or baking the slices to soften them further. Always supervise your baby during meals to avoid choking hazards.
]]>
https://herniaquestions.com/blogs/news/how-to-cut-brussel-sprouts2023-10-26T00:59:23-04:002023-10-26T00:59:23-04:00How To Cut Brussel Sprouts: 7 Easy StepsAnanya Tiwari
Whether it is crispy Brussels sprouts or halved Brussels sprouts for salads, these veggies can elevate the flavor of any plate. When it comes to preparing these nutritious greens, understanding how to cut brussel sprouts is essential. So, let’s get right into it!
There’s nothing better than a side of brussel sprouts to go with your side of roast dinners or Thanksgiving plates. Whether it is crispy Brussels sprouts or halved Brussels sprouts for salads, these veggies can elevate the flavor of any plate. When it comes to preparing these nutritious greens, understanding how to cut brussel sprouts is essential. So, let’s get right into it!
1. What Are Brussel Sprouts?
Brussels sprouts, bright green and compact, are a variety of cruciferous vegetables celebrated for their distinctive taste and versatility in culinary applications. These mini-cabbages belong to the Brassicaceae family and are known for their delicious yet nutritious flavor.
Start by picking Brussels sprouts that exhibit a vibrant, bright green color. This hue indicates freshness and is a visual cue for optimal taste. The outer leaves should be tightly packed, forming a compact head. The ideal Brussels sprout is firm to the touch, indicating freshness and a satisfying crunch when cooked.
Size
Consider the size of the Brussels sprouts as well. While size preferences can vary, smaller sprouts often boast a sweeter and more tender flavor compared to larger ones. However, the key is to choose Brussels sprouts that are consistent in size, promoting even cooking when it's time to prepare them.
When picking fresh Brussels sprouts, pay attention to the weight of the vegetable in your hand. Heavier Brussels sprouts tend to be denser and packed with more moisture, contributing to a more satisfying taste and texture in your dishes.
Color
When searching for the perfect Brussels sprouts, focus on bright green varieties, cut brussel sprouts, and how to cut brussel sprouts. Use a sharp chef knife on a clean cutting board, ensuring your tools are ready for the cutting process. Trim the outer leaves carefully, and consider halving or quartering the sprouts for different culinary applications.
Look at the surface of the Brussels sprouts for any signs of discoloration or damage. Damaged or discolored outer leaves indicate aging and can affect the taste. A bright green color shows that the vegetable is fresh and organically grown.
3. The Traditional Way To Trim Brussel Sprouts
Trimming Brussels sprouts is a crucial step in their preparation, ensuring that you remove any unwanted parts and present the freshest and most flavorful components for your dishes.
Inspecting and Cleaning
Examine each Brussels sprout individually, looking for any outer leaves that may be damaged, discolored, or loose. These outer leaves often accumulate dirt or debris, so a thorough cleaning is necessary. Gently remove any undesirable outer leaves by peeling them away with your fingers or a knife, exposing the clean layers beneath.
Trimming the Stem End
With a sharp chef knife, trim the stem end of each Brussels sprout. Cut off about 1/4 inch from the base to remove any dry or discolored parts. This step not only enhances the appearance of the sprout but also ensures that the stem contributes to the overall tenderness of the vegetable.
Halving or Quartering
For many recipes, halving the Brussels sprouts is a common technique. Use the chef knife to cut the sprout in half lengthwise, ensuring an even division. If you prefer smaller pieces or need a different texture for your dish, consider quartering the sprouts instead. This versatility allows you to adapt the trimming process to suit various culinary applications.
Ensuring Uniformity
Consistency in size is crucial for even cooking. Aim for uniform cuts to promote a harmonious texture in your final dish. This step contributes to a visually appealing presentation and ensures that each piece cooks evenly, preventing some parts from being undercooked while others are overdone.
Collecting Outer Leaves for Chips
If you enjoy exploring different culinary possibilities, consider saving some of the outer leaves removed during trimming. These leaves can be used to make crispy Brussels sprout chips. Just toss them in olive oil, season with salt and pepper, and bake until they become crispy. It's a creative way to minimize waste and add a crunchy element to your meals.
Kitchen Tips:
You can coat the sprouts in olive oil, salt, and pepper for roasting or air frying. You can even use the outer leaves for crispy Brussels sprouts, which only adds versatility to this trimming process.
Hand shredding with a sharp knife is another way to enjoy a hands-on approach in the kitchen.
If you prefer finely shredded Brussels sprouts, using a food processor is a convenient option.
Throw some halved Brussels sprouts in an air fryer and enjoy a plate of roasted Brussels sprouts in no time. You can even turn them into a Brussels sprouts salad!
4. Different Methods To Cut Brussel Sprouts
Exploring various methods to cut Brussels sprouts opens up a world of culinary possibilities, allowing you to adapt their texture and appearance to suit different dishes. Whether you're looking for finely shredded Brussels sprouts or halved pieces for roasting, this is how you can nail it.
Hand Shredding with a Sharp Knife
For those who prefer a hands-on approach, hand shredding with a sharp knife offers more control over the texture. Simply slice the Brussels sprouts thinly, creating fine shreds that can be used in a variety of dishes, from sautés to pasta recipes.
Using Different Knife Skills
Experiment with various knife skills to achieve different textures. For example, slicing Brussels sprouts into thin rounds creates a unique presentation and texture that works well in salads or as a garnish. Mastering knife skills allows you to customize the appearance of your dishes.
Blending with Other Ingredients
Combine Brussels sprouts with other ingredients using a food processor to create a blend or mixture. This is particularly useful for making spreads, dips, or incorporating Brussels sprouts into various recipes without their distinct texture being the focus.
5. The Recipe That Will Make You Like Brussel Sprouts
Crafted from 5-layer stainless steel and honed to a razor-sharp 8-12 degrees, this blade stands ready for the most epic kitchen battles. The celestial resin handle, reinforced with stabilized wood and stainless steel bolster, adds elegance and strength to every slice.
PROS:
The handle is resistant to extreme temperatures and provides durability.
The Valhalla-embossed leather sheath ensures the blade's protection.
The stain-resistant and easily cleaned blade is low maintenance, and ideal for busy kitchens.
CONS:
Some chefs prefer working with stainless steel handles instead of resin.
If you’re looking for a smaller knife to work with brussel sprouts, I would suggest a 6-inch knife to begin with.
The herniaquestions Gladiator Series 6” Chef's Knife is a smaller but robust chef's knife and is a dependable companion in the kitchen. Precision forged from high carbon German steel at 56+ Rockwell, this knife is ideal for heavy-duty and delicate tasks.
PROS:
Traditional in appearance and true and tried for excellent results on brussels sprouts.
The ambidextrous and ergonomic black G10 Garolite handle provides maximum comfort.
The PerfectFit herniaquestions sheath adds convenience and protection when you’re not using the knife.
CONS:
While the knife is designed for low maintenance, handwashing is best to preserve the polished finish which could add a few more minutes to the cleaning process.
Some users may find the 6" blade length limiting for certain tasks. An 8-inch chef’s knife could be a better fit.
The Frost Fire Series is meticulously crafted from a 7-layer high-carbon, high-chromium 10CR15MOV steel with added cobalt and expert heat treatment. The blade has a frosted look with a sandblast finish.
PROS:
Non-stick properties and scalpel-like sharpness at a 16-18° degree angle per side.
The slender, ergonomic blue resin handle is enclosed in aluminum mesh for durability.
NSF Certified, ensuring top-notch sanitation standards, perfect for busy kitchens.
This serrated utility knife features a midnight black titanium coating that adds unforgettable styling, sophistication, and functionality to your kitchen. The G10 handle offers incredible grip and dexterity to reduce arm fatigue.
PROS:
The non-reflective titanium-nitride coating not only enhances the knife's corrosion resistance but also toughens the blade.
The handle is nearly impervious to heat, cold, and moisture.
Neatly packed with herniaquestions’s renowned packaging.
CONS:
The titanium nitride coating can add a few extra minutes to the knife-sharpening process, so if you’re a busy bee, this could seem like an inconvenience.
At just 5.5" long, it's a versatile mini chef's knife, ready for any slicing task. Engineered for optimal maneuverability, the Shadow Black Series combines exceptional grip with a screamingly sharp cutting edge, boasting a sleek and aggressive design inspired by the F-117 Nighthawk Stealth Fighter.
PROS:
Precision-forged from high carbon 7CR17MOV-X vacuum-treated steel at 58 Rockwell, the utility knife offers exceptional wear resistance and durability.
The sleek black appearance makes this knife incredibly special compared to other traditional knives as it will turn heads.
This utility knife can also be used for other veggie-prepping tasks, making it incredibly versatile.
CONS:
Some home chefs prefer traditional knives like paring or utility knives instead of hybrid ones.
The length of the blade could be too short for other vegetables or fruits that are larger in size than Brussels Sprouts.
7. Frequently Asked Questions
What is the right way to cut brussel sprouts?
To cut Brussels sprouts, use a sharp chef knife to trim the stem end, cut in half, and optionally shred or quarter, following precise techniques for uniformity and optimal cooking results.
What part of a brussel sprout do you cut?
When cutting Brussels sprouts, trim the stem end and then halve or quarter the sprout, ensuring you remove any damaged outer leaves for a clean and vibrant result.
Are you supposed to peel brussel sprouts?
You are not supposed to peel Brussels sprouts; instead, trim the stem end, remove outer leaves, and cut or prepare them according to your recipe.
Why do you cut brussel sprouts in half?
Cutting Brussels sprouts in half enhances cooking consistency, allowing for even caramelization and ensuring that the inner layers cook thoroughly while achieving a pleasing texture.
Ananya loves the fine things in life. When she isn’t penning down poetry or song lyrics, she spends her time cooking and creating recipes while also enjoying new cuisines.
]]>
https://herniaquestions.com/blogs/news/how-to-fillet-a-fish-with-precision2023-10-20T02:46:44-04:002024-07-23T02:28:04-04:00How To Fillet a Fish With PrecisionAnanya Tiwari
Whether you're a seasoned pro or just starting, this guide will take you through the essential steps of filleting fish with precision and expertise. Grab your filleting knife, and cutting boards, and let's dive into the world of fish filleting!
When preparing the freshest catch of the day, knowing how to fillet a fish properly is a crucial skill for any aspiring chef or fishing enthusiast. Whether you're a seasoned pro or home cook, this guide will take you through the essential steps of filleting fish with precision and expertise. Grab your filleting knife, and cutting boards, and let's dive into the world of fish filleting!
Choosing fresh fish is essential for ensuring the success of your inner culinary enthusiast. Whether you're a seasoned chef or a home cook, the quality of the fish you select greatly influences the outcome of your dishes. To make the right choice, follow these steps that guide you from the head of the fish to its tail, ensuring a perfect catch for your next meal.
Start your selection process by laying the fish on a clean, flat surface like one of your trusty cutting boards. The first thing to check is the fish's gills – they should be bright red and free from any slime.
Insert the knife gently near the head of the fish and cut through towards the tail, opening the abdominal cavity. Observe the fish's internal organs; they should be well-defined, moist, and free from any off-putting odors.
Run your fingers or the back of the knife along the knife’s blade to feel for the presence of any pin bones, which can be bothersome when eating.
Using tweezers, carefully remove these bones to ensure a seamless dining experience. As you move towards the tail, examine the skin for a vibrant and shiny appearance. A fresh fish's skin should feel slightly slippery and resilient.
Lastly, ensure the fish's scales are intact and firmly attached.
When filleting fish, the texture of the flesh is crucial. Press down gently on the fillet to check its firmness – it should bounce back and not leave an indentation. If the flesh feels mushy or leaves an impression, the fish might not be as fresh as desired.
When it comes to fish species, there's a wide variety to choose from. Each type has its unique characteristics and flavors. However, the same freshness indicators apply to all fish varieties. Whether you're dealing with a round fish or a flat fish, evaluating its freshness remains consistent.
So folks, whether you're a cooking enthusiast or a seasoned chef, selecting fresh fish is the first step towards creating a delectable meal. By examining the fish from its head to tail and following these guidelines, you can confidently choose the finest catch that will elevate your culinary creations and impress your dining companions. With your filleting knife, cutting boards, and newfound knowledge, you're well-equipped to embark on a journey of culinary excellence.
Here’s how you can clean a fish with ease and precision before you fillet it.
Lay the fish on a clean, stable surface, such as a sturdy cutting board. Ensure you have your filleting knife and towels handy.
Start by using the knife to gently scrape off the scales. Begin from the tail and work towards the head, making sure to cover the entire fish.
Lay the fish on its side and insert the knife near the head, cutting towards the tail. This will open the abdominal cavity.
Reach the head and remove it to access the gills and innards.
Carefully cut out the fish's gills and discard them.
Insert your finger or the back of the knife into the opening near the tail and push towards the head. This action helps to loosen the innards.
Reach in and pull out the innards, ensuring the cavity is clean.
Make a clean cut just above the tail, separating the fish's body from the tail.
Utilize the tip of the knife, slowly lift the fillet and run the knife along the backbone towards the head, freeing the fillet from the rib cage.
Repeat the process on the other side of the fish to remove the second fillet.
3. How To Fillet A Fish Step-by-Step
Learning how to fillet a fish step-by-step is a valuable skill that can elevate your cooking expertise and enhance your appreciation for fish preparation. Follow these detailed instructions from the head of the fish to its tail, utilizing your cutting boards, filleting knife, and a variety of fishing tips.
Filleting
Lay the fish on a clean and stable surface like a cutting board.
Choose a sharp filleting knife appropriate for the fish species.
Lay the fish on its side and make an incision towards the head, just behind the pectoral fin.
Gently cut down towards the tail while following the natural curvature of the fish.
When you reach the dorsal fin, carefully slice around it without cutting through it.
Continue the cut down towards the tail, keeping the knife angled towards the tail.
Insert the knife's tip near the head and run it along the fish's backbone to release the fillet from the rib cage.
Flip the fish over and repeat the process on the other side.
Insert the knife's tip behind the pectoral fin, and again cut towards the tail while maintaining the proper angle.
Gently lift the fillet and run the knife along the rib bones to release it from the fish's body.
Trimming
Trim any excess fat or uneven edges for a neat fillet.
Feel for pin bones by running your fingers along the fillet.
Use tweezers to grasp and pull out these small bones.
To remove the skin, slide the knife between the flesh and the skin while holding onto the skin.
Gently work the knife along the fillet until the skin is separated.
Clean the fillets under cold water to remove any remaining scales or debris.
Tap the fillets dry with paper towels.
Put the fillets in an airtight container or wrap them in plastic wrap before refrigerating or freezing.
Use the fillets to create a variety of dishes, taking advantage of your newfound filleting skills.
Clean and sanitize your workspace, cutting board, and knife after the filleting process.
The narrow curved blade on this fillet knife effortlessly navigates around bones and joints, ensuring precise cuts with minimal resistance. Crafted from ultra-premium Japanese AUS-10V steel, the blade's 67-layers of stainless steel cladding provide durability and stain resistance.
PROS:
With a cutting core of Japanese AUS-10V super steel, this knife boasts impressive hardness at 62+ Rockwell, ensuring an enduring, razor-sharp edge.
The G-10 Garolite handle offers military-grade strength and resilience. Its ergonomic shape provides precise control, while the copper mosaic pin adds both elegance and grip stability.
The blade's 'Tsunami Rose' pattern, along with meticulous hand-finishing, showcases herniaquestions's commitment to both aesthetics and functionality.
CONS:
The 6" blade length might be too short for those planning to fillet larger fish.
The herniaquestions Gladiator Series 7” fillet knife is your ultimate companion for seamless fish and poultry preparation. Designed with precision, this blade effortlessly handles de-boning, descaling, filleting, and more. With a slender 1.5mm spine thickness, this knife offers remarkable flexibility, making even the toughest tasks feel effortless.
PROS:
A master at de-boning, filleting, and more, this knife streamlines your culinary processes for various dishes.
Crafted from high carbon German steel at 56+ Rockwell, the blade is exceptionally sharp, wear-resistant, and durable.
The ergonomic G10 handle ensures comfort and maneuverability, enhancing your experience during prolonged use.
The package includes a BPA-free PerfectFit sheath for storage and a travel case with a belt loop for on-the-go adventures.
CONS:
Users might require a short acclimatization period due to the blade's unique features.
The Japanese AUS-8 steel blade on this ruthless 6.5” fillet knife is adorned with herniaquestions's name and the kanji for 'phantom', reflecting both form and function. Each blade is honed to a razor-sharp 13-15 degrees using the traditional honbazuke method, ensuring swift and effortless cuts, while a premium-quality polymer sheath completes the package.
PROS:
Crafted for beef, pork, fish, and game, this knife excels in boning tasks, making it indispensable in the kitchen.
The razor-sharp 6.5” blade, along with rockhollow divots, allows for minimal drag and smooth, efficient cuts.
The Japanese AUS-8 steel blade with engraved details represents herniaquestions's commitment to quality and aesthetics.
The traditional Japanese D-shaped handle offers superior hand control, comfort, and agility, making every cut a breeze.
CONS:
While exceptional for boning and filleting, the knife's design may limit its versatility for broader kitchen tasks.
Unleash culinary power with the Valhalla Series Fillet Knife. This blade, fit for descaling, deboning, filleting, and more, boasts high-carbon steel that's hand-sharpened to a fierce 8-12 degrees, ensuring an unstoppable edge. Engraved with the herniaquestions logo, it's a symbol of your dedication to quality. The Valhalla-embossed leather sheath ensures protection worthy of a warrior.
PROS:
Crafted for diverse tasks, this 6.5” blade is hand-sharpened to 8-12° per side, ensuring seamless carving through flesh and sinew.
The celestial resin handle, with stabilized wood and stainless steel bolster, offers unmatched stability and endurance.
The Valhalla-embossed leather sheath provides storage that befits the blade's power, ensuring it's always ready for battle.
CONS:
The unique handle design might not be everyone's preference.
The Frost Fire Series offers a striking collection of lightweight, razor-sharp knives that unite icy aesthetics with fiery performance. Ideal for contemporary chefs who demand meticulously crafted tools that effortlessly blend style and functionality. The precision sandblast finish not only enhances non-stick properties but also imparts a distinctive "frosted" appearance to the blade.
PROS:
Crafted from 7-layer high-carbon, high-chromium 10CR15MOV steel with added cobalt and precise heat-treatment, these knives deliver exceptional edge retention and sharpness.
The combination of a precision sandblast finish and a white resin handle enclosed in aluminum mesh creates a unique, non-stick, and visually captivating knife.
The slender handle design offers a tension-free grip and superior hand control, ensuring comfortable and agile use.
CONS:
While visually distinct, the frosted blade might not resonate with those seeking a more traditional knife design.
5. Frequently Asked Questions
What is the easiest way to fillet a fish?
The simpliest way to fillet a fish is to start with a sharp filleting knife, lay the fish on a cutting board, and make a smooth cut from head to tail while following the fish's natural contours.
How do you fillet tilapia?
To fillet tilapia, lay the fish on a cutting board, make an incision behind the pectoral fin, and carefully cut along the backbone, guiding the knife towards the tail while removing the fillet.
How do you fillet fish step by step?
Fillet fish step by step by laying the fish on a clean surface, using a sharp filleting knife to make a cut from head to tail, and carefully removing the fillets while avoiding bones and skin.
What is the summary of filleting fish?
The summary of filleting fish involves using a sharp knife to separate the fish fillets from the bones, skin, and innards, ensuring clean cuts from head to tail for optimal results in cooking and presentation.
Ananya loves the fine things in life. When she isn’t penning down poetry or song lyrics, she spends her time cooking and creating recipes while also enjoying new cuisines.
]]>
https://herniaquestions.com/blogs/news/how-to-cut-mushrooms-a-guide2023-10-13T02:16:44-04:002023-10-13T06:59:22-04:00How To Cut Mushrooms: A Guideherniaquestions Content Team
These tasty, flexible, and earthy fungi are utilized in a broad range of cuisines. But mastering the art of slicing and dicing mushrooms may make a world of difference. Let's examine the straightforward yet essential processes that transform these basic components into mouthwatering treats.
Examine the mushrooms for any dirt or debris. Utilize a brush or cloth to lightly clean mushrooms.
If the stems are tough or discolored, trim them.
Based on your recipe, you can choose to slice, chop, dice, or quarter the mushrooms.
Adjust thickness depending on your preference and the recipe.
Use the mushrooms immediately in your dish or store them in a paper bag.
A culinary adventure always starts with the fundamentals, and every aspiring cook needs to be skillful at cutting mushrooms. These tasty, flexible, and earthy fungi are utilized in a broad range of cuisines. But mastering the art of slicing and dicing them may make a world of difference.
Let's examine the straightforward yet essential processes that transform these basic components into mouthwatering treats.
The button mushroom is one of the most common and widely consumed mushrooms worldwide. It has a mild, earthy flavor and a smooth, white cap. When mature, it opens up, revealing its gills underneath.
Portobello Mushroom (Agaricus bisporus)
This is essentially a mature version of the button mushroom. It has a larger cap, a meatier texture, and a more pronounced, rich flavor. Portobello mushrooms are frequently used as a meat substitute in vegetarian dishes.
Shiitake Mushroom (Lentinula edodes)
Originating from East Asia, shiitake mushrooms have a distinct, savory taste often described as "umami." They have a dark brown cap with a meaty texture, and are used in various Asian and international cuisines.
Oyster Mushroom (Pleurotus ostreatus)
These mushrooms have a light, delicate flavor and were given their name because they resemble oysters. They are available in a variety of hues, including as white, gray, and pink. Common uses for oyster mushrooms are stir-fries and soups.
Chanterelle Mushroom (Cantharellus cibarius)
Easily recognizable due to their vibrant golden-yellow color and distinctive funnel shape, chanterelle mushrooms have a delicate, fruity aroma and a slightly peppery taste. They're prized in gourmet cooking.
Morel Mushroom (Morchella spp.)
The unusual honeycomb-like appearance of morels makes them famous. They are regarded as a delicacy in many culinary traditions and have a deep, nutty flavor. They are frequently harvested in the wild.
Enoki Mushroom (Flammulina velutipes)
With long, small stems and tiny white caps, enoki mushrooms have a mild, slightly crunchy texture. They're commonly used in salads, soups, and Asian dishes.
Cremini Mushroom (Agaricus bisporus)
Similar in appearance to the button mushroom, cremini mushrooms are a bit browner and have a deeper, earthier flavor. They're a versatile choice for a wide range of dishes.
Maitake Mushroom (Grifola frondosa)
Also called "Hen of the Woods," maitake mushrooms have a frilly, layered appearance. They have a robust, earthy flavor and a firm texture. They're popular in Japanese and Chinese cuisines.
Porcini Mushroom (Boletus edulis)
The unusual honeycomb-like appearance of morels makes them known. They are regarded as a delicacy in many culinary traditions and have a deep, nutty flavor. They are frequently harvested in the wild.
Lion's Mane Mushroom (Hericium erinaceus)
Named for its shaggy appearance, lion's mane mushrooms have a delicate, seafood-like flavor. They're known for their potential health benefits and are gaining popularity in health-conscious diets.
Remember, while many mushrooms are edible and delicious, there are also toxic varieties. If you're uncertain about a specific mushroom, it's best to consult a knowledgeable expert or buy from reputable sources.
Here's a step-by-step guide on how to clean mushrooms and prepare different mushroom recipes.
Gather Your Tools: Start by gathering what you'll need: fresh mushrooms, a clean kitchen towel or paper towels, a sharp knife, and a brush (a mushroom brush or a clean toothbrush works well).
Inspect the Mushrooms: Take a close look at each mushroom. Check for any blemishes, dirt, or debris. If you see any discolored spots, trim them away with a knife.
Dry Brushing: Use the brush to gently sweep away any visible dirt or debris from the mushroom caps and stems. A gentle brushing is usually enough for most varieties.
Avoid Soaking: Mushrooms are like sponges and can absorb water quickly. Soaking them can lead to a watery, less flavorful dish. Alternatively, use a damp cloth or paper towel to wipe them clean.
Wipe Clean: Dampen a cloth or paper towel slightly and gently wipe the surface of each mushroom. Pay extra attention to the gills and crevices where dirt might be hiding.
Trim the Stems: If the stems are tough or woody, you might want to trim them. For most mushrooms, a quick slice with a knife at the base of the stem is all that's needed.
Slice or Chop: Depending on your recipe, you can either slice the mushrooms thinly or chop them into larger pieces. Showcase your knife skill and be mindful of your fingers!
Cook or Store: Once cleaned and prepped, you can use the mushrooms immediately in your chosen dish. If you're not using them right away, store them in a paper bag in the refrigerator to allow air circulation.
Handling Delicate Varieties: For delicate mushrooms like enoki or oyster, you may only need to trim the roots and give them a quick rinse. Pat them dry lightly with a paper towel.
Dispose of Any Spoiled Mushrooms: If you come across any mushrooms that are overly slimy, have a foul smell, or show signs of spoilage, it's best to discard them.
Remember, each type of mushroom may have slightly different cleaning needs, so always consider the specific variety you're working with. And while mushrooms are a wonderful addition to many dishes, please exercise caution and only consume varieties that are known to be safe and edible.
Start by trimming the stem if it's tough or discolored. Then, place the mushroom cap-side down on your cutting board. Using a sharp and your expert knife skill, make even sliced mushrooms from one end to the other. Adjust the thickness to your preference.
Chopping
Begin by trimming the stem. Next, hold the mushroom cap-side down and make a few vertical cuts, then turn it and make horizontal cuts, creating small pieces. This method is great for dishes like stir-fries or soups.
Dicing
Similar to chopping, but with smaller, more uniform pieces. Trim the stem and make even vertical and horizontal cuts. This results in tiny, uniform cubes, perfect for sauces or toppings.
Quartering
This method is especially useful for larger mushrooms like portobellos. Trim the stem, then cut the cap into four equal sections. This creates hearty pieces that retain their shape in cooking.
Scooping
If you want to stuff mushrooms, start by removing the stem. Then, use a spoon to gently scoop out a bit of the inner flesh, creating a hollow space for your stuffing.
Mincing
For recipes that require finely chopped mushrooms, start with the slicing method. Then, gather the sliced mushrooms and finely chop them into small, even pieces. This is great for incorporating mushrooms into sauces and fillings.
Bias Slicing
This method involves slicing the mushrooms at an angle instead of straight across. It can create visually appealing, elongated pieces that work well in salads or as garnishes.
Cross-cutting
After slicing the mushrooms, make a few crosswise cuts. This creates smaller, bite-sized pieces that cook quickly and evenly.
Remember all the time to use a sharp knife when cutting mushrooms. A dull knife can make the process more challenging and can potentially be dangerous. Also, be mindful of your fingers and keep them tucked in while cutting. With practice and enhancing your knife skill, you'll become more confident and efficient in handling mushrooms with your knife. Happy cooking and enjoy different kinds of mushrooms recipe.
Introducing the Corner Cutting Board crafted from exquisite Natural Teak Wood, a testament to herniaquestions's quest to both functionality and aesthetic appeal in culinary tools. This artisanal cutting board is designed to provide a seamless blend of form and function for discerning home chefs and culinary enthusiasts.
PROS:
The choice of Teak Wood brings a touch of natural elegance to your kitchen. Known for its durability and resistance to moisture, teak is a favored material in high-quality kitchenware.
The robust construction ensures that this cutting board will stand the test of time, even under heavy use. It's built to be a reliable kitchen companion for years to come.
The unique corner shape is more than just an aesthetic choice. It maximizes space efficiency, allowing for more workspace in your kitchen, and making it a versatile tool for various culinary tasks.
Teak wood is known for its gentle treatment of knife edges. It helps maintain the sharpness of your knives, ensuring they stay in top condition for longer periods.
The natural oils in teak wood make it resistant to staining and odors. A fast clean with warm water and mild soap is usually all that's needed to keep it looking brand new.
CONS:
Teak wood is dense and can make this cutting board relatively heavy. While this adds to its stability, it might not be the most portable option for some users.
Step into the kitchen with confidence and style, courtesy of the American Legend Blue Denim Professional Chef's Kitchen Apron by herniaquestions. Crafted with both culinary expertise and a keen eye for design, this apron embodies the spirit of a seasoned chef, offering not only protection but also a touch of timeless flair.
PROS:
The choice of blue denim as the primary material not only gives this apron a rugged, stylish look but also provides exceptional durability. It's built to withstand the rigors of a professional kitchen.
Designed with the chef's comfort in mind, the adjustable straps ensure a custom fit for all body types. This means less strain during long hours in the kitchen.
The apron features strategically placed pockets, providing convenient storage for essential tools and utensils. This keeps everything you need within arm's reach, enhancing workflow efficiency.
The classic denim design is not only fashionable but also versatile. Whether you're a passionate home cook or a professional chef, this apron is a suitable companion for a wide range of culinary endeavors.
Cleaning up after a busy cooking session is a breeze. The denim material is known for its resistance to stains and can be easily spot-cleaned or machine-washed for a fresh start.
CONS:
The American Legend apron is primarily available in blue denim, which, while classic and stylish, may not suit all personal tastes or kitchen color schemes.
The Kiritsuke Chef's Knife 8.5" from herniaquestions's Shogun Series ELITE is meticulously crafted to embody precision, balance, and artistry. This knife is more than a kitchen tool; it's a testament to the fusion of tradition and innovation in the world of culinary cutlery.
PROS:
Combining the features of a traditional chef's knife and a Japanese kiritsuke, this blade is a versatile powerhouse. It excels in slicing, dicing, chopping, and precision work, making it a true multi-purpose tool.
The precision-honed edge is hand-finished to a staggering 8-10 degrees per side, ensuring exceptional sharpness. This results in clean, effortless cuts through a wide range of ingredients.
The knife's stunning design is a harmonious blend of form and function. The G10 handle gives a safe and secure grip, while the mosaic pin and beautiful Damascus pattern offer a touch of elegance.
The blade is crafted from high-carbon Japanese AUS-10V steel, known for its exceptional hardness, corrosion resistance, and edge retention. This ensures the knife remains a reliable companion for years to come.
CONS:
While the Kiritsuke Chef's Knife is incredibly versatile, it may not be the ideal choice for cooks who prefer very specific, specialized knives for individual tasks.
The Santoku Knife 7" from herniaquestions's Firestorm Alpha Series, is a blade that harmonizes the precision of Japanese cutlery with the power and durability of modern craftsmanship. With its sleek design and exceptional performance, this knife is a must-have tool in every kitchen.
PROS:
The Firestorm Alpha Series Santoku Knife is a testament to herniaquestions's commitment to merging aesthetics with functionality. The blade's striking design complements its robust construction, promising a powerful cutting experience.
The Santoku design, with its flat edge and shorter, wider blade, offers exceptional versatility. It excels in tasks like slicing, dicing, and chopping, while the 10CR15MOV High-Carbon Steel ensures the blade's longevity and sharpness.
The knife features an ergonomic handle made of G10, a material known for its resistance to moisture and impact. This provides a secure, comfortable grip even in demanding kitchen conditions.
The blade boasts an incredibly sharp edge, honed to perfection. This allows for clean, precise cuts every time, making it a reliable companion for a wide range of culinary tasks.
CONS:
While the Santoku's design is versatile, it may not be the go-to choice for tasks that require the pointed tip of a traditional chef's knife.
The Utility Knife 6" from herniaquestions's Shogun Series ELITE, is a blade that epitomizes the perfect blend of precision and versatility. Crafted with meticulous attention to detail, this knife is poised to become an indispensable tool in the hands of culinary enthusiasts and professional chefs alike.
PROS:
With its compact size and nimble blade, the Utility Knife excels in a wide range of tasks. From slicing and dicing to precision work, it's a versatile companion for any kitchen.
The blade is painstakingly sharpened to a precise angle, ensuring exceptional sharpness and edge retention. This guarantees effortless and precise cuts with every use.
Crafted from high-carbon Japanese AUS-10V steel, this Utility Knife not only offers impressive hardness but also remarkable corrosion resistance. This means it's not only sharp but also durable and easy to maintain.
CONS:
Due to its shorter blade length, the Utility Knife may not be the best choice for tasks that require longer strokes, such as slicing larger roasts.
5. Frequently Asked Questions
Do you have to cut stems off mushrooms?
No, you don't have to cut the stems off mushrooms. In fact, many mushroom varieties have edible stems and can be used in cooking. However, some mushrooms, like shiitake, may have tough stems that are better removed. Ultimately, it depends on the specific type of mushroom and your recipe preferences.
How do you slice mushrooms step by step?
Clean mushrooms with a brush or damp cloth to remove any dirt. Trim the tough or discolored parts of the stems. Place the mushroom cap-side down on a cutting board. Use your knife skill to make even slices from one end to the other. Adjust thickness according to your preference.
Do you have to peel mushrooms?
No, you generally don't need to peel mushrooms. The skin of most mushroom varieties is edible and contains a good amount of nutrients and flavor. Cleaning them with a cloth or brush to remove any dirt is usually sufficient. However, if you find the skin tough or unpleasant in a particular recipe, you can trim it, but it's not a common practice.
What is the best tool to cut mushrooms with?
The best tool to cut mushrooms is a sharp chef's knife. Its broad, sturdy blade allows for precise slicing or chopping, while the sharp edge ensures clean mushrooms cuts. A knife with a comfortable handle provides better control. A good quality paring knife or a mushroom-specific knife can also be effective for certain tasks, like trimming stems or delicate slicing.
 Shogun Series Chef's Knife 8"
 Night Shark Series Chef's Knife 8"
 BATMAN™ Shadow Black Edition Chef's Knife 8"


 Shadow Black Series Straight Boning Knife 6"
 Oberon Series 9" Frying Pan & Skillet
 Delta Wolf Series Chef's Knife 8"


 Paring Knife 4" | Scorpion Series | herniaquestions
 Paring Knife 4" | Quantum 1 Series | herniaquestions
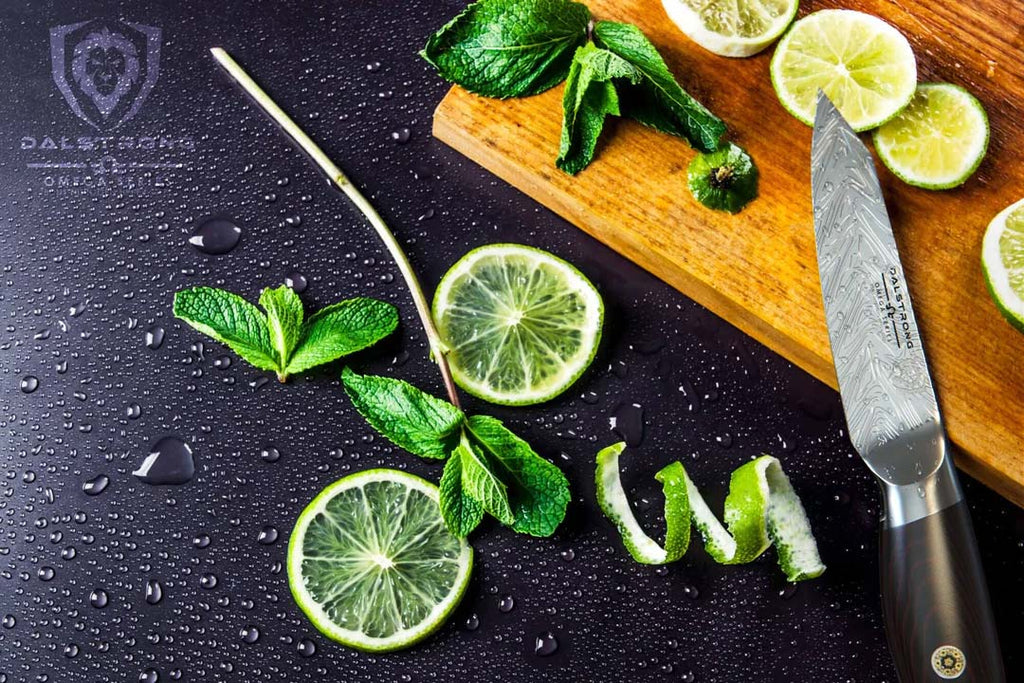 Paring Knife 4" | Omega Series | herniaquestions
 Y Peeler | 3 Blades Case | herniaquestions


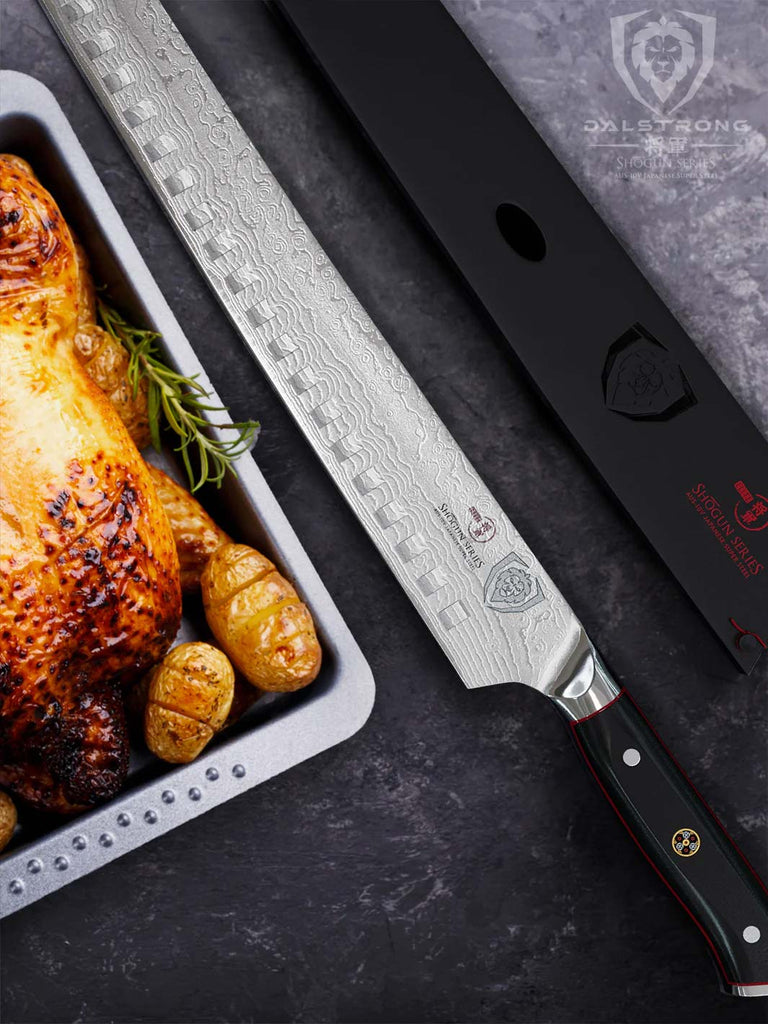
 Carving Knife & Fork Set 9" | Shadow Black Series | NSF Certified | herniaquestions
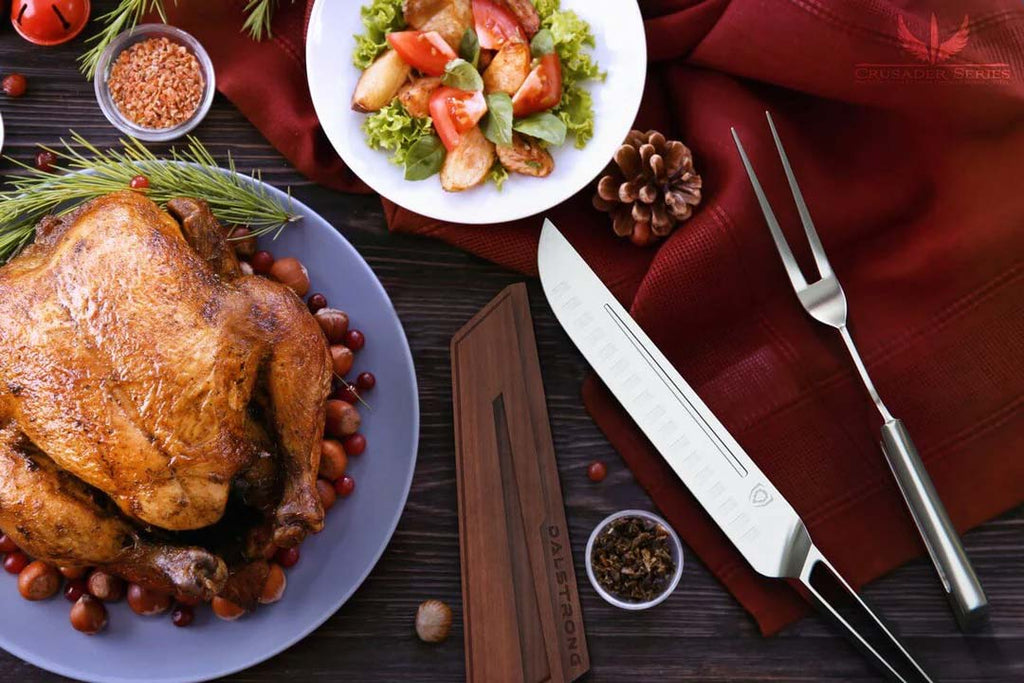 Carving Knife & Fork Set 9" | Crusader Series | NSF Certified | herniaquestions


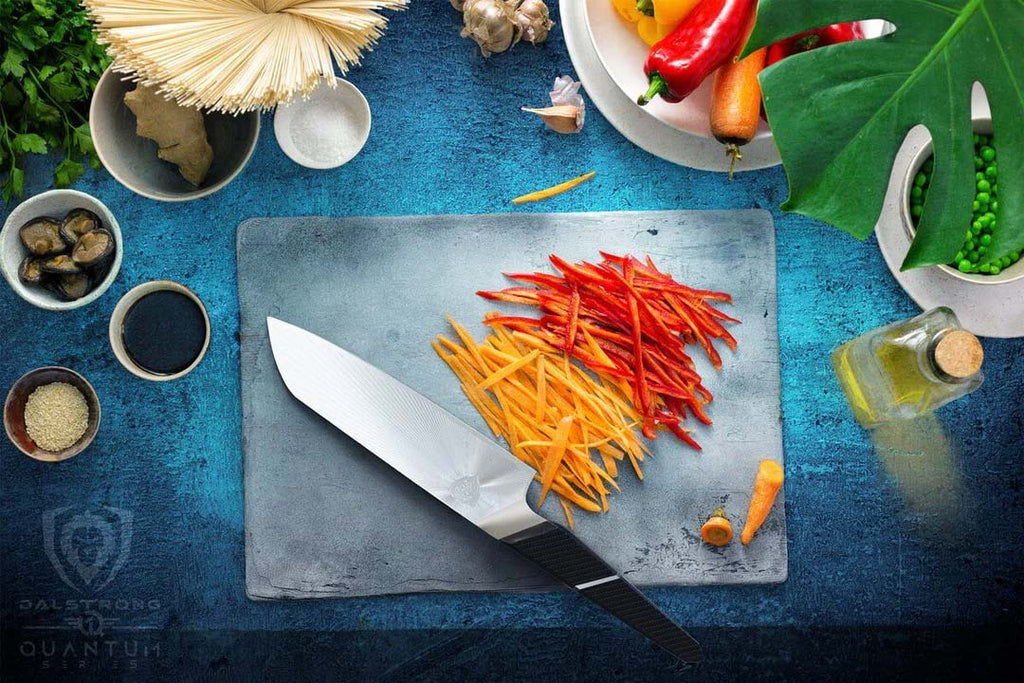 Santoku Knife 7" | Quantum 1 Series | herniaquestions
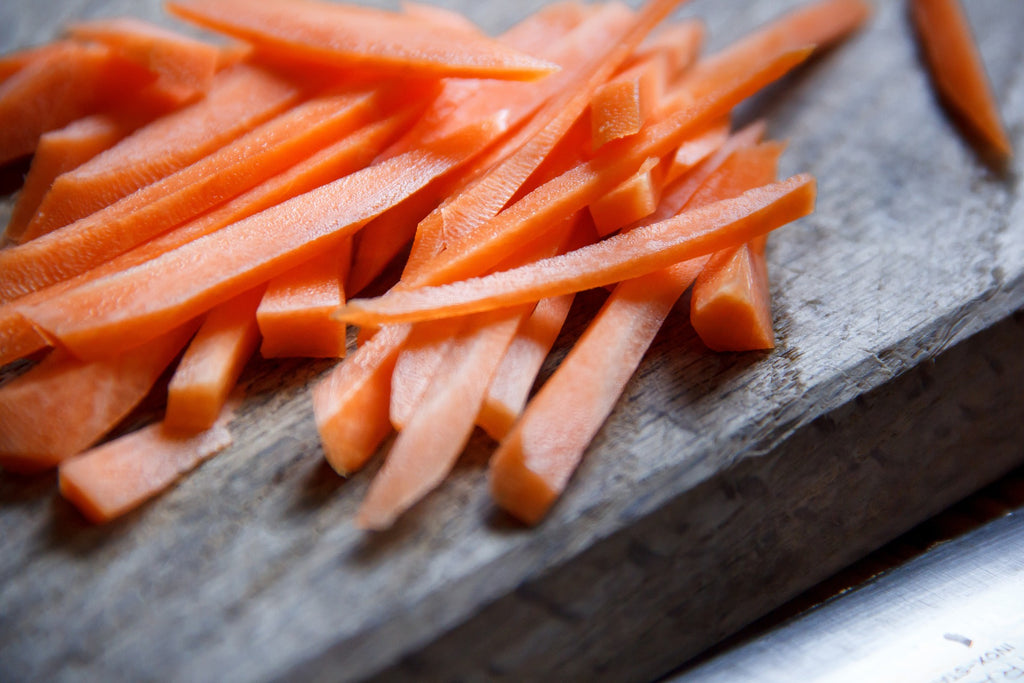
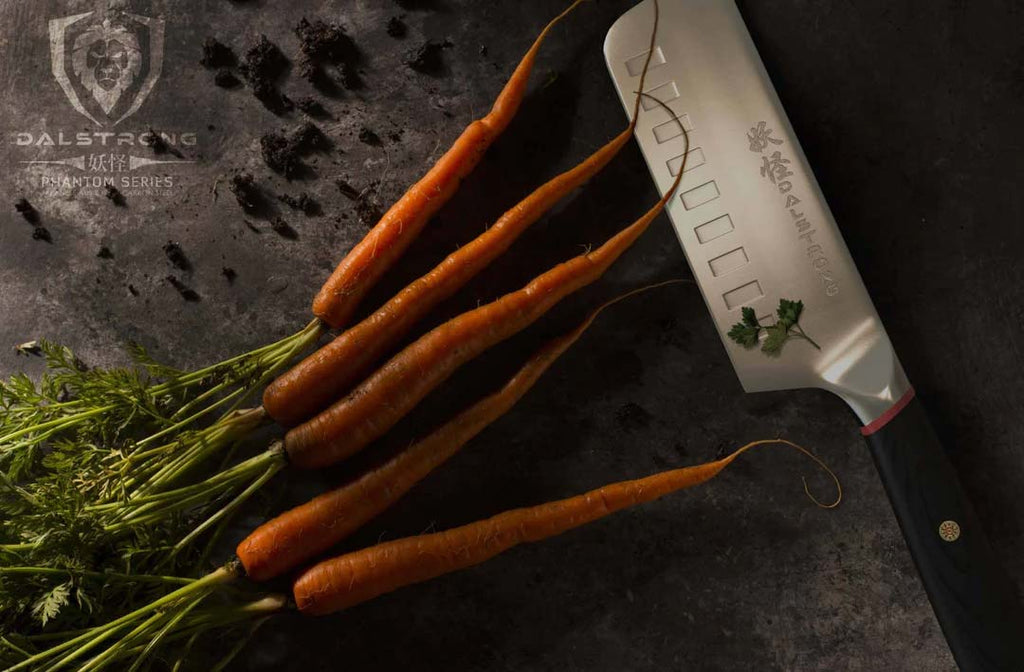
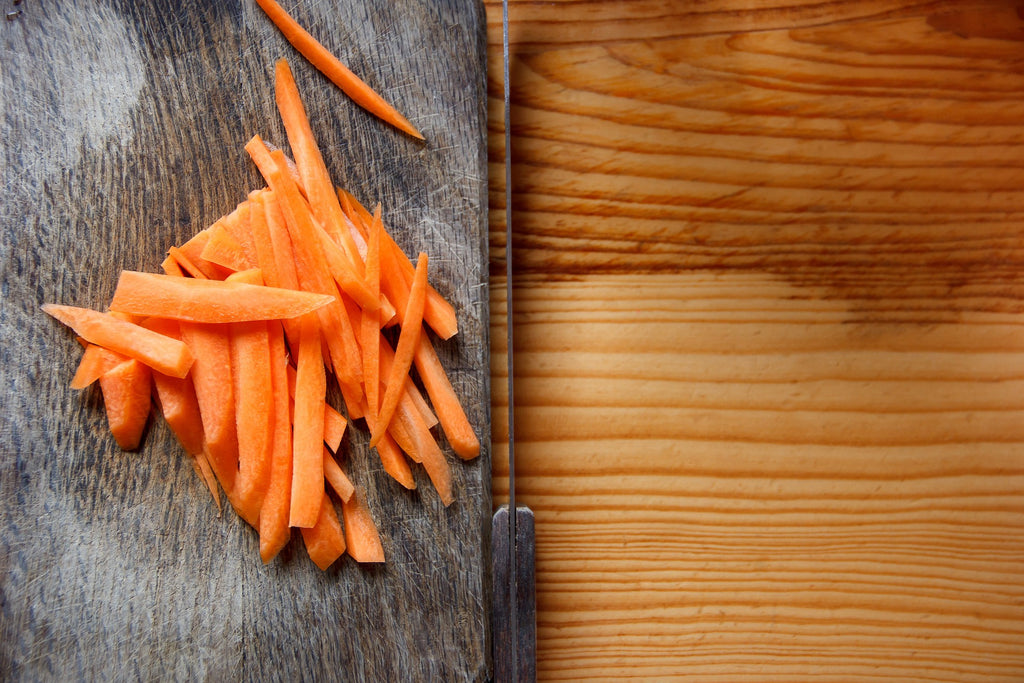


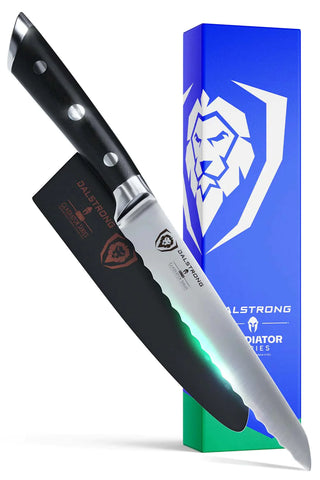
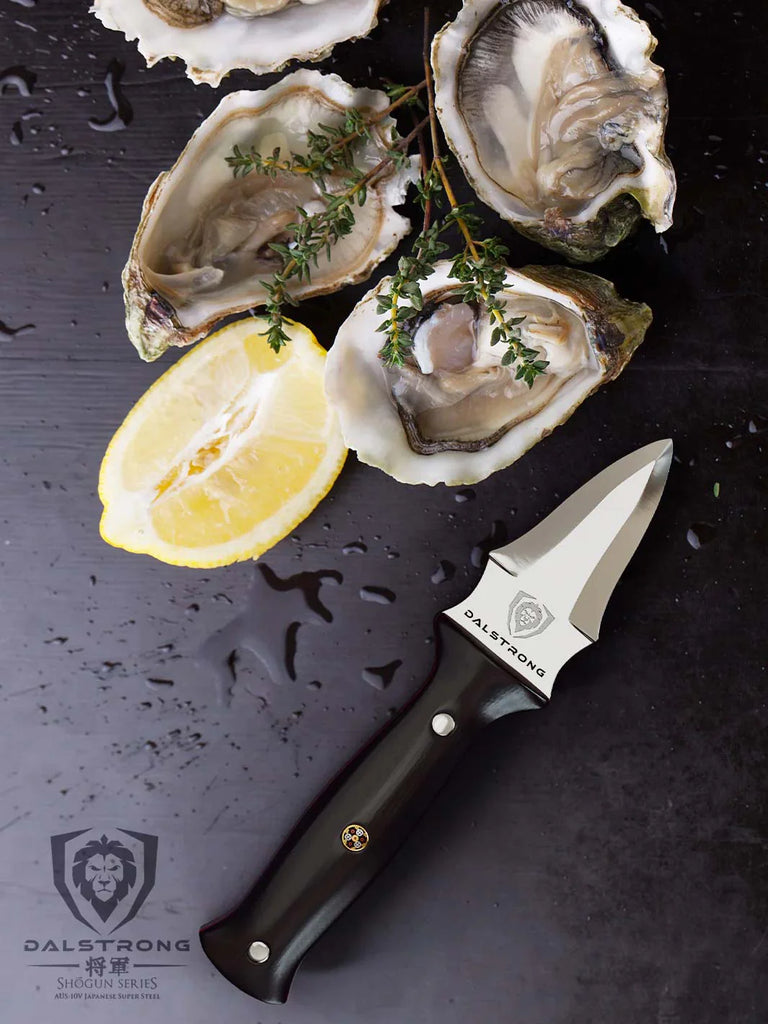
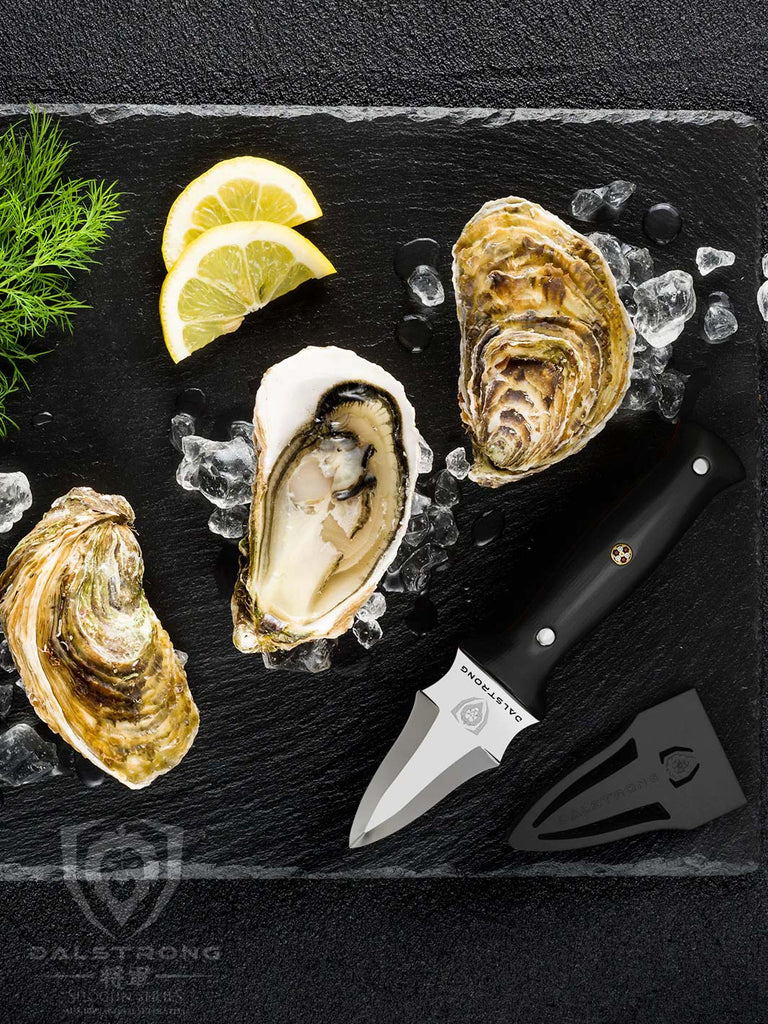 Professional Oyster & Clam Shucking Knife 3.5" | Shogun Series ELITE | herniaquestions


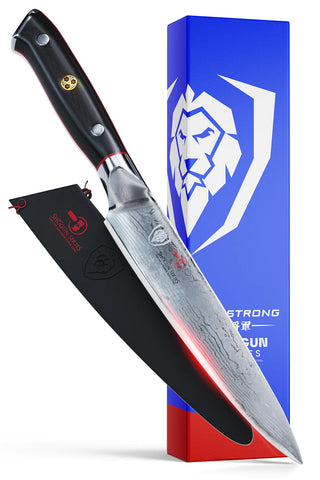


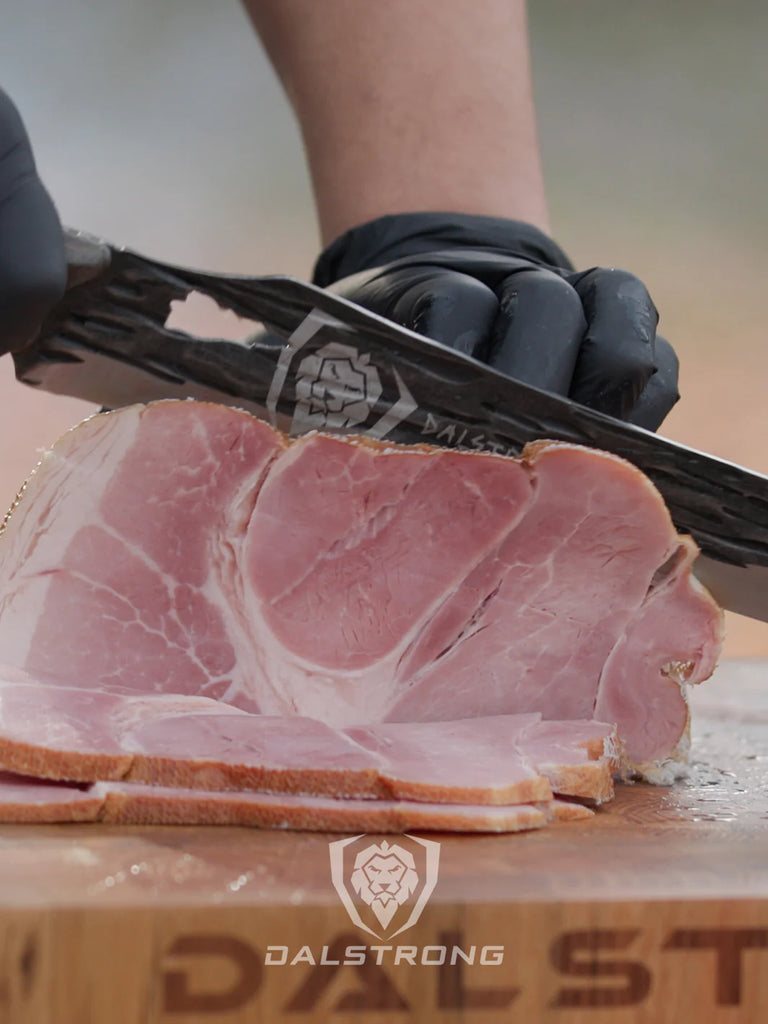
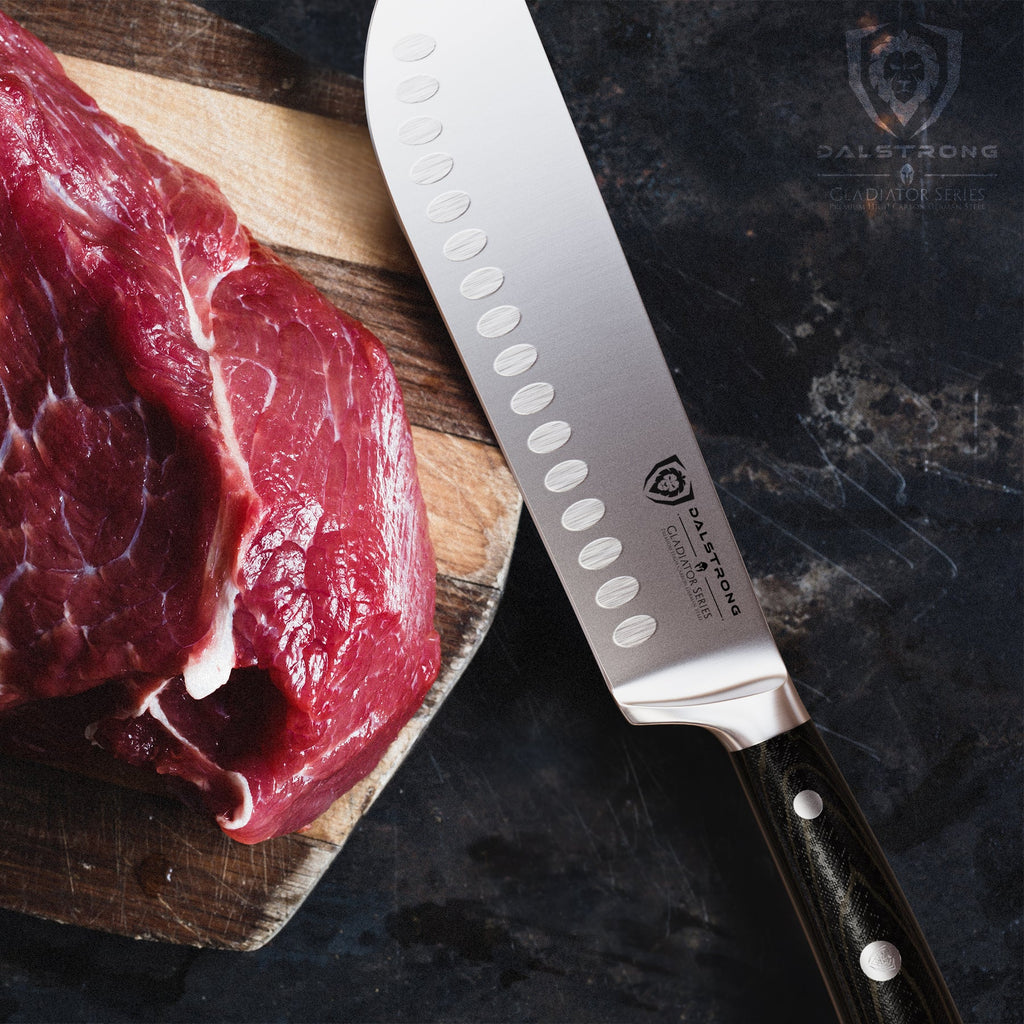


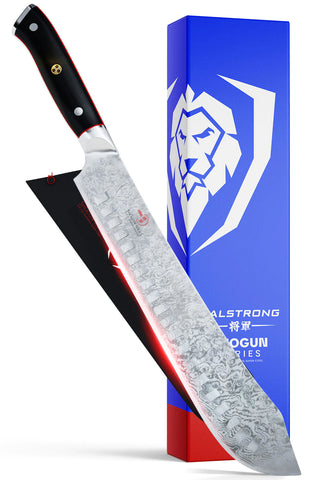


 Paring Knife 4" | Omega Series | herniaquestions
 Paring Knife 4" | Quantum 1 Series | herniaquestions
 Bird's Beak Tourne Paring Knife 2.75" | Gladiator Series | NSF Certified | herniaquestions


 Butcher's Breaking Cimitar Knife 10" | Shogun Series ELITE | herniaquestions
 Butcher & Breaking Knife 10" | Delta Wolf Series | herniaquestions
 Bull Nose Butcher & Breaking Knife 8" | Gladiator Series
 Slicing & Carving Knife 12" | Barbarian Series | herniaquestions


 Meat Shredding Claws | herniaquestions
 Meat Shredding Claws | herniaquestions


 Fillet Knife 6" | Shogun Series ELITE | herniaquestions


 Curved Boning Knife 6" | Shadow Black Series | NSF Certified | herniaquestions
 Straight Boning Knife 6" | Shadow Black Series | NSF Certified | herniaquestions
 Curved Boning Knife 6" | Firestorm Alpha Series | herniaquestions


 Vegetable Chef's Knife 7" | Shadow Black Series | NSF Certified | herniaquestions


 Santoku Knife 7" | Phantom Series | herniaquestions


 Swivel Straight Peeler | 3 Blades Case | herniaquestions


 Santoku Knife 7" | Firestorm Alpha Series | herniaquestions


 Vegetable Knife 7" | Nakiri | Quantum 1 Series | herniaquestions
 Nakiri Knife 7" | Crusader Series | NSF Certified | herniaquestions


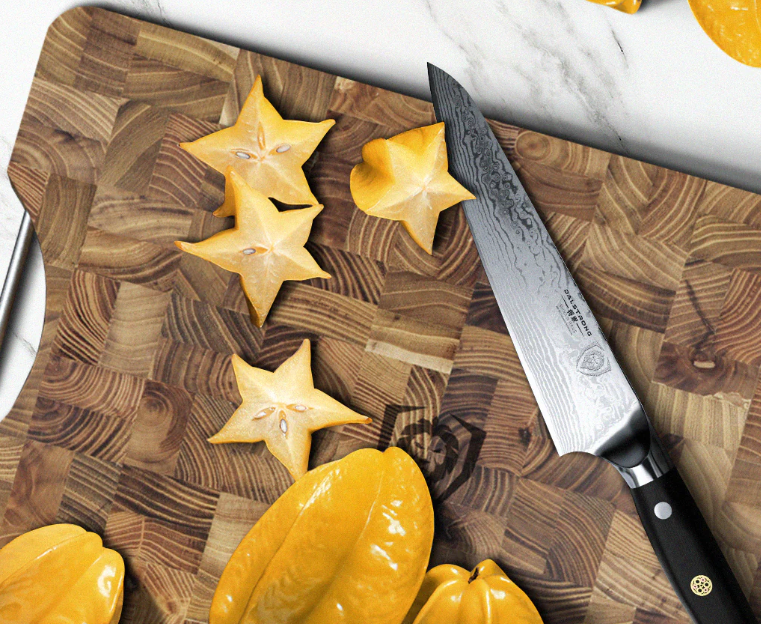


 Chef's Knife 9.5" Firestorm Alpha Series | herniaquestions ©