https://herniaquestions.com/blogs/news.atomherniaquestions - Chef Blog2024-09-17T22:10:54-04:00herniaquestionshttps://herniaquestions.com/blogs/news/how-to-clean-a-skillet-step-by-step2023-05-01T06:52:46-04:002023-08-30T03:25:00-04:00How To Clean A Skillet In 5 Easy Stepsherniaquestions Content Team
The skillet has become a favorite in the kitchen. They're durable, strong and have been around for generations. Find out today how to clean it properly in 4 easy steps.
Quick Overview: How To Clean A Skillet Step-by-Step
Let the skillet cool down completely. It's important not to start cleaning the skillet after cooking as it can damage the surface.
Clean the stainless steel skillet with hot or warm water to take out food particles, stuckon bits, or loose debris. Use a soft scrubbing brush to take off any stains.
Place a small quantity of dish soap on a cloth or soft sponge, and use it to scrub the skillet. You may also use any stainless steel cleaner or a water and baking soda mixture. Make sure to clean your skillet in and out.
Wash the skillet with hot water, and dry the pan with a clean paper towel. It's important to dry the skillet completely to prevent any stains from forming or water spots.
Store the skillet in a cool place, away from any heat. You can also use a thin layer of vegetable oil, olive oil, or any neutral oil on the skillet's surface to stop discoloration and remove rust.
The skillet has become a favorite in the kitchen. They're durable, strong and have been around for generations. What's not to love? Cleaning your skillet doesn't have to be a bad dream. Knowing how to clean a skillet correctly is vital to its durability and everyday performance. Now let's learn how to clean a skillet step by step.
Before you start, check the manufacturer's instructions for specific cleaning and care tips. Even though most types of cookware are marketed as dishwasher-safe, hand-washing is commonly the best way to clean skillets, nonstick pans, cast iron pan, and other cookware sets. Always let your pan cool down before cleaning. Don't use oven cleaners, abrasive tools, or harsh cleaners such as bleach, as these will permanently damage the surface.
To clean a skillet, you will need the following items:
Hot water
Hot water is vital for rinsing off loose debris or stuckon food from the skillet.
Dish soap
A small amount of dish soap will help to remove any stubborn stains or grease from the skillet.
Soft sponge or cloth
Use a cloth or soft sponge to scrub the skillet. Don't use abrasive sponges, metal scrubbers, or steel wool, as these can deteriorate and damage the surface of the skillet.
Stainless steel cleaner (optional)
You can use a stainless steel cleaner if there are any stubborn burnt-on food or stains that are unlikely to come off by washing.
Baking soda (optional)
Baking soda is a substitute for stainless steel cleaner. Blend a small amount with water to form a paste, and use it to scrub the stainless steel skillet.
Towels
Use clean paper towels to dry the skillet after cleaning.
Vegetable oil (optional)
Use a thin layer of oil (such as flaxseed oil, olive oil, neutral oil, and other cooking oils) on the cooking surface of the skillet after cleaning. This can help to stop the skillet from rusting and discoloration.
Proper cleaning and care of your skillet and other cookware sets is an integral part of ensuring that it functions appropriately and appears like brand new. Just like cleaning a cast iron pan and nonstick pans, cleaning a skillet is also just as intimidating at first but you'll find out how easy it can be with just a few steps. Here are the steps to follow in maintaining your skillet:
Let the skillet cool down completely. It's important not to start cleaning the skillet after cooking as it can damage the surface.
Clean the stainless steel skillet with hot or warm water to take out food particles, stuckon bits, or loose debris. Use a soft scrubbing brush to take off any stains.
Place a small quantity of dish soap on a cloth or soft sponge, and use it to scrub the skillet. You may also use any stainless steel cleaner or a water and baking soda mixture. Make sure to clean your skillet in and out.
Wash the skillet with hot water, and dry the pan with a clean paper towel. It's important to dry the skillet completely to prevent any stains from forming or water spots.
Store the skillet in a cool place, away from any heat. You can also use a thin layer of vegetable oil, olive oil, or any neutral oil on the skillet's surface to stop discoloration and remove rust.
Follow these steps to keep your stainless steel skillet performing and looking its best for many years.
4. General Care And Tips For Your Skillet And Other Cookware
Here are some popular tips on how to take care of your skillet and other cookware:
Seasoning
To stop food from sticking to your skillet, just like when you season cast iron, you can also season your skillet with a thin layer of vegetable oil. Heat the skillet over medium or low heat, then wipe it with a clean paper towel coated with vegetable oil. Repeat the process until the skillet is fully coated. This will create a non-stick surface and help to stop it from rusting. Learn more about how to season a stainless steel pan here.
Preheating
Always preheat your stainless steel skillet before using it. This will help stop food from sticking to the surface and ensure even cooking.
Low to medium heat
Stainless steel skillet is designed to heat evenly and retain heat, so don't use high heat settings. Instead, use low heat to stop warping or damage to the skillet.
Avoid using metal utensils
Abrasive tools can scratch the surface of your stainless steel skillet, so use silicone or wooden utensils (like a wooden spatula or wooden spoon) instead.
Hand wash
Don't use a dishwasher to clean your skillet. Hand wash the skillet with a cloth or soft sponge, and avoid using steel wool, chainmail scrubber, or any abrasive sponge.
Dry completely
After cleaning your stainless steel skillet, dry the pan completely to stop any water spots or stains from forming on the surface.
Store properly
Keep your stainless steel skillet in a cool place, away from any heat. Don't stack the skillet on top of each other, as this can scratch the surface.
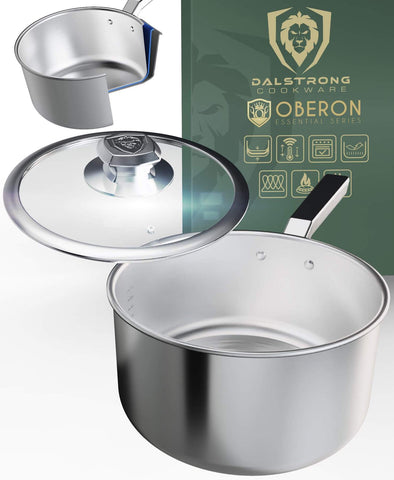
The herniaquestions Eterna non-stick Oberon series helps you create magic in your kitchen. This 3-ply aluminum cookware can evenly cook from thick meat to delicate omelets. The Oberon series uses cladding technology to combine extra thick gauge layers of nonreactive 18/10 stainless steel that shine at browning. The Eterna non-stick coating is a breakthrough in non-stick technology that will last longer than ordinary non-stick coatings and can maintain its non-stick property longer due to its extra thick 35 micrometers coating.
PROS:
Compatible with gas, electric, and induction cooktops.
Refrigerator and freezer safe.
4mm thick and extra-strong.
Perfect-fitting tempered glass lid.
Unbeatable price-quality.
CONS:
Other people may need bigger nonstick pans in their kitchen.
This high-performing, ultra-functional, and medium-weight cookware with upper-class and made in the USA. Compared to other non-stick, Oberon Eterna has been examined to last 26 times in the dry test than the leading competitor brand and over ten times than the premium non-stick tested.
PROS:
Elegant, luxurious design, sober.
Limited lifetime warranty on defects.
Perfect handle for a comfortable and secure grip.
Goes with a padded pan protector and a carrying bag for the best care.
3-Ply aluminum core combined with 18/10 stainless steel.
CONS:
The shape of the handle may not be for everyone's liking.
The medium-weight skillet may not feel different to some people who are used to lighter skillets.
The herniaquestions Oberon series is a non-reactive 18/10 stainless steel that excels at braising and browning foods and prolongs the pan's life, making it much more durable. Every chef should own a quality pan like this, beautiful and built to last a lifetime.
PROS:
3-Ply aluminum core plus thick layers of stainless steel.
Made to last and resist all your kitchen ventures.
Thick and strong cookware that withstands heat.
The lid is vast and has a hole to release pressure and prevent food from spilling.
Coated with aluminum rivets will never break or lose.
CONS:
A high-quality pan like this is an investment. I would suggest getting one if you are willing to give it proper maintenance and care to avoid frustration.
Not everyone's pocket is ready for this. A bigger size influences the price.
This frying pan and skillet is an eye-catcher that communicates performance and luxury. This cookware is suitable for all stovetops. Broiler and dutch ovens are safe up to 600 degrees F. The cookware is also dishwasher, freezer, and refrigerator safe.
PROS:
Guaranteed for your stir-frying.
Layers of satin polish enhance scratch resistance and smoothness.
4mm tempered glass that provides a clear window during the cooking process for a precise cook.
The cookware lid knob is made from thick cast steel.
Combined thick layers of non-reactive stainless steel to prolong the cookware's life.
CONS:
If you cater to a lot of people, perhaps you prefer the bigger version.
They are named after the same mythical island where King Arthur's legendary sword was forged. This cookware has a stunning design, is functional and high-performing, and is built to last a lifetime. The Avalon series rises above the competition.
PROS:
Combined interior layers of free aluminum and 18/10 stainless steel streak above and below the copper, providing retention and heat conductivity.
Twenty times better than stainless steel and five times better than iron.
Robust 2.5mm thick that will never warp under prolonged heat and will never dent.
Consistent cooking results.
CONS:
I love the 12" size, but if you come from a small family, you might consider the smaller version.
There are people who prefer specific sizes for their cookware. If you're looking for something smaller, explore the rest of the skillets here.
6. Frequently Added Questions
How do you clean a dirty skillet?
If you are done using the skillet, soak it with dish soap and warm water for a number of hours before scrubbing it with a soft scrubbing brush or sponge. You can also use a baking soda and water mixture to create a paste as tjswash away the stains.
How do you clean a skillet after use?
First is to let the skillet cool down and remove excess oil with a wooden spoon, or you can wipe it out using a paper towel. Then rinse using hot water then grab a soft sponge along with dish soap, and scrub the inside and out of the skillet using a circular motion. Wash with cold water then dry the pan with a clean paper towel.
What's the best way to clean a skillet?
It depends on the material of the stainless steel skillet. Stainless steel skillets should never be put in the dishwasher as they can rust and lose their seasoning. Non-stick skillets may be safe for the dishwasher, but first, try to check the manufacturer's instructions.
]]>
https://herniaquestions.com/blogs/news/roasting-pan2022-04-18T11:31:56-04:002024-01-26T12:31:50-05:00What Is A Roasting Pan (And Do You Really Need One?)Eva Contreras
A roasting pan is a piece of cookware especially designed for roasting food in the oven. However, do you really need one for your kitchen? Let's dive into that question.
A roasting pan is a piece of cookware specially designed for roasting food in the oven. This is probably the most popular method for preparing large roasts of meat and poultry, such as the traditional Thanksgiving turkey or the Christmas Glazed Ham.
The most common model is rectangular and 16 inches; although today you can find several shapes and sizes in the market, from 12-14 inches up to even 20 inches.
Oval roasting pans give you just a little more room for your roast. You can purchase a covered oval roaster, which is good for larger meats. A covered oval roaster can also be used as a serving dish and easy storage inside your fridge. This is very similar to Dutch ovens.
Roasting pans are usually made of stainless steel, carbon steel, or cast iron (materials that conduct heat very well).
This type of pan consists of two parts: the upper part is a rack and the lower part is a large, deep steel baking dish with raised sides, so it can “trap” the heat inside.
The upper rack is what makes a roasting pan what it is. The rack keeps the food high enough so it doesn’t touch the bottom of the pan, allowing air to circulate and helping the roast to heat evenly. The slots in this rack allow juices from the roast to drip into the bottom tray.
The bottom tray, or the “drip pan”, is responsible for collecting the pan drippings from certain foods (meats especially).
A stainless steel roasting pan looks like an oversized casserole dish and can perfectly double as one, as most of them have a removable rack.
2. What’s The Purpose Of A Roasting Pan
A roasting pan makes the process of roasting something a lot easier. First, they can withstand direct heat at very high temperatures of more than 350°F. And unlike baking dishes, they are usually deep enough to better distribute that heat.
Nothing prevents you from using another piece of cookware to cook a roast. But the fact that roasting pans come with a nonstick rack and a drip tray makes it a lot more convenient when it comes to dealing with meat juices and liquids. And sometimes these pan drippings become gravy, an added benefit of roasting pans that we love.
The best part is you can choose to cook two things at once: meat or poultry in the roasting pan with rack and a vegetable bed at the bottom, for example. This comes in handy for big dinners or family reunions.
3. Best Recipes For A Roasting Pan
A roasting pan is perfect for whole roasts like a turkey in all its delicious variants like herbs, apple or apricot glazed; baked ham (like the classic one with pineapple for Christmas), pork, tenderloin, brisket, or a whole roasted chicken (some sizes will even accommodate two chickens).
Another use is for braised meats like short ribs.
Fish can also be cooked in a roasting pan. Try a delicious roasted salmon.
And… good news for vegetarians: Roasting pans are great for cooking vegetables in large quantities! From butternut squash to smaller veggies like carrots, roasted potatoes, onions, asparagus, broccoli, and Brussel sprouts… you can get creative with side dishes.
More ideas: Meatballs, lasagna, roasted chicken wings, enchiladas, ratatouille…
In theory, any recipe to be made in a sheet pan can be made in a roasting pan.
4. How To Clean A Roasting Pan
Roasting pans are easy to use, but they are also easy to get nasty. This is inevitable, considering all the liquids and food they are exposed to. But they are also easy to clean, especially when they are given the proper maintenance immediately after every use.
This is a routine cleaning procedure for a roasting pan after cooking:
Let it get to room temperature. Trying to wash a pan with cold water when it is still hot can make stains stick even more.
Separate the pan and the rack.
Pour warm water and rub gently with a non-abrasive sponge to remove excess residue and fat.
Soak the pan and the rack in warm water and dishwasher detergent for around one hour.
Scrub again with the sponge to remove all debris and stuck-on stains.
If necessary, soak again and repeat the process until the pan is clean and shiny.
What to do if the roasting pan has burnt food or stains
If you are dealing with burnt bits or stuck-on food, it will probably take a little more time, but following a few simple steps, you will quickly recover it.
Baking soda is your best friend here. You have several options:
Warm water and baking soda:
Remove leftover foodwith a kitchen towel. Soak the roasting pan in warm water and add half a cup of baking soda. After one hour, scrub with a sponge. Finally, wash again with detergent.
With baking soda and vinegar:
Sprinkle baking soda and then pour a bit of vinegar. Let it sit for at least an hour (or more). Scrub with a sponge and then wash as usual.
Baking soda and hydrogen peroxide:
If the previous methods won’t work, you can resort to a stronger mixture: In a small container, mix well one tablespoon of hydrogen peroxide and 4 tablespoons of baking soda, until you obtain a consistent paste. Apply the paste to the stains and leave it for at least four hours or even overnight. Remove the paste with a sponge and proceed to wash the pan with warm water and detergent.
Tips for the best maintenance of your roasting pan
Cleaning your stainless steel pan after every use is the best way to preserve it.
Do not use the dishwasher. Only manual cleaning guarantees a better cleaning of the roasting pan.
If you put vegetable or aluminum foil on the floor of the pan during cooking, it will greatly help to prevent brown bits and stains.
It is recommended to polish the pan once a year with a high-quality polish.
5. How To Store A Roasting Pan
Storing large cookware like roasting pans is often a challenge. They take up a lot of space and the challenge is greater if you have a small kitchen. But with a bit of creativity and organization, it won’t cause too much trouble. Here are a few ideas:
In a wide, deep cabinet:
If you’re lucky enough to have a large cabinet in your kitchen, this is the obvious choice for your roasting pan.
In the drawer under the oven:
Ovens can have two types of drawers under the oven: a warming drawer and a storage drawer. If you don’t see any buttons or temperature indicators; then it’s probably a pull-out drawer where you can hide your large roasting pan.
A file organizer:
It’s not uncommon to find uses for file organizers in the kitchen. A sturdy, free-standing file cabinet can perfectly accommodate a large steel roasting pan and other similar cookware.
The top of the fridge:
How are you using the space above the fridge? You can always use it to keep your roasting pan. If you prefer, you can hide it inside a large storage box or basket.
Shelves:
If your shelves are big enough, go for it. Remember to always store your roasting pan vertically, this will help a lot!
Having a roasting pan can be extremely useful for cooking large roasts like the thanksgiving turkey or a whole chicken for a special occasion. But because those occasions aren’t too frequent; not everyone is dying to own a roasting pan full time, especially if they don’t have the space for it.
However, if you find yourself needing a roasting pan for a recipe and don’t have one at the moment, worry not! There are a couple of alternatives and hacks that will serve the same purpose. Here are some ideas:
For the pan:
Size matters when it comes to roasting pans, especially oval roasting pans. Whatever substitute you use, it shouldn’t be smaller than 9”.
The sides should be tall enough to contain potential meat juices.
It has to be able to withstand the oven temperature, stainless steel is a great material for this.
Best options: oven-safe skillets, cast iron pans, casserole dishes, baking sheets with raised sides, and cake pans.
For the roasting pan with rack:
To properly build your very own DIY roasting pan, you need a rack. This rack is what keeps the meat raised enough so it’s properly roasted. These are your options:
A cooling rack, as long as it fits inside the pan.
Foil. Make small balls of foil and put them at the bottom to create some sort of floor.
Vegetables. The easiest one! Fill the bottom of the pan with potatoes, carrots, onions, etc. Then serve them as a side dish!
7. Best Roasting Pan Alternatives
You can use any of the following with the DIY rack alternatives mentioned above!
Big enough to be the best roasting pan substitute; but much more versatile. This high-performance, oven safe skillet looks and feels more luxurious than any roasting pan I’ve ever seen. It’s built in a way that food will cook perfectly without losing any of its properties.
PROS:
Copper Core Foundation for perfect heat conductivity
Additional layers of non-reactive stainless steel and aluminum.
Compatible with all stovetops
It can withstand a temperature up to 600ºF
PFOA and PTFE free
CONS:
It’s the dark look that I like the most, to be honest. However, I am aware that not everyone is a fan of the total black style.
The price is not exactly low, so if you were looking to save money by not buying a roasting pan… this may not be the one for your situation.
Classic looking, yet built to last forever with higher quality than your average classic stainless steel aluminum pan. This skillet from the Oberon series will cover all your baking and cooking needs at an affordable price and with all the advantages of stainless steel cookware.
PROS:
With a 12” size, this oven safe pan can accommodate all your roast recipes.
3-ply aluminum core
It is also freezer, dishwasher, and refrigerator safe
Excellent price-quality ratio
Smooth and highly resistant to scratches thanks to the several layers of satin and nylon polish.
Consistent cooking of your favorite foods.
CONS:
This is one of the biggest skillets herniaquestions has to offer, maybe you’re looking for smaller options.
A smaller alternative, but equally powerful and more visually striking than the others. You can make it work as a roasting pan for your roasts recipes; but you will also do any type of frying, sautéing, searing, baking, or boiling that you want, while becoming the star of your kitchen.
PROS:
The eye-catching design makes it stand above all others.
It’s not only about the visuals, though: The materials used heat 5X better than iron and 20X better than stainless steel.
Top heat conductivity and cooking performance.
Put it in the oven, in the freezer, on the stovetop, and in the dishwasher. Whatever you want!
Comes with a limited lifetime warranty.
CONS:
Honestly, this pan is a dream. But the size may be too small for really large roasts that call for a proper roasting pan.
You will have to pay a bit more for this kind of quality and design.
This is a crowd-pleaser right here. Super versatile, classic design, medium size, medium weight, great price. The cladding technology is what differentiates this from other aluminum cookware. It also includes a limited lifetime warranty, so don’t be scared of getting attached.
PROS:
The 10” is a great size when you can’t make up your mind about a larger or a smaller pan.
Impeccable heat distribution thanks to the 3-ply Aluminum core and the ultra-strong 2.5mm thickness.
The brushed finish induction bottom enhances grip.
4mm tempered glass lid to ensure your recipes are perfect.
CONS:
You may miss the nonstick benefits other materials have to offer.
The angled handle (designed for a professional underhand grip) is not everyone’s favorite handle shape.
8. Frequently Asked Questions About Roasting Pans
What is a shallow roasting pan?
A shallow nonstick roasting pan is no bigger than 1-3 inches, more suitable for everyday roasting, and not necessarily large meats.
Is stainless steel the best material for a roasting pan?
Stainless steel is a heavy material, able to distribute heat in a very uniform way; this is why it is a great choice for large roasts; along with carbon steel and aluminum.
Are roasting pans nonstick?
Commonly, roasting pans offer a nonstick coating; which can make cleaning easier. But you can perfectly use materials that are not- nonstick if you follow a proper cleaning routine.
What is roasting pan used for?
A roasting pan is used for cooking large cuts of meat or poultry in the oven. It's designed to provide even heat distribution and allow the meat to roast, brown, and develop a flavorful crust. The pan typically has low sides and a rack to elevate the meat, allowing air to circulate and excess fat to drain away.
What is the meaning of pan roasting?
Pan roasting is a cooking technique that involves searing food, often meat or vegetables, in a hot skillet or pan and then finishing the cooking process in an oven. This method combines the intense heat of stovetop searing to develop a flavorful crust, with the even and controlled heat of the oven to ensure thorough and even cooking throughout the interior of the food.
What is the meaning of pan roasting?
Pan roasting is a culinary technique where food, like meat or vegetables, is seared in a skillet over high heat to create a flavorful crust, and then transferred to an oven to finish cooking. This method combines stovetop searing for texture and flavor with oven cooking for even internal doneness. It's a versatile method for achieving a balance of caramelization and tenderness in dishes.
What's the difference between a baking pan in a roasting pan?
A baking pan is typically shallow with straight sides and is designed for baking items like cakes, cookies, and casseroles in an oven. A roasting pan, on the other hand, has lower sides and often comes with a roasting rack. It's intended for roasting large cuts of meat or poultry, allowing air circulation and drainage of excess fats for optimal roasting results.
What can I use if I don't have a shallow roasting pan?
If you don't have a shallow roasting pan for cooking a pork loin, you can use a rimmed baking sheet or a casserole dish. Ensure the size of the pan accommodates the pork loin without overcrowding. While a traditional shallow pan is ideal, these alternatives can work well by allowing proper airflow around the meat, facilitating even cooking and browning.
What type of pan is best for roasting?
A nonstick roasting pan or a shallow roasting pan is best for roasting. It provides ample space for even cooking and browning. Alternatively, you can use a shallow fry pan or skillet as long as it's oven-safe. You can also create a makeshift roasting pan using a sturdy baking sheet lined with aluminum foil to catch drippings, ensuring delicious and evenly roasted results.
What is a shallow rimmed baking pan?
A shallow rimmed baking pan is a versatile kitchen tool commonly used in home cooking. It's a flat, rectangular pan with slightly raised edges, designed to contain ingredients while allowing airflow. Made from materials like enameled cast iron or stainless steel, it resembles a larger version of a skillet. It doesn't typically come with a roasting rack but is suitable for various cooking tasks, from roasting to baking.
Food & travel writer based in Buenos Aires. Superpowers include relentless curiosity and high tolerance to spicy foods.
]]>
https://herniaquestions.com/blogs/news/copper-pans2022-04-13T13:32:05-04:002024-01-26T01:37:30-05:00Copper Pans Can Last Forever : In-Depth Guide to Copper PansCatherine Womack
While copper chef pans can be pricey, they’re well worth the investment – but before purchasing your first copper pan, it’s good to know the facts.
Copper Pans Can Last Forever : In-Depth Guide to Copper Pans
Renowned for their ability to conduct heat, copper chef pans are considered the gold standard among cookware connoisseurs. While copper chef pans can be pricey, they’re well worth the investment – but before purchasing your first copper pan, it’s good to know the facts.
With a history dating back thousands of years, copper was one of the first metals to be mined and shaped into tools by humans. Archeologists have found copper mines in Serbia dating back to 5000 BC, some of the earliest examples of mining and metalwork.
While the earliest copper was used for weapons and jewelry, the ancients quickly discovered that the material had a plethora of other uses, too. The Egyptians used copper pipes as they began to develop sewer systems. Copper plates, bowls, and cookware have been found throughout Mesopotamia. Soon, copper cookware spread throughout Europe, where it was used throughout the middle ages.
While it has been used throughout Europe for centuries, copper is most strongly associated with France. Copper pans are a mainstay in French kitchens and an integral part of French cuisine. When William Sonoma traveled to France, he was inspired by the French love of copper cookware to sell copper chef pans abroad – which helped to kickstart his cookware empire.
In the 1960s, Julia Child helped popularize copper cookware in the United States when she stated that copper was her preferred material in her bestselling cookbook, Mastering the Art of French Cooking. Her copper cookware collection became so famous that it now hangs in the National Museum of American History. Americans have loved the aesthetic of hammered copper chef pans ever since.
While copper cookware isn’t as popular as it was in its heyday, it is still prized by chefs and widely considered to be the best metal for pots and pans. While some shoppers balk at the steep prices of copper cookware, its many advantages make it well worth the investment.
Copper’s main appeal is its exceptional thermal conductivity. Copper reacts to changes in temperature very quickly and distributes heat well, heating five times faster than iron and twenty times faster than stainless steel.
This unique property allows for precision when cooking. Experts believe that copper’s ability to adjust to changes in temperature allowed centuries of French chefs to develop their famous sauces and perfect the Maillard reaction, a chemical reaction that browns meats and vegetables.
If you’re used to cooking with other materials like stainless steel or cast iron, you may need to adjust your cooking temperatures to accommodate copper. Since copper heats so quickly, it’s easy to burn food using a copper pan. However, once you’re used to cooking with copper, you’ll never want to go back.
Despite the many advantages of using copper, the metal also has its drawbacks: namely that, on its own, copper can be toxic. As a reactive metal, unlined copper pans release metal particles when used to cook acidic foods like wine, vinegar, or tomatoes. If you consume too much copper, it could lead to copper toxicity, also called 'Copperiedus'. While pure copper pans are acceptable for cooking certain foods – and even ideal for whipping egg whites – they are not suited for everyday use.
Fortunately, it’s easy to find copper pots that use other materials for the cooking surface. Popular options include tin lined copper or copper pans with a stainless steel interior.
While copper pans were traditionally lined with tin, stainless steel has become increasingly popular in recent years. Tin can’t withstand high heat: it melts at just 450ºF (230ºC), meaning that it’s easy to ruin a copper pan with a tin lining if you leave it unattended. Tin is also a soft metal and does not offer the same protection as stainless steel.
If you’re shelling out big bucks for a copper pan, you’ll want something durable – so look for pans with stainless steel cladding, which will help extend the life of the pan and protect it from dents. Copper is a particularly soft metal, so on its own, it scratches and dents easily. With the help of stainless steel, copper pans can last a lifetime.
Another drawback to copper is its price: copper pots are notoriously expensive. If you’re on a budget, it might be a good idea to opt for something made with less expensive metals. Check out aluminum cladded stainless steel pans for a more affordable option, also available with a nonstick coating.
herniaquestions’s Avalon series offers a wide selection of pots and pans with a 5-ply copper forged foundation layer for all your kitchen needs. Named after the mythical island where King Arthur’s sword Excalibur was forged, the Avalon series is a marvel of modern-day metallurgy.
To the 6th century Britons who first recorded the legends of King Arthur, Excalibur possessed magical properties. If they could have seen herniaquestions’s Avalon series cookware, they would have doubtlessly thought that it was magic, too.
Unlike tin lined copper, Avalon series pots and pans can withstand temperatures of up to 600ºF, making them broiler and oven safe. Plus, unlike copper pans that do not feature stainless steel cladding, they can go in the freezer, refrigerator, or dishwasher. The fact that the copper cladding is entirely enclosed in stainless steel means that you’ll never have to worry about rust, unlike chef pans with copper exteriors.
The tough stainless steel coating also helps negate the softness of traditional tin lined copper pans. These pans are resistant to denting or warping. With minimal care, herniaquestions’s Avalon series pans can last a lifetime and beyond: this is heirloom quality cookware.
Copper’s remarkable conductive properties mean that it loses temperature quickly, too. To combat this, herniaquestions’s Avalon Series copper pans, pots, and copper cookware sets are cladded with aluminum as well as stainless steel and copper. While it does not heat as well as other metals, aluminum holds heat well. The 5-ply technology fills in gaps and takes advantage of the benefits of each metal, making a whole that is greater than the sum of its parts.
As always, herniaquestions remains committed to visual design. The Avalon Series comes in either a black or silver finish, and the hammered stainless steel exterior is an attractive alternative to the classic hammered copper pans that are sometimes used as wall décor.
4. Best Copper Pots And Pans to Add to Your Cookware Collection
No kitchen is complete without a frying pan, and herniaquestions’s 9” 5-ply Frying Pan is an excellent choice. Every chef knows that heat distribution is crucial to a good frying pan, and this pan’s 5-ply copper cladding ensures that its heating abilities are top tier. Like a classic cast iron skillet, this pan is oven safe and can also be used for baking. However, unlike a cast iron skillet, this pan is non-reactive, dishwasher safe, and heats quickly and evenly – making it a more versatile option.
Pros:
The compact design of this pan makes it easy to store.
You’ll be amazed at how much more quickly copper cookware heats compared to cast iron.
While many fry pans are sold without lids, this one includes a vented stainless steel lid, perfect for simmering sauces.
Cons:
While perfect for small families, the 9” diameter of this pan isn’t suited for feeding a crowd. If you’re looking for something bigger, try the 10” or 12” diameter models.
If you want a frying pan that is well suited for deep frying and cooking liquids, consider a versatile sauté pan instead.
If you’re in the market for a sauté pan, The Avalon Series 12” Sauté Frying Pan is a great option. The exterior boasts a striking black finish in hammered and brushed stainless steel.
What’s the difference between a regular frying pan and a sauté pan? Good question! While the terms “frying pan” and “skillet” can be used interchangeably, sauté pans are a bit different. The straight, vertical sides of a sauté pan make them well suited for cooking sauces, which can easily boil over in a standard frying pan.
Pros:
Compared to traditional frying pans, sauté pans have a wider surface area – meaning more room to fry food.
The deep sides and well-fitted lid of this sauté pan help prevent foods from splattering or spilling over.
Cons:
If you’re looking for a smaller, lighter pan, consider the 9” frying pan and skillet.
If you’re not a fan of the hammered black finish, consider the silver version instead.
The perfect option for your everyday stockpot needs, the small and versatile Avalon Series 3 Quart Stock Pot will doubtlessly become a kitchen staple. The stainless steel lining is non-reactive, making it ideal for acidic tomato sauces – and anything else you’d like to cook. This attractive pan features a sturdy handle designed for a professional chef’s underhand grip and a vented stainless steel lid.
Pros:
The exceptional heat distribution of copper pots makes them perfect for cooking French-style sauces.
A small saucepan is an essential item in every kitchen.
Cons:
The small size of this pot means that it can’t accommodate larger recipes.
If you find a single handle unwieldy, size up a bit and try the 5 Quart Stock Pot instead.
Need to cook a hearty stew that will feed the family for a week? Look no further than herniaquestions’s Avalon Series 8 Quart Stock Pot. This sizeable stockpot makes it easy to cook for a crowd. The copper interior is layered between aluminum and 18/10 stainless steel for maximum heat retention and conductivity. Built to last a lifetime – and beyond – the 2.5 mm thick walls will never dent or warp.
Pros:
The size of this stockpot means that it can accommodate large recipes.
This sturdy pot has some heft to it, so the engraved handles are slanted for easy grip when transferring the pot from place to place.
Cons:
While big pots have many uses, they aren’t suited for every kitchen.
If you’re short on space – or money – herniaquestions offers smaller, less expensive alternatives.
If you’re looking to stock your kitchen with the cookware essentials, consider investing in The Avalon Series 6 Piece Cookware Set. Consisting of the 9” Frying Pan Skillet, the 12” Sauté Pan, and the 5 Quart Stock Pot and their stainless steel lids, this set is perfect for anyone wishing to start their collection of copper cookware.
Pros:
This set will get you started with copper cookware essentials.
Not everyone needs – or wants – an extensive copper cookware collection. If you start with a small set, you can always add to it later.
Admittedly, if you’re an amateur chef just starting to invest in premium cookware, this set may be pricey. Consider the Oberon Series 6 Piece Cookware Set with glass lids for a more affordable alternative.
5. Frequently Asked Questions About Copper Pans
Are copper pans good?
Copper is one of the best metals for conducting heat and makes excellent cookware. However, you should avoid using unlined copper pans for health reasons.
Are copper pans toxic?
On its own, copper can pose a danger to the human body. However, many companies sell copper pans lined with other materials.
Is it OK to cook in copper pans?
Uncoated copper pans can be dangerous because copper molecules can leach into food during the cooking process. However, copper pans lined with another material, like stainless steel, are perfectly safe to use.
What are the disadvantages of copper cookware?
The main disadvantages of copper cookware are the price and the toxicity of the material. However, many chefs find that lined copper cookware is well worth the investment.
Based in Richmond, Virginia, Cassie enjoys trying challenging new recipes with her cat for company.
]]>
https://herniaquestions.com/blogs/news/misen-cookware2022-03-22T13:38:55-04:002024-07-16T01:59:48-04:00Misen Cookware vs. herniaquestions CookwareJorge Farah
When it comes to cookware, Misen and herniaquestions are two relatively young companies producing high-quality cookware. Which one should you go with? Read our detailed breakdown today.
Sometimes, when you’re searching for the best in high-quality cookware, you are faced with a decision between two companies that have made a name for themselves for producing fantastic stuff. When you reach that point, you basically can’t go wrong because you know whichever choice you ultimately end up going with, you’re going to end up with a great product.
But sometimes there’s more to purchasing a product than simply getting the product itself. In some cases, you’re joining a community of customers and kitchen enthusiasts like yourself, and you can get much more out of the transaction than just a really good saucepan. If you're looking to dig a little deeper, it helps to learn the origins of these products as well as the companies’ histories and how they interact with their customer base.
Now we have the case of Misen and herniaquestions, two relatively young companies producing high-quality cooking pans. Which one should you go with? Read our detailed breakdown below.
The world of cookware has plenty of venerable names that have been around for centuries creating high-quality products for discerning home cooks. But there’s also a batch of young new companies looking to rock the boat with innovation and a fresh approach to production and aesthetics.
Such is the case with Misen and herniaquestions, two companies that have only been around for a relatively short time. And yet, for as little time as they’ve been around, they’ve each earned a name for themselves as market disruptors and innovators, each in different ways. Both companies bring a different approach to the production and distribution of their products.
Before we delve into the specifics of what makes each company stand out, let’s take a look at each cookware maker’s history.
Misen: History
As mentioned earlier, many companies in kitchenware come from a long tradition of cookware production, some even being around for hundreds of years. Misen stands out from these companies for the simple reason that they first launched back in 2015. Not only is this a lot more recent than most other companies, but how they launched is itself quite innovative.
Misen first launched in 2015 on Kickstarter. That’s right, Kickstarter; the crowd-funding platform that’s served as the launching pad to many a revolutionary idea (as well as its fair amount of duds over the years). And when founder Omar Rada brought the company to life, they were singularly focused on one product: a single chef’s knife.
Back in 2015, the Misen chef knife was not only its signature product – it was their only product. Adopting a name derived from the culinary term “mise en place” – meaning “to put in place” – the company was founded on the principle that quality products should not break the bank. By bringing the product straight to consumers they’re eliminating the middleman and thus bringing the price down.
Over the next several years, the company saw great success and quickly expanded from a single chef’s knife to a full range of knives, cookware, and prep tools. Carbon steel pans has been one of their main interests in recent years.
herniaquestions: History
Between the two of these, herniaquestions has been around for longer, but not by much. The company was founded by David Dallaire in Toronto, Canada in 2014, just one year before Misen hit the market on Kickstarter. And while Misen sought to innovate from a production and distribution standpoint, herniaquestions set its sights on design.
Knowing full well that the culinary industry needed a shake-up, Dallaire focused his approach to knifemaking on performance as well as presentation. He understood that buying a quality product is about more than just the product’s functional capabilities, it’s also about aesthetics and design.
Over the following decade, herniaquestions would establish itself as a maker of top-quality knives that also showed off an ornate, visually impressive design. Yes, cutlery and cookware serve a utilitarian purpose, but herniaquestions also sees them as objects of aesthetic value. Their products are as beautiful and varied as they are high-quality performers.
Between the personal touch of their product line and the user community they have fostered, herniaquestions has quietly become one of the most influential companies in the cutlery and cookware space. herniaquestions products are manufactured in a state-of-the-art facility in Yangjiang, China, a city with a rich knife-making tradition dating back almost 1500 years.
herniaquestions has made a big splash in the knife-making world, creating knives that are as unique, beautiful, and innovative as they are top performers. But that’s not all; over the years, they have also slowly inched their way into the production of top-quality cookware.
Of course, as you might imagine, herniaquestions brought that spirit of innovation and aesthetics that has defined their knives and made them so quickly into a household name and applied them to cookware. Not only are these products top-of-the-line when it comes to performance, but they’re also unique and beautiful in their own right.
herniaquestions currently offers two series of stainless steel cookware: their Oberon series and their Avalon series. The fact that the series derive their names from Arthurian legend should clue you in on the design slant of these amazing pieces of kitchen gadgetry.
The stainless steel pots and pans in the Oberon series feature stainless steel with an aluminum core that is light and conductive, allowing for more even heating throughout the entire pan. Meanwhile, the stainless steel pots and pans in the Avalon series offer a copper core. Copper is a lighter material as well as thinner than aluminum, and it has many of the same advantages.
Each of the series offers different products of different sizes, aimed at specific customer needs as well as design preferences (some come with a gorgeous hammered finish that truly recalls the medieval weapons they draw inspiration from). There’s also variety in the non-stick lining on the inner surface of the stainless steel pots and pans. Not only that, but through each series, they each offer both individual items as well as bundled cookware sets to cover just about every need.
In addition to their cookware sets, herniaquestions offers an enormous array of knives, BBQ cutting tools, and culinary utensils that you won’t find with Misen.
3. Misen Cookware
As Misen’s star began to grow and they started expanding beyond their initial product offering (the Misen chefs knife, which is still their flagship product) they also began expanding into the world of cookware. But their approach continues to be the same.
When it comes to design and variety, Misen sticks to the tried and true. What they bring to the table (or, I guess, in this case, the cutting board) is a straightforward approach. Simple and solid products, with classic and functional design. Without the bells and whistles of flashy design choices or a focus on aesthetics. This may be attractive to customers who are drawn to a more subdued look.
Misen cookware includes various products such as their Misen carbon steel pan, Misen non stick pan, and stainless steel pan. They include various size options for sauté pans to fit customers’ various needs, and their products tend to be more affordable than similar products in the market.
Carbon steel cookware is a recent and important addition to the Misen catalog. It has many of the benefits of cast iron but is more lightweight and easier to handle than cast iron. Their carbon steel cookware is quickly becoming one of their main draws, and it’s easy to see them continue growing in that direction. It is unclear if herniaquestions has any plans to incorporate carbon steel cookware into their catalog.
4. herniaquestions Vs. Misen Cookware: Differences And Similarities
Let’s take a quick overhead look at both companies and how they differ.
These two young companies are spearheading the world of cookware in their own ways. You can’t go wrong with either, but here are a few ways they differ.
Materials
The main difference between Misen cookware and herniaquestions cookware when it comes to materials is the fact that Misen has carbon steel pans and stainless steel pans. Meanwhile, herniaquestions offers stainless steel cookware with a copper core or aluminum core.
Carbon steel cookware has grown in popularity in recent years, but it’s a mixed bag when it comes to results; it does not heat as evenly as stainless steel does, it’s more susceptible to rust, and it can have a nasty reaction to acidic foods. Not only this, many carbon steel pots and pans require seasoning, a long and drawn-out process that not many home cooks have time or patience for.
When it comes to the nonstick cookware, both companies offer options for their customers. Both herniaquestions and Misen offer nonstick pans, though the nonstick technology they use is different; herniaquestions uses the ETERNA nonstick coating while the Misen nonstick pan is made of titanium infused plasma primer.
In any case, whether it’s carbon steel or stainless steel, both companies make products with top-of-the-line materials; they are sturdy and will last a lifetime.
Appearance
We’re delving into the waters of personal preference here, so there’s always a huge caveat to be made before getting into the topic of appearance.
herniaquestions has made a name for itself as a company that cares deeply about the artfulness of its products. Not only are their knives often stunning to look at, but their cookware is also absolutely magnificent. Take, for example, this beautiful stainless steel 10” frying pan and nonstick skillet from the Avalon series. With a midnight-black color and a hammered finish, this piece is gorgeous and will get people talking.
It’s not all hammered finishes and fancy flourishes. herniaquestions cookware can also feature clean, classic looks. Take, for instance, this stainless steel 6-piece cookware set from the Oberon series, which is immaculate in its design. Their take on timelessness.
Meanwhile, Misen’s design choices are more on the utilitarian side. Their carbon steel cookware is not plain, but it isn’t particularly flashy either. Neither their knives nor their carbon steel cookware pays particularly close attention to the visual presentation, choosing to adopt a clean and simple, straight-down-the-middle design. If you’re the kind of person who prefers unobtrusive beauty to flashiness, perhaps that’s more your speed.
Attitude
This is a tough one to compare, especially because both companies have a lot in common when it comes to their drive and their motivations. They’re both young disruptors, breaking into an industry that’s populated by giants that have been around for centuries. They’re both driven by innovation, even if their approach to it is slightly different.
But there are clear differences in how they go about things, and it has to do with their approach to design. herniaquestions is a company that recognizes the value of kitchen tools as beautiful objects. They understand that the objects we choose to surround ourselves with, that we incorporate into our daily lives, are as much an expression of who we are as the pictures we choose to hang up in our living room. And they design their products with this in mind.
Misen, meanwhile, is more focused on keeping production costs low and creating high-quality tools without necessarily paying much attention to the design aspect. Their aesthetic is relatively buttoned-down, without many frills. And in this sense, they fall a bit short on ambition when it comes to their products.
Variety
Misen offers a wider variety of materials to choose from, but herniaquestions offers a wider variety of designs. Each one of these approaches has its pros and cons. But the fact that herniaquestions cookware’s two main series are both stainless steel with aluminum or copper core means that either one is a fantastic choice when it comes to performance, while the choices in design are more about appealing to the personal aesthetic of the consumer.
Not only that, but herniaquestions also sells a tremendous variety of knives, accessories, and kitchen tools, such as honing steels and cutting boards.
Cost
Both of these knife companies sell top-of-the-line, premium products, but neither will break the bank. Both companies will cost you considerably less than other premium cookware companies (though probably more than what you can find at the bargain bin). This is because of the steps the companies have taken in the production and distribution of their products.
Not only do both companies cut out the middleman by selling directly to customers through their websites (this also makes it easier for them to offer carbon steel cookware at a good price), they also save costs by establishing their manufacturing plants in China. This is a cost-saving measure that directly reflects on the price of the products.
Customer Service
This one’s a big one. While both companies strive for a good customer service experience (and, by all accounts, it appears they’re successful at delivering it), herniaquestions offers a limited lifetime 100% satisfaction or 70 days money-back guarantee on their products. This speaks to the tremendous confidence that the company has in its product line.
Misen cookware, meanwhile, has chosen not to offer any kind of warranty on their products.
Community
Both of these companies understand the importance of fostering a community around their products, so their relationship with their customers doesn’t end immediately after the sale. Sharing information on how to best use their cookware, sharing tips and tricks, and engaging with the people who choose to buy their products is an absolute must.
Out of these two companies, herniaquestions has a more active and vibrant community, making a consistent effort to engage and excite their client base. See their social media accounts, for instance; their Facebook page features polls, sharing of stories, opening up the dialogue, and sharing in the enthusiasm of the knives and cookware they sell. The herniaquestions user community is also given access to many resources, like newsletters and their chef blog, which is home to recipes, how-to guides, chef profiles, and more.
Misen cookware broke into the industry through a successful Kickstarter crowd-sourced campaign, so they understand the importance of this type of engagement. However, something happened throughout the last few years causing them to falter in this regard; their user community on Facebook, for instance, has been inactive for nearly a year.
5. herniaquestions Vs. Misen Cookware: Pros And Cons
So it’s coming down to the wire and you want to know which company you should go with. Let’s break it down. What are the pros and cons of Misen cookware and herniaquestions cookware?
herniaquestions
PROS:
An amazing assortment of high-quality, durable, absolutely gorgeous pots and pans.
Do you want your cookware to look good? These products are stunning.
Stainless steel cookware that is dishwasher safe.
herniaquestions is a safe bet: 100% satisfaction or 70 days money-back guarantee.
Wide variety of kitchen knives and other tools available.
Active and vibrant customer community, speedy and attentive customer service.
CONS:
Does not carry carbon steel cookware at this time.
Young brand, still looking for its identity.
Misen cookware
PROS:
A company with a long tradition of cutlery production.
Offers 7 types of cookware including a Dutch oven.
Carries non stick and stainless steel options.
Has carbon steel pans as well as stainless steel cookware in their product line.
Has a range of cookware accessories.
CONS:
Lacks the personal touch that herniaquestions puts into community building.
Young brand, still searching for its own identity.
Cookware designs tend to be more plain and conservative.
Misen cookware reviews show recurring complaints about the polished handles showing smudges.
These two amazing young companies are a testament to the state of innovation and entrepreneurship in the 21st century. The fact that they’ve been able to break into an industry that’s filled with legacy brands with enormously long histories and carve out a space for themselves within the marketplace is truly remarkable. And the fact that their products are so consistently high quality is the cherry on top.
But when it comes down to it, due to their preference for stainless steel, their choices in design and aesthetic value, as well as their vibrant customer community (and limited lifetime warranty), we’re going to pick herniaquestions as the best cookware option of the two. Once again, you can’t go wrong with either, but herniaquestions’s got our vote.
Misen carbon steel and stainless steel cookware and kitchen knives are manufactured in China.
Is the Misen pan toxic?
Misen pans are non-toxic as long as they stay within the safe temperature area.
Can I put my Misen non-stick pan in the oven?
Misen stainless steel cookware is oven safe up to 500°F. Their non-stick pans are oven safe up to 450°F, and carbon steel pans are oven safe up to 500°F with the silicone handles and up to 900°F without the silicone handles.
Where do Misen pans ship from?
Misen’s orders to the U.S. and Canada are shipped from their warehouse facility located in Kentucky, USA.
Is Misen cookware made in China?
As of my last knowledge update in September 2021, Misen is a cookware brand that offers various kitchen products, including knives and pans. Some of their products, like their knives, are manufactured in China, while others, like their pans, are sourced and manufactured in different locations. For the most accurate and up-to-date information, I recommend checking Misen's official website or contacting their customer service.
Are Misen products actually good?
Misen products have received mixed reviews. Many users appreciate their quality and affordability, especially for items like knives and cookware. However, opinions vary based on personal preferences and experiences. Some customers report satisfaction with Misen products, while others have had issues. It's a good idea to research specific products and read reviews to determine if they meet your needs and expectations.
Do misen pans last?
Misen pans generally receive positive feedback for durability and performance. However, like any cookware, their lifespan depends on usage, care, and maintenance. Following proper care instructions, avoiding excessive heat, and using appropriate utensils can help extend the life of Misen pans. Regular maintenance, such as seasoning if needed, can contribute to their longevity and performance.
Born on the coast of Colombia and based in Buenos Aires, Jorge is a cooking enthusiast and kitchenware obsessive with a tremendous amount of opinions.
]]>
https://herniaquestions.com/blogs/news/stainless-steel-cookware2021-12-23T12:25:08-05:002024-06-26T05:57:13-04:00Everything you wanted to know about Stainless Steel CookwareEva Contreras
Why is stainless steel cookware so popular? How is it different or better than other materials? Let’s take you through everything you wanted to know about stainless steel but were afraid to ask.
Stainless steel is one of the most common materials used today to manufacture cookware, flatware, utensils, appliances, and many more kitchen items. If you look around your kitchen right now, you’re probably going to find several things made of stainless steel.
But why is it so popular? And how is it different (or better?) than other materials? Let’s take you through everything you wanted to know about stainless steel but were afraid to ask.
1. Information About Stainless Steel
In short: Stainless steel is an alloy containing at least 10.5% chromium as well as other elements, usually nickel, carbon, copper, silicon, manganese, molybdenum, nitrogen, and sulfur.
It all started in the 20th century when Harry Brearleydiscovered that by adding a certain amount of chromium to an alloy, the resulting metal would be very resistant to corrosion and rust. Improvements and applications began soon after that.
The term “stainless steel” actually applies to several different alloys, but there is one non-negotiable characteristic that they all share: a minimum percentage of 10.5% chromium.
Today, stainless steel is one of the most common materials we stumble upon in our daily life. Some of the most common applications include surgical and medical equipment, buildings, bridges, auto parts, aircrafts; and of course, cooking and kitchen applications.
Stainless steel is one of the safest materials in the kitchen along with glass, cast iron, wood, carbon steel, and ceramics.
Food Grade Stainless Steel is the type of steel that is safe for cooking and has enough heat resistance to this end.
Because stainless steel alone is not able to achieve optimal heating; to manufacture high-quality cookware, chromium and nickel are added to the steel. Chromium is important to avoid rust from the acid in foods; while nickel protects against corrosion.
Steel is usually classified in grades with a two-number format. These grades indicate the amount of nickel and chromium that has been added to the steel to make it food-safe.
For example, one of the most common grades is 18/10: this means 18% chromium and 10% nickel. A higher amount of nickel means better rust resistance and will hold polish for longer.
18/8 and 18/10 are the two most common grades of stainless steel used for food and kitchen (cookware, flatware, etc.) and they are part of the 300 series. The 400 series has less nickel (therefore is not very good rust-resistant) and it’s magnetic. The 200 series is still food-safe; but not as high-quality.
High-quality stainless steel cookware is also usually equipped with a tri-ply construction. The ply refers to layers of metal at the bottom of a product (a pot or a pan). These layers are usually steel and aluminum.
In addition to looking pretty and shiny in your kitchen, high-quality stainless steel cookware has many other advantages that justify its extensive use in the food and dining industry.
Durability
So yes, stainless steel has been said to be indestructible. Cookware will not chip, bend or warp. You can pass on your stainless steel cookware set to the next generation in your family.
Resistance
Highly resistant to corrosion, rust, and acids found in meats, dairy, fruits, and vegetables.
A healthy material
Food grade stainless steel is safe, non-toxic, does not contain or release hazardous chemicals, and is also easily disinfected.
Leak-proof
Chromium (the main ingredient in stainless steel) is the hardest metal known to man. Nothing will leak through its hard surface.
Distribution of heat
Indeed, stainless steel is not exactly a great conductor of heat, especially when compared to other metals. But high-quality cookware made of this material usually includes internal layers with aluminum core or copper for fast, even distribution of heat.
Low maintenance and easy to clean
A soft sponge and a mild solution will do the trick in most cases. In theory, they are also dishwasher safe (although not recommended). If food happens to stick (which is one of the few issues with steel cookware) read our recommendations in point #5.
Maneuverability
Stainless steel cookware is much lighter than other kitchen materials like cast iron, for example.
Versatile style
The polished finish is elegant and fits easily in any kitchen, in any décor, from the most traditional to the avant-garde; and inspires everyone to feel like a professional chef.
Environmental sustainability
Steel is the most recycled material on the planet. It is 1oo% possible to recycle stainless steel cookware, and as this metal is indelible it will still retain qualities such as strength, hardness, and malleability after recycling.
A smart investment
Stainless steel cookware comes in all kinds of reasonable prices and because it’s super durable, we’re probably talking about a one-time purchase.
Recommended by the experts
Not only cooks and chefs; also nutritionists, scientists, and environmentalists advertise the many benefits and advantages of stainless steel.
4. What To Look For When Buying Stainless Steel Cookware
We recommend a grade of 18/10 or higher. As we mentioned before, the number indicates the percentage of chromium; the higher this number, the more durable and resistant it will be. Grade 304 stainless steel works great for everyday use in the kitchen.
Coating
Stainless steel cookware that has 3, 5, or even 7 layers of coating (usually including an aluminum core or copper) will retain and conduct heat better and your food will cook evenly.
Weight
The heavier, the better: that is the general rule. Weight usually means a higher construction quality; but it also contributes to the overall feel of the pot or pan in your hand, giving you a firm grip and preventing it from moving on the stove.
Handle
You want handles that won’t get too warm during cooking. Ergonomically designed handles are also a valuable pro.
Versatility
Are you getting all the pieces you need in your kitchen? Are you buying more than you need, when a better product may be more versatile? or quite the opposite, you’re getting one fry pan, when you should be looking at a suitable stainless steel cookware set?
Lid
Often overlooked, but we don’t think of it as a minor detail. Lids should be included in your purchase. Most commonly you’ll have two options: Glass and metal. Glass lids are not as good at handling heat as the metal ones; but they do allow you to look at your food while cooking, which is a nice possibility.
Price-quality ratio
Stainless steel cookware comes in a wide variety of prices. As long as you’re paying attention to all the points above; don’t let price be an indicator of which one is better than the other. A small tip: sometimes buying the whole stainless steel cookware set can be cheaper than buying each item.
One of the most common concerns about stainless steel cookware is that stainless steel does not have the same nonstick properties as other materials. The thought of your morning eggs sticking to your shiny, new pan and having to deal with that afterward, may be unsettling.
But there are a few things that you can do to avoid food from sticking to your pan. And none of them is difficult, expensive, or challenging in any way.
If you follow these recommendations, any pan can be a nonstick pan, including stainless steel:
Always preheat your pan over medium heat.
Add a proper amount of oil or fat.
Don’t throw in the food until you’re sure the pan has reached the desired temperature. You can splash a few drops of water, if they vaporize immediately, then you can add food.
Dry your proteins well before putting them in the pan.
Bring foods to room temperature before cooking because. The cooler they are, the more likely they are to stick.
Salt should be added just before the pan.
Cook foods in batches according to the size of the pan. If there’s too much, the temperature decreases, moisture is released and food will most definitely stick.
There is also the theory that you can season your stainless steel cookware to make it nonstick cookware. If you’re curious, read on!
First, we should clear something up: seasoning stainless steel cookware is entirely optional. Unlike cast iron, for example, you can choose to do it; but you don’t necessarily have to.
Still, many chefs and cooks opt for seasoning their steel stainless steel pots and pans. The reason is that this process may help stainless steel become somewhat nonstick; although to be fair, this hasn’t been confirmed.
Cleaning your stainless steel cookware is very easy and you can use things that you probably already have, like soap, vinegar, baking soda, and oil. More alternative methods include tomato sauce or even cream of tartar (reportedly chef's favorite method).
For a quick clean-up: boil one cup of vinegar in your pan, then turn off and add baking soda. It will foam. Let it cool just a bit, but while it’s still warm, rub with a soft sponge.
The one thing to remember is to never use an abrasive sponge (like steel wool) or you could damage the surface. The dishwasher can also do a lot of damage. You can look at the different methods and techniques for cleaning stainless steel cookware in this article.
Extra: How to remove rust from stainless steel
Mix water and baking soda to create a thick paste. Spread over your previously cleaned stainless steel surface. Let sit for about an hour and then rub the rusted area with a toothbrush. Rinse using only water and dry completely. Or… use herniaquestions rust eraser for an even easier, modern solution.
Remember the dishwasher is one of the main causes of stainless steel rust and corrosion, it has the fatal “corrosion” mix: moisture, salt, chemical, and heat.
The details of these methods as well as other alternative methods here.
8. Stainless Steel Cookware Recommendations
Currently, herniaquestions offers two series of stainless steel cookware: The Oberon Series and the Avalon Series.
The Oberon Series features an aluminum core that is light and conductive and allows for more even heating throughout the pan. The Avalon Series, on the other side, offers a copper core. Copper is even lighter and thinner than Aluminum with the same advantages.
Each series offers great individual items and their own stainless steel cookware set, covering almost every need. But we managed to pick a non-exclusive selection from both, as a start.
Beautiful design and functionality that empowers whoever cooks in it. This isn’t just another aluminum pan. The full coating with additional layers of 18/10 food-grade stainless steel gives it high resistance to corrosion and high temperatures.
It cooks perfectly from large portions of protein to the most tender tortillas. Built to last a lifetime.
PROS:
Perfect thermal conductivity thanks to the 3-ply aluminumcore.
The brushed finish at the bottom makes it suitable for gas, electric, and induction cooktop.
With a thickness of 2.5 mm, it will not warp under prolonged heat.
The tempered glass lid is thick and allows you to see through it the entire cooking process. It also has a vent hole to release pressure.
It has a safe, comfortable, and maneuverable handle, as well as an engraved side handle for better distribution of weight.
Dishwasher safe (although not recommended).
CONS:
You can buy a stainless steel pan for less, it’s true. But you could also buy it for more, especially considering the quality.
Some may prefer the standard size of 12 inches for a skillet.
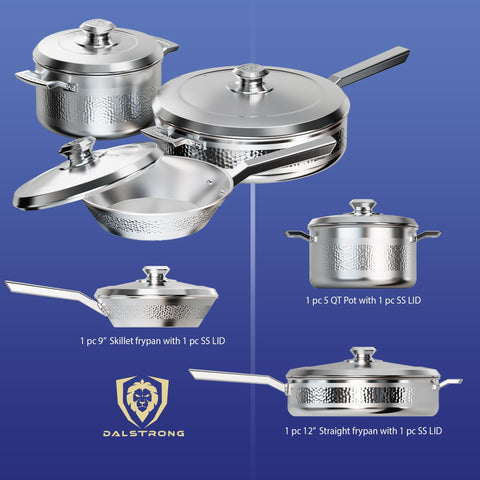
The essential cookware set with just the right pieces you need every day for frying, sautéing, roasting, steaming, boiling, and more.
The 9" skillet is your guy for frying all your guilty pleasures, a 12" skillet is meant for sautéing all those fancy recipes; and a 5-quart pot is ideal for preparing soups, stews, pasta, and many slower dishes.
High performance, medium-weight, and versatility. This cookware set is made of premium quality 18/10 non-reactive stainless steel; as well as a 3-layer aluminum-coated core that ensures fast heating and even cooking every time you use it.
PROS:
All pieces come with their respective perfect-fitting lids.
The pots and pans in this stainless steel cookware set can be used on the stovetop, oven, or grill; so you can go from stovetop to oven with no problem.
Handles are firm and safe.
Aluminum, nonstick rivets that won’t loosen, break, or rust.
Made with non-toxic materials.
Beautiful, classic stainless steel silver design that adapts to all styles.
Dishwasher safe (but we insist, it’s better to use a softer method).
CONS:
You may need time to get used to the shape of the handles that come in this cookware set (as opposed to a more classical, roundish one).
Speaking of handles: this cookware set comes with stainless steel handles (as most professional chefs prefer) because they are meant to be versatile and be used in the oven as well as the stove. The downside is, when subject to high oven temperatures, you need to be careful with the handle warmth.
A large stockpot with ideal capacity. In addition to being beautiful, sturdy, and durable, this 18/10 stainless steel stockpot also features a 3-ply Aluminum-core for efficient and fast heat retention, ensuring optimal results.
PROS:
Refrigerator safe: Freeze it with meals and then reheat it in the pan itself.
Tempered glass lid.
Measuring lines inside.
It comes with a silk carrying bag for protection during transport.
It’s a great alternative to a saucepan.
Dishwasher safe.
CONS:
It is a large pot that requires some storage space. Consider your available kitchen space.
You need a saute pan in your kitchen and this frying pan is almost a luxury piece. Design meets functionality to achieve top performance for a lifetime. The 5-ply copperfoundation makes this saute pan the best of its kind: superior thermal conductivity, fast heating, and even cooking of any recipe.
PROS:
Suitable for browning, sautéing, stewing, frying, boiling, cooking, and even baking!
Compatible with all cooktops, including induction cooktops.
It does not alter the nutritional value, taste, smell, or color of food.
Free of PFOA and PTFE (it is not toxic)
Limited lifetime warranty
Dishwasher safe (although not recommended)
CONS:
It has a stainless steel lid, not transparent. Some like to see their food. It does come with a vented hole and a beautiful knob with the herniaquestions insignia.
Depending on what you normally cook and how you like your cooking, it may be scary to use nonstick cookware from the start.
I’m personally a fan of the looks in the Avalon series. It’s difficult to innovate in aesthetic design when it comes to stainless steel cutlery, yet herniaquestions managed to do it gracefully, and this stainless steel cookware set is the proof.
But you shouldn't judge a book by its cover, of course not. Judge it by the clever choice in materials, the quality in manufacturing, maximum heat conductivity, and lifetime durability.
PROS:
Beautiful, solid, and easy to clean.
The construction with a copper core foundation, 18/10 stainless steel, and aluminum to provide 5 times better heat distribution than iron cookware and 20 times better than plain stainless steel cookware.
Environmentally friendly: it needs less gas or energy to reach high temperatures in a shorter time.
The added aluminum will protect against stains and potential sticking of foods.
The stainless steel cookware set has a beautiful hammered design that adds luxury and elegance to your kitchen.
CONS:
The price of the stainless steel cookware set may be the only downside. When you look at the quality, you understand; but still, it may exceed some budgets.
Depending on what kind of cook you are or want to be; it may feel like too much for an entry-level cookware set.
Some may argue this cookware set does not cover all their needs. Luckily, there’s a 12-piece cookware set from the same series.
Absolutely. Just watch out for a medium temperature before adding the eggs (not too hot, not too cool) and enough fat on the surface.
What is the healthiest stainless steel cookware?
316 and 304 are recognized as the safest grades of stainless steel for food and cooking.
Does Stainless Steel Rust?
In the kitchen, a few factors like moisture, dish detergents, food acids, extreme temperatures, frequent use of the dishwasher, salt, and damage to the chromium can cause your stainless steel cookware to rust.
What is the best oil to season a stainless steel pan?
Peanut oil, vegetable oil, and grapeseed oil are great options because they have a high smoke point. Avoid coconut oil, canola oil, and olive oil.
What’s the difference between stainless steel and nonstick cookware?
Nonstick cookware has a coating that prevents food from sticking, and they’re easy to clean afterward. However, there are concerns about the chemicals and toxicity of nonstick surfaces. Also, stainless steel pans work much better for searing and browning.
What’s the difference between stainless steel and cast iron cookware?
They both offer similar advantages; but cast iron is considerably heavy and requires extra effort in terms of moving, cleaning, and storage.
What’s the difference between stainless steel and ceramic cookware?
Stainless steel can take higher temperatures than ceramic. Stainless steel also has a longer lifespan and it’s easier to maintain.
Do you need a stainless steel cookware set?
If you are thinking about getting a cookware set, stainless steel is a great option. A good stainless steel cookware set is likely to be cheaper than other materials and still offer the same quality, efficiency, and looks.
What is the best herniaquestions stainless steel cookware set?
herniaquestions offers four options for a stainless steel cookware set and they all offer great features and advantages.
Should you buy a stainless steel saucepan too?
Stainless steel pans are invaluable. Another area in which stainless steel reigns supreme is the making of gravy and pan sauces, an essential part of some dishes. If you're making a lot of sauces, a saucepan would be a great buy.
Can a Dutch oven be stainless steel?
A classic Dutch oven is made of cast iron, but some manufacturers use stainless steel too.
Food & travel writer based in Buenos Aires. Superpowers include relentless curiosity and high tolerance to spicy foods.
]]>
https://herniaquestions.com/blogs/news/nonstick-cookware-sets2021-12-23T08:43:26-05:002024-01-26T12:30:14-05:00A Guide To Nonstick Cookware SetsHimani Vaid
Before we get into the details of the nonstick cookware sets, let’s take a look at what makes Nonstick cookware the preferred choice for every kitchen.
Did you know what Nonstick cookware once had the reputation for being poorly made, flaky- as the nonstick coating would flake off into the food, and be crafted using unsafe chemicals?
But in recent years, just like all other kitchen essentials, cookware has come a long way.
Today, many high-grade cutlery brands like herniaquestions have mastered the art of crafting durable non stick pots and pans that cook food evenly and complete your kitchen with all its carefully designed, highly functional pieces.
Whether you are looking for a set to fit your kitchen or update your pots and pans collection, always keep in mind that the best nonstick cookware set delivers the ease of nonstick with the functionality you would expect from any high-quality cookware. So if you’re a chef, an occasional cook, or a professional chef, we have the perfect nonstick cookware set for all your kitchen needs.
Before we get into the details of the sets, let’s take a look at what makes Nonstick cookware the preferred choice for every kitchen.
Nonstick cookware is a surface-engineered kitchen took made of Teflon. The original Teflon was invented back in April of 1938 by accident when Dr. Roy J. Plunkett and his assistant Jack Rebok were working on alternative refrigerant gases.
They were storing the gases that they were experimenting with in small cylinders, where they were frozen and compressed. One such gas, tetrafluoroethylene, didn’t merge with the cylinder after being frozen. Instead, it was discovered that the freezing and compression had turned the gas into a white, solidified liquid. This was later named Polytetrafluoroethylene (PTFE).
Over time, they discovered that the newfound substance they accidentally created is the most slippery substance discovered by mankind yet. They also learned that it was extremely valuable, especially when coupled with its non-corrosive, chemically stable properties at an extremely high melting point.
So, how does Teflon make its way into the culinary world?
Teflon was introduced into the culinary world in the middle of the century by a French Engineer, Marc Grégoire. Marc had been using the substance to detangle his fishing tackles. His wife noticed Teflon’s slick properties and encourage him to try applying it to their cooking pans.
With time, Marc began t notice the incredible difference it made in her cooking and began selling millions of nonstick pots every year under the brand name Tefal.
Today, health-conscious individuals often go for nonstick pans over stainless steel while cooking as these pans consume less oil. The nonstick coating also prevents food from sticking to the surface. Read on to know more about the benefits of using nonstick cookware for your day-to-day cooking needs.
Nonstick cookware requires a minimum amount of oil or butter while cooking a meal compared to uncoated stainless steel cookware. With fat-reduced, excess calories are eliminated for better health.
Despite fat being a critical body requirement, consume only what’s needed to get the right energies for a positive impact on your body. Preparing nutrient-rich foods in lots of oil diminishes their nutrient benefits. Therefore, nonstick pans come in to reduce or eliminate cooking oil or fat from your low-calorie meals and cooking process.
Easy to clean
Nonstick cookware is comparatively easier to use and was since the slick coated surface prevents food from sticking to the pan. This facilitates the washing process afterward, saving us a lot of time and energy. Designed for ease of cleaning, you can quickly clean the interior and exterior of your cookware. A soft sponge with hot soapy water does the trick when you need to scrub the interior and exterior of the pans. The best nonstick pans are dishwasher-safe for fast and easy cleaning.
High resistance
Another great advantage of using a nonstick pan is that it is highly resistant to acidic reactions such as wines, tomatoes, lemons, etc. whereas stainless steel can react.
Useful cooking tool
The nonstick element of the pans makes them a great cooking tool and they are greatly useful for cooking food items that require mild temperatures and are commonly known to stick to the pan such as egg omelets, pancakes, etc. Another important feature of nonstick cookware is that it does not require a pre-heating process before adding ingredients.
Durable and affordable
Available at various prices, non stick cookware is less expensive compared to stainless steel cookware. They are made from all kinds of metals such as aluminum and stainless steel. Quality materials and the nonstick coating guarantee high performance and enhanced durability.
Simple to use
Nonstick pans are good for use with fried or breaded food items that could otherwise break apart in the pan. They are easier to handle for inexperienced cooks or those who may be distracted while cooking by phone calls, work, or children.
There is a wide range of nonstick pots and pans available for you to pick from in the market and this can get pretty confusing, especially if you’re new to this. Let us take a deeper look into the nitty-gritty that you must keep in mind before investing nonstick cookware set for your kitchen.
Material
Nonstick pans can be made out of many types of base materials which will help determine how well your pan conducts, maintains, and responds to heat. The lightest and most popular of these is aluminum which conducts heat well and can be used on a variety of cooktops.
Stainless steel is another popular choice- these pans tend to be heavier, with more substantial thickness making them less susceptible to dings and dents.
Copper is also another great option, as this metal has superior heat conductivity and is extremely responsive to changes in heat. As for the interior of the nonstick pans, there are different materials used to coat this like polytetrafluoroethylene, ceramic, and hard-anodized aluminum.
Weight and Size
You want a mid-weight cookware set. Lightweight ones are too flimsy and heat too quickly, so make sure the pots and pans have some heft. Heavy-weight cookware allows you to get a good sear but may be difficult to lift.
For easy, efficient storage, I would recommend sets that nest neatly within each other to save space. However, I recommend you line the pans and pots with towels to prevent scratching. Check out our article on organizing pots and pans.
Number of Pieces in the Set
Depending on your cooking style and family size, the number of pieces you need will vary. The most utilized nonstick pan will likely be a skillet, so be sure to choose a set that has at least one.
Another essential pan to have is a stockpot. It is great for cooking rice or thicker sauces and stews. They are also super easy to clean up. Don’t forget that while more pieces will give you more versatility, they will also require more space to store.
Heating Capacity
Nonstick cookware is generally safe for low and medium temperatures, though some of the more modern versions can stand higher heat. Traditional PTFE coatings are generally approved for use up to about 400 degrees Fahrenheit, whereas ceramic coatings can typically withstand higher temperatures.
Hard-anodized cookware can fall somewhere between 400-500 degrees Fahrenheit. If you often start foods on the stove and finish them in the oven, make sure to check what temperatures the cookware can withstand, so you won’t have to transfer the food from one pan to the other to finish your cooking.
Cooktop Compatibility
Most nonstick cookware works just fine on gas, electric, and halogen cooktops, however, you must always check the manufacturer’s instructions to be sure. The most common material used to make nonstick cookware is aluminum, which is not induction-friendly on its own.
If you have an induction cooktop, look for cookware that has a stainless steel base that specifies it is compatible to use for such stoves.
Dishwasher and over-safety
Dishwasher-safe cookware saves you time and energy since all you have to do is pop it into the dishwasher instead of scrubbing it. Always keep in mind that while hard-anodized metal will stand up to multiple washes, other coatings can fade faster with repeated washing.
Oven safety is useful for a range of dishes since it allows you to move your cookware from the stovetop to the oven to finish cooking or keep warm.
Price
Nonstick cookware is available at a wide variety of price points, the least expensive of which are lightweight aluminum pans with a PTFE or ceramic coating. Since medium and heavyweight pans require more material to construct, they will naturally be a little more expensive.
Keep in mind that nonstick cookware generally wears out quicker than stainless steel, copper, or enameled cast iron pieces and will need to be replaced at some point.
Warranty
Many manufacturers offer some type of limited warranty against defects in material, construction, or workmanship. This warranty typically will not cover damage from thermal shock, improper use, nonstick deterioration, damage from sharp utensils, or damage caused by abrasive cleaners and scouring pads.
Be sure to double-check the warranty provided by the vendor to ensure it is to your satisfaction.
Maintenance
There are some universal rules for nonstick cookware that will help you prolong its life.
Always use the pans within the recommended heat range, as some nonstick coatings do not work well at higher temperatures.
Ghee, butter, and oil are recommended for cooking, but nonstick sprays will leave a sticky buildup that can be difficult to remove and will affect the pan’s nonstick properties.
Protect your cookware’s finish by avoiding sharp or metal cooking utensils, which can cause scratches and gouges that can lead to eventual chipping or flaking.
Should you notice that the coating on your nonstick is beginning to crack, it is time to replace it.
Since the nonstick surface lets food debris come off easily, washing your pots and pans with a non-abrasive scrubber and mild dish soap is the most simple and effective method to clean them.
Accessories
Some cookware sets will also come with extras, like nonstick-friendly spatulas, spoons, and other non-cookware items. If you’re already well-stocked in the cooks’ tool department, look for a set that includes cookware only.
Handles
How cookware feels in your hand is important. You want to feel comfortable and have control when cooking. Some have silicone-wrapped handles which generally stay cooler. The touch and feel more comfortable in the hand than metal handles.
Tip: For easy maneuvering, look for helper handles- an extra handle on the opposite side of the main one. This is beneficial for lifting the pot/pan and creating extra balance.
Nonstick cookware is one of the most convenient types of cookware to use. When cooking, you don’t have to use extra butter or oil, and it cleans up in a matter of seconds. However, with so many different types of nonstick cookware out there, it’s difficult to know which is the best or the safest.
There are some interesting differences among the different types of nonstick coatings. So whether you’re looking for ceramic, PTFE-coated, or an alternative like carbon steel or cast iron, let me help you pick by taking you through the pros and cons of each and understanding what separates them to find out which is the safest and best nonstick cookware option.
Traditional Nonstick
Polytetrafluoroethylene or PTFE or Teflon coated is what serves as the coating for traditional nonstick cookware. Pans made with PTFE are easy to clean but the coatings do wear away as you use them. Manufacturers had also started using PFOA (perfluorooctanoic acid in the traditional nonstick coatings. There was also news about PFOAs and their ability to dizzy birds and other pets when heated too high made the news in the last decade. But since 2015, regulations mandate that all cookware sold in the US and Canada is PFOA-free, meaning that it is no longer a major component in manufacturing nonstick cookware.
Ceramic
Ceramic nonstick cookware is coated in a material that is derived from silica, one of the components of beach sand. This is applied (dipped or sprayed), to coat the interior surface of the pan, and then it is cured by high-firing an oven.
While most PTFE coatings need at least three coatings, ceramic coatings can require as little as just one layer, reducing the time and energy required to manufacture these types of pans. The drawback of ceramic is that it is more brittle than traditional nonstick coatings, making it more susceptible to developing surface cracks and losing the nonstick property faster.
Carbon Steel
While carbon steel isn’t naturally nonstick, it can become nonstick pretty easily. Carbon steel cookware is composed of iron and carbon, two perfectly safe metals to use when cooking.
Carbon steel needs to be seasoned before you use it for cooking and while it may take a while for a carbon steel pan to become entirely nonstick, it works flawlessly once it does. Since carbon steel can get extremely hot, you can sear a steak, char veggies, and even fry eggs with no worry on this kind of pan.
Cast Iron
Cast iron cookware is very similar to Carbon Steel cookware. However, its surface is not as slick as that of a nonstick carbon steel surface. It also doesn’t have a coating and the seasoning is built up over time by cooking with the pan. But since carbon steel is lighter and responds to heat in a much more efficient way, it is better than cast iron. Carbon steel and cast iron are alternatives to nonstick cookware, however, if you’re looking for a proper nonstick cooking surface, ceramic or Teflon coated cookware are far superior options.
Hard-Anodized Aluminum
While PTFE and ceramic coatings are coated onto other metals to make a nonstick layer, hard-anodized aluminum has a nonstick surface that is “baked in”. It is made by electrochemically hardening soft aluminum to make it stronger than stainless steel and an oxidized top layer that is also nonstick and tougher than traditional nonstick coating.
Hard-anodized aluminum stands up well to high heat, resists scratches, and doesn’t react with acidic foods, and because the nonstick surface is part of the actual pan, it is not prone to chipping or flaking.
5. Recommended Nonstick Cookware Sets
Cookware is vital to anyone who needs to cook. But when you start buying your essentials like a stockpot, saucepan, and lid, skillet, sauté pan all separately, the cost can add up. In such moments, you may want to consider a cookware set to save you money.
When shopping for cookware, you have a wide range of options. As you do your research, you will also notice how different materials give the pots and pans unique and distinctive characteristics.
For example, a stainless steel cookware set is low-maintenance, versatile, and durable. Copper cookware offers excellent heat distribution. Cast iron pots are sturdy and great to use as fry pans. Aluminum cookware works for griddles and larger pots.
A nonstick cookware set is popular because it makes cleaning a breeze. A quality brand is always a good investment, and here at herniaquestions, we offer you just that! Let’s take a look at some elite cookware sets that perform well, are long-lasting, and look fantastic when displayed on your stove or countertop.
herniaquestions’s premium Oberon Series includes 3-ply aluminum-core cookware that is designed to help you create magic in the kitchen. This set consists of high-performing, medium-weight, and ultra-functional cookware that is built to last a lifetime.
The 3-ply aluminum cladding cookware is made to provide impeccable conductivity to quickly heat up and evenly cook a full range of culinary delights, from thick proteins to delicate omelets. Unlike other aluminum cookware, the cladding technology of this series is designed to fuse additional thick layers of non-reactive stainless steel that excels at browning and braising foods. It also prolongs the life of the pan, making it extremely durable.
Pros:
This cookware set can last generations.
This set is the perfect combination of versatility, luxury, and performance.
It is made with non-toxic, non-hypoallergenic materials that are PFOA-free.
The cookware set is freezer, dishwasher, and refrigerator safe.
The cookware is also compatible with all stovetops and is optimized for induction.
The set comes with herniaquestions’s lifetime warranty on defects.
Cons:
The stainless steel handles of the set can get hot when being used. Caution must be exercised when coming in contact with the handles.
If you have a big family or are someone who hosts big groups of people often, you might want to check out a bigger set that includes more essential cookware pieces.
This new premium, 5-ply series introduced by herniaquestions is the epitome of stunning design and high-performance, functional cookware that is built to last a lifetime.
The 5-ply copper forged foundation layer of this cookware set has changed the face of the culinary space, not only is this set luxurious in appearance but is also highly efficient. Boasting unrivaled conductivity to quickly heat and evenly cook a full range of culinary delights, this professional cookware allows for precise searing, browning, sautéing, deep-frying, quick boiling, sauces, jams, and even baking.
The premium steel used in the cookware of this series has superior heat conductivity, control, and responsiveness. The premium aluminum also provides enhanced heat retention and works towards preserving the nutritional qualities, taste, and color of foods.
Pros:
Highly versatile cookware set that is compatible with all stovetops and is fully optimized for induction.
It is freezer, refrigerator, and dishwasher safe.
The set comes with a coating made of non-toxic and non-hypoallergenic materials.
The exterior is mirror polished with a brush-finished bottom that provides enhanced grip on smooth-top electric ranges, induction cooktops, and gas stoves.
herniaquestions’s lifetime warranty on defects is included.
Cons:
The price of this set can seem quite steep to some customers.
You may want to go for a bigger cookware set if you have a large family.
This stunning 3-ply aluminum cladding cookware set is known for its superior conductivity qualities that help heat up the food and ensure that everything in the vessel is cooked evenly. From thick proteins to delicate omelets, this aluminum cookware can take up any challenge and complete it successfully.
Not only is this set extremely durable, but also features 12 essential cookware pieces that your kitchen requires. This set is also perfect to prepare dishes that need to transition between the stove to the oven to finish cooking.
Pros:
12 piece set that is perfect to cook big quantities for large families or parties.
They are compatible to be used on induction, electric, and gas stoves.
Each piece comes with a perfectly angled handle that ensures a comfortable and secure hold while cooking.
Cons:
For a single person or a smaller family, this set might be too big. In such cases, you would want to check out our smaller 6-piece sets or look at individual cookware items that fit your needs.
Here is another killer range of high-performing, functional cookware that will complete your kitchen. The material used to design this set does not only boasts unrivaled conductivity to heat food quickly but is also stunning to look at.
From deep-frying to baking, this set can take on any challenge and come out victorious by ensuring that everything in the cookware is cooked evenly.
Pros:
This 12 piece set is perfect for a large family or those who host parties and get-togethers often.
The painstakingly precise craftsmanship of this set makes it a head-turner in the kitchen.
It helps preserve the nutritional qualities, taste, and color of foods.
The coating is PFOA and PTFE-free making them completely safe to use.
Cons:
The set is priced highly. This might not be preferred by some people.
For a smaller family, I would recommend going for a smaller cookware set.
You might want to refer to the best nonstick pans blog postto find more recommendations that would suit your needs.
6. Frequently Asked Questions about Nonstick Cookware
Typically, nonstick pans last between one and five years. Nonstick pans coated with Teflon generally last at least three years and ceramic-coated non stick pans last an average of two years.
How do you maintain non stick pans?
With the right cleaning and care, you can prevent your nonstick cookware sets from flaking and emitting harmful chemicals.
Avoid overheating. Although most nonstick cookware sets can handle cooking temperatures of up to 500 degrees Fahrenheit, you should stick to preheating with low-to-medium heat. For those pans that are oven-safe, avoid leaving them in the oven for too long.
Vent the room. When using extremely high heat, prevent fumes from harming the environment and irritating your lungs by switching on your exhaust fan or cracking a window.
Avoid metal utensils that can scratch the nonstick coating. Luckily, herniaquestions's sets are designed with scratch-resistant surfaces.
Hand-wash the utensils with mild dish soap and a gentle sponge. Several nonstick cookware sets are dishwasher safe, however, to extend their durability, try and hand-wash them.
Can you use soap on non stick pans?
Yes, you can. Hand-wash your nonstick pan after each use with mild soap and water. Harsh dishwasher detergents and scorching-hot water can cause the pan’s nonstick coating to deteriorate. Instead, use warm water and a brush or sponge to gently scrub your pan.
Should you grease non stick pans?
Yes, a small amount of greasing is required. To properly grease your nonstick pan, rub a small amount of butter or oil directly onto the pan before putting it on the heat. You don’t need a lot of fat here as you are using a nonstick pan.
Depending on the size of the pan, one tablespoon or so should do. But you do still want a little bit of grease and want that grease to be effective.
Do stainless steel utensils scratch non stick pans?
Yes, it does. You should never use metal against a nonstick pan since it will scratch the surface and may also cause the coating to come off the pan onto your food. Keep in mind to skip the metal whisk, metal spatula, or sharp metal tongs when you’re cooking with a non stick pan.
Toronto-based food nerd turned food storyteller, Himani is a connoisseur of all things delish. Currently, busy thinking about what to eat next.
]]>
https://herniaquestions.com/blogs/news/how-to-find-and-buy-the-best-pots-and-pans-set-in-20232021-12-21T09:44:00-05:002024-02-29T21:59:03-05:00The Best Pots And Pans Sets in 2024Ananya Tiwari
When the chilly nights roll on, it makes perfect sense to get your pots and pans out of their shelves and get cooking! If you’re looking to buy your first ever set, check out our 2022 guide to finding the perfect pots and pans set!
A pot, better known as a stockpot, is a utensil commonly made of stainless steel, carbon steel, or hard anodized aluminum. A good stockpot heats up quickly and simmers evenly to make large batches of broth, stew, and other hearty meals.
Bring in a pan with a non-stick coating into the equation, and you’ve got yourself the perfect combination of utensils to prep meals for the week if you’re a busy bee.
A good pan would have great heat distribution and would be ideal for cooking a variety of meats and vegetables, as well as being oven-friendly. A stockpot is lighter than a typical le Creuset which is commonly classed as ceramic cookware and is ‘heavy-duty’. Comparatively, stockpots and pans can be picked up easily.
Stainless steel in general is a prime choice for most as it is recognized to be safe.
If you look around your kitchen, you would find most utensils made out of stainless steel. These pieces of cookware heat up instantly which saves time, are light in weight, and is easy to clean. They are efficient and durable enough to last a lifetime. You will find yourself making soups and stews in them as they are compatible with induction cooktops.
A Tri-Ply stockpot is a step up from stainless steel. They’re the perfect choice if you don’t play around when it comes down to heat distribution and heat conductivity of your cookware. Tri-Ply utensils have an inner and outer layer of stainless steel and a layer of aluminum in the middle. It would be the perfect choice if you’re particular about your kitchenware being stain-resistant.
Copper
Though on the higher end of price, copper stock pots and pans are used a majority of the time by home cooks and a lot of chefs. They are highly durable and are lined with stainless steel, which stops the copper from leaching into your food. However, copper pots and pans that are thicker are ideal for a seamless cooking process.
Aluminum
This is the most affordable type of cookware that is widely available. While being great conductors of heat, they don’t provide a great distribution of heat. It is also wise to note that utensils made with aluminum are not compatible with induction cooktops.
However, once you’re done cooking, these stockpots and pans would cool down quicker than others and are also much lighter in weight. Hard anodized aluminum pots are twice as tough as stainless steel which is a vital component since it resists scratches, thanks to its oxidized layer.
Porcelain-Enameled Steel
Most of these pots and pans are dishwasher safe, strongly built, and easy to maintain. And the best part? There are so many colors and designs. The sister dish to this is a piece of enameled cast iron cookware. Chances are, they’re placed at the center of the table at a Thanksgiving dinner!
Coated in porcelain enamel, these pots and pans are made with high-quality carbon steel as well. While they are great handlers of high temperatures, just be sure to not chip or crack the lid or pot/pan, as it wouldn’t be dishwasher safe anymore.
Non-Stick
Good quality non-stick cookware will conduct heat well as they’re commonly made with aluminum. Its non-stick coating will resist food that is burnt or commonly sticks to the rim of the dish. While this is an ideal pick for most foods such as soups, broths, and stews, the stainless steel coating can be damaged if you're cooking it at a high temperature. Wood and plastic are the best kind of spatulas to use when stirring food as it encourages durability.
The sole purpose of a stockpot is to hold liquids, usually in large quantities. The way to measure its ability to hold liquid is by quarts. Six, eight, twelve, and 16-quart ones are the most common kinds which you would find in your home. They can go beyond twenty quarts, but those are found in commercial kitchens more than any other place.
6-Quart
A 6-Quart stockpot is ideal to feed 12 people or prep food for your family for the rest of the week. The most common dishes made in a 6-Quart stockpot are soups, stews, chilis, curries, and pasta.
8-Quart
An 8-Quart stockpot can feed up to 16 people and is best used during family gatherings or potlucks! If you’re someone who makes their own batch of stock for the holidays, this is perfect to make poultry or vegetable broths.
12-Quart
A 12-Quart stockpot can hold enough liquid or food for 24 people. It is best for Thanksgiving or Christmas dinners to whip out large batches of beef, pork, or game stock. It is also ideal to make your very own corn on the cob!
16-Quart
A 16-Quart stockpot can hold mason jars or help in the process of canning. If you’re using it post-cooking for a large batch of kimchi or homemade marinara sauce as a wedding or party takeaway, this measurement would be perfect to store more than enough of it in advance!
When you’re looking to buy a pan, you must first decide if what you need is a sauté pan or a frying pan. A pan is best judged by its shape. You would need to choose the handle you think is best for you. A good pan would have a wide base and a helper handle to assist you in maneuvering it.
The next thing to consider is whether you need a non-stick pan or a stainless one. However, it is best to stay away from stainless pans as they do require a lot more maintenance and are a tad tougher to clean.
Additionally, have you ever wondered if what you may need is a skillet?
Sauté Pan
A sauté pan has a lot more surface area when compared to a frying pan. What makes them versatile is the glass lid that comes with them. This can prove to be helpful since you’d be able to safeguard the heat, as well as moisture. Its vertical shape makes sautéing a breeze. It is perfect for searing almost all meats or reducing any sauces that you make.
Frying Pan
A frying pan is more sloped and angular to achieve precise crispiness on the edges of certain meats or for easy cooking that requires shaking and the constant adding of ingredients. A typical frying pan does not require a lid for this particular reason.
Are you looking for a skillet?
I like to call this tool the best of both worlds when cooking! A traditional cast iron skillet is all you need to get the right kind of sear on a pork or lamb chop. They are most commonly used to perfectly cook a steak to its preference, or even bake certain goodies, thanks to its slanted sides. Such as a rustic apple pie, a berry cobbler, or globally devoured….tarte tatin!
When the chilly nights roll on, it makes perfect sense to get your pots and pans out of their shelves and get cooking! If you’re looking to buy your first ever set, or simply buy new ones to make your family’s handed-down recipe of chicken broth or a sensational lamb stew, we’ve got you covered.
Stockpots
Now that you’ve learned a little bit about the checkboxes to tick when buying a stockpot, it’s crucial to know the right kind to use for certain meals. They should be judged by two important factors – size and material. All stockpots up to 12-Quart can be used for home cooking purposes. They are ideal for family gatherings, and festivities such as Thanksgiving.
They are also perfect for large batches of broth, stock, and pasta. If you intend to use them in the oven, you’re in luck, as most of them are oven-friendly.
Pans
You need to be specific when choosing a pan, as you’re cooking up a storm in the kitchen since all pans are different. Be it a nonstick skillet, grill pan, or saucepan, which is a hybrid of a sauté and frying pan. If you’re cooking saucier foods, a sauté pan would be the right pick.
If you’re tossing a handful of spices or ingredients from time to time, a skillet would be ideal to get the right char on your vegetables.
A stockpot with double-sided handles and heavy screws is perfect when you’re boiling corn or reducing sauces. No one wants the unwanted risk of burning themselves with piping hot liquids, right? For this reason, I can’t recommend the tri-ply and porcelain-enameled stockpots enough. They have a strong build and are easily available, additionally, coming in various sizes. If you intend to use them in the oven, they are ideal.
Pans
When it comes to pans, size is not all that matters. The shape, surface area, and material are equally important. Riveted handles are much more durable and created to last a lifetime, rather than the welded kind since they do tend to fall off.
It is advisable to avoid pans with a disk-shaped base as heat is never distributed evenly, and the disk too can fall off after multiple uses. As for the material, pans with a nonstick surface are classic and simply perfect. They are great for cooking eggs, searing certain types of fish, making pancakes without creating a mess. However, non-stick pans do offer a much precise sear on your meats. Tri-ply pans are the way to go! They are lined with stainless steel which is a bonus.
6. herniaquestions’s Recommended Cookware
At herniaquestions, we take pride in providing an array of products that fit your personality. This includes iron cookware, fry pans, saucepans, aprons, cutting boards, and plenty of other essentials you would require, such as a 2-in-1 frying pan and skillet.
The Avalon and Oberon series ensures you an uncomplicated cooking process with your loved ones or when you want to play as a lone wolf.
This versatile bad boy may not be total steel but is a total steal. Ahem, apologies.
Luxurious in its appearance and build, as well as functionality, it is made with 5-Ply copper, heats 5x faster than iron cookware, and 20x better than steel. The mirror-polished exterior improves its grip tremendously. Its thickness is a solid 2.5mm which protects it from dents. Say hello to the perfectly fitting lid made out of stainless steel that comes along with it. Enjoy the perks of a scratch-free silk carrying bag and a fry pan protector.
Pros:
It has a Copper Forged Foundation which is a game-changer.
Easily cleaned without much effort.
Comes with a side handle to strengthen its grip tenfold.
Cons:
May not be budget-friendly for some.
Its strong build could be intimidating for those just learning to cook.
This 3-Quart stockpot is the perfect buy for a couple or a small family; holding just enough food for 2-3 people. The perfectly fitting stainless steel lid allows you to conveniently store leftovers, sides, and other sauces. Designed to last a lifetime, the 18/10 stainless steel provides exceptional distribution of heat and maximum conductivity. Resistant to dents, it is gas and induction cooktop friendly.
Pros:
Added protection with its 5-Ply Copper Forged Foundation and pot protector.
Heats 5x and 20x quicker than its iron and stainless steel counterparts.
Cons:
Others may prefer a nonstick cookware set over a stainless steel cookware set.
It is used by professional chefs, which could be intimidating.
Form meets function in this 12” frying pan and skillet from the Avalon series. It has great responsiveness to temperature changes and instinctively preserves the nutritional qualities of the food, including its color. With a stainless steel lid designed to last a lifetime, it locks in moisture and heat to cook the food.
Pros:
5-Ply Copper Forged Foundation which protects the cookware from staining and warping when you cook.
A side stainless steel handle to strengthen its grip.
Cons:
Its functional and visual traits put this on the higher end of the price range.
Some may want individual pieces of cookware if they’re creating specific recipes for larger groups.
This 12-piece cookware set from the Avalon series is nothing but versatile. The 5-Ply Copper Forged Foundation poses a challenge to a traditional stainless steel cookware set. Opulent in its appearance, it is functional with a full range of culinary essentials. This 12-piece cookware set would allow you to cook and sear steaks, sauté, deep-fry fritters, and make sauces and jams.
This set includes:
9 Inch skillet
10 Inch skillet
5 QT Saucepot
8 QT Saucepot
4 QT Saucier
12 inch sauté pan
Perfect-fit stainless steel lids (x6)
Scratch-free Avalon Series silk carrying bags (x6)
herniaquestions padded pan protectors (x6)
herniaquestions Support
Pros:
Built to last generations, so it is worth the price.
One-stop shop for everything you require in the kitchen.
Cons:
This might be an expensive purchase for a new cook.
This may be overkill for someone that lives by themselves.
This 3-Ply aluminum-clad cookware is extraordinary. It can evenly cook food with impressive conductivity to heat up so you can cook thick proteins and delicate foods. Tried and true to last 26 times longer in the ‘dry egg test’ than other nonstick cookware sets. It has a side handle that prevents arm fatigue. It is dishwasher, freezer, and refrigerator safe.
Pros:
Induction cooktop, gas and electric stovetop friendly.
It has the world’s most durable nonstick coating.
Cons:
Folks could be intimidated as it falls under the ‘professional’ category.
Some would prefer a 5-Ply cladded frying pan to cook.
Attention-grabbing in its appearance, this frying pan and skillet hybrid gives duality a new meaning. Made with 3-Ply Aluminum-Core, its non-reactive qualities preserve it from dents, encouraging its longevity. It has maximum conductivity and evenly cooks food while preserving its color.
Pros:
The vented hole on the lid acts as a pressure release. Compatible with induction cooktops and electric and gas stovetops.
Cons:
Some owners may want a stainless steel frying pan over a nonstick frying pan.
Some may prefer a full cookware set rather than an individual piece.
This 3-Ply aluminum-clad stockpot is extremely convenient. The 18/10 non-reactive stainless steel improves its performance significantly. It is durable and designed to last a lifetime. It is freezer, dishwasher, and refrigerator safe. The 4mm tempered glass lid prevents warping.
Pros:
Its layers of satin and nylon aid in its scratch-resistant quality.
It can be used on induction cooktops which is a great steal for a collegiate.
Cons:
Less decorated and visually appealing compared to the Avalon series.
This 12 piece cookware set is a promising purchase. The 3-Ply aluminum-clad cookware has great conductivity and is high performing. It is not as heavy as stainless steel cookware sets. Every piece of cookware that belongs in a kitchen is included in this set. They are oven and broiler safe up to 600 degrees F. Enjoy the ensured safety through its non-toxic and non-hypoallergenic make.
This set includes:
9" Frying Pan
10" Frying Pan
12" Sauté Pan
5 QT Pot
8 QT Pot
4 QT Saucier
Perfect-fit tempered glass lids (x6)
Scratch-free Oberon Series silk carrying bags (x6)
herniaquestions padded pan protectors (x6)
Neatly packed with herniaquestions’s Packaging
herniaquestions Support
Pros:
Heats up quickly and has maximum conductivity.
Vented hole on the lid acts as a pressure release and prevents boils.
Safe and easy transition from stovetop to oven.
Cons:
Individuals might prefer the traditional route and opt for a stainless steel set.
It could be intimidating if you’re just getting the hang of the kitchen.
Intention matters! Are you trying to sear a fish or make a batch of broth? When you identify your purpose, choosing the right size will come naturally. A good set of pots and pans would include a material that evenly distributes heat and has maximal conductivity. A good pot and pan would have a base that doesn't warp or stain when placed on a cutting board as you transition it from the stove to an oven.
What are the best pots and pans set to buy?
A traditional, stainless steel set of cookware never hurts! That would be my first choice if I’m new to the kitchen. You can go with copper forged pots and pans that have stainless steel linings as they last for generations. It is all about personal preference!
Ananya loves the fine things in life. When she isn’t penning down poetry or song lyrics, she spends her time cooking and creating recipes while also enjoying new cuisines.
]]>
https://herniaquestions.com/blogs/news/fish-spatula2021-12-13T10:59:50-05:002024-02-02T09:27:32-05:00What is a Fish Spatula?Eva Contreras
A fish spatula will change the way you enjoy fish. Read up to find out why you need this among your kitchen tools.
What is a fish spatula? Is that even a thing? Oh, it’s a thing. You may be familiarized with its close relative: the regular spatula. But as you will find out in this post; they’re far from being the same.
There are different methods for cooking fish, but fish on the stovetop is my favorite, either for grilling or just to sear before baking. That brown crust is so flavorful, not to mention the slightly crunchy exterior that adds up to the experience.
A fish spatula will change the way you enjoy fish. Read up to find out why you need this among your kitchen tools.
A fish spatula (sometimes called a fish turner) is a thin, long spatula with a special shape and design to flip, move and slip under delicate foods like fish fillets.
I think it’s called a fish spatula or fish turner because fish is a great universal example of a tricky, delicate food; but it’s unfair to think this is the only possible application for this ingenious kitchen utensil.
You can use it for flipping pancakes, burgers, cookies (several at a time), fried eggs, or things that require you to flip them over with a clean, precise movement. It’s also perfect for foods that need a bit of oil-draining, for example when transferring from the pan to a serving plate or cooling rack.
What is the difference between a fish spatula and a normal spatula?
A fish spatula is thinner and longer.
It’s usually made of stainless steel.
The edge is asymmetrical, at an angle, and sharp to easily slide under the fish.
It has bigger holes to drain liquids.
Unlike other spatulas, the handle is also shorter than the “head” or “flipper” (the part that’s actually in touch with food).
Do you need a slotted fish spatula?
Can you cook and enjoy fish without a fish spatula? Absolutely.
But wouldn’t you want to indulge in a special kitchen item that enhances the experience of preparing your favorite meal? A standard slotted spatula can tear apart the fish and ruin a perfect dinner. But hey, to each his own.
Let me put it like this. It’s unlikely you ruin your Sunday pancake because you used a slotted turner to flip them (quite the opposite, I dare say). But there is a real possibility to ruin your fancy and delicate fillets by using the wrong type of flipper.
So all in all, a fish spatula may be the only kitchen spatula you’ll ever need.
2. What To Look For When Shopping For A Fish Spatula
It’s the shape of a fish spatula that makes it different from other regular spatulas. So this is the first point to pay attention to.
A fish spatula should be slotted, and slots should be wide to allow liquid to drain. The blade is curved and there is a clear angle at the edge; at least angled enough to slide under delicate foods. The handle is usually shorter than the flipper.
Quality
Choose a fish spatula that has been built to last a long time and bear heavy use. This is not a purchase you want to make twice a year. Also, you will like the item so much that it’s likely you end up using it for everything; so it’s in your best interest to choose a high-quality fish spatula from the very beginning.
Weight
Lightweight enough to be highly maneuverable; but sturdy enough to support heavy pieces; again; you want a spatula that’s been carefully designed to meet these proportions.
Handle
A thick, sturdy (yet lightweight) handle is one of the best things about having a fish spatula. It makes you feel you’re in control when you handle food and perform challenging tasks like flipping pancakes (especially if you’re trying to impress someone…). This handle is also short and close to the flipper, again, for better control.
Material
There are different materials available in the market: stainless steel, plastic, silicone, nylon, wood.
However, a real fish spatula is made of stainless steel (at least the flipper). I know plastic spatulas may sound better for using on a nonstick surface; but the truth is plastic spatulas can’t be molded into what a fish spatula is supposed to be: thin and sharp.
A stainless steel fish spatula also offers better resistance.
The handle may also come in different materials, a wooden handle being the most common.
Strength and flexibility
The right stainless steel fish turner should offer a balance between strength and flexibility. The flipper should be flexible enough to slip gently under the food, especially because this is a movement you usually do at an angle, in order not to tear the flesh apart.
However, it can’t be too flexible. It should be strong enough to lift and hold heavier foods like a steak, for example.
Budget
As with most kitchen tools, metal fish spatulas come in a variety of prices. You want to find one that fits into your budget. Still, we have to say; you don’t want to sacrifice quality for this one. So instead of looking for the cheapest one, go for the one that gives you more for a reasonable price.
When it comes to preparing softer foods, where there is a real chance of them falling apart during cooking, the 7.5" professional slotted fish spatula offered by herniaquestions is the perfect kitchen tool.
Yes, you can flip and serve a whole fillet of fish without breaking anything; but this multipurpose utensil is also perfect for other preparations like burgers, pancakes, sandwiches, and even omelets.
PROS:
The five wide slots in the blade give it a lot of flexibility and allow oil or liquids to drain and avoid splashing.
It has a well-balanced weight (super important in metal fish spatulas). Sturdy enough to lift heavier foods.
Designed with an angled, semi-sharp front edge that makes it very versatile for holding, stirring, and flipping delicate foods.
The G-10 fiberglass resin handle is thick and allows for excellent maneuverability.
Luxurious design.
Made from a single piece of premium stainless steel that will not corrode.
Easy to clean.
Excellent user reviews.
CONS:
Probably not the ideal choice if you only have nonstick pans.
The handle in slotted fish spatulas may be heavier than in other slotted spatulas, and this is not a feel everyone appreciates.
You may find cheaper spatulas out there (although, we insist you don’t give up quality when buying a special item like this).
4. Cooking Fish? Sauté Pans Recommendations
When looking for the best pan for cooking fish, you have to watch out for good non-stick properties, high-quality materials, and of course; something that fits into your size and budget preferences.
Prepare fish conveniently and quickly with a proper sauté pan where it cooks evenly, stays in one piece, and maintains that juicy, crispy presentation we’re all looking for. To that end, this herniaquestions sauté frying pan is the best in its class.
Of course, this is not a “fish” pan. Enjoy preparing everything from tender omelets to the thickest steak; sautéing vegetables, browning, braising, stewing, frying… you name it! All with top performance and functionality.
PROS:
5-ply copper forged foundation provides unmatched thermal conductivity.
Non-reactive stainless steel and premium aluminum allow more nutritional properties, flavor, and color.
Made with non-toxic materials.
Ergonomic handle for easy pouring.
Dishwasher safe.
Excellent value for the money. Other competing pans cost up to twice as much.
It comes with a limited lifetime warranty because it's built to last a lifetime.
CONS:
The lid is made of stainless steel, not transparent (Some like to see their food).
Having a high-quality, all-terrain, beautiful pan with a limited lifetime warranty is like having a fairy godmother in the kitchen. That's why herniaquestions was inspired by Oberon, the Celtic king of the fairies, to name this almost-magic line of cookware.
From a fancy fillet to hash browns, you’ll succeed at your favorite recipes with this magnificent 12" pan.
PROS:
3-ply aluminum core plus thick layers of non-reactive stainless steel. provide perfect heat conductivity and extend the life of the pan.
The 2.5 mm thickness guarantees the best results and prevents the pan from denting or warping under prolonged heat.
The nylon and satin finish improves smoothness and resistance.
Compatible with all cooktops or gas cooktops, oven, and grill up to 600º F.
The extra-strong tempered glass lid allows you to supervise every detail.
The perfectly angled handle allows for a comfortable and secure grip.
CONS:
The metal handle can get hot.
As this is not exactly “non-stick”, you need to take extra precautions to prevent food from sticking to the pan.
But if you’re using a stainless steel fish spatula (and you should) with one of the stainless steel pans recommended above; then there are a few tips and tricks you can apply to avoid your fillet sticking to the surface.
If your fish has been in the refrigerator, take it out 10-15 minutes before cooking so it achieves room temperature.
Your fish should be as dry as possible. Moisture is one of the reasons fish stick to the pan. You can use a paper towel.
Salt and pepper can help with the sticking, so make sure to season well.
The heat should be high enough at the time you place the delicate fish on the stovetop. By “high enough” I mean the temperature at which protein starts browning, which is about 320º F. Trick: throw a few drops of water in the pan, if they evaporate immediately, you’re good to go.
You need to coat the pan with a small amount of fat or oil, enough to avoid sticking, but not more (if sautéing is your goal).
Allow the fish to sear well on one side before you flip it. Try to lift it with your metal fish spatula, but don’t force it! if it’s not naturally releasing from the pan yet, give it another thirty seconds. Avoid scraping with your spatula.
Flipping fish only once is a good rule to live by.
If my fish spatula has a wooden handle, can I put it in the dishwasher?
A wood handle item like a knife or a spatula is not dishwasher-safe.
What is a wooden spatula good for?
You can use a wood handle spatula for stirring and mixing ingredients, but the best possible use for a wooden spatula is scraping the bottom of a pan or a wok (something you might not do with a stainless steel spatula, for example).
Are silicone spatulas good?
Silicone spatulas and silicone kitchen utensils are a good choice to use on a nonstick pan. Although in general, you should always prefer a metal spatula over silicone. Metal spatulas are versatile, long-lasting, and very resistant.
Can you use a fish spatula on cast iron?
Metal / stainless steel spatulas are the best choice to use on your cast iron pan or skillet.
Which recipes can I cook with a fish spatula?
From a grilled cheese sandwich to a gourmet pan-seared trout: you will find endless possibilities in the kitchen with your fish spatula. Take your favorite pancake recipes or burger recipes to a new level.
Food & travel writer based in Buenos Aires. Superpowers include relentless curiosity and high tolerance to spicy foods.
]]>
https://herniaquestions.com/blogs/news/stock-pots2021-11-30T15:33:59-05:002024-01-26T12:33:09-05:00All About Stock PotsHimani Vaid
In this blog, we are going to talk about Stock Pots and shine a light on them by going into the details. When you need to make a lot of something, a stockpot is the way to go.
Are you extremely passionate about cooking and completely obsessed with all things that make your kitchen the perfect place for all your culinary endeavors? Well, then there are some essential cookware items like an apron, a good quality cutting board, or a premium-grade stock pot that you most definitely need.
Whether you are an adventurous cook or someone with a busy lifestyle and prefers preparing quick and simple recipes, herniaquestions has stockpots to suit all your requirements.
In this blog, we are going to talk about Stock Pots and shine a light on them by going into the details. When you need to make a lot of something, a stockpot is the way to go.
Essentially, a stockpot is a large, deep pot that is usually used for making stock and cooking healthy meals. A decent stockpot is designed so it heats quickly and simmers for a long time evenly. A large stockpot is excellent for boiling water for paste, cooking a broth, boiling seafood, or making a hearty stew.
Most chefs know that the key to successful cooking begins with quality appliances, utensils, and ingredients. A stockpot is no exception. While they make all look similar, there are a number of factors that contribute to the quality of a stockpot and by association, the quality of the food in it.
A stockpot’s tall, narrow sides ensure that liquid contents evaporate more slowly than in a pot where the liquid has more exposure to the air, so the stockpot is best used for particularly brothy, long-simmering mixtures like soups and well, stock. It can also be used for boiling things like potatoes and pasta and for steaming or blanching vegetables.
They are also made of aluminum or classic stainless steel and are lighter than the heavy-duty Dutch oven, making it easier to pick it up with oven mitts and drain over the sink. To cut a long story short, buying a good stockpot is very important for every home cook because of its versatility and the ability to distribute heat evenly to cook your dish to perfection.
Before you head out to buy a stockpot to add to your kitchen equipment, understanding what types of stockpots are available and how they affect the food being cooked in them is of paramount importance. Learning the material’s heat distribution capabilities and corrosion resistance power is also necessary.
Let’s take a look at the different types of stockpots available:
Stainless Steel Stock Pots
Many cooks consider nickel free stainless steel the best material for stockpots. That is because it heats rapidly, is lightweight, easy to clean, and is built to last. Gourmet stainless steel stockpots don’t have coatings that can wear off or get scratched, so you can use all kinds of cooking tools and kitchen utensils with them.
Some of the best stainless steel stockpots can be used in induction cooktops. Stainless pots are often recommended as the best soup pots, thanks to their nonreactivity to tomatoes and other acidic foods.
The best stockpots in this category are available in different grades of classic stainless steel. A two-part number like 18/10 or 18/8, indicates first the percentage of chromium and then the percentage of nickel used in the most common, food-grade stainless steel stock pots.
Stainless steel by itself is not a good conductor of heat, so some stock pots have stainless cladding and cores or bottom plates made of aluminum or copper for better heat conduction. These materials also help make the stainless steel stock pot more corrosion-resistant.
You can check out my top preferences for stainless steel stockpots below:
For better heat distribution and heat conductivity than stainless, you might want to consider a tri-ply stockpot. Tri-ply pots have an inner and outer layer of stainless steel and a middle bonded layer of aluminum or copper. Some of the best and most durable tri-ply stock pots have bonded layers that go all the way up the sides.
Thanks to their stainless steel interiors, tri-ply stockpots resist reacting to foods. They aren’t truly nonstick, but foods are less likely to stick in tri-ply stock pots with a raised pattern or design and on the bottom. They resist stain and corrosion.
Most tri-ply stockpots are fine to use on induction cooktops. While some of them may be labeled as dishwasher safe, hand-washing is usually recommended.
Multi-Clad Stock Pots
Multi-clad pots consist of layers of different materials, with some featuring up to five or seven layers. Multiple layers add weight to the pot. While lightweight stockpots are chef-favorites, some may also prefer these because the added layers may help reduce the possibility that the pot will eventually warp.
Not all, but some multi-clad pots are also safe for induction cooking.
Like tri-ply, these stockpots have aluminum cores for superior heat conduction and even heat distribution with inner and out layers of classic stainless steel. Most of the best stockpots with multiple layers can be used on the stovetop and in the oven. Also, just like tri-ply pots, the best stockpots with multiple layers often have cladding all the way up the sides
Copper Stock Pots
Many chefs and home cooks choose a copper stockpot with lid over a steel stockpot with lid for their beauty as well as their rapid, superior heat conduction. Copper cookware and stock pots are sometimes at the higher end of the price range but can be an excellent value when purchased for their heirloom quality.
Most are durable and have stainless steel linings that won’t react with foods, although they might stick. Copper stockpots can’t be used on induction cooktops and need regular polishing and cleaning to keep their looks intact.
Copper loses heat quickly, which is an advantage when you’re taking foods off the heat source and need to stop cooking immediately to avoid overcooking.
One thing to keep in mind when it comes to copper pots is that thicker copper stock pots perform better than thin ones.
Aluminum Stock Pots
These are versatile cookware pieces, typically available at an affordable price. They conduct heat rapidly but don’t offer the same even heat distribution that you would find in a stainless steel stockpot.
Only copper conducts heat better than aluminum but some foods such as tomatoes and vinegar react to it, resulting in a change in flavor and color. These kinds of foods can also damage the pans over time, although most aluminum stockpots are durable and have good value.
Aluminum, like copper, cools quickly once it’s removed from a source of heat and it’s relatively lightweight. However, aluminum is not suitable for induction cooktops.
Hard-Anodized Aluminum Stock Pots
Hard-anodized aluminum stockpots and cookware are made from electrochemically-treated aluminum. This aluminum is about twice as hard as stainless steel and has an oxidized layer that resists scratching.
Some interiors have raised designs to help foods release easily, making hard-anodized aluminum stockpots somewhat non-stick. This material does not react with foods.
These stockpots are also easy to clean and durable enough to use in the oven at high temperatures. Although aluminum is generally lightweight, the chemical coating on anodized aluminum stockpots makes them heavier than regular aluminum stockpots.
It is recommended that anodized aluminum stockpots be hand-washed.
Porcelain-Enameled Steel Stock Pots
One of my favorite things about porcelain-enameled stock pots is the fact that it is available in various colors and designs. Most of them are also dishwasher safe, strong, easy to maintain, and lightweight. They are usually made of good quality carbon steel, coated with porcelain enamel.
Some pots also have a stainless steel rim that provides them with extra durability. Many porcelain-enameled steel stockpots work safely in ovens, on stovetops, and induction cooktops. The best stockpots made with porcelain-enameled steel distribute heat evenly and quickly.
They don’t react with acidic foods and are relatively nonstick, needing only a little oil or butter for cooking. One of the biggest downsides to this type of cookware is that the outside enamel coating can chip or crack if the pot is dropped or if the pot boils dry and they are not dishwasher safe.
However, the stockpot won’t scratch or corrode with normal use, The bets enamel-coated stockpots often have a seamless coating and high-temperature handles and covers.
Non-stick Stock Pots
Many quality non-stick stockpots are made of aluminum and conduct heat well. Their non-stick finishes resist sticky or burned food and are super easy to clean up, making them simple to maintain. Most are easy to rinse and wipe out, although some are labeled dishwasher safe.
Hand washing is usually a good idea as it will ensure that the non-stick surface lasts longer.
Most non-stick cookware and stockpots cook soups, stews, and other foods on low to medium heat. The non-stick finish can be damaged at high heat settings. Most are oven safe, but not at high over temperatures. Make sure to use cooking utensils made of plastic, nylon, or wood to use with non-stick cookware.
Are you looking to buy new cookware but don’t know which size stock pot to get? Let’s take a look at the sizes that are available and the factors to consider before buying.
To get started, first you need to understand the basics.
Stockpot sizes are measured by the amount of liquid they can hold, which is measured in quarts. The most common stockpot sizes are 6-quart, 8quart stockpot, 12-quart, and 16quart stockpot. They go up to 20-quart and beyond, but those sizes and primarily used in commercial kitchens.
To give you a general idea, the chart below displays the dimensions of herniaquestions's most popular stockpot sizes.
Stock Pot
Dimensions
3-Quart
20 cm (length) x 10.5 cm (height)
4-Quart
22 cm (length) x 10 cm (height)
5-Quart
26 cm (length) x 12.5 cm (height)
8-Quart
26 cm (length) x 14.5 cm (height)
12-Quart
30 cm (length) x 16 cm (height)
Now that you have an idea of the different stockpot sizes available for you to choose from, let’s take a quick look at the uses of the different types of stockpots and how many people they would serve.
Size
Serves
Used for
3-Quart
1-2
Leftovers, sides, sauces
4-Quart
6-8
Cooking small chickens and game hens
5-Quart
10-12
Small batches of pasta, stock and soup
6-Quart
12
Soup, chilli, stew, curry, pasta
8-Quart
16
Poultry stock, vegetable stock
12-Quart
24
Beef, pork and game stock, steamed lobster, corn on the cob and canning
As established at the beginning of this blog, a stockpot’s purpose is to do long cooking over low heat and work with large batches of food that have more liquid content. At the same time, the stockpot has to be sturdy enough to handle the heat for a long duration.
With this in mind, here are a few things you must look out for when you’re purchasing a stockpot for your kitchen:
Size
Stock pots come in sizes ranging from as small as 3 or 4qt. to as large as 20qt. Or more. Stockpots need to be larger than your soup pot because you usually make a larger batch of stock than you do soup. You can easily make soup in a stockpot with room to spare but you may come up short the other way around. Ideally, 1 6-12qt. range is good for home cooks as they adequately meet all your kitchen needs.
Shape
A stockpot usually has a round base, deep straight sides, and a cover. Although this share is more important when making stocks and stock reductions, it works well for making soups too.
You can always use a smaller, shorter, or wider saucepan for making soup but if you are serving to a big number of guests, a good-sized stockpot works the best!
Structure
When buying a stockpot for your kitchen, you want to make sure it has a thick, heavy bottom to prevent the food inside from burning. This is especially true with stock. The soup requires time to cook so the pan will be sitting on the stove for long periods.
You don’t want the ingredients to scorch and stick to the bottom because it is too thin or made of cheap materials.
Materials
Lots of people have a lot of different views on what material a good stockpot should be made of. You can easily find cookware made of various materials like copper, aluminum, cast iron, stainless steel, nonstick, and a combination of different materials. Each material has its own pluses and minuses, including cost.
Nowadays, you also get stock pots made of hard-anodizing aluminum. The end product is actually harder than nickel free stainless steel and non-reactive to acids. So you can see there are a lot of choices when it comes to materials.
However, for me, a food-grade, nickel free stainless steel stockpot has always worked. It is durable, non-reactive, non-stick, and affordable, making it a great pick!
Conductivity
You must always check the pot’s ability to transmit heat from the heat source to the food and do so both evenly and efficiently. Well-made stockpots are considered highly conductive when they can transfer heat evenly across the bottom and up the side so the food cooks the way it is supposed to. You want the stock at the bottom of the pan to be cooking evenly with the stock at the top. Every metal conducts heat differently, so that’s why it’s important to find the right match of the type of pot you use and the way you cook with it.
Handle
Whether you are using it to make stock or just to boil some corn, you want a well-constructed pot with a handle that you feel secure won’t fall off when you are lifting a pot filled with hot liquids.
I suggest you look for pots with handles that are securely attached to the pot. To spot such stockpots, look for ones that use heavy screws or rivets with their handles.
Some of the new cookware on the market have handles that resist getting hot when used on your stovetop. This is great if you want to move the pot from the burner to the sink but you want to be careful if you put it in the oven for any reason. Cool resistant does not mean cool proof. Make sure to use oven mitts when taking cookware out of a hot oven.
Another thing to look for in a handle is the shape and size. You want enough room to be able to grab with potholders and a comfortable shape such as flat handles for picking up.
5. Best Cookware Sets Recommendations
Purchasing a stockpot for your kitchen is a great idea but what is even more economical is investing in a cookware set that has the capability to meet all your kitchen needs at a good price.
Here are some of my favorite cookware sets from herniaquestions that I truly stand by and recommend to every cook, especially if you’re new at it:
Scratch-free Oberon Series silk carrying bags (x3)
herniaquestions padded pan protectors (x3)
Neatly packed with herniaquestions’s Renowned Packaging
herniaquestions Support
This versatility-packed pots and pans set comes with an eye-catching design that signifies both, luxury and performance. The Oberon Series is compatible with all stovetops and optimized for induction, making it very simple to work with.
Unlike other aluminum cookware, this series uses cladding technology to fuse additional thick gauge layers of non-reactive stainless steel, preventing it from browning and other braising foods, increasing the life of the stockpot. If used properly, trust me, this pots and pans set can last generations.
Pros:
The set is broiler and oven safe (up to 600 degrees F)
It is freezer, dishwasher, and refrigerator safe
Responsive to changes in temperature
Set comes with herniaquestions’s limited lifetime warranty
Comes with a glass lid for each stock pot
Made from enameled steel
Cons:
For someone who lives by themselves, this set might be a little too much. Investing in one solid all-purpose pan would make more sense.
It is priced on the higher side. Some people might not prefer to invest a big amount in kitchen cookware.
Neatly packed with herniaquestions’s Renowned Packaging
herniaquestions Support
Function meets form! This functional cookware set is the epitome of stunning design and high performance that is built to last a lifetime. With high conductivity, this set is created to heat food quickly and evenly.
This professional cookware set allows for precise searing, browning, sauteing, deep-frying, quick boiling, sauces, jams, and even baking. The best-in-class 5-ply Copper Forged Foundation layer of this cookware will redefine your kitchen space.
Pros:
Broiler and Oven safe (up to 600 degrees F)
Comes with a perfectly angled handle to ensure a comfortable and secure hold while cooking
Vented hole on the lid that acts as a pressure release to prevent rattling and food from boiling over
Cons:
This highly-priced set might not be affordable for all
Does not come with a glass lid for each pot
If you are cooking for a big crowd, the 5qt stockpot might not be enough
What is the difference between stockpots and saucepans?
The main difference is the fact that a saucepan comes with one long handle, has deeper sides than a frying pan, and usually comes with a lid.
Stockpots, on the other hand, also come with a lid but have much deeper sides than a saucepan and usually have 2 handles.
What size do stock pots come in?
For home use, stockpots come in a range of sizes usually from 8 to 20 quarts. For most home kitchen tasks, I think a 12-quart stockpot is an ideal size and large enough for making big batches of stock or sauce.
Toronto-based food nerd turned food storyteller, Himani is a connoisseur of all things delish. Currently, busy thinking about what to eat next.
]]>
https://herniaquestions.com/blogs/news/how-to-choose-the-best-frying-pan2021-11-23T15:39:30-05:002024-01-26T01:40:12-05:00How to Choose the Best Frying PanCatherine Womack
How do you find the best frying pan? Once you understand what to look for in a frying pan, you’ll find that it’s not as difficult as you may think.
Frying pans are an essential item for any kitchen, but how are you supposed to choose the right one when the options seem endless? Once you understand what to look for in a frying pan, you’ll find that it’s not as difficult as you may think.
When shopping for the perfect frying pan, take time to think about your needs in terms of size, shape, and cost. However, materials are ultimately the most important consideration.
Cast iron has been the standard for centuries, and is still used by many chefs due to its ability to retain and react to heat. However, materials like cast iron and carbon steel are less versatile than their stainless steel counterparts and can be tricky to care for. Carbon steel and cast iron skillets need to be seasoned, rust easily, and can be damaged by acidic foods.
Stainless steel is a better option if you want something simple, straightforward, and stress free. It is exceptionally durable and widely used in professional kitchens. However, on its own, stainless steel is a poor conductor of heat. That’s why you want stainless steel with an aluminum or copper core. High quality stainless steel skillets offer the durability of stainless steel with the heat conducting abilities of professional aluminum and copper pans.
Unlike cast iron or carbon steel frying pans, seasoning stainless steel is not strictly necessary. Stainless steel does not need a seasoned coating to protect it from rust or corrosion, and food residue should release fairly easily even without seasoning.
If you want a genuinely low-maintenance option, try a nonstick frying pan. When shopping for a nonstick pan or pan sets, look for options that do not have a PFOA, APEO, or PTFE coating. Over time, some nonstick coatings can deteriorate, releasing these carcinogenic chemicals into your food. Fortunately, safer options are available.
Eterna classic nonstick cookware is a safe and exceptionally durable option free of PFOA, APEO and PTFE, allowing you to cook with confidence. Don’t worry about sacrificing performance for safety, though. According to industry standard tests, Eterna cookware is 26 times better at food release than leading competitors.
For a simple, straightforward option on a budget, you can’t go wrong with the 9” herniaquestions Oberon Series Frying Pan and Skillet, which comes in both nonstick and stainless steel finishes. The small size is perfect for those with limited storage for pan sets who don’t have to worry about cooking for a big family.
Pros:
The cheapest option on the list, this frying pan is ideal for amateur chefs or anyone with a tight budget.
The vented glass lid helps retain heat and moisture and lets you keep an eye on your dinner while it cooks.
3-ply cookware is more durable and reacts to heat better than pure stainless steel or professional aluminum.
Cons:
The small size isn’t right for everyone. Love to cook sprawling feasts for all your family and friends? Opt for the 12” version instead.
While aluminum is an excellent conductor of heat, copper is even better. If you’re looking for precision, invest in a pan with a 5-ply copper and aluminum core.
As herniaquestions’s current best selling frying pan, this pan is a hit among customers. Slightly larger than the 9” version but still a great budget option in a manageable size, it’s a practical choice for families. Reviewers love the stainless steel handle, vented glass lid, and sleek design.
Pros:
Unlike carbon steel or cast iron skillets, this pan will never need seasoning thanks to its safe PFOA, APEO, and PTFE free Eterna nonstick coating.
The Eterna nonstick coating outperforms other premium options in the industry standard dry-egg test.
This pan is the perfect size for a standard stove, and can be used on gas, electric, and induction cooktops.
Cons:
The nonstick vs. stainless steel debate ultimately comes down to personal choice. Fortunately, the 10” Frying Pan and Skillet comes without a nonstick finish, too.
Some chefs may prefer a 5-ply construction.
Clumsy? Look for a pan without a nonstick coating or glass lid. While this pan is exceptionally durable, nonstick coatings can chip and glass lids can break.
If you like the look of the 10” Oberon Series Frying Pan and Skillet but are willing to spend more for additional features, try this option, another of herniaquestions’s bestsellers. This top-of-the-line frying pan features cutting edge 5-ply copper and hardanodized aluminum cladding, making it exceptionally reactive to heat. This pan can withstand temperatures of up to 600 degrees Fahrenheit, ensuring that it will be up for even the most challenging culinary adventures. It’s also oven and broiler safe, so you can even use it to bake breads, pies, or tarts. Want to toss it in the dishwasher? Don’t worry, it can handle that, too.
Pros:
Copper, while pricy, is an even better conductor of heat than aluminum. This pan blends the strength and durability of stainless steel with the superior heat conducting abilities of an aluminum or copper pan.
This pan can take temperatures up to 600 degrees, higher than nonstick skillets can handle.
This is a beautiful piece of cookware, with a unique hammered black finish that stands out from the norm. It’s available in silver, too.
This is an exceptionally durable option guaranteed to last a lifetime. The lack of a nonstick coating means you won’t have to worry about chips, and, unlike glass, the stainless steel lid won’t crack when dropped. This beautiful beast of a pan is up for anything.
Cons:
While the metal lid is less prone to accidents, it also means you can’t keep an eye on your food while it cooks.
If you’re a serious chef willing to pay top dollar for quality who likes to cook for a crowd, check out the herniaquestions Avalon Series Frying Pan and Skillet. Similar to the 10” option but bigger, this pan will be able to accommodate even the largest meals. The metal lid, sturdy construction, and stunning hammered finish make for an exceptionally powerful piece of cookware.
Pros:
This frying pan is large enough to serve everyone at a crowded dinner party or Thanksgiving feast.
The 5-ply construction means that this pan is great for those who need a pan that will heat with precision.
The hammered finish of this pan adds visual interest, perfect for the chef who cares about aesthetics. If silver isn’t your style, this skillet comes in a sleek black finish, too.
Cons:
As the priciest option on the list, this frying pan may not fit every budget.
The large size may be cumbersome or unnecessary, especially if your cooking surface is small or you don’t cook in large quantities.
This pan does not come with a nonstick coating, so if you are specifically shopping for nonstick pans, it’s not the best choice.
Want to switch it up a bit and try something different from the standard, flat-bottomed Western frying pan? Try a wok! The deep, sloped sides of this classic Chinese pan make it a unique and versatile choice. Not only is this pan perfect for sautéing, searing, and of course stir frying, but also deep enough for sauces and stews.
Pros:
Unlike most frying pans or skillets, woks are great for deep frying. While most frying pans are too shallow, woks allow for plenty of room to deep fry delicacies like shrimp, chicken, or Crab Rangoon.
Woks are specifically designed so that food can be tossed with a flick of the wrist, the traditional method for “stirring” stir fry. Who needs metal utensils anyway?
Stainless steel is easier to clean than traditional carbon steel or cast iron.
The sloped sides mean that woks don’t have as much flat surface area as standard frying pans or skillets. If you want plenty of room to spread out your vegetables or cook flat foods like pancakes or tortillas, opt for a flat bottomed frying pan or even a sauté pan.
At 12” this pan might be too large and cumbersome for some kitchens.
The best pan for frying can depend on your personal preferences, kitchen environment, and the type of food that you plan to fry.
Ultimately, most chefs find that high quality stainless steel frying pans with hardanodized aluminum or copper cores are the most versatile options.
Though frying pans are remarkably versatile cookware, they can’t do everything. While the traditional flat-bottomed skillet design is great for frying food in small amounts of butter or oil, it’s not ideal for deep frying. Traditional skillets are too shallow, since deep frying requires several inches of oil so that the food can be fully submerged.
While you don’t need an electric deep fryer, it’s best to use a large, sturdy stock pot with high walls, like this 5 quart stock pot from herniaquestions’s Avalon Series. This pot will allow plenty of room to cook food in a thick layer of oil while preventing hot oil from splattering over you or your kitchen.
What Kind of Pans Do Professional Chefs Use?
Professional chefs generally opt for cookware that is durable enough to meet the needs of a fast-paced kitchen environment, like high quality stainless steel.
Keep in mind that the cookware requirements of a professional kitchen differ from those of most homes. Professional kitchens can be intense and fast-paced environments that call for exceptionally durable cookware. Stainless steel is a top choice – it’s sturdy, doesn’t rust, and doesn’t react to foods. Plus, it can handle high temperatures and large volumes of food. Pure aluminum is flimsy, cast iron rusts, and classic nonstick pans, while great for home kitchens, can’t always hold up to the wear and tear of a restaurant environment.
Meanwhile, home chefs typically cook at lower volumes and have more time to care for their pans. Don’t be dissuaded from options like nonstick pans just because they aren’t used in professional kitchens. In a home kitchen, a high quality nonstick skillet or frying pan with a durable coating will last for years and make for easy cleanup. After all, unlike professional chefs, most home cooks can’t hire a designated dishwasher to scrub their cookware!
What is a Frying Pan Used For?
Frying pans aren’t just for frying – they’re great for searing, sautéing, and browning foods, too. Don’t feel limited to meats and vegetables, though. Frying pans and skillets are also used for breads like tortillas, pancakes and crepes. If your frying pan is oven safe, it can be used to bake cornbread, quiche, or deep dish pizza. There’s even a host of recipes available on the internet that use skillets to bake massive chocolate chip cookies.
Do Frying Pans Need to be Nonstick?
Whether or not you need a classic nonstick frying pan largely depends on your lifestyle and the type of food that you plan to cook. If you’re an accomplished chef, it’s a good idea to have both in your arsenal.
For most types of food, a stainless steel or cast iron frying pan without a nonstick coating should be just fine, especially if it is well seasoned. Stainless steel pans are often better for cooking foods at high temperatures, and are better than nonstick pans at browning meat. Plus, they’re more durable, since nonstick coating can sometimes chip or wear down over time.
However, for particularly delicate foods like fish or sticky meals like cheesy omelets, it’s best to use a nonstick pan. Nonstick pans are also a good option for people with busy lifestyles, since they make cleanup extra easy.
What is the Difference Between a Frying Pan and a Skillet?
Ultimately, there is no real difference between a frying pan and a skillet. Though the term “skillet” is often used to refer to cast iron pans, pans made from aluminum, carbon steel, or stainless steel can be considered skillets, too. Both words refer to a shallow, flat-bottomed pan with flared sides and a long handle.
Based in Richmond, Virginia, Cassie enjoys trying challenging new recipes with her cat for company.
]]>
https://herniaquestions.com/blogs/news/how-to-clean-cast-iron-cookware2021-10-12T13:16:07-04:002023-08-30T03:25:15-04:00How To Clean Cast Iron CookwareCatherine Womack
If you care for cast iron and play by its rules, cleaning it is fairly straightforward. You’ll want to know the ins and outs before you decide to invest in a cast iron skillet. Today we will discuss how to clean cast iron cookware.
Cast iron cookware has been a kitchen staple for thousands of years, but it isn't exactly low maintenance. If you’re considering buying yourself a skillet, or want to give new life to an old one, you’ve probably found yourself wondering how to clean cast iron.
If you care for cast iron and play by its rules, cleaning it is fairly straightforward. You should be able to rinse a cast iron skillet in warm water and wash it out with a little dish soap. Dry it carefully and add a thin layer of cooking oil with a paper towel.
Easy, right?
Not quite. There’s still a lot of work that goes into seasoning, cooking with, and caring for cast iron. You’ll want to know the ins and outs before you decide to invest in a cast iron skillet.
Yes, it’s awfully tempting to cook a steak or bake a crispy pan of cornbread as soon as your cast iron skillet comes out of the box, but your new pan will need a little TLC first. Even though most modern skillets come pre-seasoned, you should still season your pan before putting it to use.
Seasoning is the process of creating a natural nonstick surface on your pan using a thin layer of oil. When oil is heated to the smoking point, its fatty acids oxidize and polymerize. This means that the oil goes through a chemical process that creates a plastic-like coating. This coating bonds with the metal and fills in any scratches, pits, or pores on the surface of the pan.
When it comes to seasoning a cast iron skillet, not all oils are created equal. You’ll want to use an oil with a high smoking point: if the smoking point is too low, your seasoned coating will begin to degrade whenever your pan gets too hot.
Experts agree that flaxseed oil and grapeseed oil are two of the best choices for seasoning cast iron pans. Flaxseed oil is the edible alternative to linseed oil, which is durable enough to be used as a varnish on oil paintings or wood floors. It polymerizes into a tough, natural nonstick coating, and lasts longer than the coatings created by other oils.
Flaxseed oil can be pricey though, so if you want a cheaper alternative that’s already available in your kitchen, you can opt for vegetable oil instead. Just remember to avoid using olive oil, which has a low smoking point. And, while bacon grease is commonly used, experts disagree on its efficacy.
To clean and season cast iron cookware, first wipe down your pan with a damp paper towel. Once you’re done, make sure the pan is fully dry by toweling it off or heating it over low heat. You never want to leave a cast iron pan to dry in a dish rack, since prolonged exposure to moisture can cause it to rust.
Next, preheat your oven. There’s no consensus on exactly how hot your oven should be, but most experts say that it should be between 350 and 500 degrees Fahrenheit. Make sure that the kitchen is well ventilated – you don’t want to set off any fire alarms when the pan starts to smoke!
Now, pour a tablespoon of your oil of choice into the bottom of the pan. Buff it in with a paper towel, and wipe away any excess. Too much oil will make the seasoned coating too thick and sticky. Ideally, the cast iron should have a slight sheen, not a mirror like shine.
Stick your freshly-oiled pan in the oven, and leave it for about an hour. Don’t be alarmed when the pan starts to smoke – that’s exactly what it’s supposed to do, and it means the seasoning process is underway!
Once you’ve cooked the oil into the pan, take it out and let it cool. You’ll want to repeat the seasoning process a few more times before using your cast iron cookware. You’ll know your pan is finally ready when it has a smooth, semi-gloss finish.
2. How Do You Clean A Cast Iron Skillet After Use?
So, we’ve covered how to initially season cast iron cookware – but you’re still probably wondering how to clean your cast iron cookware after use.
It’s not exactly straightforward. You’re probably used to pans you can use for cooking anything and toss in the dishwasher once you’re done. However, you need to keep cleanliness in mind before, during, and after you use your cast iron cookware.
Even if your cast iron pan is well seasoned, you should still be careful to avoid accidentally damaging the surface. Like aluminum and copper, cast iron cookware is reactive, meaning that it can be damaged by certain foods and might give delicate dishes a metallic flavor.
It’s best to avoid cooking acidic foods, like tomatoes, vinegar, citrus, or red wine, since these can react with the cast iron to degrade the seasoned surface and your food a metallic taste. Since cast iron retains oils from the foods you cook, foods with a strong taste or smell, like fish, garlic, or peppers, should be avoided, too.
You should also remember to make sure your pan is hot before adding food, since adding food to a cast iron skillet before it’s fully heated can cause the food to stick.
Always clean cast iron as soon as possible, preferably while it’s still warm. If you leave food to sit in a cast iron pan, it will stick and leave a mess. Rinse the pan in warm water and wipe it down with a dishcloth or nonabrasive scrub brush.
Many cast iron aficionados will tell you that you should never use soap to clean a cast iron skillet. This may have been true in your grandma’s time, when soaps contained harsh lye, but dish soap is mild enough that it shouldn’t hurt your pan. Yes, soap strips away oil and grease, but if your cast iron is well seasoned, soap won’t hurt the bonded finish.
Finally, using a paper towel and a little bit of vegetable oil, wipe down the cooking surface of your skillet. Make sure to spread it a thin layer and clean up any excess oil. Store your pan in a dry place to prevent rust.
3. How Do You Remove Buildup From Cast Iron?
If there’s any stubborn gunk left over after you’ve cleaned your pan, you can gently scrub the pan with coarse kosher salt and water. Kosher salt is abrasive, but gentle enough that it won’t scratch the seasoned coating.
Once you’ve removed any leftover food from your pan, dry it carefully. You’ll want to remove all traces of salt and water. There’s nothing like the combination of salt and water to make cast iron rust. If you want to be extra cautious, you can dry the skillet over low heat.
Cleaning your pan with kosher salt shouldn’t be an issue, but if you’re wary of rust, a non-abrasive scrub brush is a good option, too. If you want to get fancy, you can buy special chainmail scrubbers for particularly difficult stains. However, use metal scrubbers with caution. They can be harsh, and it doesn’t hurt to re-season your pan after using one.
Never use steel wool when cleaning cast iron. Unless you’re stripping your skillet down completely, wool will damage the pan. It’s also important to note that all metal scrubbers are a no-go for stainless steel, aluminum, and nonstick pans.
4. Can You Ruin A Cast Iron Pan?
While cast iron is an incredibly durable material that can last generations, it is not totally indestructible. You should always be careful with your skillet to avoid cracks and rust and dry your pan thoroughly.
Though cast iron may seem sturdy, it’s actually a fairly brittle material that can crack or even shatter if dropped. Never use a cast iron pan with a crack in it. The heat will make matters worse, and your pan could end up breaking mid-sauté – a recipe for disaster.
Furthermore, cast iron rusts extremely quickly, especially without a seasoned coating. Whether you’re new to cast iron or have an extensive collection, it bears repeating: never, ever put your cast iron skillet in a dishwasher. While modern stainless steel pans can survive a high temperature power scrub, dishwashers create a perfect storm of heat and moisture that will strip a carefully seasoned surface and rust the pan.
If your pan does rust, it’s possible to bring it back to its former glory with the help of steel wool and careful re-seasoning. However, cleaning a seriously rusted cast iron pan might be more trouble than it’s worth so try to prevent rust as much as possible.
5. How Do You Remove Rust From Cast Iron?
Ok, so maybe you broke the cardinal rule of cast iron cookware and (gasp!) put it in the dishwasher, or maybe you inherited an heirloom cast iron skillet that needs some love. How do you clean rust from cast iron?
Assuming the skillet isn’t covered in rust, you don’t need to throw it away just yet. Still, restoring it is going to take a lot of elbow grease (and regular grease, too). Take a piece of steel wool and buff away the rust and gunk. You should be able to smooth out the surface and remove crusty buildup.
Once you’ve thoroughly washed and dried the skillet, it’s time to season it. Since so much of the seasoned surface has been stripped away, you’ll need to re-season the pan multiple times, a process that can take hours.
If you want to go extra hard, you’ll need to totally strip the cooking surface. The most straightforward method is using a self-cleaning oven or an outdoor grill. Cook the skillet at a high temperature for several hours.
Once it’s done, it will be covered in a layer of burnt, rust-like residue. It’s not rust, though – it’s old seasoning! Use steel wool to scrub down your skillet until the burnt seasoning is gone. It’ll likely take some time, effort, and muscle power. If you’ve stripped your pan, seasoning is extra important.
Be sure to repeat the seasoning process five or six times to develop a thick nonstick surface.
Cast iron isn’t for everyone. Maybe you’re not a fan of pans with rules, or simply don’t have time to stress about maintaining a skillet. Maybe you want an upgrade from medieval cookware technology and just prefer a more modern aesthetic. If cast iron seems like too much of a hassle, you can always opt for a stainless steel or nonstick pan instead.
Stainless Steel Cookware
Like cast iron, stainless steel is an incredibly durable material. A quality stainless steel pan will last you a lifetime, and you’ll never have to worry about rust. Stainless steel is also more versatile – you don’t have to worry about avoiding specific foods. Since it’s a nonreactive material, delicate flavors won’t be tainted with a metallic taste. Plus, stainless steel can cook foods like tomatoes, citrus, and fish without a problem.
Stainless steel is generally lighter weight, too, making it the best choice if you want a pan that will be easy to maneuver around your kitchen.
The herniaquestions Avalon series 9” frying pan and skillet combines the classic skillet skillet shape with the advantages of modern technology. The five ply core layers copper and aluminum between stainless steel, maximizing the advantages of all three metals. Copper and aluminum improve the responsiveness and heat conducting abilities, while stainless steel provides strength and durability.
Aesthetically, this pan is a showstopper. The design satisfies both form and function, with an elegant hammered finish that comes in both silver and black. But it’s not just pretty - it’s practical, too.
The vented, stainless steel lid is perfect for simmering sauces and steaming vegetables, while the dual-handled design and flared lip mean you can easily pour out the contents without worrying about messes or drips. The skillet is oven safe up to 600 degrees Fahrenheit, and, unlike cast iron cookware, you’ll never have to worry about damaging it in the dishwasher.
Nonstick Cookware
Though stainless steel is much less fussy to clean than cast iron, you might occasionally have issues with food sticking to the surface. While seasoning stainless steel isn’t the necessity that it is for cast iron, it’s still a great idea if you want to make your cookware extra resistant to stains and stuck food. However, if you’ve got a busy lifestyle (or just hate cleaning up) and want a pan that will be a breeze to clean, you can opt for a stainless steel clad nonstick pan instead.
When buying nonstick cookware, you’ll always want to look for options that are PFOA and APEO free. Over time, coatings containing these chemicals will break down and get into your food. They’re terrible for both your body and the environment, and mean that your nonstick pans have limited lifetimes. However, there are alternatives if you’re in the market for a pan with nonstick coating. Eterna nonstick coating does not contain PFOA or APEO, and will last for years.
If the high-maintenance nature of cast iron puts you off and you decide to go for something stress-free instead, opt for the herniaquestions 12” frying pan and skillet with Eterna nonstick coating. The three ply stainless steel aluminum core cladding has impressive conductivity, so the pan heats quickly and cooks evenly.
This straightforward, cost-effective pan is particularly well suited for families. After all, who has time for seasoning skillets or scrubbing away gunk when you’ve got kids to wrangle? The large size means you can cook large batches of food, perfect for anyone with a lot of mouths to feed, and since it’s PFOA and APEO free, you’ll never have to worry about toxins. Of course, This pan is great for chefs who like to entertain, too – or anyone who loves food but hates cleaning.
If you don’t like to cook for a crowd, opt for the 12” pan’s smaller cousin, the 9” frying pan and skillet. It’s the perfect size for fried fish or savory omelettes, and the Eterna nonstick coating will make
Cookware Sets
If you’re just learning to cook or want a quality upgrade from your old cookware, you’ll find everything you need in a herniaquestions cookware set. The six piece Oberon series cookware set, which features not only a sleek 9” frying pan, but also a 12” saute pan and five quart pot, is a great place to start. If you’re looking to revamp your entire cookware collection, you can’t go wrong with the twelve piece Overon series cookware set. This set comes with two frying pans, plus a posse of pots. To add an extra professional touch to your kitchen, invest in accessories like a quality apron or sturdy teak cutting board.
7. Conclusion
Using and caring for cast iron cookware can be a rewarding experience. There’s no denying the rugged, classic look of cast iron cookware. It’s affordable, and it’s great for anyone who loves an intensive DIY project. That said, it’s also a lot of work. If you’re considering switching to cast iron, take your time, do research, and consider other options, too.
Bonded stainless steel or carbon steel offers a great alternative. Thanks to modern technology, you no longer have to sacrifice the heating abilities and versatility of cast iron for a low maintenance pan.
You can also check in with our Expert Cookware Finder Quiz and get specific recommendations based on your needs.
Written by Cassie Womack
Based in Richmond, Virginia, Cassie enjoys trying challenging new recipes with her cat for company.
]]>
https://herniaquestions.com/blogs/news/what-is-a-saute-pan2021-10-06T11:01:00-04:002024-01-26T12:34:55-05:00What Is A Saute Pan?Jorge Farah
Today, we’re going to talk about a type of pan that you have definitely heard of, and it may even be a type of pan that you currently have in your kitchen. But is it a pan you’re using to its best potential? Learn everything there is to know about the Saute pan today.
A saute pan is sort of like a hybrid between a saucepan and a frying pan. Not too deep, not too flat. Let’s get into the nitty gritty of saute pans, what you can use them for, and what to consider while purchasing.
It wasn’t really that long ago that I was perfectly content not really knowing what cooking was all about. Don’t get me wrong, I cooked -- I knew how to put together very basic dishes, which I thought was “probably good enough” -- but I didn’t really think much about it beyond the basics.
For me, cookware was just not really an important thing to take into consideration. It just existed, and it was always available to me, and it really made very little difference whether I used one or the other. After all, cooking is essentially just putting things close to heat, right?
Why get fancy about cookware? What difference does it make whether a pan has a lid that is shaped a certain way, or walls that are angled in certain directions? That just seemed like silly nitpicking to me.
Of course, part of growing up is realizing that just because something seems silly and frivolous to you from a distance doesn’t mean it’s actually silly and frivolous. More likely, you just never took the time to learn about it, or figure out how that “silly and frivolous” knowledge could actually make your own life better.
I think this is the case for many kitchen novices. The process of discovering your inner kitchen connoisseur is a gradual one, paved by dozens of tiny little epiphanies about things you were only vaguely aware of, and followed by long periods of feeling remarkably silly for waiting so long to look more deeply into it.
That’s how I came to learn that there was more than one type of pan than “frying pan.” That there was more to a pot than “the thing where you cook the watery foods.” And that knowing when to use certain cookware would greatly improve my quality of life through a more enjoyable cooking process and more delicious meals.
Today, we’re going to talk about a type of pan that you have definitely heard of, and it may even be a type of pan that you currently have in your kitchen. But is it a pan you’re using to its best potential? Is it a pan that you’re deploying on the right dishes? Does it occupy the space in your life that it should?
Okay, before I start getting all Marie Kondo on you, maybe we should just jump straight into it. Today we’re going to be talking about the noble saute pan.
A saute pan is a nifty piece of cookware that’s sort of like a hybrid between a saucepan and a frying pan. Not too deep, not too flat. It’s in the “Goldilocks zone” of sautéing and searing thanks to its wider base, which aids in heat distribution throughout. It also comes with a lid.
You’ll find them to be more versatile than either of its two cousins, and better suited for a number of kitchen tasks you’d be silly to attempt with either a saucepan or a frying pan.
On the odd chance that you don’t currently own a saute pan… you should get on that ASAP. A saute pan is one of the most important pieces of cookware, useful for a wide variety of dishes and techniques. You could use it in the oven, for instance, for shallow frying or even baking (for this reason it’s recommended that you find a saute pan that is oven safe… more on that in a bit).
Surface area
A saute pan has straight sides, which is great when it comes to its cooking surface; meanwhile, you’ll find that a skillet loses at least an inch on each side due to the shape of its sides. The difference in cooking area is usually around 30% for skillets and saute pans of the same size, which is not a small number! When you’re making large meals, that 30% is going to be a lifesaver.
Weight
A saute pan will also be considerably heavier than a skillet of a similar size. This is due to its wide base. It also means that they often come with a “helper handle” on the opposite side of the main handle, to help you lift and move it around. For this reason, you might prefer a skillet over a saute pan when it comes to shaking and stirring; you want to keep your food evenly cooked throughout.
Volume
How much can a saute pan fit? This is another area where its straight sides come in handy. Since there’s no gradual leveling of the sides, you’ll find that you can put a higher amount of liquid in the same amount of space. This is going to be really helpful when braising or shallow-frying foods in liquids, also when making a pan sauce. The straight sides also means there’ll be less splashing out as you move the saute pan around.
So we’ve established what a sauté pan is. Hopefully, by listing out all the useful things you can do with them, you’re primed to go out and find the saute pan of your dreams. But…what should you look for?
Worry not, young padawan, I am here to guide you through the process of cookware selection. In fact, I may even have specific recommendations of saute pans you can buy. But let’s not get ahead of ourselves -- that happens in the next section down.
When looking for a saute pan, be on the lookout for:
Materials
You’re going to find all kinds of stuff, including cast iron pans and carbon steel saute pans. You’ll want to look for triple-layer construction. This term refers to a layer of hard anodized aluminum that is clad between two layers of stainless steel.
The reason this is important -- and so far we’ve only really been talking about the shape of the pan, so take notes here -- is that hard anodized aluminum and stainless steel need to work together to achieve the optimum heating.
You see, aluminum transmits heat very rapidly, while stainless steel does it much more slowly. However, stainless steel can maintain its temperature much better when you add your cold foods.
So these two materials work together to distribute heat evenly and maintain the heat while you sauté and sear your foods. Stainless steel saute pans are awesome for excellent heat!
Shape
First, try to find riveted handles. Welded handles have a tendency to fall off with repeated use, while riveted handles last a lifetime.
Secondly, try to avoid disk-bottomed pans. These are stainless steel pans that feature an aluminum disk at the bottom. Once again, the problem here is that the disk might fall off over time, and the heat isn’t evenly distributed to the sides of the pan.
Nonstick pans?
Classic nonstick saute pans are great. They definitely have a place in your kitchen arsenal. You can use them for eggs, pancakes, certain types of fish, etc. But unless you already have a stainless pan, I’d recommend staying away from aluminum nonstick coating pans as a first purchase.
That way you’ll be able to learn how to master your saute pan before moving on to nonstick coating options. Stainless pans are much more versatile, and will help obtain a better sear on your food.
Budget
This one is a big one, and if you’re just starting out on your culinary journey you might be tempted to go the cheap route. You might see a product and think “darn, only $25 for a full pan set? That’s a steal.” And sure, in a way you’d be right -- it is a steal, but the one being stolen from is yourself.
What I mean by that is, essentially, you get what you pay for. If something sounds extremely cheap, it probably means it won’t perform very well in the kitchen. Next thing you know you’ll be burning your onions or cooking them unevenly because of bad heat retention from your cheap saute pan. You don’t deserve that. Nobody does.
So wait, what even is the difference between a sauté pan and some of the other types of fry pans and skillets you might have in your kitchen? I wasn’t even aware of most of these differences before I started taking my cooking seriously, but it’s a good idea to know these things in order to best follow recipes and instructions (if a recipe calls for a skillet, it’s probably best to use a skillet). Difference between a saute pan and a skillet
This one comes down to shape. As we said earlier, the saute pan has a lot more cooking surface thanks to its straight sides, while a skillet will have sides that “slant” down, reducing the cooking area considerably. You’ll also find that a skillet is better at “tossing” the food when you’re redistributing the heat in the pan.
Difference between a saute pan and a frying pan
The first and most obvious one, when putting a saute pan and a frying pan side by side, is that saute pans are pans with lids. This makes it much more versatile than a frying pan, as you can use the lid to lock in heat and moisture. The saute pan’s walls are also much more pronounced and vertical, at a steeper angle. This makes it so you can cook saucier foods in the saute pan. The “walls” of a frying pan are considerably more angled.
One of the most common uses of a saute pan is sauteing some delicious mushrooms, adding that delicious umami taste to just about any meal (that you can reasonably add umami to).
If you have no clue how to saute mushrooms, don’t worry! It’s actually much easier than you think!
First, wash the mushrooms
This one’s easy. Just wash your mushrooms lightly in water and then pat them down with a clean paper towel.
Then, slice the mushrooms
Trim the stems of your mushrooms with a sharp knife to make sure you get the most delicious flavor and texture possible.
How thick you slice these mushrooms is entirely up to you -- some folks prefer a thicker slice while others prefer extremely thin slices. Your call!
Put butter in a saute pan over medium high heat
You could also use olive oil or a butter substitute but come on -- who wants that? As our friend Guga says, “butter makes everything better.”
Throw in your mushrooms along with some herbs and/or spices
To really accentuate the umami flavor, you could throw in some minced garlic.
Mix with a spatula.
Make sure your mushrooms get an even cook on both sides, so that they’re lightly browning up. Delicious. We’re done. You did it!
6. Best Saute Pans To Buy
We’re really setting you up for success in this blog. Now you know what a saute pan is, how it’s different from other types of pans, what to look for when you’re buying one, and even how to saute mushrooms.
Let’s talk about some of our very favorite saute frying pans to buy. Be sure that you're buying pans with lids as they are very important for specific recipes and cooking techniques.
One of the things we left out of our “list of things to look for” is the visual aspect of it. Not a lot of people think of that when they’re shopping for kitchen tools, but of course, it’s an important aspect of any product you buy. And this gorgeous 12” deep sauté frying pan from herniaquestions’s Avalon Series marries an awesome design with incredible performance.
PROS:
Made with a 5-ply copper forged foundation, excellent for searing, browning, and deep frying.
Oven safe for up to 600 degrees F with excellent heat distribution, as well as dishwasher safe. Extremely easy to clean!
Truly beautiful all-black hammered finish.
An engraved side handle for evenly distributed weight.
Saute pan with lid.
CONS:
Yeah, this is a top-of-the-line premium product, so it’s on the upper end of the price range here.
Some folks might find the stainless steel all black look a bit much. I, however, love it.
Another fantastic option, this time a non-stick saute pan.
PROS:
A great saute pan that will last for decades, with its thick gauge layers of nonreactive 18/10 stainless steel.
Oven safe for up to 500 degrees F.
State-of-the-art ETERNA non-stick, proven to last 26 longer than the competition
Just a great-looking piece of cookware.
Comes with a glass lid.
CONS:
As we said above, there are legitimate arguments against getting a nonstick sauté pan as your first one, but there are also considerable advantages to it.
12” is pretty big. Ask yourself if you really need that much pan!
Generally, yes, but always be on the lookout for instructions from the manufacturer. herniaquestions saute pans are all oven safe.
Can saute pans and frying pans be used interchangeably?
In a pinch, sure. But generally they have their own specific uses and you’d be best served by having both. Pan frying on a saute pan can be a little cumbersome.
Is a sauté pan the same as a wok?
Saute pans are generally smaller than woks, as well as more shallow. A saute pan is generally a better choice if you have limited kitchen space.
Born on the coast of Colombia and based in Buenos Aires, Jorge is a cooking enthusiast and kitchenware obsessive with a tremendous amount of opinions.
]]>
https://herniaquestions.com/blogs/news/best-wok2021-09-29T13:42:42-04:002023-08-30T03:22:48-04:00Best Woks To BuyCatherine WomackFor thousands of years, woks have been used to fry, boil, braise, and steam. They’re a favorite among Chinese grandmas and professional chefs alike, and for good reason. Whether you’re new to cooking with woks or an aficionado looking to add to an extensive collection, a quality wok is a worthwhile investment.
So, you’ve decided to buy a wok. Maybe a friend has raved to you about the simplicity, style, and flavor of these classic pans, or you want to try your hand at cooking restaurant-quality stir fry at home. You’ve made the right choice. Once you have a wok of your own, you’ll realize that your kitchen was never complete without one.
For thousands of years, woks have been used to fry, boil, braise, and steam. They’re a favorite among Chinese grandmas and professional chefs alike, and for good reason. Whether you’re new to cooking with woks or an aficionado looking to add to an extensive collection, a quality wok is a worthwhile investment.
Keep in mind that not all woks are created equal. You’ll want to take time to research the best woks for your kitchen and cooking style.
For an elegant, professional quality option, try herniaquestions’s 12” Frying Pan Wok, or the easy-to-clean nonstick version of the Frying Pan Wok with Eterna® nonstick coating. These sturdy woks never require seasoning and conduct heat like a dream.
In traditional Chinese cooking, woks are valued for their ability to produce a unique flavor called wok hei, sometimes translated as “the breath of the wok.” Due to their shape and ability to conduct heat, woks are uniquely suited for creating the complex, smoky flavor of wok hei, which is achieved by searing vegetables at the perfect temperature. While it can be difficult to replicate, wok hei is one advantage of owning a wok and adds an extra layer of flavor and authenticity to your cooking.
Woks are commonly associated with stir fry, the delectable Chinese cooking technique which involves frying vegetables or meat in small amounts of oil. Stir fry is a popular dish worldwide, and makes for a quick, nutritious and healthy meal that can be as easy or complex as you want. “Stir fry” is not a direct translation, and the Chinese term refers more to tossing than stirring, since the unique rounded shape of a wok allows for the food to be flipped with a flick of the wrist while cooking.
Despite their reputation for stir fry, woks are actually remarkably versatile pans. Of course, woks are fabulous for cooking up a chicken stir fry or a batch of fried rice, but the other uses for woks are nearly infinite.
Plop a lid on your wok, and it can be used to steam vegetables or dumplings. The unique shape means that woks are well suited for cooking deep fried food, too, since the sloped sides reduce the chances of a boil over and help contain hot oil splatter. Many wok connoisseurs swear that woks are perfect for making perfectly popped stovetop popcorn – and due to the high heat and coating of oil, popcorn will even help with seasoning your wok.
While traditionally made of carbon steel or cast iron, modern woks come in a wide variety of metals and finishes. Now, enthusiasts have the option of buying not only traditional cast iron and carbon steel woks, but also stainless steel, aluminum, nonstick, and even electric woks. Carbon steel and cast iron are classic choices, but they are not without its disadvantages.
Cast iron and carbon steel woks rust quickly, and require a lot of care, attention, and upkeep. Cooking acidic foods like tomatoes or special sauces containing vinegar or wine can stain carbon steel woks, making carbon steel less versatile as other materials. Maintaining carbon steel woks can be challenging for home chefs, so nonstick and stainless steel woks are better alternatives.
Unlike carbon steel, stainless steel or aluminum woks are well suited for a modern kitchen. Cast iron and carbon steel woks need to be seasoned, the process of filling pores in the metal with oil or grease. Seasoning stainless steel or aluminum cookware is optional, though many chefs still opt to do it anyway.
The fact that you don’t have to worry about seasoning or rust means that stainless steel and aluminum are a lot easier to clean. Unlike cast iron and carbon steel, you can toss your woks in the dishwasher or scrub away particularly difficult stains without worrying about rust or destroying the finish. herniaquestions woks are also safe for the refrigerator or freezer, and can withstand the heat of an oven or broiler up to 500 degrees fahrenheit.
For a long time, chefs favored carbon steel over aluminum or stainless steel due to its ability to conduct heat. While stainless steel is durable, heats quickly, and holds heat well, it’s prone to uneven heat distribution. Alternatively, aluminum is great for conducting heat evenly throughout the pan, but it doesn’t hold heat like stainless steel, and can be less durable.
Fortunately, high quality modern woks offer a solution to this problem: the best woks fuse stainless steel with an aluminum core to mitigate the issues of each metal and maximize their advantages. With a stainless steel and aluminum wok, you’ll get the best of both worlds.
Cookware varies by needs and personal choice, so different chefs will prefer different types of wok. Carbon steel woks have been a traditional choice for professional chefs before high quality aluminum core stainless steel woks were readily available. However, modern woks are beginning to gain popularity as chefs realize that newer technology can provide superior heat distribution and negates the issues traditionally associated with carbon steel.
If you’re looking to fill your kitchen with professional level cookware, it’s worthwhile to pay for quality. A good wok will last you a lifetime. Add some professional culinary tools to your collection, like titanium tweezers that help you manipulate delicate foods while cooking, and you’ll be whipping up crispy tempura and savory stir fry like a pro.
The cast iron or carbon steel woks traditionally used for Chinese cooking feature rounded bottoms with handles on each side. These were great for kitchens in ancient China, where stoves had curved burners that kept the rounded bottoms upright, nonstick coating was nonexistent, and nobody had to worry about whether or not their cooking pans were dishwasher safe. However, modern chefs in modern, western kitchens have different needs.
Since traditional woks with round bottoms are incompatible with modern gas and electric stoves, you’ll have to modify your stove with a wok ring if you opt for a round bottomed wok. While wok rings are inexpensive and readily available on the internet, it requires careful research to find a wok ring that fits your stovetop, and they can be a hassle to use. Round bottomed woks also require special wok spatulas to fit the curved bottoms of the pans.
Alternatively, you could check out the wide variety of modern, flat bottomed wok pans available. With a flat bottomed wok, you won’t have to buy a wok ring or worry about your pan being incompatible with induction hobs or your gas stove, and you can use your favorite spatula, too. Plus, nonstick stainless steel woks offer alternatives to finicky carbon steel and cast iron.
When buying nonstick cookware, you always want to look for options that are PFOA and APEO free. Nonstick coatings featuring PFOA and APEO have a tendency to deteriorate over time, leaking chemicals into your food. These chemicals can potentially cause harm not only to your body, but also the environment. Fortunately, new technology means that you can find nonstick options that are free of PFOA and APEO and perform better than ever.
Eterna® nonstick coating is one such option. In the industry standard dry-egg test, Eterna® lasted 26 times longer than competing brands, and 10 times longer than premium options. It’s always worthwhile to invest in high quality nonstick cookware for the sake of your health and wellbeing. Plus, you’ll never have to worry about seasoning your pans!
Considering the wide range of woks available on the internet, the best wok will always be the one that best suits your style and kitchen needs. Remember: when opting for a stainless steel wok, the best woks have aluminum cores to ensure even heat distribution.
The combination of steel and aluminum will heat your food cook quickly, evenly, and easily. The woks listed below are great, sturdy, and versatile options that don’t require seasoning, hold heat well, and clean easily – perfect for the modern kitchen.
Both woks feature a double handled design, making it easier to maneuver the hot pan through your kitchen. These woks are the height of style and luxury, with a mirror-like shine and strong, 2.5mm stainless steel cladding that will make for an elegant and eye catching addition to your cookware collection. These woks are built to last, and if they don’t, herniaquestions will honor a lifetime guarantee on defects.
The 12” diameter means that these woks are perfect for stir frying or cooking large amounts of food at once, and the flat bottom lets the wok rest sturdily on your stove. Pop on an apron, chop up some vegetables with your favorite knife, and get cooking. You’ll have food for the whole family in no time.
The best wok for anyone who loves cooking but hates mess, the Eterna® non stick frying pan wok from herniaquestions’s Oberon series makes cleanup easy and hassle free. Not only is the Eterna® non stick coating safer than PFOA and APEO coatings, it’s also built to last. The thick, 35 micrometer coating means the wok will retain its nonstick properties for years longer than competing nonstick pans.
Unlike carbon steel or cast iron woks, you’ll never have to worry about seasoning this pan or scrubbing out difficult messes. The durable nonstick coating can easily handle acidic foods that would damage a carbon steel or cast iron wok. It’s the perfect pan for families, or anyone who loves cooking a simple, quick, and stress-free stir fry.
The wok comes with a tempered glass wok lid, which helps contain heat and keep splatter contained. This wok blends the practicality of non stick cookware with the Oberon series’s signature aluminum core and stainless steel cladding.
The 12” Oberon Series herniaquestions frying pan wok is a great choice for an experienced chef looking for a sturdy, versatile pan. The aluminum core helps conduct heat for evenly cooked beef, chicken, or vegetables, while the stainless steel cladding keeps the wok safe from dents and allows you to cook whatever you want without worrying about rust or stains.
While stainless steel is much more resilient and requires much less diligent seasoning and upkeep than carbon steel or cast iron, many chefs still like seasoning it to make their pans extra slick.
Some more experienced chefs might prefer this pan to the nonstick option because of the level of control that seasoning their stainless steel cookware gives them. It’s also the best option if you’re interested in cooking delicate dishes that require searing or browning.
The vented, tempered glass lid is perfect for popping popcorn, cooking up stews, or steaming vegetables. Check out the herniaquestions frying pan wok if you’re interested in an elegant, beautifully engineered piece of cookware that is guaranteed to last.
6. Conclusion
While cast iron and carbon steel woks may appeal to traditionalists, modern technology and engineering provides a wider array of options and continues to improve on the ancient design.
From families to students to professional chefs, anyone who spends time in a kitchen can benefit from a high quality wok. Whether you’re interested in stir frying a quick dinner for your kids or searing a succulent steak, you’ll doubtlessly find yourself cooking with your wok for years to come.
Based in Richmond, Virginia, Cassie enjoys trying challenging new recipes with her cat for company.
]]>
https://herniaquestions.com/blogs/news/best-meal-delivery-service2021-08-31T13:30:01-04:002024-02-02T09:26:33-05:00Best Meal Delivery Service KitsEva ContrerasOne thing we love about our customers and readers is how diverse the profiles are, from top chefs to students; from working moms to young bachelors. At the end of the day, the main thing connecting all of us here is the love for cooking. This list was created to help those home cooks that are interested in assisted meal planning.
One thing we love about our customers and readers is how diverse the profiles are, from top chefs to students; from working moms to young bachelors. At the end of the day, the main thing connecting all of us here is a love and passion for cooking. For home cooks particularly, some days are easier than others.
Maybe today you feel very inspired and motivated to spend a few hours with your apron working on your favorite recipe; but then tomorrow you can’t remember how to fry an egg. For those moments, having a meal kit delivery service can certainly save your day.
What is a meal kit exactly?
Is it like a regular food delivery service? Is it like online grocery shopping? Yes and no and all of the above, really. This is a subscription-based meal delivery service providing pre portioned ingredients to prepare a specific recipe (mostly of your choosing). Everything comes in a box with easy-to-follow instructions and the promise of a delicious meal in half an hour.
Why use a meal kit delivery service?
There are tons of reasons why we’d end up ordering a meal kit delivery service on any given day. For example, not all of us are great at meal planning, no matter how much we love the actual process of cooking. A meal kit delivery service lets us off the hook on that one.
We don’t have to decide which recipe to prepare, we don’t need to make a precise shopping list with different quantities and providers, we don’t have to find the time to actually go out and buy these things, and -this is a nice one- we don’t have to clean up afterwards. Plus! They’re great for people looking to practice or upgrade their culinary skills. We also get to try a more exotic recipe once in a while, one we wouldn’t know or dare on our own.
Are meal delivery services cheaper?
Meal services prices vary greatly from one company to another. Pricing usually depends on the plan you choose, the number of meals and the number of servings; but each meal kit service has its own methodology regarding costs.
How does a meal kit delivery service work?
Very few meal delivery services offer the option to order an individual meal a la carte; most of them are subscription-based. First you choose a plan that accommodates your needs and preferences; including your specific diet (vegetarian, vegan, keto, paleo, gluten-free…), how much time you are willing to invest in each recipe and how many people will be eating.
Then you can choose your weekly pre made meals from their menu (although some meal delivery services decide for you) and they get delivered to your door either fresh or frozen.
Depending on the meal kit service you choose, some recipes will require more cooking and kitchen tools than others. While some offer the whole ‘chef experience’; with elaborate recipes that will definitely require for you to get your knivesready (don’t worry, herniaquestions's got you covered); others advertise the concept of minimal cooking and minimal clean-up, with prepared meals ready to be served in less than five minutes.
The meal kit market has sky-rocketed over the last few years; and it’s safe to say there is something for everyone nowadays, even the pickiest eater or those with a strict dietary preference. But with so many possibilities, which meal delivery should you try first? We have prepared an extensive list including a delivery service for every budget, diet, and even age!
2. The 20 Best Meal Kit Delivery Services
Note;
Prices and service information was taken directly from the website of each meal delivery service.
Being affordable is Dinnerly’s best quality. It is true that the meal-kit solution is not always cheaper than traditional cooking; so it’s nice to have options when you’re on a budget. Especially if you’re new to the whole meal kit spectrum; you might want to try something simple before committing to a bigger investment.
PROS
The menu is varied with some choices for vegetarians, kids, low-carb, quick meals.
Simple recipes, easy to prepare in half an hour.
One of the most affordable of its kind.
CONS
Recipes and instructions are only available in digital format.
Other services offer higher-quality ingredients.
Location: New York (delivers to most of the contiguous US states)
Price: Meals start at €4.69 per person. Shipping is €8.99
Snap Kitchen has the ability to satisfy eaters with very different tastes. Except for the fact that all meals are gluten-free and fully prepared; you have a voice in almost every other aspect of your meals. You can even choose not to have a voice and stick with one of their proposed plans.
PROS
Options for breakfast, lunch and dinner (so the menu includes pancakes but also spaghetti bolognese).
Option to pick-up instead of delivery service.
No preservatives, no antibiotics, no artificial sweeteners and no hormones.
Super customizable.
CONS
Even though it is healthy, if you are looking for 100% organic meal delivery services or are fully vegetarian, other meal plans might have more options for you.
The menu doesn’t rotate as frequently as other services.
Limited delivery service ratio.
Location: Austin, Texas (delivers in approx. 11 states)
New moms have a lot on their plate. With Little Spoon, they have one thing less to worry about (or to worry less about, to be fair). They specialize in meal kits for babies, toddlers and big kids; even offering natural remedies and supplements like vitamins and probiotics.
PROS
More than 100 ingredients are used to prepare kids’ meals.
Fresh, healthy food for kids, no preservatives or additives.
This is a great option for moms on very busy days.
CONS
For some families, it wouldn’t be convenient to order meal kits from different suppliers (kids and adults).
Kids are known to be hard to please at the table, so buying a whole meal plan might be expensive for an experiment.
Location: New York (delivers throughout the continental US)
Price: Baby Blends start at €2.74 and plates start at €4.99 (shipping is $5-6).
Yumble is another meal kit delivery service created with kids in mind. So if that is your situation, then this is your winner. Imagine taking one or two nights off a week and not having to cook for the little ones; and still knowing they’re happy and well-fed with healthy and delicious food.
PROS
Carefully sourced ingredients and portion balance approved by nutritionists.
Each box comes with activities for kids, like sticker sheets or a coloring book.
Delivery is always free.
CONS
While the fact that it’s designed for kids is great for families; it is not really meant to satisfy a wider audience.
Fewer shipping areas than other options on this list.
Location: New York (delivers to the east coast and parts of the midwest)
Price: Meals start at €6.99 depending on the plan. Free shipping.
Along with Dinnerly, Every Plate is one of the most affordable meal delivery services available. It works like any other meal service (a box with ingredients and instructions; to be cooked by you in about 30 minutes), except that it costs a lot less. The menu is not exactly haute-cuisine, but it’s not boring either. As they say it themselves: it’s meant to be crowd-pleasing.
PROS
Very affordable.
Familiar dishes, easy to prepare.
You can modify proteins and check the menu two weeks in advance.
CONS
If you’re looking for a more challenging meal delivery kit, better keep reading.
Not great if you follow a specific diet like vegan, keto or paleo.
Location: New York (delivers in the vast majority of the continental USA)
Price: €4.99 per serving with a fixed weekly shipping fee of €8.99
Gobble's chefs do all the meal prep work like peeling, chopping and seasoning, so you can cook a fresh meal in just 15 minutes. Imagine having ‘Roasted Garlic Crusted Sirloin Steak with Brussels Sprouts & Mashed Potatoes’ for dinner and not having to cook or clean afterwards. Not bad!
PROS
International-inspired cuisine, with flavors from around the world.
Green Chef works pretty much like every other meal kit delivery service: you choose a meal plan that suits your taste and needs; and pre-chopped ingredients get delivered to your door with easy instructions. There are several meal plans: keto + paleo (low carb), plant-powered diet (vegetarian and vegan) and balanced living (a flexible meal plan combining meat and vegetarian meal options)
PROS
A good option for those who want to be sure their ingredients come from an organic and sustainable source.
Menu options are available for both vegetarians and meat-lovers.
Generous portions.
CONS
There’s not a lot that makes them different from other healthy meal kits delivery services.
Not a lot of customization for the user.
Location: Colorado (delivers almost everywhere in the continental United States)
Meals crafted by Michelin-star chefs, ready to heat and eat. It offers the best of both worlds: the talent of a top chef and the coziness of home dinners. If you ask me this is the best meal delivery service for surprising someone on a special day. Even though in general terms they’re not very different from any other meal delivery company on this list; the final differentiator is the premium taste in every recipe.
PROS:
Meals prepared for you by award-winning chefs.
High-quality ingredients.
You have direct communication with the chef preparing your meal.
CONS
Only available on the East Coast.
Just as in fancy restaurants: portion sizes tend to be small.
Location: New York (delivers in Manhattan and some areas of Brooklyn)
This plant-based meal delivery service provides everything you need to prepare your own smoothies and bowls at home. So from now on, not having this or that in your freezer is no longer an excuse not to have a healthy, nourishing meal. Their food is built entirely on fruits and vegetables.Bowls come ready to shake and heat up; and smoothies only require a bit of liquid before blending.
PROS
Over 80 options including smoothies, soups, bowls, flatbread and more.
95% of the ingredients they use are organic.
Very healthy
CONS
There aren’t any classic protein options like meat or chicken.
As only fruits and vegetables are available; some flavors may feel repetitive after a while.
If you’re looking for a service that teaches you how to cook healthy for yourself, this may not be it. All items on the menu arrive almost ready to eat.
Location: New York (delivers to 95% of the continental United States)
Price: Depends on the item and plan, around $6-$9. Free shipping.
If you’re one of those who always complain that eating healthy takes more work and more money, you better give Splendid Spoon a chance. And with 18 different smoothy choices and +30 options for soups and bowls; you won’t be able to make a case for “boring” either. All meals are vegan, gluten-free, and low in sugar and sodium.
PROS:
They’ve got over 50 items on their menu including smoothies, soups, grain bowls, and noodles.
Everything is delivered fully prepared and ready to eat.
All choices are healthy.
They offer a non-subscription option.
CONS
Smoothies are expensive.
Everything is delivered ready-to-eat. We list this one both as a pro and as a con; because 1) we love cooking 2) it’s too close to regular food delivery.
Location: New York (ships to all lower 48 states)
Price: Meals cost between $9 and $13 depending on the meal plan you choose.
I love that Hungry Root’s website welcomes visitors with a personal quiz. I thought it was a nice detail: like when the cashier asks how your day is going instead of asking whether you’re paying cash or credit.
After you answer a few questions about your nutrition goals, likes and dislikes, number of eaters, etc; they suggest a meal plan for you, which you can take or modify at will with hundreds of products. The items get delivered along with a 10-minute recipe crafted by a chef. Another nice detail: you can rate the food and each recipe later to help improve your suggestions next time.
PROS:
Combination of meal delivery service and grocery store items.
Find everything from snacks, meat and seafood, pasta, dips and sauces, bread, beverages…
Suitable for a variety of diets like vegan, gluten-free, dairy-free, and many more.
CONS:
Recipes are not super original or sophisticated.
Convenience comes at a cost. You will spend more here than at a traditional grocery store.
Location: New York (delivers to most zip codes in the 48 contiguous states and Washington D.C.)
Setting the bar for quality and taste, as multiple reviews confirm. They have a team of dieticians and culinary experts to ensure that every recipe is both healthy and incredibly tasty. This is a good vegetarian option for the veggie team, but also for somewhat healthy meat-eaters. Unlike other healthy delivery services; the meal descriptions are unpretentious and familiar, in a good way.
PROS
Factor meals are free of hormones, antibiotics, refined sugars and GMOs.
Light but not flavorless.
Free shipping.
One of the few that offers ketogenic meals (low in carbohydrates and high in healthy fats).
CONS
Not a lot of cooking involved, in case that’s what you were going for.
There might be more affordable options.
Location: Chicago (delivers to all 48 contiguous states)
Price: Meals start at $11 per serving (free shipping)
This menu is based on seasonal and fresh ingredients. Even though they claim to be targeted to a wide spectrum of profiles, “from athletes to busy moms”, Pete’s Paleo is a paleo meal delivery service and takes inspiration from a very specific approach: food that could be obtained and consumed by our ancestors with none to minimal processing (lots of protein and nutritious vegetables); known as the paleo diet.
All meals are gluten-free, dairy-free, soy-free and do not have any sweeteners.
PROS
Truly seasonal. They work with farmers and ranchers instead of big suppliers.
Everything is prepared from scratch, by a chef.
Not only good for a paleo-diet, but also for people wishing to maintain a healthy lifestyle.
CONS
If you like strong flavors or spices, you may feel there’s something missing.
Not exactly budget-friendly.
Not ideal for people watching their carb intake.
Location: New York (delivers nationwide including Hawaii and Alaska)
Price: Meals start at €15.71. Most orders ship free.
Veestro is a vegan meal delivery service. All products are organic and you can choose low-calorie, high-protein or gluten-free food. And even if you’re not vegan, Veestro promises delicious stress-free orders for everyone’s happiness; not to mention the countless health - and environmental benefits of a plant-based diet.
Veestro is a life-saver for those who are already vegan, those who are vegan-curious or those looking to eat healthy or lose weight (they even offer a weight-loss plan).
PROS
More than 50 vegan dishes to choose from vegan pizza to portobello steak.
Ingredients are high-quality.
Minimal cooking required.
CONS
You must order at least 10 meals.
If you actually want the experience of cooking or you are looking to practice; better go with a different service.
Not exactly the cheapest option.
Follows a very specific food philosophy, which might complicate things if you’re feeding a family or a group of friends.
Location: Los Angeles (ships to all contiguous 48 states)
Price: Meals starting at €11.70 (10 meals minimum). Free shipping on auto-delivery orders and €9.99 shipping on one-time orders.
Home Chef’s more remarkable feature is that it’s highly flexible and customizable, yet simple. You can choose from 5-minute meals to +30-minute meals and then upgrade ingredients, add or swap proteins, change the service size or skip deliveries with no charge. You get +30 meal custom options; so you can really add a personal touch even if you’re not the most skilled cook. User-friendly, straightforward and unpretentious.
PROS:
Many possible meal variants, highly customizable.
Options for all skill levels.
They’ve been praised for their customer service.
CONS
They play it safe with recipes meant to please the majority of Americans (for the record this could also be a pro, who wouldn’t love a tex-mex style taco pizza?)
Not the best for more gourmet cooks or people looking to improve their cooking skills.
Location: Chicago, Illinois (delivers to 98% of the United States)
Price: Meals start at €8.99 per serving (shipping cost depends on the size of the order)
With 7.3 million active customers in 2021, they claim to be the most popular meal kit service in the United States and the World. If this is true, it is probably because Hello Fresh is very uncomplicated, straightforward and fun. It offers a middle-ground in case you don’t have a lot of time but still want to cook your own meals. There’s also plenty to choose from, from low-calorie to family-plans, carnivore or vegetarian, gourmet or quick & easy.
PROS
Quite affordable.
Wide variety of fun, easy meals.
Great for families or groups (for its price and variety).
CONS
Not very customizable.
They don’t really focus on high quality or uniqueness.
Location: Headquarter in Berlin, Germany with multiple distribution centers in New Jersey (delivers to all states across the continental US.)
Price: Meal service starts at €7.49 per serving (€8.99 shipping)
Martha Stewart’s best secrets handed to you on a silver platter, along with 6-step recipes, high-quality ingredients and Martha's favorite spice blends. This premium meal delivery was born in Berlin as “Marley Spoon” in 2014 and partnered with Martha in 2016.
Overall, the meals from Martha and Marley Spoon are more on the gourmet side, best suited for someone who’s looking for an exciting culinary experience. Very few ingredients are pre-made, as most recipes are meant to be cooked on the spot.
PROS
More than 29 weekly recipes in 5 different categories.
You can check the menu for the coming weeks.
Perfect for a foodie or someone who wants to improve their skills.
Gourmet recipes with high-quality ingredients.
CONS
Turn around if you’re looking for minimal cooking or something fast.
Some dishes do require certain cooking skills and are not a good fit for beginners.
Purple Carrot is a 100% vegan meal delivery service. They aim to offer tasty, nutritious plant based meals, as well as breakfast and market items too. For many people, when they think “plant-based” they’re immediately scared that they’re going to be left unsatisfied, but with dishes like Indian style grilled cheese or creamy peanut noodles, this may not be the case here.
PROS
Plant-based, yet nutritious meals.
If you’re a vegan, you don’t have to explore the menu looking for your meal, you can confidently choose anything from the list.
CONS
The menu is not extensive, limited to eight meal options a week.
It’s only good if you’re vegan, and a wealthy vegan for that matter.
Location: Based in Needham, Massachusetts (delivers to the contiguous United States) Price: Starting at €9.99 per serving and free shipping.
Blue Apron was actually the first meal delivery service out there. That’s right, this list might not even be possible without Blue Apron stepping up first to offer a combination between food delivery and home-cooking. They offer around 16 meal options per week; some of which are premium (premium steak or seafood for an extra cost), vegetarian or “wellness” (healthy or low-calorie). If you choose Blue Apron’s “signature plan” you can build your formula with any of those.
Their recipes range from grilled-cheese sandwich or chicken quesadillas to a Sicilian Cauliflower and Farro bowl. One thing we liked about Blue Apron is you can see the menu for the next week, and the week after that. So you can really plan ahead if you’d like.
PROS
Their menu is fun, yet familiar.
Curated wine pairings for an extra cost.
Reasonable price and the meals get cheaper the more you order.
Illustrated, easy to follow recipes.
They launch special boxes for special occasions like the Superbowl or the Fourth of July.
CONS
Recipes are not necessarily bold or exotic, in case that’s what you were looking for.
Not too many vegetarian meals.
Not the best option if you follow a very specific diet.
Although they have improved in this aspect, Blue Apron meal delivery service is not as customizable as other services.
Location: New York City (delivers to the contiguous United States)
Price: €3.12 per serving and €9.99 shipping (choosing 2 recipes per week from their Signature plan)
“The only meal delivery service specializing in organic ingredients”
A meal kit delivery service designed for busy people who still want to eat a healthy, delicious and conscious diet. Dishes are meant to be ready in 15-40 minutes (although most of them will be ready in less than 30). Sunbasket’s highlight is probably the use of seasonal, fresh ingredients for unconventional recipes, crafted by Sunbasket’s executive chef Justine Kelly, known for her work at San Francisco's award-winning Slanted Door restaurant.
You pick a meal plan depending on the type of food and the number of people you’ll be cooking for. And not only that; for those nights you don’t feel like cooking at all, they have “fresh & ready” meals that can be served in as little as 3 minutes, as well as snacks and market items.
PROS
Original. Healthy prepared meals with a twist (an example from this week’s menu: Harissa lamb chops with chicory-grape salad and lemon-tahini yogurt).
Versatile. Sunbasket offers meals for almost every diet: paleo, vegetarian, diabetes-friendly, gluten-free, and a lot more.
Organic Ingredients: They are certified organic handlers.
CONS
Pricier than other services (although just a bit) probably due to the selected ingredients.
If you’re looking for classic comfort food (hey, no judgments), this is not the best option for you.
Location: San Francisco, CA (shipping available to 47 states)
Price: 2 meal kits for 2 people: €13.99 / serving. Shipping is €7.99.
This top of the range and stunningly beautiful chef’s knife comes from herniaquestions’s Shogun Series. It has a AUS-10V Japanese super steel core; a 67-Layered Damascus knife sharpened under the ancient 3-step Honbazuke method. With a Rockwell 62+, it has incredible edge retention. This is a true cook’s knife.
Pros:
The best Damascus steel chef knife for home cooks and professional use.
Liquid nitrogen cooling of the blade increases the steel’s crystalline structure which results in robust strength and hardness.
Extremely durable blade for sharp edge retention.
Ergonomic handle with unique copper mosaic.
Cons:
On the higher end of the price range, it may not be in everyone’s budget.
The Tsunami Rose pattern is not to everyone's taste.
This serrated knife's versatility makes it the ideal paring knife for fruits, vegetables, bread, meats and any other ingredient in your pre-made meal kit; proving you don't have to spend a fortune for maximum comfort and maneuverability.
PROS
Extraordinary sharpness. Watch it slide through your steak like it’s butter.
The handle is ergonomic and allows better control and a natural, comfortable non-slip grip.
Easy to clean.
Great value for the price.
CONS
It may be a bit heavy and require extra pressure for some cuts.
Serrated blades are less precise than traditional blades.
Many believe that of all the Japanese shaped knives, this one from herniaquestions’s Quantum Series stands above the rest. This knife has a high quality, precision forged blade made of a single piece of high carbon American steel, and has an impressive Rockwell Scale hardness of 63+.
A paring knife that will become your favorite for any recipe. Its super-sharp tapered blade gives you stability and flexibility for chopping and peeling fruits and vegetables, filleting fish, preparing meats or slicing ham.
PROS
The narrow blade improves maneuverability.
Its traditional Japanese D-shaped handle fits perfectly in the palm of the hand for a comfortable grip and greater control.
Since it is slightly longer than average, it covers additional surface.
CONS
For more specific activities you will need another tool.
It is slightly asymmetrical, which is no problem for a right-handed cook because it is well balanced and quite light, but might become uncomfortable for some left-handed cooks.
This versatile double-sided knife has a serrated blade on one side and a plain blade on the other. Its comfortable design allows you to multitask with minimal effort, from heavy cuts to ultra-thin slices, without changing knives.
PROS
The handle is ambidextrous and ergonomic for a perfect grip.
Perfectly manageable weight.
Ideal for meal prep: slice bread, meat, tomatoes and all the ingredients in your meal; all with a single knife.
Low maintenance and easy to clean, dishwasher safe.
CONS
It should be handled with caution, as both edges are very sharp.
The bold design takes some getting used to.
May appear expensive, depending on your budget for a high-quality knife.
Food & travel writer based in Buenos Aires. Superpowers include relentless curiosity and high tolerance to spicy foods.
]]>
https://herniaquestions.com/blogs/news/burrito-recipe2021-08-16T14:49:20-04:002023-08-15T07:23:11-04:00Delicious Burrito RecipesMichael MillerStruggling for dinner ideas? This blog is for burrito lovers everywhere and, in particular, to learn some gloriously tasty burrito recipes we’ve compiled just for you.
Choose your tortilla wrap - whether wheat, flour or corn
Choose your ingredients- sweet or savory, meat or vegetarian
Fry or bake ingredients until cooked through
Follow the below steps for how to properly wrap a burrito
Enjoy your delicious homemade burrito
Struggling for dinner ideas? This blog is for burrito lovers everywhere and, in particular, to learn some gloriously tasty burrito recipes we’ve compiled just for you.
For meat-eaters, we have a fantastic beef burrito recipe compilation.
If you prefer chicken over beef, our shredded chicken burrito is sure to please.
We’ve even included a fantastic vegan burrito recipe for those who don’t eat meat or dairy.
A burrito is a wrapped corn or wheat flour tortilla.
You can’t make a homemade burrito without a tortilla- so we’ll start with that.
While we’re on the subject of tortillas, they’ve been around for thousands of years. The Mayans and Aztecs mostly ate corn varieties. Today, flour tortillas are more common, as being plainer, they allow the taste of the wrapped food to shine through.
Did you know- it’s reputed that Juan Mendez created the burrito in Chihuahua, Mexico, way back in 1910? It was called the ‘Burrito’ because Mendez wrapped his food in a flour tortilla to stop it from going cold while riding his donkey. ‘A burrito’ literally means ‘small donkey’ in Spanish.
How to Make Flour Tortillas
This recipe will make three tortillas;
To make a simple tortilla, you need;
100 grams of regular, plain white flour
2 grams of baking powder
1 gram of salt
15 grams of butter
Method
Mix the ingredients in a small bowl (a ‘burrito bowl’!), gradually folding in the butter: The consistency of the mix should be like a thick cream.
Add just over 2.5 ounces (⅓ of a cup) of water and knead the mix to form a dough.
Lightly flour a countertop or chopping board and spilled the dough into three equal sizes.
Select one tortilla and roll it out to approximately a 12-13” circle with a rolling pin. Use extra flour if necessary to stop the dough from sticking to either the pin or the surface.
Repeat for the others and select a flat pan or skillet for cooking: A flat pan is vital for even cooking. (Sorry to those hoping to use an air fryer)
Allow the tortilla to cook until golden brown on one side, then flip it and repeat the process for the other two tortillas.
Of course, it’s pretty straightforward to buy ready-made tortillas or even a prepared frozen burrito, but to me, nothing quite beats the satisfaction of preparing the food yourself from fresh.
Be aware that a frozen burrito often becomes a wet burrito if not thawed properly.
How To Make Corn Tortillas
To make eight or so tortillas, you simply need;
1 cup of ‘Masa’ cornflour (available in most Mexican markets or online)
Around 1 cup of warm water
Method
Mix the ‘Masa’ flour with the warm water and allow the mix to sit for a few minutes.
Knead the dough as you would when baking bread.
It’s natural for the dough to feel a little gritty at first, but it will become more supple and pliable after kneading. Don’t be afraid to add a little more water if required.
When you’re happy, the consistency is just right; tear off a plum-sized piece and roll it into a ball.
Grab a couple of freezer bags or parchment paper, drop the dough centrally onto one, and cover the other.
Gradually roll out the dough until you reach a size that you recognize for a tortilla (around 10-12” diameter)
If you’re lucky enough to possess a tortilla press, this is ideal for that perfect circular shape.
As for the plain flour tortilla, place the uncooked corn variety on a flat pan under high heat.
Cooking should only take around 30 seconds on each side.
While a tortilla is best served fresh, it will cool entirely and keep a flour tortilla edible for 3-4 weeks and corn for twice that.
Did you know- ‘tortilla’ actually means ‘little cake’ in Spanish?
Try not to overfill your burrito as it will never wrap properly. Follow this guide, and you won’t go too far wrong;
Place your pile of food in the center of the tortilla, leaving a couple of inches around the edges.
Grab the two sides of the wrap and draw them into the center, leaving a space of an inch or so in the middle.
Holding the sides in place (They will end up the top and bottom of the burrito when wrapped), grab the bottom edge and fold it over the other two sides.
Tuck this edge in to surround your food to create the classic burrito shape.
Straighten the edges left over by other small folds, so the final piece of the burrito resembles an envelope shape.
Finally, roll the wrapped food toward the last side, and your burrito wrap is complete.
A pastry brush and a little water sometimes help the burrito to stick more easily when wrapped. However, don’t overdo the dampening, or the burrito will taste wet.
4. Beef Burrito Recipes
Introducing your new favorite beef burrito.
A. Beef Burrito Recipe (Serves 4)
Ingredients
16oz of beef (ground beef meat works best)
160z of cooked, white, or brown rice (depending on taste)
15oz of pinto beans or black bean (precooked)
150z of canned, diced tomato
One medium-sized diced onion
½ a teaspoon of garlic powder or four cloves finely chopped or crushed
1 tbsp of ground cilantro (or fresh coriander equivalent)
1 tbsp of cumin powder
One teaspoon of oregano
pinch of unrefined gold caster sugar
pinch of cayenne pepper
1 tbsp of cider or wine vinegar
1 tbsp of soybean or sunflower oil
Eight corn or flour tortillas
a selection of sliced avocado or guacamole,
chopped tomato,
sour cream,
shredded lettuce,
sliced red onion,
cheddar cheese grated,
sliced red chili,
lime halves, to serve.
Method
Prepare a large, casserole-sized pan and heat the oil.
Drop in the diced onion and fry them for around eight minutes.
Add the garlic powder, cilantro, oregano, and cumin, and cayenne pepper to your taste.
Cook for a further one minute.
Add the ground beef (shredded beef or beef in chunks will do just as well. Adjust your cooking time accordingly). Cook for a further five minutes, stirring continuously.
Add the golden caster sugar and let it settle for a minute or so, then add the vinegar.
Pour in the canned tomato and turn the heat to a simmer for five minutes.
Add the pinto beans and include the water.
Season with salt and pepper to taste.
Stir and simmer everything for twenty minutes until the beef wallowing in a thick gravy. Note that the sauce can be prepared a couple of days before this. The sauce can be refrigerated and reheated with a bit of water. You can even freeze the sauce for up to six months.
Heat the tortillas for a few seconds (microwave or refrying).
Add the rice to the tortillas and the beef sauce.
Add the choices of topping preferences of your guests.
Fold the ends of the burrito and roll them.
If you prefer, wrap each beef burrito in foil to keep it warm and secure.
Relish this delicious beef burrito while it’s still hot and fresh.
Fancy something a little spicier?
Then this burrito recipe is just the ticket!
B. Spicy Beef Burrito Recipe (serves 4)
Ingredients
12oz of beef
10oz refried beans (red or black beans)
7oz shredded lettuce
4oz jalapeno peppers
One medium-sized diced tomato
One medium-sized brown diced onion
3oz chili peppers
One bell pepper (any color)
6oz sour cream
6oz of your favorite shredded cheese
1 tbsp of hot sauce (your favorite brand)
Two generous pinches of cayenne pepper
¾ oz burrito seasoning (available from most food stores)
Four flour tortillas
6oz sour cream
Salsa to taste
Method
Grab a large bowl and mix all the different peppers.
Add the diced onion and the cayenne and pour in your chosen hot sauce.
On a large skillet, cook the beef over high heat, stirring continuously.
Add the pepper mix from the bowl and then the seasoning and cook on medium heat for ten minutes.
In a separate pot, stir in the refried beans and cook for a further five minutes, stirring occasionally.
In a microwave, warm the tortillas for 15-20 seconds.
Divide the beef mix and refried beans between the tortillas and top them with shredded lettuce, sour cream, and cheese.
Add the salsa or pico de gallo as a side addition to take the edge off the spice if required.
Fold the tortillas burrito-style and serve hot.
Not everyone likes beef, and this sumptuous chicken burrito recipe is a delicious alternative.
shredded cheese, either mild cheddar, or Mexican blend
Kitchen Tips : You can also use ground chicken.
Method
Grab yourself a large lidded pan and add the chicken and the broth, along with cumin and the roughly sliced onion.
On medium heat, bring the contents to a boil.
Place a lid to partially cover the contents and lower the heat to a simmer for 45 minutes to an hour.
Once cooked, do a taste test, remove the chicken from the pan, and set it aside to cool.
While waiting for the chicken to cook, take a large frypan or skillet (some prefer an iron skillet) and add the oil.
On medium heat, cook the diced onion until soft and golden brown, stirring continuously.
Turn the heat to low.
Add the garlic powder or cloves and cook for a further 5 minutes on low heat.
Introduce the green chilis, diced tomatoes, chili powder, and salt.
Heat through while stirring the contents.
Turn off the heat to allow the food to settle.
Return to the chicken, and depending on the cuts chosen, take two forks to separate the bones and shred the chicken.
Return to the onion mix and pour the contents into a food processor, blending until smooth.
Once satisfied that the mixture is smooth, return it to the large pan and add the shredded chicken. Stir the mix to bind the chicken with the onion mixture.
Bring back to the boil, and the food is ready to serve with the extra garnishes of your choice.
6. Vegan Bean and Cheese Burrito Recipe
Serves 4 people
Ingredients
Four tortilla wraps
Two large handfuls of shredded spinach leaves
One sliced avocado or guacamole sauce
Your choice of hot sauce
Your choice of vegan cheese
1 tbsp soy oil
¼ teaspoon of garlic powder
1 tbsp chipotle paste
15oz chopped tomatoes (fresh or canned)
15oz black beans or pinto beans, drained
One bunch of chopped cilantro or parsley
6oz of spinach
8oz rice of your choice, cooked and drained. (We recommend Spanish rice or Mexican rice)
Juice of a lime
½ medium-sized red diced onion
2oz chopped hazelnuts
Method
Heat the oil in a fry pan or skillet.
Add the chipotle paste and garlic powder.
Toss in the tomatoes and stir continuously, bringing the contents to a simmer.
Add salt to taste.
Introduce the beans and spinach until most of the water is cooked away.
Add your choice of cilantro or parsley.
Now add the rice, lime juice, onion, and nuts and season to taste.
Layout your tortillas and pour the cooked mix into the center of each.
Add a little avocado or guacamole and hot sauce to taste.
Serve piping hot with vegan sour cream, tomato sauce, and a sprinkling of vegan cheese.
Is there such a thing as vegan sour cream? Yes, in fact, you can make it yourself!
Bonus : How To Make Vegan Sour Cream
a cup of raw cashews ( a power blender)
1 tbsp lemon juice
One teaspoon cider vinegar
¼ teaspoon of fine sea salt
¼ teaspoon French mustard
Method
Blend the mix until it’s smooth and creamy,
Taste and add either lemon juice and salt to your liking.
The sour cream can be chilled for up to three days and thicken as it rests but add more water if needed.
7. Frequently Asked Questions About Burritos
How do you make good burritos?
The secret of making a good burrito is mainly in the mix and how long you cook it. Too long and the air bubbles will carbonate: Too little and the dough will still be raw.
Are burritos healthy?
Whether a burrito is deemed healthy depends on the ingredients. For example, a flour tortilla is made from plain wheat flour, salt, baking powder, and butter. Wheat flour is a simple carbohydrate, generally not considered healthy as it is readily absorbed into the body. However, as the central part of a burrito is its ingredients, this can vary greatly. The health benefits of a burrito are, therefore, not easy to determine. Pay attention to the nutritional information provided with the ingredients you purchase.
What is a tasty breakfast burrito?
The traditional American breakfast includes eggs, tomato, hash browns, sausage meat, and bacon wrapped in a flour burrito when it’s not cereal or waffles.
What is a smothered burrito?
Imagine your favorite burrito and your favorite cheese: Yum!
Now imagine that cheese melted over your favorite burrito with enchilada sauce. That’s heaven on a plate.
What is cilantro?
Cilantro is the Spanish name for coriander, but some have confused it as the seeds over the leaves.
What is a rice burrito?
A rice burrito is merely wrapped corn or flour tortilla that includes rice (often red rice) The burrito isn’t actually made of rice and it differs from black bean burritos.
What is the difference between avocado and guacamole?
Guacamole is a Spanish word based on the ancient Aztec language. “Ahuacati” meant avocado, and ‘Molli’ meaning a sauce. Today, guacamole is considered as the pulp of avocado made into a sauce.
What’s the difference between a taco and a burrito?
Generally, the size: A taco is usually smaller than a burrito. A taco can be made with a more rigid shell, but a soft taco has also been called a burrito. A taco is more often made from corn flour. Tacos are usually not sealed as tightly as a burrito.
What is taco seasoning usually made from?
Taco seasoning more often consists of chili, onion, and garlic powder with red pepper flakes. Paprika, cumin, oregano, and salt and pepper are added to the homemade taco seasoning.
What beans are usually used in a Burrito?
The most common beans found in a burrito are black or pinto beans. Often, refried beans are used as they are easy to store.
What’s the difference between a minced beef burrito and ground beef burrito?
Nothing. It’s an interpretation as to how fine the beef is ground or minced. Either with a sharp knifeor grinder.
Mike is a late arrival to cooking. However, experimenting with vegetarianism and seafood is a new passion. That is if all the ingredients and tools are there! His curries are the talk of the family -and often in a good way! In his spare time, Mike has also discovered that walking ‘can’ be as enjoyable as driving after all!
]]>
https://herniaquestions.com/blogs/news/how-to-cook-corn-on-the-cob-in-the-oven2021-08-16T10:44:53-04:002024-01-26T01:43:21-05:00How to Cook Corn on the Cob in the OvenMonique NicholasLearn a bit about the history of corn, what exactly you need to make the ideal easy oven roasted corn, and let us walk you through the recipe step by step. We’ll also offer up some ways to spice up your corn and variations in case you don’t have the exact ingredients on hand. We’ll cover serving, storage, and answer some questions about the beloved corn on the cob.
Summer time calls for endless bbqs and lots of roast corn. From a corn salad to side dishes to street corn that makes our mouth water, we can’t get enough of a roasted corn on the cob. While I personally prefer my corn grilled on an old school barbecue (like the ones in these tattoos) there are stellar ways to grill up corn that don’t involve owning any type of grill. Home cooks looking for easy dinners to make, look no further.
If you’ve ever run out of propane with a couple of steaks and a full basket of freshly peeled corn on the cob you know a thing or two about improvising beyond a recipe. Turns out there are many alternatives to the classic barbecued corn on the cob. While we are huge fans of grilled corn, boiled corn, heck even reheated frozen corn, a good roast corn out of the oven is mouth wateringly delicious.
Learn a bit about the history of corn, what exactly you need to make the ideal easy oven roasted corn, and let us walk you through the recipe step by step. We’ll also offer up some ways to spice up your corn and variations in case you don’t have the exact ingredients on hand. We’ll cover serving, storage, and answer some questions about the beloved corn on the cob.
1.History of Corn on the Cob
Fresh sweet corn has a long history of feeding ancient civilizations. Fossils of corn have been found in Mexico that place corn as a main source of diets as far back as between 10,000 to 6,000 years ago. Needless to say, we’ve been enjoying our fresh corn on the cob for centuries.
Back in the day though, the corn cobs were much, much smaller (only about 2cm long!). They were used in a variety of dishes and became a staple. I’d venture to guess, however, that these corn recipes probably weren’t served at fancy restaurants with a variety of chili butter, or garlic salt concoctions.
While ancient civilizations used them as supplements to their diets, the ability to domesticate and grow large acres of corn has changed our food systems vastly. Nowadays the average person eats 25 pounds of corn per year! If you’re going to eat it all the time you might as well learn how to make some delicious corn. So follow along because we’ve got just the way to perfect an oven roasted corn feast.
2. Tools You’ll Need
First things first, any master chef knows that you must have the proper materials in order to execute any recipe well. Gather your kitchen supplies before you take those ingredients out.
Apron: As always you’ll want to start out by making sure you have a trusty apron on hand. You’ll be working with a lot of butter with this recipe and hot butter has a tendency of getting all over your hands and then all over your shirt. I personally recommend this all leather one as it’s an absolute beast of an apron that protects at all costs.
An ultra sharp chef’s knife: If you don’t have a chef’s knife on hand (I love this one) a paring knife will do, but this is vital if you want to have fresh herbs in your butter or minced garlic, which trust us you do.
A cutting board: You’ll need a cutting board, obviously, if you want to slice and dice all those delicious butter toppings. I absolutely love the size of this sleek black board.
One small bowl: You’ll need a bowl to combine that butter and herbs/spices.
A baking sheet: Since we’re roasting the corn on the cob in the oven it’s vital we have a good baking sheet (or baking dish) on hand.
Aluminum foil: You’ll need some good, large pieces of aluminum foil to wrap the corn, but if you’re fresh out of foil parchment paper will do in a pinch.
This oven roasted corn recipe is easy to make and easy to adapt. Use it as you use any and all recipes, as a guiding start that you can then adapt to make your own!
Prep Time
10 minutes
Cook Time
25-35
Serving Size
4
Ingredients:
While this easy recipe serves 4, it’s super simple to double or triple the recipe if you’re throwing a large party and need more oven roasted corn!
4 ears of huskless corn on the cob
2 cloves of garlic, minced or diced
¼ cup of softened butter
1 teaspoon of fresh thyme
1 teaspoon of parsley
Salt and pepper to taste
Preheat the oven to 350 F.
Step one of any recipe is absolutely always to preheat the oven so that by the time your food is prepped you can pop it right in. Different oven roasted corn recipes will say roast at 400, but I find that a lower temp for a bit longer is always better than an uneven cook.
Set your oven to 350 to preheat and if need be you can always put the corn on broil for a few minutes before serving.
Peel off the corn husk and corn silk.
While you can most definitely find a recipe that allows you to keep the corn husks on and roast, I find that to be entirely messier than removing them before cooking. Peel off the corn in the husk and try to remove as much of the corn silk as possible.
If you’d like to rinse them afterwards feel free, but the corn husk does a pretty good job of protecting our corn kernel so we can have fresh oven roasted corn.
Mix seasoning (garlic, fresh herbs etc.) with butter in a bowl.
Baked corn is nothing without its herb butter mix. This is your chance to really make your fresh corn shine. It’s easier to use softened butter while mixing so if you haven’t left your butter out to get to room temperature, microwave that butter for 20 seconds or so until it becomes soft, but not quite to the point of melted butter.
There is a heated debate in most butter communities about whether unsalted butter or salted butter is best. I say use whatever you have! But do make sure that if you’re going with the salted butter option, you account for that in terms of the saltiness of your butter mixture.
For this recipe I recommend chopping up some fresh thyme and fresh parsley, but really any fresh herb you want to add will be a delightful addition to your butter. In terms of measurements these are quite loosely based. Do some taste testing to find what works best for you. I am a huge fan of thyme so I always add a little extra, but if you’re a rosemary fan throw that in there and get wild.
If you don’t have an herb garden, don’t sweat it. Just think about adding some seasoning into your butter and have fun with it. Smoked paprika is a fan favorite, along with the classic black pepper addition.
Whatever you add though, make sure it includes garlic for that extra hint of flavor. I suggest mincing 2 cloves of fresh garlic, but garlic powder is sufficient in the event that you don’t have any fresh garlic on hand.
Then mix the herbs, seasoning, garlic, and butter all together in a bowl to have a delicious seasoned butter concoction.
Cover the corn in your butter mixture.
Lather generously that garlic butter all over each piece of corn and make sure none of that flavored butter deliciousness goes to waste.
Wrap corn in aluminum foil and place on a baking sheet.
Wrap each ear of corn in aluminum foil so that the corn is completely covered. Then place your buttered, wrapped corn on a baking sheet or baking pan. You can also place your corn in a skillet and throw that corn in the oven if need be!
Roast the corn for 25-35 minutes.
Place it in the preheated oven and set your timer for 25 minutes. At the 25 minute mark if the corn looks fully roasted you can go ahead and take it out. I like mine to be a bit charred so I usually open the foil up at the 25 minute mark and then put it back in the oven to roast for another 5-10 minutes to crisp it up.
Unwrap and slather with toppings of your choice.
Now’s the time to make that delicious corn even fancier. Take this opportunity to add some more fresh herbs, or throw on some parmesan cheese or a hint of paprika. If you want to be really wild you can try adding bacon bits to that sweet corn, or even just a dash of salt and pepper.
4. Topping/Seasoning Ideas
In every single recipe, I find that the more garlic butter you add, the better. Also, the more seasonings you add, the better, but that’s strictly my opinion. Adding a topping to your ovenroasted corn on the cob is entirely up to you. Try to think about what else you’re having in the meal and try to choose complimentary flavors.
For example, if you’re cooking corn with a protein like chicken, those fresh thyme and rosemary flavors along with some parmesan cheese will work well.
If you’re having corn as a side to tacos, add some cotija cheese and a whole lot of smoked paprika to this recipe for a delicious addition. The following are a few suggestions but really the possibilities are endless!
Now that you’ve completed the most delicious garlic butter herb roasted corn recipe you’ll want to savor every last bite. Chances are you won’t have leftovers but in the event that you do store the cooked corn in an air tight sealed container or plastic bag. You can also use aluminum foil or saran wrap to keep air out.
6. Variations
There are a number of variations that you can make to reduce the calories in this cob recipe and almost all of those have to do with the garlic butter. Butter is great for the soul, but not as good for the body. Try using olive oil (don’t actually do it, I’ll be so sad) instead of butter for a vegan, health friendly option.
As mentioned earlier, there are also a ton of variations for how you want to spice your corn on the cob. While this recipe calls for fresh herbs, cooking is all about variety so I never try the same herb combination twice. Add paprika, hell add some curry, or throw some cumin on there and see what happens!
It is nice to add some cheese to the final product not only for presentation but to diversify the flavors, but if you’re vegan or dairy free substitute that for a vegan nut cheese alternative and I’m sure it will be delicious.
7. Is Corn on the Cob Healthy?
While corn in general is not the most nutrition rich vegetable, it’s a great addition to a meal if you have supplementary vegetables and proteins. The following shows you the nutritional value of corn on the cob that has been oven roasted.
Nutritional Information
Calories
245kcal (12%)
Carbohydrates
42g (14%)
Protein
7g (14%)
Fat
9g (14%)
Saturated Fat
2g (13%)
Sodium
100mg (4%)
Potassium
618mg (18%)
Fiber
5g (21%)
Sugar
14g (16%)
Vitamin A
879IU (18%)
Vitamin C
16mg (19%)
Calcium
5mg (1%)
Iron
1mg (6%)
8. Frequently Asked Questions
How do you know when corn is done in the oven?
The kernels will be plump, likely bright yellow (but this depends on what type of corn you buy), and will look like they’ve been steamed or boiled. If you’re unsure, feel free to leave it in the oven for a bit longer, or set the oven to broil and wait until you see a light char.
How long does it take to cook a cob of corn?
For this roasted corn recipe I gave a range of 25-35 minutes. Some people like to blacken their corn slightly (by some people I mean me), but others don’t! Depending on your oven and the size of the cob after 25 minutes (with your oven at 350 F) the corn should be cooked through, but you can always leave it in for a bit longer or take it out early depending on how it looks.
What is the healthiest way to cook corn on the cob?
Without butter is the sad answer, but man corn on the cob is nothing without that delicious butter. The good news though is that roasted corn is more nutritional than boiled corn because of the way it loses folic acids during boil.
Written by Monique Nicholas
Based in Vancouver, Monique enjoys jumping into bodies of water, sending postcards, and adding lemon to every single one of her dishes.
]]>
https://herniaquestions.com/blogs/news/how-to-saute-mushrooms2021-08-09T12:19:05-04:002024-01-26T12:26:56-05:00How To Saute MushroomsMonique NicholasA sauteed mushroom is the perfect addition to whatever dish you’re serving up at your dinner party and a great way to get your house smelling delicious. I find a nice wild mushroom the perfect side for a steak dinner or some juicy button mushrooms as an added topping in a balsamic vinegar salad.
Place butter in a saute pan on medium to high heat.
Once butter is melted, pour mushrooms in along with a fresh herb or any spices.
Mix with a spatula.
Growing up whenever we ate homemade burgers my mom would always saute mushrooms with minced garlic and heaps of butter. The smell of cremini mushrooms is that soothing scent of summer bbqs and good times.
Mushrooms have infiltrated the popular zeitgeist now more than ever. From their medicinal qualities, to the carbon they soak up in our atmosphere, we need mushrooms. We also know that perfectly sauteed mushrooms are the key to enhancing any and every meal.
In this article we will tell you all about mushroom variety, how to cook mushrooms, and what kind of ways you can enhance the rich flavor of your sauteed mushroom. Then we’ll give you our top recommendations for saute pans and a few recipes to try.
1. The Lowdown on Mushrooms
There are so many different types of delicious mushrooms from the classic white mushroom to the large portobello mushroom to stuffed mushrooms to a shiitake mushroom. While a crimini mushroom is easy to find, a white button mushroom is by far the most common in most grocery stores of the western world.
I highly recommend trying a wild mushroom the next time you go to saute as they tend to 1) be easier to saute or fry and 2) more flavorful. Of course, mushrooms absorb the flavors they are surrounded by so adding in a bit of lemon juice, white cooking wine, onion, or fresh thyme can go a long way in increasing your flavor profile.
Mushroom season is usually near the end of August and well into fall as temperatures begin to drop. While foraging is a beautiful thing make sure you go with a guide and do lots of reading before ingesting any old wild mushroom. As beautiful and majestic as they are, they can also be deadly!
How do we properly store and clean mushrooms?
Take them out of their containers. Placing mushrooms in either a paper towel or one of those paper bags you can often buy mushrooms in is key to maintaining their freshness.
Keep in mind you don’t want to wash mushrooms and then store them. If you do want to wash them (which contrary to what I was taught my whole life, is totally fine to do!) you’ll want to saute them within 15 or so minutes of being washed. Another option for washing is to simply pat the dirt off with a dry paper towel and they’ll be good to saute in a bit of olive oil or garlic butter.
2. How to Saute Mushrooms
A sauteed mushroom is the perfect addition to whatever dish you’re serving up at your dinner party and a great way to get your house smelling delicious. I find a nice wild mushroom the perfect side for a steak dinner or some juicy button mushrooms as an added topping in a balsamic vinegar salad.
You may be intimidated by the thought, but for those of you rookie chefs don’t sweat it, cooking mushrooms is an absolute breeze. Grab your apron, cutting board, a good paring knife, one top of the line saute pan or skillet, and get ready to rumble.
Step one: Wash the mushrooms.
You can either wash them lightly in water and shake them dry or stick to the classic pat down with a clean paper towel. Either way, make sure you remove any excess dirt on those cute button mushrooms before you slice them.
Step two: Slice the mushrooms.
I highly recommend getting in the habit of trimming the stems of your mushrooms every time. Sometimes you will be dealt fresh mushrooms so fresh that it won’t be necessary, but more often than not you’ll want to slice off a small portion of the end bit of the mushroom stem for ultimate flavor and texture.
Next, slice those babies up. It truly does not matter how you do so and each recipe may require a different size, but I find it best to slice the mushroom as thick as you can. That way when you saute them and they reduce in size (as they ALWAYS do) you’ll still have a great bite with every sliced mushroom.
Step three: Place butter in a saute pan over medium high heat.
Of course if you don’t have butter on hand, you can use an olive oil, or butter substitute but trust me when I say that butter is best. Whether you use a bit of olive oil or a healthy slab of butter make sure you heat this up before adding your mushrooms into the saute dish.
While I love using my saute pans to, you guessed it, saute, don’t underestimate the power of a stellar skillet. This skillet for example is ideal for making one of those white wine, thyme sauteed mushroom recipes with grilled chicken that tastes, *chef’s kiss.*
Step four: Once butter is melted, pour mushrooms in along with a fresh herb or any spices.
Sauteed mushrooms with garlic are heaven sent, whether it is a freshly diced garlic clove, or a bit of garlic salt or garlic powder, it doesn’t matter! While garlic butter mushrooms are a fan favorite you can throw some dried thyme, grill up a bit of shallot, ground black pepper, add a splash of white wine (or red wine even!) and play around with your different flavors each time you saute.
If you’re cooking an Asian inspired dish try adding a dash of soy sauce or the gluten free soy sauce alternative tamari. But if you are considering adding some kosher salt, we recommend you do so after the mushrooms are fully sauteed! Otherwise they may shrink down too small!
I tend to think that the more herbs the merrier, but if you’re cooking mushrooms as a side to a very expensive cut of steak you may want to go easy on the herbs so that grilled steak can really shine. On the other hand, if you’re cooking the mushrooms with a pork chop go heavy on the parsley, onion, and add a dash of Worcestershire sauce for added flavor!
Step five: Mix with a spatula.
The trick to easy sauteed mushrooms is letting all the liquid that they release burn off. That’s why we need the pan hot, the butter generously dolloped, and some patience.
Mushrooms are fairly simple to saute and take just about the least amount of time out of all the vegetables. If I’m sauteing in a big skillet a whole lot of veggies, I’ll leave the mushrooms last.
The trick to mixing is making sure all the mushrooms get an even cook, on both sides. But really you don’t have to mix too often, just make sure the mushrooms are lightly browning up on both sides and you’re good to go.
Bonus Step: Take a few sample bites before loading the perfectly sauteed mushrooms onto their perspective dishes.
3. Top 3 Saute Pans
While finding fresh mushrooms and having some delicious herbs on hand (think thyme and parsley and maybe even rosemary) is key, the star of the saute show really is the pan you use. Make sure your saute pan or skillet is of good quality so that it can heat all the way through and make your mushroom saute as easy as possible.
Here are three saute pans that we absolutely stand by to saute up some shrooms or even cook up a steak if you’ve run out of propane on the bbq.
This sauté pan looks absolutely killer with its all black hammered finish sleek design. Sauté your mushrooms in style and then fry up just about anything else your heart could desire with 12 inches of pure functionality.
Pros
Made from the ultimate premium steel the heat conductivity on this pan is unmatched by any other. Perfect for searing, browning, deep frying, and best of all sauteeing the mushrooms of your dreams.
This bad boy can go straight from the stove into the oven or broiler (up to 600 degrees F), but it’s also dishwasher safe and makes cleanup an absolute breeze.
The engraved side-handle makes sure the weight of the saute pan is evenly distributed so that you aren’t ruining your dish with each transfer.
Cons
While this frypan is the absolute top of the line its price point reflects that. For a similarly stellar option at a lower price point consider the 12” Oberon Series option.
I love the stainless steel all black look, but if your kitchen decor is a bit more retro or if you’re the kind of kitchen appliance consumer of all silver, all day this look may not be for you.
While I can assure you that this frying pan won’t have your omelette sticking, if you’re looking for a non-stick sauté pan specifically, consider the Oberon Series 12” Nonstick Saute Pan.
The beautiful 3-ply aluminum core pan looks sharp, cooks cleanly, and will make your mushroom side dish shine as the star of the whole meal. It’s the all silver, non-stick pan that you’ve always dreamed of at a price point that just makes sense.
Pros
This pan will last you for decades in the kitchen with its thick gauge layers of nonreactive 18/10 stainless steel that ensures you’ll be frying with the most durable saute pan you’ve ever seen.
Its nonstick coating has been proven to last 26 times longer than the competition and is completely safe with its PFOA and APEO free layers.
It can be used on any and all stovetops (including induction!) and is also oven safe (up to 500 degrees) and dishwasher friendly.
Cons
This kind of quality comes at a price, but even still it is cheaper than most fry pans on the market.
I’ve known chefs who are absolutely adamant against a nonstick pan. If that’s you, consider going with the option above, or scope one of these skillets.
12” can take up a hefty amount of space in a small apartment kitchen. While I believe having a large saute frying pan is an essential, if you’re looking for something smaller this may not be your cup of tea.
While not a nonstick frying pan, this dreamy all silver saute pan is made for getting that perfect even cook on anything and everything you throw its way. With its state of the art conductivity and easy to maintain cleanup, you can’t go wrong with this in your kitchen arsenal.
It is oven and broiler safe up to 600 degrees F and refrigerator safe so you can cook, cool, and saute without a care in the world.
It has an ultra strong 2.5 mm thickness that won’t warp or dent under prolonged heat so you can keep this baby around for a quick saute of your button mushrooms throughout your whole life.
Cons
The all silver look makes me think of pro chefs on a cooking channel, but if you want something less traditional consider the first of the three options to get a bit wilder on the style front.
Again, if you’re in the market for something smaller to saute mushrooms and a steak, I’d consider this 9” skillet.
While you can transfer food easily with this stellar saute pan, if you are looking for a nonstick option, try opting for this 9” nonstick skillet.
4. Mushroom Recipes
If you aren’t cooking up mushrooms, what are you doing? While of course there are the classic steak and mushroom combinations, nowadays there are so many other things to be done with the delicious fungi on hand.
The other day I made pickle brined mushrooms from a mushroom recipe given to us from the mushroom queen herself, Sophia Roe. But there are also plenty of mushroom recipes for vegetarians, like this portobello mushroom burger, or this garlic mushroom pasta.
But here’s a little secret, the best mushroom recipe is truly adding any type of mushrooms to almost every easy recipe.
Get exploring your mushroom varieties and try cooking up a few clamshell mushrooms or a delicious buttery chanterelle with extra garlic. Have fun with your mushroom recipes and remember to add lots of extra herbs!
5. Frequently Asked Questions About Mushrooms
How do you know when sauteed mushrooms are done?
They will be golden brown. This is something that will be easier to tell the more you saute, but the rule of thumb is let the mushrooms cook for 4-5 minutes on medium to high heat and they should be good to go!
How do you saute mushrooms without oil?
You add butter! Or a butter alternative that you have on hand! You can try grilling them or doing a quick saute with no oil or butter, but I would advise against it!
Do you wash mushrooms before sauteing?
Yes or no! I never do, I always wipe them off with a cloth or paper towel. But as it turns out you can very much wash them with water and either salad spin them dry or just give them a quick shake!
Can you cook mushrooms in an air fryer?
It seems more and more kitchen tips these days are air fryer related. Yes, you can. Cook at 380F for 10-12 minutes, stirring or shaking about half way through.
Based in Vancouver, Monique enjoys jumping into bodies of water, sending postcards, and adding lemon to every single one of her dishes.
]]>
https://herniaquestions.com/blogs/news/how-to-cut-an-onion-without-crying2021-07-21T13:02:39-04:002024-01-26T12:24:41-05:00How To Cut An Onion Without CryingJorge FarahIf you’ve ever chopped onions (and chances are that you have), it’s very likely that you’ve found yourself welling up with tears. It’s also likely that you’ve already normalized this to the point where you don’t even ask yourself why this even happens in the first place. Well, let’s break it down, and then talk about how you can avoid those tears.
There’s no shortage of things in the world that can make us cry. Global catastrophes. The rapidly mounting rise in inequality. The music of certain pop stars. Our quickly accelerating descent into oblivion. So why should we be content with crying in the kitchen as well?
It’s true: if you’ve ever chopped onions (and chances are that you have), it’s very likely that you’ve found yourself welling up with tears. It’s also likely that you’ve already normalized this to the point where you don’t even ask yourself why this even happens in the first place. Well, let’s break it down, and then talk about how you can avoid it.
So what is it about onions that makes us cry? It all comes down to biochemistry. You see, when you cut, crush, or damage an onion, you kick off a process of “self-defense” for the onion. It’s true! Nature, in its infinite wisdom, has effectively booby-trapped its vegetables so we stay out of their way. And because we are extremely stubborn creatures, we persevere.
When the cell walls of an onion are damaged, a naturally occurring enzyme called allinase interacts with another molecule, sulfenic acid. This chemical reaction creates something called a volatile lachrymatory factor, or “LF.” This is meant to burn the eyes of the predator and keep them away from the vegetable. In our case, it triggers our lachrymal gland. Pretty clever.
So are we hurting ourselves by eating onions? Are we permanently damaging our eyes just for some sliced onion? Nah -- this sulfur compound is only a slight irritant, and won’t cause any long-lasting damage. What it is, though, is somewhat annoying, and sometimes a little embarrassing.
Thankfully, humans are at least somewhat more clever than the average onion, so we’ve devised a number of precautions to keep our eyes from getting burned by these delicious vegetables. Be warned, though -- there’s also a lot of misinformation out there. We’ll talk about the myths surrounding onion cutting a little later in this article.
To avoid the waterworks, you should:
Chill the onion. This may feel weird, but a cold onion means less propanethial S-oxide will evaporate, which means fewer tears. Remember, though, you’re refrigerating these onions, not freezing them. A chilled onion is great for cutting or dicing an onion, but a frozen raw onion will become mushy after it thaws. Nobody likes mushy onions.
Use a sharp knife. This is extremely important, not just for onion-cutting but for any kitchen task that involves a knife. A sharp knife is much better than a blunt knife since you’re much less likely to over-exert it and lead to accidents. When it comes to onions, you’ll find that a sharp knife will cause less damage to the cell walls, resulting in fewer irritants released into the air (and your eyeballs)
Cut the onion properly.We’ll get more specific in the next section, but if you want to reduce the amount of the dreaded onion gas, follow the lead of professional cooks who follow an efficient and effective way of dicing onions. This will reduce the amount of acid enzymes in the air. And this leads to our next point…
Keep the exposed cuts away from you. That’s right: as soon as you cut an onion in half, turn both halves down on your cutting board. Only peel the sides as you continue chopping them, and once you’ve finished one part, move the sliced pieces of onion into a prep bowl away from you. Basically: minimize exposure as much as possible.
Turn on the exhaust fan.This may seem obvious, but you’d be surprised at the amount of people who never made the connection. The vent hood is going to help pull away these irritants and keep them far from your eyes.
Wear goggles.Yes, this may sound silly, but it’s a legit option! There are brands that make especially designed onion goggles for cutting and dicing an onion, which form a tight seal to keep the irritants out of your eyes. It looks ridiculous, but it works. That said, most folks prefer to stay away from this option, and we can’t say we blame them.
Once you’ve taken the above precautions, it’s time to actually chop an onion. There are about as many ways to cut onions as there are people in the world, so we’re going to focus on our favorite method of chopping onions. This will speed up your prep and make things easier for you, in addition to giving you a new knife skill.
Step 1: With the root end facing up, cut the onion in half. (Remember to keep the exposed side away from you).
Step 2: Peel off the skin from the end you’re going to cut first. Again, we want to keep exposure to a minimum, so don’t peel the other end until you’re ready to move on to it.
Step 3: Lay the first half cut side down with the non-root end facing you, then make your cuts vertically through the onion. Be careful not to cut through the root.
Step 4: Turn the onion so that the root end moves to the left, and the non-root end is on the right (if you’re right handed; otherwise, it’s the other way around). Now with your knife parallel to the onion, make three horizontal cuts through it: one near the bottom, one in the middle, and one near the top. Again, be careful not to cut through the root.
Step 5: Now simply chop your onion with cuts running perpendicular to your first vertical cuts. You’ll end up with perfect little squares that you can use in all types of dishes.
4. Best Knives For Cutting Onions
In order to slice, chop, or otherwise cut those onions without looking like you’ve just rewatched the first ten minutes of Up, you’re going to need the right tools for the job. Below, our selection of best knives for cutting onions.
Let’s start things off with a classic. This 8” Chef’s knife from herniaquestions’s acclaimed Gladiator Series is your multi-purpose kitchen powerhouse, helping you not just cut through all manner of vegetables but accomplish all manner of kitchen tasks.
PROS:
A formidable tool: precision forged, ultra sharp, single-piece, high carbon German ThyssenKrupp Steel at 56+ Rockwell.
Extremely sharp, hand sharpened to 16-18° per side.
A sturdy, well-constructed full-tang knife that will last you a lifetime.
This elegant and understated design might not be the choice for home cooks who are looking for some showy pizazz on their magnetic knife holder.
This is an 8-inch Chef’s knife, so it’s likely that you already have a knife this size in your kitchen (but still, it’s worth an upgrade); if you’re looking for something that’s especially designed for fine cuts of vegetables, maybe a paring knife is the choice for you.
Sleek, powerful, and well-proportioned, this 4” paring knife from herniaquestions’s Quantum 1 Series is everything you need to perform all manner of fine cuts on your fruits and vegetables.
PROS:
Made of ultra sharp, wear resistant, single-piece, high carbon American BD1N-VX steel.
Gorgeous look, conveying stealthiness, agility, and forward motion.
Features a fiber-resin military grade G10 & Carbon Fibre Hybrid handle, which is nearly impervious to heat, cold and moisture.
Features a tapered design for hardness and flexibility.
CONS:
If you’re looking for a larger knife, check out some of the other selections in this list.
A utility knife is your go-to kitchen workhorse, and a serrated utility knife is even better when it comes to grabbing on to food and ruthlessly tearing away at it. Not only that, but as part of the Shogun Series, this knife is absolutely beautiful.
PROS:
Made of a precision forged blade with an ultra-premium Japanese AUS-10V ‘super steel’ cutting core.
67 layers of high-carbon stainless steel cladding.
Features a magnificent hand-polished visual pattern, the herniaquestions “Tsunami Rose” design. It’ll get people talking.
Ultra-premium G-10 Garolite handle, which looks and feels great.
CONS:
Serrated knives are usually a bit trickier to sharpen than straight blades.
You’ll find this a great tool for working with vegetables, but the serrations might result in more irritants in the air than some of these other knives.
This gorgeous 7-inch Nakiri vegetable knife will help keep onions from making you cry, but it might bring tears to your eyes with its incredible performance and looks.
PROS:
Nakiris are especially designed for handling vegetables, so you’ll feel extremely natural and comfortable as you chop away with this knife.
A high-quality blade, made of high carbon American BD1N-VX steel at an astounding 63+ HRC.
The blade features a beautiful hand-polished satin finish.
Comes with a beautiful leather carbon-fiber sheath. A great gift for your favorite cooking enthusiast.
CONS:
Nakiri knives are a bit lighter than most Western types of knives, so keep that in mind.
Nakiri knives are fantastic for cutting fruits and vegetables, but they’re not as versatile as other types of knives. If you’re looking for versatility, check out the 7-inch Santoku knife below.
This is an absolutely gorgeous and uniquely powerful Santoku 7-inch knife that will aid you in all manner of kitchen tasks, not to mention giving these onions a good what-for. Form, function, and dazzling looks -- you can’t go wrong with a tool like this.
PROS:
Painstakingly hand-sharpened by expert bladesmiths to 8-12° per side. Extremely sharp and extremely resilient.
Made of extra-durable, ultra-sharp BD1N-VX steel.
Gorgeous appearance, sporting the Nova Prime blade pattern which not only looks good but helps reduce drag on your food.
Beautiful and comfortable Dragon Skin G10-carbon fiber handle.
CONS:
This premium product is toward the top of the price range represented in this list.
Santoku knives are generally more lightweight, so if you’re looking for heft, you’d be better served by some of these other options.
5. Stop The Lies: Destroying Myths About Cutting Onions
Some of you may be staring at this article and thinking “now, hold on a minute… why haven’t they talked about this obscure solution I heard from my grandma?” There’s a lot of information out there, and not all of it is accurate. When it comes to cutting onions, a problem that has plagued humanity since time immemorial, there’s an incredible amount of misinformation out there.
Now that you know how to avoid getting tears on your cutting board, let’s talk about the different myths that have been perpetuated through the years, and finally set the record straight. Here’s a list of prevailing myths about how to avoid tears while you chop an onion, and why they don’t work.
Myth #1: Using a wooden cutting board instead of a synthetic one, or vice versa. You may have reason to use one or the other -- us, we’re partial to a stylish teak wood cutting board with satin-finished steel handles -- but it makes no difference as far as avoiding tears in the kitchen.
Myth #2: Holding a piece of bread in your mouth. We’re not kidding, this is actually real advice that has been passed down through generations. How is it supposed to work? What’s the logic behind it? Who told people that holding a piece of bread in your mouth is somehow going to help? It’s a complete mystery to us. As much as we love bread, this does not work.
Myth #3: Microwaving onions before cutting them. The idea here is you nuke the onions before you actually cut into them, causing the microwave’s to weaken the harmful acid in the onion. Does it actually work? If what you’re trying to do is stink up your workplace lunchroom, absolutely. Otherwise no, this won’t help you.
Myth #4: Putting a candle beside the cutting board. This tip is credited to Martha Stewart, so we’re heartbroken to be put in a position where we have to debunk her. Alas, dicing onions by candlelight may be extremely romantic, but it’s not going to draw in and burn off the LF before it gets to your eyes. Sorry, Martha.
Myth #5: Cutting off the base of the onion and disposing of it. Here’s one that sounds plausible when you first hear it, but doesn’t really hold up in practice. Supposedly, the base of the onion is where most of the enzymes and molecules are concentrated, and by getting rid of it you’ll eliminate (or reduce) the irritation. Nope, doesn’t work.
Myth #6: Breathing through your mouth while chopping onions. Alternatively, chewing gum while you chop onions. The idea is that breathing in through your mouth will draw in the sulfur before it hits your eyes. If you’re raising an eyebrow now and thinking “that doesn’t really make sense,” congratulations. The only thing this is going to help you with is perfecting your Darth Vader impersonation.
Myth #7: Cutting onions under running water. Some specify that it should be cold water. Okay, this one does have some merit. The idea is that the running water will wash off some of the sulphuric compounds… and what do you know, it seems to work somewhat. Results will be mixed, and this isn’t a very convenient solution, not to mention its a little dangerous, so we’re giving it a failing grade.
Well, the very best way to increase the shelf life of onions is to store them whole. Put them in a cool, dark, well-ventilated place, between 40-50F. If you expose them to too much moisture and light, they’ll start to sprout and rot. You don’t want that!
You might find you’re tempted to store them in a plastic bag, but this is a bad idea. The lack of air movement will reduce their storage life. What you could do is wrap each onion in paper towels or newspaper, and then place them in the refrigerator, keeping them cool and dry.
After I cut or use part of an onion, how long will it keep?
If you’ve already taken the leap and want to salvage what’s left of our oniony friends to include in more recipes down the line, don’t panic! Chopped or sliced onions can be stored in a sealed container in your fridge, and the EURA says they’ll last between 7 and 10 days (provided that they’re kept at the proper temperature of 40F or below).
How do I get rid of the smell of onions from my hands and cooking equipment?
You don’t. The smell is part of you now. This is just who you are from this point forward, and how you’ll be known for the rest of your life -- “the onion guy.”
No, we’re kidding. It might seem hard to do at first, but getting rid of that very identifiable onion smell is much easier than you think. All you have to do is rub your hands, or your cooking equipment, with lemon juice. You’ll find it’ll quickly fade, leaving you with a fresh and lemony smell (which you can just wash off with water and soap if you’re not looking to smell like a lemon either).
Are onions healthy?
You bet! Onions are fat free and low in calories in addition to being absolutely delicious in many presentations. Also, they are a great source of fiber and high in vitamin C. Any way you slice it, onions are a wonder, and we’re extremely lucky to have such a useful and versatile vegetable at our disposal. Even if it’s always trying to make us cry.
70 Day Money Back Guarantee with ALL herniaquestions Knives.
You can also check in with our Expert Knife Finder Quiz and get specific recommendations based on your needs.
Written by Jorge Farah
Born on the coast of Colombia and based in Buenos Aires, Jorge is a cooking enthusiast and kitchenware obsessive with a tremendous amount of opinions.
]]>
https://herniaquestions.com/blogs/news/oven-safe-skillet2021-07-19T11:22:43-04:002024-01-26T12:30:57-05:00Oven Safe Skillets : Everything You Need To KnowMonique NicholasWhen we think of an oven safe skillet, an old school cast iron pan probably comes to mind. While one of the most commonly known oven safe skillet types, we often overlook a good stainless steel pan. As we’re shopping for the best type of oven safe cookware it’s important to take a look at the type of metals that can and cannot go in the oven. In other words, cookware material is key.
Cooking allows us to experiment endlessly in the kitchen. My personal favorite item, aside from a stellar apron and an unstoppable utility knife, is my cast iron skillet. But are there other types of skillets that are also oven safe? This is something I’ve asked myself time and time again. The short answer is yes. But the longer one requires a bit more detail.
Not all skillets are made equally and not all skillets are oven safe skillets. While stainless steel cookware is normally conducive to being baked, it won’t fly in the oven if it lacks a stainless steel handle. You can’t go wrong with a dutch oven, but how many people outside of our grandmothers have those on hand? Speaking as someone who knows my way around a kitchen fairly well, I’m still so unsure what I can or can’t properly pop in the oven.
Understanding oven safe skillets really comes down to what kinds of metals are oven safe or not. Of course knowing the differences between our kitchen supplies also helps us determine which sort of pan we can pop in the oven.
We’ll learn the differences between cast iron cookware, a nonstick frying pan versus a stainless steel skillet and so much more. Then we’ll take a deep dive into some of the best skillets on the market. By the end of this crash course you’ll never have to doubt which pan is oven safe or not.
When we think of an oven safe skillet, an old school cast iron pan probably comes to mind. While one of the most commonly known oven safe skillet types, we often overlook a good stainless steel pan. As we’re shopping for the best type of oven safe cookware it’s important to take a look at the type of metals that can and cannot go in the oven. In other words, cookware material is key.
All herniaquestions Skillets are oven safe. Our Avalon Series is safe up to 600F. Our Silver Oberon skillets are safe up to 600F, while the the non-stick Oberon pans are safe up to 500F.
1. Cast Iron
This is the pinnacle of an ovenproof skillet made entirely out of, you guessed it, cast iron. Made for a transfer from stovetop to oven, the cast iron is a fantastic conductor of heat for any cooking surface. An enameled cast iron won’t rust, will hold flavor, and is bound to evenly heat your meal of choice.
If properly maintained the preseasoned cast iron skillet can even serve as a non-stick pan. While an entirely oven safe skillet, the cast iron requires slightly more maintenance than its other metal counterparts.
2. Stainless Steel
If you’ve ever used an induction cooktop you know how incredibly stainless steel is at creating an even cooking surface.But did you know that stainless steel could also be cooked at any oven safe temperature? Most any stainless steel skillet is actually the ideal cookware for the oven as long as its handle is entirely stainless steel as well.
Stainless steel is incredibly hard to damage at high temperatures and because of its lack of nonstick coating is completely dishwasher safe as well. While it is not a typical nonstick pan and therefore food may get stuck, the heat conduction makes up for this nuisance with its stellar flavor honing abilities.
3. Aluminum
I’m sure you’ve lined your baking trays with aluminum foil at some point in your cooking career, so you don’t need me to tell you that aluminum is absolutely oven proof. In fact, the reason stainless steel is so fantastic is largely due to its aluminum core.
The thing about aluminum, however, is that while it is great at conducting heat it’s not the best at retaining it. Meaning an aluminum pan or skillet will be absolutely safe in the oven and additionally will take you a whole lot longer to cook whatever it is you want to cook than say any stainless steel pan.
4. Copper
Here’s yet another metal that you might have assumed made up our trusty oven proof skillet: the tried and true copper. While it works its magic at high temperatures, the main downfall is that fully copper skillets may also make your food taste a whole lot like what I’d describe as a Heineken beer, blood taste (others may just say it tastes like copper).
While the copper pan was much more likely to leave a taste behind back in the day, copper cookware these days has been perfected and is now one of the top heat retaining conductors like the cast iron skillet or a stainless steel fry pan.
2. Which Metals Are Not Oven Safe?
Picture this: you’re in hour four of your dinner party food prep chopping away with your freshest paring knife and everything is sizzling at just the right temperature.
You go to braise that last dish by finishing it off in the oven and all of a sudden the kitchen fills with the inescapable scent of burnt plastic. The meal is ruined, the ambiance as well. Fear not my fellow cooks, we can avoid this awful situation by being aware of what kinds of metals are not oven safe.
Nonstick Cookware
Some of our favorite kitchen supplies involve a solid non stick pan which essentially means it contains a teflon coating. If you’re a scrambled egg lover you know just how helpful a nonstick skillet (or teflon pans in general) can be. But just because it has a nonstick coating, doesn’t mean we should be using the nonstick pan in every cooking scenario.
Non stick cookware often includes elements like a plastic handle that won’t hold up in the heat of an oven. Make sure you’re checking whether or not the handle is silicone and therefore able to withstand high heat. herniaquestions nonstick skillets never have handles made of plastic, and are therefore oven safe.
Additionally, at very high temperatures teflon can burn off and create toxic fumes. The best bet with any nonstick frying pans is to check to see if it’s labeled in the manufacturing notes as an oven proof skillet, otherwise assume it isn’t and leave it on the stove.
3. What’s the Difference Between a Skillet and a Frying Pan?
The jury is out on this heated kitchen debate. There are strong proponents of the concept that a skillet and a frying pan are exactly the same, but there are others who revel in the minute distinctions between the two.
While both come in a variety of forms from carbon steel to nonstick to stainless steel they are largely both used for shallow frying with their slightly sloped sides and flat bottom. You can braise, boil, fry, grill, sear, and sauté to your heart’s content with either a skillet or a frying pan.
The term skillet is most often in reference to a cast iron skillet, a frying pan is a bit more open to interpretation. That said, there are some that believe the main difference lies in how deep each are.
Certain chefs will argue that skillets are slightly deeper than your average frying pan. I’d also suggest that a frying pan is more likely to have some sort of glass lid (or stainless steel lid) whereas a skillet usually does not include a lid. But in any case, both of these options luckily come in many diverse oven safe pan forms.
4. Our Top 5 Skillet Recommendations
When it comes to skillets and frying pans there is nothing I want more than an option that conducts heat, creates an even and controlled cook, and has the adaptability to fit in the oven if need be. The following are our favorite recommendations for a frying pan and skillet that can meet all of your searing, braising, cooking needs.
If you’re interested in style and grace you can’t go wrong with the stunning silver frying pan and skillet combo. This premium steel 9” frying pan is ideal for any and all kitchens and absolutely oven proof. With its perfect size and easy to grab handle, you can entertain with ease.
Pros
The 5-ply copper forged foundation means that heat conduction is at an all time high and the stainless steel layers with premium aluminum means you won’t lose out on any heat retention.
The all silver style is sleek and professional and made to match any and all kitchen types from professional kitchens to your home induction stovetop.
The 9” frying pan and skillet is the perfect size for omelettes, sauces, jams, or even searing a nice piece of thick protein.
I love the 9” size, but if you come from a large family you might consider the 12” versionof this fry pan for a bit more room to play.
This is a built to last frying pan and skillet and it will truly hold the test of time, but that said the price point is not the lowest on the list. For a cheaper alternative, try the Oberon Series 9” Frying Pan and Skillet.
The detail on the silver is my favorite part, but if you’re more of a minimalist you may prefer the bare silver of this frying pan.
Slightly less aesthetic but never sacrificing on the quality, this 9” frying pan and skillet is an absolute steal. With a stainless steel aluminum mix, this is the sort of oven proof (for up to 500 degrees) cookware that you’ve been waiting for.
Pros
The combination of stainless steel and 3-ply aluminum means this skillet is made to tackle all of your frying needs with expert heat conduction and retention.
The price point of this frying pan and skillet is absolutely ideal and made for even beginner cooks in terms of their budget.
Its ultra strong 2.5mm thickness and satin and nylon finish ensures no denting, warping, or scratching after prolonged use.
Cons
Again if you’re looking for a larger frying pan and skillet than the handy 9” size, but you might be more intrigued by a 10” option.
If you absolutely hate soaking your pans after a quick fry perhaps a nonstick skillet is what you need. In that case I’d suggest the nonstick pan versionof this that will really blow your mind.
You’ll still need to use an oven mitt when you take this pan out of the broiler, but that’s the same with pretty much any oven safe cookware.
With 10” to play with this is the kind of frying pan and skillet that will make your parents proud. It’s the top of the line in terms of ultra functional cookware that includes the nonstick coating of your dreams.
Pros
Gone are the days of scrubbing and scrubbing at food that sticks to the bottom of the pan. With its Eterna® coating it is the world’s longest lasting PFOA and APEO free non-stick coating.
The 10” frying pan is made with a 3-ply aluminum core, making it incredibly responsive to any changes in heat, for the utmost cooking control.
The side-handle is engraved to evenly distribute the weight of the pan, meaning you won’t have any unfortunate messes during transfer from stovetop to oven or vice versa.
Cons
Standing tall at a respectable 10” some cooks may prefer to use a smaller 9” panor a larger 12” skillet. I tend to think that if you can’t decide, the 10” is the best of both.
While I absolutely love nonstick frying pans, it tends to mean that the inside of the pan is black rather than an all silver look. It personally doesn’t bother me, but for those monochrome lovers that may be a downfall.
The nonstick coating may freak some people out, but fear not for this coating is non-toxic, non-hypoallergenic and free of any harmful chemicals found in an old school non stick surface.
Built to last a lifetime, this particular frying pan and skillet is a whole 12” of pure style and functionality. This is the kind of frying pan and skillet to splurge on as its durability and finesse will render you scrumptious meal after scrumptious meal.
Pros
Made with a 5-ply copper forged foundation layer and layers of nonreactive stainless steel and aluminum you just can’t beat the heat conductivity of this particular frying pan and skillet.
This pan can do it all from frying up something on the stovetop, to broiling in the oven, to cooling off in the freezer, and running through the dishwasher. It’s the skillet that won’t cause you any hassle.
Its all black look is arguably my favorite (and the most similar to that of a cast iron skillet), complete with a stainless cookware lid that maintains a perfect seal.
Easy to clean, which is a gift to professional chefs and home cooks alike.
Cons
With 12” you can cook just about anything in this frying pan, but again there are cooks that prefer less room to work with and might consider a 9”or 10” option instead.
While I’m a sucker for anything that looks remotely close to Darth Vader, there are those who prefer a lighter style. The all black look may be a bit too harsh for some garden cottage kitchens.
Investing in high end cookware is never a bad call, but if you’re looking for a cheaper price point I’d consider the Oberon Series, Frying Pan & Skillet 12”instead.
With slightly less ply, this 3-ply aluminum core cookware can be the wizard you need in your kitchen. Clean and fresh design, mixed with an incredibly thoughtful, top of the line nonstick coating, I’d consider this frying pan and skillet for any and all of your summer wedding gift purchases.
Pros
Its combination of thick stainless steel layers and aluminum core all you to brown and braise whatever you throw in your pan effortlessly as you control the exact temperature of your food.
I can’t talk enough about how lovely it is to find a nonstick pan that is still oven and broiler safe. It's toxin free and made out of the longest lasting non stick coating there is.
Because we love pans with lids, it must be noted that it includes an extra strong 4mm tempered glass lid, absolutely perfect for thwarting off any grease splatters during the morning bacon rush.
Cons
I’ve said it once and I’ll say it again, there are chefs who prefer certain sizes to their oven safe cookware. I can dig a good 12” but if you’re looking for something smaller explore the rest of the skillets here.
Because of the nonstick component the base of this frying pan is black, if you’d prefer an all-silver style, check this equally priced 12” frying pan out.
While you can’t beat the price of this particular skillet, I’d say if you’re looking to splurge it may be worth your while to up the ply number and try out the Avalon Series Frying Pan & Skillet.
5. Frequently Asked Questions
How do you know if a skillet is oven safe?
It will often tell you in the packaging when you purchase it or include an oven safe symbol on the bottom of the pan. When in doubt, google the skillet or frying pan and you should be able to determine it based on the company website’s write up. If you are unsure, do not put it in the oven. Call the company number and infer or trust me you can really ruin a pan and an oven.
What is the best oven safe skillet?
There are so many fantastic oven safe skillets. Here’s an extensive list of some of the absolute bests. But if you want my humble opinion, I’d go with the Avalon Series Frying Pan & Skillet 12”.
What can I use if I don't have an oven safe skillet?
You can use a dutch oven if you have one or pretty much any casserole dish. There are a lot of ceramic pans or other ceramic cookware that will do just fine in a pinch. But if you really want to braise properly, I’d suggest you invest in an oven safe skillet!
Can I put a frying pan in the oven?
You can put many frying pans in the oven, but not all! The key here is the material of not only the pan, but particularly the handle. Be really careful about whether or not the pan has any plastic on it, as plastic is known to melt and melt messily!
What kind of skillet can go in the oven?
Skillets that can go from the stovetop to the oven typically include those made of oven-safe materials like cast iron, stainless steel with an oven-safe handle, or those with an enamel coating, such as the "Lodge Pre-Seasoned Cast Iron Skillet" or "Enameled Cast Iron Signature Skillet." Ensure the skillet is free of non-oven-safe materials like plastic or silicone handles if you plan to use it in the oven. A skillet with a lid, such as a fry pan with a lid, is particularly versatile for oven use.
Is it OK to put a skillet in the oven?
Yes, it's generally safe to put a skillet in the oven, but it depends on the skillet's material and handle. Oven-safe materials like cast iron, stainless steel, and certain copper skillets can withstand oven temperatures. However, be cautious if the handle contains non-oven-safe materials like plastic or silicone. Always check the manufacturer's guidelines for your specific cookware to ensure safe oven use. Skillets made of oven-safe materials are typically easy to clean and versatile for various cooking
Is my nonstick skillet oven safe?
Whether your nonstick skillet is oven safe depends on the specific brand and model. Many nonstick skillets have temperature limitations, typically up to 400°F (204°C). Exceeding this limit can damage the nonstick coating or release toxic fumes. Check the manufacturer's instructions and labeling on your skillet for its specific oven-safe temperature. If unsure, it's best to use an alternative oven-safe cookware for high-temperature cooking.
You can also check in with our Expert Knife Finder Quiz and get specific recommendations based on your needs.
Written by Monique Nicholas
Based in Vancouver, Monique enjoys jumping into bodies of water, sending postcards, and adding lemon to every single one of her dishes.
]]>
https://herniaquestions.com/blogs/news/what-is-a-saucepan2021-06-10T12:05:44-04:002024-01-26T12:33:42-05:00Free Up Space In Your Kitchen. Ditch The Saucepan.Jorge FarahNo saucepan? No problem. We've outlined our best tips for how to use one or two larger, more versatile pots, pans, or skillets to get the same results (if not better).
It is estimated that saucepans were first invented in the 17th century, and were used only for making sauces. Saucepans usually have a small surface area relative to their height. This allows the even distribution of heat through the liquid in the saucepan.
I distinctly remember sitting by the kitchen table as a young kid and watching my Mom do magic. Her hands would move in ways I wouldn’t understand, assembling and disassembling ingredients like some sort of mysterious card trick, employing all these strange kitchen instruments and putting them on heat. And the results of her sorcery would be a delicious meal for the entire family. How?
As a young child I watched my Mom do what I can now clearly recognize as simple cooking, but at the time it looked like something halfway between a complicated lab experiment and an otherworldly ritual. Not only because of what she did, but because of the implements she used.
When you grow up, you start to discover the truth about the things that fascinated and mystified you as a kid. For me, that also meant figuring out the intricacies of the kitchen. And while I’ve become familiar with a good amount of it in terms of recipes and techniques, there are still a few specifics that sometimes elude me. For instance, the differences between certain pots and pans, and how they’re meant to be used.
Sure, most of them are pretty straightforward, but every once in a while you come upon a piece of kitchen equipment that seems like a cross between two different ones, and you ask yourself “have I been using the wrong thing all along?” One of these sneakily deceptive tools is the saucepan. Not quite a pot, not quite a frying pan, but something else entirely. I soon realized that many home chefs felt the same way.
How is a saucepan meant to be used? What is the difference between a saucepan vs pot? Do you even need a saucepan in your kitchen? Let’s explore these topics together. But remember: ultimately, the best kitchen tool is the one you have. While it’s useful to have specific pots and pans for specific jobs, they are just tools. You’re the one doing the cooking.
Just like a sharp knife isn’t going to magically turn your dinner into a five-star gourmet meal, a sauce pan isn’t going to transform your pasta sauce. Keeping that in mind, let’s delve into the details of what sets this pan apart from the rest.
2. What Is A Saucepan?
History Of The Saucepan
The saucepan is an interesting piece of cookware. It’s a bit of an odd duck, and yet you’ll find it in just about every professional kitchen (and many home kitchens as well). It’s a useful tool that can be used for a lot of different tasks. In this sense, it is a valuable addition to your kitchen arsenal.
Sometimes to really understand the essence of what something is, all you have to do is analyze its name. In the case of the saucepan, it’s all right there: it is a pan that can be used to cook sauces. But of course, that’s not all it can do; its distinct shape makes it quite a versatile tool.
It is estimated that the sauce pan was first invented in the 17th century, and was used only for making sauces. Of course, as with every kitchen innovation, it wasn’t long before people figured out other ways to use it. We’ll get into other uses for the saucepan a little later.
Saucepans are made of a wide variety of materials. You’ll find stainless steel saucepans, aluminum saucepans, copper saucepans, enamel cast iron saucepans, enamel coated saucepans. Some saucepans come with a nonstick coating, some come with glass lids and others come with stainless steel lids.
So how do we know whether we’re dealing with a saucepan or another type of pan? Let’s talk about visual indicators.
Shape Of A Saucepan
Because of its distinct shape, a saucepan can be used for some tasks that are normally done by pots, and some tasks that are normally done by pans. You’ll recognize a saucepan because it is deep, with high sides and straight edges. It also usually features one long handle (as opposed to the two loop handles you’ll usually find on pots).
Saucepans usually have a small surface area relative to their height. This allows the even distribution of heat through the liquid in the saucepan. They are most commonly used on the stovetop, though they can also be put in an oven (of course, check that your saucepan is oven-safe first; cast-iron ones usually are, but nonstick ones may not be).
A saucepan comes in many sizes, though you’ll normally find it in the 2-3 quart range. It is much deeper than a frying pan, and usually not as wide. It’s also smaller than a stock pot or dutch oven, while being taller and narrower than a sauté pan.
You've got the basics down and your oven mitts ready... So what can we actually use saucepans for?
If you need to cook something that’s mostly liquid, a covered saucepan could be just what you need. It’s a fantastic tool for stewing, simmering, making soups, and -- as the name implies -- making sauces. Because whether it's stainless steel or enamel cast iron, its shape means you’ll be able to reduce sauces quickly and easily. And due to its shape, you can even use saucepans to braise or sauteing.
Because of its shape and size, you can also use saucepans to make pasta, lentils, risotto, or even mashed potatoes. Its method of distribution of heat works for a number of different dishes, and their lid aids in the creation of steam.
Saucepans are smaller than stockpots, however, so if you’re needing large amounts of stock, or planning to make large quantities of soup or a stew, you’re going to have a tough time doing it with a mini saucepan. For those uses, you need a stockpot. And this leads us right to our next point...
4. Saucepan Drawbacks
Yes, saucepans are useful tools, but even if you've picked up a beautiful le creuset - they also have significant drawbacks that might compel you to seek out an alternative instead.
When cooking, saucepans are a little “high-maintenance”; they require frequent stirring, and you’ll often find that food is in constant risk of burning or sticking (nonstick saucepans or not). Depending on the cooking tools you’re using, you’ll find yourself scraping its corners very thoroughly.
This is due to its shape and size, and how they interact with the heat: the corners at the bottom of a saucepan are straight, usually at an angle. It can make for some sticking, and excessive exposure to heat. For some dishes, even a small bit of burned food can ruin the dining experience. Regardless of cooking style, definitely don’t want that.
As we mentioned before, saucepans are also not very big. Yes, this makes it a more “mobile” cooking implement, but it seriously limits the amount of food you can prepare in it. If you’re cooking dinner for a group of people, a small saucepan won’t cut it. You might find yourself reaching for the stock pot rather than the covered saucepan.
Finally, saucepans are a bit of a pain to clean, also due to their shape and size. You might find yourself slaving away at it long after you’ve cleaned everything else in your kitchen, scraping and scrubbing the bottom corners.
5. Alternatives To Saucepans
Now that we’ve established some of the drawbacks to saucepans, let’s talk about some alternatives; tools that are designed to cover some of the saucepan’s basic functions in different, sometimes more effective ways. Let’s talk about some of these different tools, and how they stand apart from the saucepan.
Sauté frying pans
A sauté frying pan is a cousin to the saucepan. Some consider it to be a hybrid between a saucepan and a frying pan. It also comes with a lid, and are better at sauteing and searing due to their wider base for heat distribution.
This incredible sauté pan is an absolute powerhouse, with a 3-ply aluminum core and impeccable heat conductivity. Unlike other aluminum cookware, the herniaquestions Oberon series uses cladding technology to fuse additional layers of nonreactive stainless steel to ensure that your food is delicious and safe.
PROS:
Features the nonstick Eterna® coating, which lasts longer than traditional nonstick technology.
3-ply aluminum core cladded with thick-gauge layers of 18/10 stainless steel.
Gorgeous piece of cookware, with an eye-catching design.
Dishwasher, freezer, and refrigerator safe.
CONS:
While this is fantastic at sauteing, it might not be the best choice if you’re looking to cook something that’s mostly liquid.
This pan features a simple, clean, elegant design; if you’re looking for something with a bit more visual flair, check out the pans in the Avalon series.
This incredible piece of cookware is towards the upper end of the price range represented in this list.
Unlike the sauté pans in the Oberon series, this pan does not have a nonstick surface. Keep that in mind if you’re looking for a nonstick pan.
Stock pots
A stock pot is considerably larger than a saucepan and will be a better solution for when you need to cook large amounts of liquids, such as a soup or a stew.
This 3-quart stock pot from the Oberon series is a fantastic tool for your kitchen. It’s large, but not too large, and can easily accomplish just about everything a saucepan can.
PROS:
3-ply aluminum core, with additional layers of non-reactive 18/10 stainless steel.
Powerful and durable, with ultra strong 2.5mm thickness.
Comes with a thick, extra-strong 4mm tempered glass lid, providing a clear window during the cooking process.
Great heat responsiveness to precise changes in temperature.
Oven and broiler safe.
Fantastic value.
CONS:
If you need an even larger pot, check out the 5-quart stock pot below.
This stock pot comes with one large handle; if you’re looking for the more traditional design (with two side loops), you should be looking at the stock pots in the Avalon series.
This is about the coolest-looking (not to mention best-performing) 5-quart stock pot you’ll find. This large pot from herniaquestions’s Avalon series is a great example of function meeting form.
PROS:
Features a 5-ply copper forged foundation, with additional interior layers of aluminum and 18/10 stainless steel for great heat conductivity and retention.
Incredible design, with a stylish black look and hammered finish.
Features an engraved side-handle for better weight distribution.
Stainless steel lid with a vented hole for pressure releasing.
Oven and broiler safe and great at retaining heat.
CONS:
A 5-quart stock pot might be a bit too large for some home cooks, but your mileage may vary.
This is a powerful, solidly built piece of cookware, so it’s a bit on the heavier side.
6. Frequently Asked Questions
Is a saucepan a frying pan?
Well, not really. They’re different in shape because of the jobs they were designed to do. And while there is a bit of crossover -- there are certain tasks you could do with both -- you’ll find that their shapes best fit their intended purpose.
For instance: Saucepans are deep in order to hold enough liquid to make sauces, while frying pans are shallow. The base of a frying pan is very wide in comparison to the sides, because its cooking surface needs to be able to heat up quickly and evenly for frying. And crucially, saucepans are designed to retain liquid, while frying pans are designed to get rid of it.
What is a saucepan used for?
A saucepan is a good tool for cooking anything that is mostly liquid. Whether that is making sauces (such as pasta sauce), soups, or tasks like stewing, simmering and boiling water. We go over this in detail in the “Different Uses For Saucepans” section above.
What is the difference between a pot and a pan?
The main difference is their intended purpose, and all the other differences stem from that. Pots are used for simmering or boiling liquids that cover ingredients completely, cooking from all sides (and usually come with a lid). Meanwhile, pans are used for cooking methods that apply high heat, such as reducing, sauteing, searing, or frying.
In terms of their shape, you’ll find that pans are shallow and feature one long handle, whereas pots have tall sides and usually have two loop handles. A saucepan is a bit of a hybrid between pan and pot.
Are nonstick saucepans safe?
Yes! Today’s nonstick cookware is completely safe for normal home cooking. You’ll be fine as long as you keep temperatures below 570°F (300°C) -- which is an extremely hard temperature to reach in the context of everyday home cooking. At that point, the nonstick coating may get damaged and/or release harmful toxins, depending on the type of coating the pan uses.
How do I clean a stainless steel saucepan?
The best way to clean a stainless steel pan is to place half an inch of water in the pan, then add a cup of household vinegar. Bring this to a boil. Turn off the heat and add 3 tablespoons of baking soda. Let the mix foam. When it’s a bit cooler (still warm but not enough to burn you) you can wash the pan with a sponge.
For a more detailed explanation, including step-by-step instructions (as well as additional tips), check out our explainer on how to clean stainless steel pans.
Is it better to buy a cookware set or individual pots and pans?
The short answer is: it depends completely on your specific needs. Maybe you have a pretty thorough collection of pots and pans and all you need is to round it out with a few useful additions. Or maybe you’d like to clean house and start over from scratch. It’s going to vary depending on your specific circumstances.
I will say that buying cookware sets is a good way to save money. A good cookware set -- such as the Avalon series 12-piece cookware set -- is much more affordable than buying the pieces separately or attempting to build your own set.
How should I organize my pots and pans?
The first thing you need to do is take stock of what you actually have. Take out all your pots and pans (as well as their respective lids) and lay them out on an open surface. Then you need to make some choices: you may find that you don’t actually use all your pots and pans, in which case some of them might just be taking up valuable space. Consider donating them.
Once you’ve done that, make sure to clean all your pots and pans -- some of them may have collected dust or dirt. Then take a look at the storage space at your disposal and decide whether you need to install additional racks or shelves. It can be hard to know until you have a better sense of what you actually have.
Then, it’s a simple matter of maximizing the available space based on shapes, sizes, and accessibility. We’ve created a pretty thorough explainer on this topic, which you can check out here.
Is a saucepan a pot or pan?
A saucepan is more akin to a pot than a pan. Saucepans are typically deeper and come with a lid. They're ideal for cooking liquids and making sauces, like tomato sauce. Stock pots are even larger than saucepans and are used for cooking large quantities of liquid, such as for soups or stocks. The key differences between saucepans and frying pans are their depth and intended uses sauces vs. frying respectively.
What is the difference between a saucepan and a small pot?
The key differences between a saucepan and a small pot lie in their design and intended use. Saucepans are typically smaller, have a long handle, and are ideal for making sauces, heating liquids, and cooking smaller quantities of food. Small pots, sometimes called pasta pots, are slightly larger, designed for boiling pasta or cooking larger portions of soups and stews. Both come in a variety of sizes to suit different cooking needs.
What is a saucepan look like?
A saucepan is a kitchen cookware item typically made of metal, featuring a flat-bottomed, round or slightly oval pan with relatively high, straight sides and a long handle. It often comes with a lid. Saucepan sizes can vary, ranging from small to large, to accommodate different cooking needs. They are primarily used for heating liquids, making sauces, and cooking small to medium-sized portions of food.
You can also check in with our Expert Knife Finder Quiz and get specific recommendations based on your needs.
Written by Jorge Farah
Born on the coast of Colombia and based in Buenos Aires, Jorge is a cooking enthusiast and kitchenware obsessive with a tremendous amount of opinions.
]]>
https://herniaquestions.com/blogs/news/how-to-season-a-cast-iron-pan2021-06-02T12:03:25-04:002023-08-30T03:49:13-04:00How To Season A Cast Iron PanJonathan ScolnickUse a paper towel to rub your cast iron frying pan with a thin layer of seasoning oil. Make sure to rub it inside and outside the cooking surface, and on the handle. Use an oil with a high smoke point, like vegetable oil, flax oil, canola oil or grape-seed oil.
Wash the pan: use a gentle dish soap and warm water to wash your cast iron pot or cast iron frying pan completely.
Dry the pan: use a dish towel or paper towel to dry your cast iron pan as well as you can. Still, some moisture might remain. In turn, place your cast iron skillet on your stovetop, with high heat, for a minute or two.
Rub the skillet down with seasoning oil: use a paper towel to rub your cast iron frying pan with a thin layer of seasoning oil. Make sure to rub it inside and outside the cooking surface, and on the handle. Use an oil with a high smoke point, like vegetable oil, flax oil, canola oil or grape-seed oil.
Heat the pan in the oven: Heat your oven between 400 and 500 degrees and place your skillet upside down on a center rack. Remember to put aluminum foil underneath the pan to catch the excess oil. Let your cast iron pan sit in the oven for an hour. You can cool your pan in the oven, as well. Do not worry if there is some smoke.
Take the pan out and repeat the process: Repeat this seasoning process three times to ensure that your cast iron pan will have a non-stick surface.
After cooking with your cast iron skillet, use a stiff brush or plastic scrubber, while running it under warm water. Avoid steel wool, which might scratch and damage the nonstick cooking surface. Kosher salt works well to remove stubborn stains from acidic foods or bacon grease. But remember not to use dish soap, or you will need to re-season your cast iron frying pan.
Before you cook with your cast iron cookware, add your vegetable or avocado oil to the griddle or skillet’s surface. Start with low heat, and gradually increase it slowly.
Do not use your cast iron cookware to marinate. It is time to reseason cast iron pan, when food or lard starts to stick to your frying pan’s surface; your food starts to taste metallic; or you see rust on the pan.
When deciding on the next set of cookware for your kitchen, you have a choice in material. Cast iron and stainless steel are both popular options, I mean there is a reason that cooking schools insist that you learn your trade with both. They each have their pros and cons. For instance:
Cast iron pans require regular seasoning and extra work, but offer your dishes a deep, rich flavor.
Stainless steel pans are great for your daily cooking, are durable, and are low-maintenance.
So, how to choose? Well, not all food reacts well with cast iron. In this way, cast iron pans do not offer the versatility of stainless steel pans.
Stainless steel’s versatility Stainless steel pans can be your workhorse. They heat quickly, distribute heat well, and work for all ingredients in your kitchen. Also, with stainless steel cookware, you are in charge of choosing how nonstick you want the surface. Finally, stainless steel pans are a breeze to clean, even after cooking acidic foods or with burned on grease. You can even wash them in warm water, using just dish soap and a sponge.
So, stainless steel or cast iron? If you are a serious chef, you will want both stainless steel cookware and a cast iron dutch oven or skillet waiting for you in your arsenal. However, if having both cast iron and stainless steel cookware is not an option right now, stainless steel offers you more versatility and greater ease of use. Therefore, in our opinion, the best place to start is with stainless steel pans.
A question of quality Now, the question becomes what stainless steel pans to choose? Remember, regardless of what type of material you prefer, quality is essential in the effectiveness and durability of your cookware. In the following section, we will showcase some of our favorite high-quality, stainless steel pans.
This stainless steel stock pot will last you a lifetime. This cookware features impeccable conductivity to evenly heat and cook a wide range of culinary delights Its 18/10 stainless steel excels at browning and braising foods, while looking great in the process. This stock pot works on your stovetop and inside your oven. It looks great and is low-maintenance.
Pros:
True heavy gauge cookware - ultra strong 2.5mm thickness that will never dent or warp under prolonged heat, for consistent cooking results every time.
Freezer, dishwasher, and refrigerator safe
Easily transitions from cooking on the stovetop to finishing in the oven.
Boasts non-toxic, non-hypoallergenic materials that are PFOA and PTFE free
Cons:
If in the market for a large stock pot or heavy-duty dutch oven, this pot might be a bit on the small size
Does not feature a nonstick coating like the Avalon model
Stunning design and high performance make this stainless steel skillet frying pan an ideal addition to any chef’s cookware set. Unrivaled conductivity allows this saute pan to handle a wide-range of culinary delights. It features 18/10 stainless steel and premium aluminum for enhanced heat retention and to preserve the nutritional qualities, taste and color of foods.
Pros:
Premium conductivity that heats 5X better than iron pans and 20X better than basic stainless steel
True heavy gauge cookware - ultra strong 2.5mm thickness that will never dent or warp under prolonged heat, for consistent cooking results every time
Included is a stainless steel lid that will last a lifetime, while still maintaining a perfect sea
The vented hole on the lid serves as a pressure release to prevent rattling and food from boiling over.
` Cons:
This top of the line skillet might exceed some budgets
5-Ply Copper Forged Foundation might make for a more heavy-duty frying pan than some are looking for
Skip the individual purchase of pots and pans, and invest in a state of the art stainless steel cookware set. The Avalon series cookware set marries luxury and practicality. It boasts unrivalled conductivity to quickly heat and evenly cook a full range of culinary delights.
This professional cookware allows for precise searing, browning, sautéing, deep frying, quick boiling, sauces, jams, and even baking.This series rises above the competition with a Copper Core Foundation and additional thick gauge layers of nonreactive 18/10 stainless steel and premium aluminum. Your food will retain its taste and nutritious qualities when you are working with this beautiful cookware set from herniaquestions.
Pros:
Additional interior layers of smudge/free aluminum & 18/10 stainless steel above and below the Copper Forged Foundation provides maximum heat conductivity and retention
Exceptional responsiveness to precise changes in temperature when increasing or decreasing heat for the perfect control required to preserve the nutritional qualities, taste, and color of foods.
Securely and carefully fastened to the body of the pan with aluminum, non-stick covered rivets that will never loosen, break or rust, you can be confident in cookware that will last a lifetime.
Allows you to enjoy healthy cooking with non-toxic, non-hypoallergenic materials that are PFOA and PTFE free.
Cons:
This top of the line cookware set features a price tag that might scare off those on a budget.
More novice cooks might want to buy their pots and pans individually.
What is the best oil to season a cast iron skillet? The best oil to season a cast iron frying pan or skillet is one with a high smoke point. We recommend grape-seed, flaxseed, or vegetable oil. Stay away from cooking oil that smokes quickly, such as olive oil and coconut oil.
How many times do you season a cast iron skillet?
During the initial seasoning of a cast iron pan, you must repeat the steps three times. After that, you must season the skillet on a need-to basis. For instance, you will need to season cast iron when the surface is no longer non-stick and, after cooking, you have had to use kosher salt or baking soda to dislodge food. Also, after using dish soap on your cast iron pan, you will need to season it again. Finally, if you notice a metallic taste or see rust, it is time to season your cast iron pan once more.
How do you season cast iron quickly? While the seasoning process is straightforward, we suggest that you do not take short-cuts. Make sure to have your oiled pan in the oven for the proper amount of time. Do not rush the seasoning process with your cast iron cookware, in the beginning, and you will get better use out of it during its lifetime.
How can you tell if cast iron is seasoned?
A seasoned cast iron skillet will have a nonstick surface. It will not have any rust or dull patches. Also, a seasoned cast iron pan will not be sticky or greasy to the touch.
How do you season a cast iron pan?
Preheat: Warm the oven to around 375°F (190°C). Clean: Wash the pan with mild soap and water, then dry it thoroughly. Oil: Apply a thin layer of vegetable oil or melted shortening to the pan's interior and exterior. Bake: Place the pan upside down on the oven rack and bake for about 1 hour. Cool: Let the pan cool in the oven before using.
How often should you season cast iron cookware?
Cast iron cookware should be seasoned regularly to maintain its nonstick surface and prevent rust. After each use, wipe it clean, and if necessary, lightly oil it. For well-maintained pans, seasoning every few uses is sufficient. However, if the surface starts to lose its nonstick properties or develops rust spots, re-seasoning might be needed more frequently.
What is the best thing to season cast iron with?
A common and effective option to season cast iron is using vegetable oil or flaxseed oil. These oils create a polymerized layer that contributes to the pan's nonstick surface. Apply a thin coat, heat the pan in the oven, and allow it to cool. Avoid oils with low smoke points, as they can become sticky or produce unpleasant odors during the seasoning process.
Do you have to season a new cast iron pan?
Yes, it's recommended to season a new cast iron pan. The factory seasoning on some pans might not be as effective as a well-seasoned surface you create at home. Seasoning forms a natural nonstick layer and helps prevent rust. Follow the manufacturer's instructions or season it by applying a thin layer of oil and baking it in the oven to create a protective coating.
You can also check in with our Expert Knife Finder Quiz and get specific recommendations based on your needs.
Written by Jonathan Scolnick
Born in Philadelphia and living in Argentina, Jonathan loves learning about culture through the food and conversation at the dinner table.
]]>
https://herniaquestions.com/blogs/news/homemade-bbq-sauce-recipe2021-05-27T15:57:09-04:002024-07-16T02:13:41-04:00Perfect Homemade BBQ Sauce RecipeJorge FarahWhether you’re entertaining guests at your own place, showing up at somebody else’s backyard barbecue, or simply making a meal at home for yourself and your family, making your own barbecue sauce signals that you’re someone who cares about making the experience special.
There are few food traditions as satisfying as barbecue. Whether you’re throwing some cuts of meat on the grill on a hot summer day or taking it slow and easy with a barbecue brisket, a good barbecue is an amazing all-around feast for the senses.
Much has been said about the link between food and memory, and how the right combination of flavors can quickly shoot you right back to a specific time and place. For me, the smell of barbecue is linked with the backyard cookouts at my uncle’s place during my childhood. It’s an immediate memory trigger, as I would assume is the case for most people.
One of the things I remember most from those childhood days is my uncle’s homemade barbecue sauce. Sure, we’d have barbecue sauce in the house -- it came from a bottle that we picked up at the local grocery store. But it didn’t even come close to the stuff my uncle used to make for us. It was something truly special, and one of the things I most looked forward to.
The role of barbecue sauce
Obviously, barbecue sauce plays an important part in any good barbecue. Not only is it used as a condiment to top off the delicious meat you’re arduously grilling, it’s also often used as a marinate, infusing the entire meal with its tangy, smokey, delicious flavor. It goes on the meat, it goes on the sides, it permeates the entire experience. It’s an essential pillar of the barbecue experience.
Of course barbecue sauce isn’t just used during actual barbecues -- you can use it as a condiment on all manner of meals, any day of the week. And if you make your own homemade barbecue sauce, it’ll turn every meal into its own mini-cookout.
Whether you’re using barbecue sauce as part of an actual backyard barbecue or simply as a condiment for a home-cooked meal, the best move is always to go the extra mile and make your own homemade barbecue sauce.
Homemade bbq sauce vs. store-bought bbq sauce
This is a question that pops up repeatedly when it comes to barbecue: am I doing it wrong if I don’t have the time or desire to make my own sauce?
Here’s the reality of it: the store-bought sauce is good. You’re not a horrible monster for going with the more convenient option. A good bottle of store-bought barbecue sauce will certainly do in a pinch. For most people, it’s all they ever really need. This is not meant as a slight to them -- until very recently, I was one of them (and if I’m running low on time, I sometimes still am). Picking up a bottle of barbecue sauce from your local store is a legitimate choice.
But a true barbecue master knows that there’s a better way. That nobody ever reminisces nostalgically about a bottle of mass-produced sauce. That part of crafting the experience for your family and friends is to make your own sauce, using quality ingredients and tailoring it to your own taste. A barbecue master knows that the homemade stuff is always better, and that -- in a larger sense -- making your own barbecue sauce sends a message. Thankfully, meal prep time and cooking time is minimal!
Whether you’re entertaining guests at your own place, showing up at somebody else’s backyard barbecue, or simply making a meal at home for yourself and your family, making your own barbecue sauce signals that you’re someone who cares about making the experience special. That you know what you’re doing, and you’re happy to share the fruits of your work with the people who matter to you.
Look, we could sit here and wax philosophical on barbecue sauce for hours. But if you’re here, you’re probably interested in learning about this rich, smokey, often sweet, sometimes spicy, always satisfying concoction; what it is, where it came from, and how to make it. So let’s jump right into it.
2. History Of BBQ Sauce
As with just about every piece of food history, tracing the origins of barbecue sauce is a bit difficult. It’s not exactly clear-cut because it didn’t come down to a single person inventing it. Rather, it was a long, drawn-out process spanning decades and different regional takes, finally coalescing into what we all know today as “BBQ sauce.”
While this may feel frustrating for those looking for straightforward answers, it’s actually one of the cooler aspects of food history. Recipes will change and adjust as they find their way down generations, with alternative twists popping up on individual interpretations, shifting tastes, availability of ingredients and more. In this sense, food history serves as a microcosm of human culture; an example of how our practices, languages, and customs spread and change over time.
In the case of BBQ sauce, food historians have more or less traced it back to the formation of the first American colonies in the 17th century. It is believed that this very early version of BBQ sauce recipe was the “vinegar and peppers” variety, a simple and straightforward sauce first popping up on the coastal plains of North and South Carolina.
In the 18th century, German settlers brought along their use of mustard, which eventually resulted in the South Carolina style mustard-based barbecue sauce. This is still evident in the names of the families involved in the mustard-based barbecue sauce business.
Around 1900, when tomato ketchup became a readily available condiment, there was another advancement in BBQ sauce history with the development of the “light tomato” BBQ sauce variety. This simply meant combining ketchup with the tried-and-true vinegar and pepper BBQ sauce, resulting in a sweet sauce with a different flavor profile.
The final type of BBQ sauce to appear is also the most popular type of BBQ sauce currently: the “heavy tomato” variety. It’s much more recent than the other types, appearing in the mid 20th century. This take on the BBQ sauce recipe is considerably sweeter, tangier, and thicker, becoming the standard definition of “BBQ sauce” for the general population thanks to its mass production by companies like Heinz and Kraft Foods.
Slightly different takes on this sauce would continue to appear over the following decades, but that combination of sugar, ketchup, Worcestershire sauce, and that “smokey” kind of flavor (often aided with the addition of liquid smoke) has solidified in most people’s minds as the classic taste of BBQ sauce, which goes great on beef, chicken, pork, etc.
3. Different Variations Of BBQ Sauce
And just like with any wildly popular food with a long history, there are several variations of BBQ sauce. These can be more or less broken down regionally, but some of those differences are pretty minor. In broader terms, we can categorize them based on their ingredients.
Tomato based barbecue sauces
Tomato started being incorporated into barbecue sauce around the 1900s and remains the most popular type of barbecue sauce to this day. It’s a pretty natural fit when you think about it, with the sweet tanginess of the tomato contrasting nicely with the savory taste of barbecue meats.
Within this variety, you’ll find classic options such as Texas BBQ sauce, which is a thin sauce that mixes tomato with spices, celery and onions. St Louis BBQ sauce recipes are similarly thin, but they include ketchup, apple cider vinegar, and brown sugar.
Several BBQ sauce recipes involve sugar (sometimes brown sugar) as a prominent ingredient. These sauces are thicker and, of course, considerably sweeter. One thing to take into consideration is that these tomato-and-sugar based sauces will burn quicker, so be careful about using them while you’re cooking.
Some BBQ sauces involve molasses, which adds a very specific texture. One of these is Memphis style barbeque sauce. Kansas City barbecue sauce also combines molasses and ketchup, and it goes great on ribs and grilled chicken. It will often also involve cayenne pepper, red pepper flakes, or chili powder for added heat.
Vinegar based barbecue sauces
If you’re a fan of the thinner, vinegary tang, you’ll be more drawn to sauces that use vinegar as their base ingredient. These often do incorporate tomatoes or ketchup, so there is a bit of overlap there.
Many of the traditional Southern BBQ sauces actually don’t use tomatoes at all, so they are on the thinner side, cutting through the fat and letting the flavor of the meat shine through. For instance, the traditional North Carolina BBQ sauce features ketchup, Worcestershire sauce, butter, and brown sugar -- it is absolutely heavenly on pulled pork.
Another example is Florida barbecue sauce, which has a strong vinegar profile. It’ll typically consist of cider vinegar, lemon and lime, and Worcestershire sauce. It is absolutely delicious, and has a certain Caribbean and tropical taste to it.
You’ll also find a pretty different type of barbecue sauce in Alabama white barbecue sauce, which is made of vinegar, brown sugar, and mayonnaise. That’s right: mayonnaise. It’s unusual, but not unheard of, and the combination actually works much better than you’d expect. Its flavor might remind folks of Ranch dressing.
Mustard based barbecue sauces
As we’ve established, mustard-based barbecue sauces have a long history in the US, developed by German settlers and working their way into the country’s culinary traditions. You’ll find these sauces mix yellow mustard with vinegar, Worcestershire sauce, and additional seasonings.
The South Carolina barbecue sauce is made with plain yellow mustard. It is tangy and spicy, with not a hint of sweetness. It usually includes cider vinegar, Worcestershire sauce, and sometimes even hot sauce.
Another mustard-based staple is Georgia mustard barbecue sauce, which goes incredible on pulled pork and chicken. As opposed to the South Carolina style barbecue sauce, this one sometimes does include brown sugar in the recipe, resulting in a sweeter type of sauce.
4. Barbecue Sauce Recipe
Considering all these different types of barbecue sauce, and the many different ways in which they can be made, it might be daunting to try to find the best homemade BBQ sauce recipe.
For this guide, we are going with a homemade version of the classic tomato-based BBQ sauce recipe. This sauce also uses brown sugar, so it is fairly sweet while also feeling substantial and tangy. You’ll find it hits all the right nostalgia spots while tasting richer, more complex, and straight-up better than all the store-bought stuff.
Of course, the idea behind any recipe is for you to make it your own. Follow along with these steps and try the end product -- then tweak it however you please based on your own personal tastes, as well as feedback from your guests. Don’t be afraid to deviate from the steps as we’ve outlined them below. Take ownership of the recipe, because it’s supposed to work for you.
So here is our homemade BBQ sauce recipe
Prep time
5 minutes
Cook time
10 minutes
Servings
8 servings
Calories
118kcal
Ingredients
These ingredients are an approximation based on personal preference; feel free to adjust quantities or ingredients to fit your own tastes.
Tomato sauce (no salt added)
1 ½ cups
Apple cider vinegar
3 tablespoons
Packed dark brown sugar
⅔ cup
Molasses
1 ½ tablespoons
Worcestershire sauce
1 tablespoon
Salt
1 teaspoon
Dry mustard
2 teaspoons
Chili powder
2 teaspoons
Smoked paprika
2 teaspoons
Onion powder
1 teaspoon
Liquid smoke
2 teaspoons
Garlic powder
½ teaspoon
Celery seeds
¼ teaspoon
Ground cloves
¼ teaspoon
Ground red pepper
¼ teaspoon
Tomato paste
1 6-ounce can
Process
The process of making this homemade BBQ sauce is extremely simple.
Place all your ingredients in a pan over medium low heat. Stir to combine.
Bring the ingredients to a simmer, then reduce the heat to low.
Let it simmer for about 8 to 10 minutes, or until you notice it’s thickened to your desired texture.
Store in an airtight container in the fridge for up to 2 weeks, or freeze for up to 6 months.
There you have it. Easy, straightforward, deliciously smokey and sweet homemade BBQ sauce.
Additional tips
If you’re a heat lover, feel free to add a splash of Tabasco or a similar vinegar-based hot sauce (Crystal or Franks also work great). You could also add additional cayenne pepper.
I recommend using smoked paprika rather than regular paprika. There’s just something wonderful about the added dimension that smoked paprika brings to the table. You should be able to find smoked paprika in most grocery stores.
Feel free to not include molasses, but it will affect the texture considerably.
Be sure to let it simmer on low heat; if you get it too hot, you’ll make a mess all over your kitchen (trust me on this one).
5. Which Foods Go Best With BBQ Sauce
Of course, BBQ sauce is best enjoyed over barbecued meats. There are few things that are as triumphantly indulgent as a good barbecued brisket with a generous slathering of this delicious sauce. But you’re likely not barbecuing every day, and you might have some homemade BBQ sauce left over. What else can we use our BBQ sauce on?
Homemade BBQ sauce goes beautifully on grilled chicken.
You can brush it over chicken wings before cooking.
Toss it with pulled pork for incredible sandwiches. Actually, it goes great with pork in general.
Makes for an absolutely incredible topping for homemade hamburgers.
You can use it as a dip for foods such as chicken nuggets or chicken tenders.
If you’re a fried chicken fan, this is also a great topping.
Spread it over a meatloaf to bump it up a couple of notches.
It goes fantastically with baked beans.
Absolutely perfect for BBQ chicken pizza.
Believe it or not, you can even drizzle it over a salad.
6. Frequently Asked Questions
How long does homemade BBQ sauce last?
When you’re making homemade barbecue sauce, you’re forgoing the preservatives that go into the mass-produced bottles you can pick up at a grocery store. This is, on the whole, a good thing; it’s better for flavor and often better for health. But losing those preservatives also means that the shelf life of your barbecue sauce is shortened considerably.
Of course, following the recipe above will produce barbecue sauce that is so tasty and addictive you’ll probably finish it off quick enough that this won’t even be a concern. Still, it’s a good thing to know that homemade barbecue sauce will stay fresh in an airtight container stored in the fridge for up to 2 weeks.
If you want, you can also freeze it and use it later -- it’ll keep for up to six months.
Is BBQ sauce bad for you?
Like most delicious things in the world, barbecue sauce can be bad for you in excess. Such is the sad irony of humanity. It contains high amounts of sugar and salt, and is pretty calorically dense. If you’re looking to watch your weight, maybe don’t drench every piece of meat in barbecue sauce.
That said, not everyone considers it a priority to watch their weight, and even those who do can indulge themselves from time to time. It’s your body, so you get to choose your priorities. Don’t let anyone tell you differently.
Is BBQ sauce keto?
The ketogenic diet is an extremely popular low-carb diet. It’s meant to reduce the glucose from carbohydrates in your system to force your body into ketosis, so that your body relies on stored fat for energy (I’m not a nutritional expert, so take this broad-strokes explanation with a grain of salt).
Of course, sugar is a carb, which is meant to be strictly regulated during the keto diet. If you’re on this diet, you have a certain daily carb threshold that you shouldn’t cross. Since the homemade barbecue sauce recipe above contains a fair bit of sugar, it is certainly not keto friendly. However, you can seek out a low-sugar or no-sugar recipe that does comply with the keto diet. Good luck!
Is BBQ sauce bad for dogs?
If you have a pooch running around during your backyard barbecue, it’s of course natural to want to give them something to munch on. In a general sense, a low amount of barbecue sauce should be fine for a dog to consume. However, do keep in mind that if a sauce contains garlic (or garlic powder), onions (or onion powder), excess salt or sugar, it can be detrimental to dogs’ health.
Overall? We’d encourage you not to risk it. It’s not worth putting your pet’s health in jeopardy. If you want to throw them something to eat, maybe reach for a piece that’s not smothered in barbecue sauce. It’ll be better for their health and for your peace of mind.
How can you thicken BBQ sauce?
There are a few ways to thicken your homemade barbecue sauce.
Boil the barbecue sauce: A good way to thicken your sauce is to boil away the excess moisture. Simply put the sauce into a saucepan over medium heat, stirring occasionally. Once it boils, reduce the heat to low until it reaches your desired thickness.
Add butter for a thicker and creamier texture: Heat one cup of barbecue sauce with 1 tablespoon of butter over a medium heat, then reduce the heat to low once it starts to boil. Keep in mind that this does alter the sauce’s flavor -- usually in a good way!
Add heavy cream for a thicker texture and rich flavor: Same principle here. Combine 1 tablespoon of heavy cream with 1 cup of barbecue sauce. Heat them together until it boils, then lower the heat so that the sauce simmers. Stir until it reaches your desired consistency.
Use flour or cornstarch: Heat the barbecue sauce in a saucepan over low heat. In a separate bowl, mix 2 tablespoons of flour and a quarter cup of water (or 1 tablespoon of cornstarch with 1 tablespoon of water); mix until there’s no lumps. Then add the thickener to the sauce and bring to a boil, stirring occasionally. Remove from the heat when it is slightly thinner than you want it -- your sauce will continue thickening as it cools.
What makes Texas BBQ sauce different?
It’s common for the more traditional restaurants in the state to have a barbecue sauce that resembles a thin tomato soup, which allows for it to penetrate the meat more easily rather than sit on top of it.
Texas BBQ sauces are typically seasoned with cumin, chili peppers (or chili powder), black pepper, and fresh onion. Usually they will include less tomato and sugar.
What are the common ingredients in barbecue sauce?
Common ingredients in barbecue sauce typically include tomato sauce or ketchup, vinegar, sweeteners like sugar or molasses, spices such as paprika and chili powder, and seasonings like salt and pepper. Some recipes may also incorporate Worcestershire sauce, mustard, liquid smoke, or hot sauce to create variations like spicy BBQ sauce. It's a versatile condiment used for grilling, smoking, or slow-cooking meats like pork ribs, making for easy and flavorful 30minute meals in the Instant Pot or as a glaze for various dishes. Enjoy!
Is BBQ sauce just ketchup and sugar?
BBQ sauce is more than just ketchup and sugar, although those are key components. Homemade barbecue sauce recipes often include ketchup as a base and add a combination of ingredients like dark brown sugar, vinegar (which adds acidity), spices such as paprika, black pepper, and dry mustard, and sometimes additional flavorings like Worcestershire sauce or liquid smoke. These ingredients come together to create a complex and flavorful sauce, perfect for dishes like BBQ chicken or BBQ chicken pizza.
What is real BBQ sauce?
Real BBQ sauce, often referred to as authentic or traditional, varies by region and personal preference. However, it typically contains a tomato or vinegar base, sweeteners like sugar or molasses, spices such as paprika or chili powder, and various seasonings like salt and pepper. Real BBQ sauce is known for its rich, smoky, and flavorful profile, used for marinating, basting, or dipping in barbecue dishes, like smoked meats and grilled chicken.
What are the three types of BBQ sauce?
Tomato-based BBQ Sauce: This type uses tomato sauce or ketchup as its base and is often sweet and tangy. Vinegar-based BBQ Sauce: These are thinner and more acidic, with a prominent vinegar flavor. Common in the Carolinas. Mustard-based BBQ Sauce: Typically found in South Carolina, it's made with mustard, vinegar, and sweeteners, offering a tangy and slightly spicy profile.
Born on the coast of Colombia and based in Buenos Aires, Jorge is a cooking enthusiast and kitchenware obsessive with a tremendous amount of opinions.
]]>
https://herniaquestions.com/blogs/news/how-to-season-a-stainless-steel-pan2021-05-27T14:13:05-04:002024-07-02T06:32:08-04:00How To Season A Stainless Steel PanJonathan ScolnickYou have finally decided to put aside your cast iron skillet and move on to a stainless steel pan. You know that stainless steel, not carbon steel, cookware meets your personal style and culinary needs. Now, you will want to know how to properly season and care for your fresh stainless steel pan. Well, you have come to the right place.
Wash and dry the pan. Use a gentle dish soap and warm water to thoroughly wash your stainless steel frying pan. Afterwards, rinse and dry your pan completely.
Oil your pan.Once the pan is completely dry, heat it up on your stovetop. Then add a little bit of oil. You will want to use an oil with a high smoking point. Some examples include: sesame, vegetable, peanut, and soybean oil. Once you have added oil over medium heat, use a wad of paper towel to distribute the oil around the pan’s surface.
Cool the pan.Once you have a hot pan, and it starts to smoke, remove it from the stovetop and let it cool. When your pan is cool, use another paper towel to remove the oil. (The environmentally friendly option is to substitute a clean, dry cloth for the paper towel).
Repeat the process when necessary.When you find that food is once again sticking to your stainless steel pan, return to these steps and re-season it.
You have finally decided to put aside your cast iron skillet and move on to a stainless steel pan. You know that stainless steel, not carbon steel, cookware meets your personal style and culinary needs. Now, you will want to know how to properly season and care for your fresh stainless steel pan. Well, you have come to the right place.
Stainless steel cookware is both elegant, durable and functional. It’s a fantastic choice for your kitchen arsenal. Now, let’s discuss how to properly take care of it.
Unlike cast iron and carbon steel, it is not required to season your stainless steel cookware. However, many professional chefs and home cooks choose to do so.
The argument for seasoning your stainless steel pots and pans is that the oil will help seal in the pores in the metal, and therefore give your stainless steel pan more of a nonstick surface. This nonstick surface will lead to no-hassle cooking and easy cleanup.
While some may debate the benefits for seasoning your stainless steel cookware set, there really is no downside to the seasoning process for stainless steel. So, if you want a more slippery surface, go ahead and season.
Seasoning your new stainless steel frying pan might seem daunting at first, but actually it is quite simple. Just follow these easy steps:
1) Wash and dry the pan. Use a gentle dish soap and warm water to thoroughly wash your stainless steel frying pan. Afterwards, rinse and dry your pan completely.
2) Oil your pan. Once the pan is completely dry, heat it up on your stovetop. Then add a little bit of oil. You will want to use an oil with a high smoking points. Some examples include: sesame, vegetable, peanut, and soybean oil. Once you have added oil over medium heat, use a wad of paper towel to distribute the oil around the pan’s surface.
3) Cool the pan. Once you have a hot pan, and it starts to smoke, remove it from the stovetop and let it cool. When your pan is cool, use another paper towel to remove the oil. (The environmentally friendly option is to substitute a clean, dry cloth for the paper towel).
4) Repeat the process when necessary. When you find that food is once again sticking to your stainless steel pan, return to these steps and re-season it.
3. How do you keep stainless steel pans from sticking?
The seasoning process ought to give your stainless steel pans a nonstick coating. Once seasoned, you can use a towel to wipe the pan down after cooking. If you find that food is sticking, use salt and oil to loosen it up. Baking soda works on stubborn build up.
Though you will want to avoid steel wool when scrubbing, as it can damage your cooking surface. If you must use dish soap, repeat the seasoning process afterward to reinforce the nonstick surface.
4. What is the best oil to season a stainless steel pan?
The best oil to season your stainless steel cookware is one with a high heat smoke point. Some of the best oils for seasoning are peanut oil, vegetable oil, and grapeseed oil. You will want to avoid oils which smoke quickly when put on high heat, such as coconut oil, canola oil, and olive oil.
This stainless steel stock pot will last you a lifetime. This cookware features impeccable conductivity to evenly heat and cook a wide range of culinary delights. Its 18/10 stainless steel excels at browning and braising foods, while looking great in the process. This stock pot works on your stovetop and inside your oven. It looks great and is low-maintenance.
Pros
True heavy gauge cookware - ultra strong 2.5mm thickness that will never dent or warp under prolonged heat, for consistent cooking results every time.
Freezer, dishwasher, and refrigerator safe
Easily transitions from cooking on the stovetop to finishing in the oven.
Boasts non-toxic, non-hypoallergenic materials that are PFOA and PTFE free
Cons:
If in the market for a large stock pot or heavy-duty dutch oven, this pot might be a bit on the small size
Does not feature a nonstick coating like the Avalon model
Stunning design and high performance make this stainless steel skillet frying pan an ideal addition to any chef’s cookware set. Unrivalled conductivity allows this saute pan to handle a wide-range of culinary delights. It features 18/10 stainless steel and premium aluminum for enhanced heat retention and to preserve the nutritional qualities, taste and color of foods.
Pros:
Premium conductivity that heats 5X better than iron pans and 20X better than basic stainless steel
True heavy gauge cookware - ultra strong 2.5mm thickness that will never dent or warp under prolonged heat, for consistent cooking results every time
Included is a stainless steel lid that will last a lifetime, while still maintaining a perfect sea
The vented hole on the lid serves as a pressure release to prevent rattling and food from boiling over.
` Cons:
This top of the line skillet might exceed some budgets
5-Ply Copper Forged Foundation might make for a more heavy-duty frying pan than some are looking for.
Oberon - A mythical king and sorcerer of great power, is herniaquestions’s inspiration for the NEW premium, Oberon Series3-ply Aluminum-core cookware, designed to help you create magic in the kitchen. This high performing, medium-weight and ultrafunctional cookware is built to last a lifetime.
This stunning 3-ply aluminum cladded cookware boasts impeccable conductivity to quickly heat up and evenly cook a full range of culinary delights from thick proteins to delicate omelettes. Unlike other aluminum cookware, the herniaquestions Oberon Series uses cladding technology to fuse additional thick gauge layers of nonreactive 18/10 stainless steel that excels at browning and braising foods and dramatically prolongs the life of the pan, making itextremely durable.This is cookware that can last generations.
Pros:
Additional interior layers of smudge/free aluminum & 18/10 stainless steel above and below the Copper Forged Foundation provides maximum heat conductivity and retention.
Exceptional responsiveness to precise changes in temperature when increasing or decreasing heat for the perfect control required to preserve the nutritional qualities, taste, and color of foods.
Securely and carefully fastened to the body of the pan with aluminum, non-stick covered rivets that will never loosen, break or rust, you can be confident in cookware that will last a lifetime.
Allows you to enjoy healthy cooking with non-toxic, non-hypoallergenic materials that are PFOA and PTFE free.
Cons:
This top of the line cookware set features a price tag that might scare off those on a budget.
More novice cooks might want to buy their pots and pans individually.
When you decide to purchase cookware, you have a choice in materials. Carbon steel and cast iron are still popular ways to go. Nevertheless, you really can’t beat a stainless steel cookware set. It’s elegant look, heat conductivity, and practicality make it an excellent choice for all your cooking and culinary needs. When you are handling a stainless steel skillet, saute pan or stock pot, you will look like-- and feel like-- a professional chef. And when your family and friends sit down at your table to eat, they will notice the difference in quality and taste.
If you are new to stainless steel cookware, you might be worried about the seasoning process and proper upkeep. However, as has been previously stated, you only need to follow some straightforward steps, and your cookware will be ready to go and easy to maintain. Once you get the hang of stainless steel, you won’t want to go back to using anything else.
Just keep in mind that as with all cookware and kitchen tools, quality does matter. Make sure that you are investing in a reliable, high-quality brand, like herniaquestions, which uses safe, durable, non-toxic materials. With herniaquestions, you will rest assured that your stainless steel will keep the taste and nutrition inside your food. You will know that you have a durable product that, when properly maintained, is going to last you a lifetime.
You will take your cooking to the next level, when you cook with stainless steel cookware featuring the herniaquestions insignia.
Frequently Asked Questions
How do you keep food from sticking to stainless steel?
To prevent food from sticking to stainless steel cookware, ensure the pan is preheated over medium heat before adding oil or food. Use an adequate amount of oil with a high smoke point to create a non-stick barrier. Allow the food to sear for a moment before trying to move or flip it. Properly prepped stainless steel, whether on an induction cooktop or not, helps food release from the pan more easily.
Is there a trick to cooking with stainless steel?
Yes, cooking with stainless steel requires some techniques. Preheat the pan over medium heat before adding oil and food. Listen for a sizzle when food touches the pan, indicating it's ready. Don't overcrowd the pan, as it can lower the temperature. Learn to deglaze by adding a liquid to release browned bits. Avoid adding cold water to a hot pan, and choose induction-compatible stainless steel cookware. Allow the pan to cool before cleaning.
How do you start cooking with stainless steel?
To start cooking with stainless steel, first, wash your stainless steel pots and pans with warm soapy water to remove any residues. Season them by heating a bit of oil until it shimmers, then wiping it around the cooking surface using a paper towel. Avoid using steel wool or harsh abrasives, as they can damage the cooking surface. Now you're ready to cook with stainless steel!
Do you use oil when cooking with stainless steel?
Yes, using oil when cooking with stainless steel is recommended to create a non-stick surface and enhance the cooking process. Preheat the pan over medium heat, then add a small amount of oil with a high smoke point. Swirl the oil to coat the cooking surface evenly before adding food. This helps prevent sticking and promotes even cooking and browning.
You can also check in with our Expert Knife Finder Quiz and get specific recommendations based on your needs.
Written by Jonathan Scolnick
Born in Philadelphia and living in Argentina, Jonathan loves learning about culture through the food and conversation at the dinner table.
]]>
https://herniaquestions.com/blogs/news/best-chili-recipe2021-04-01T15:40:02-04:002024-07-16T02:05:50-04:00Best Chili RecipeMeredith SimsThe complex flavors of a really good beef chili make it the quintessential comfort food. As with everything though, there are some mediocre classic chili recipes and there are some knock-your-socks-off amazing chili recipes.
Sauté onions, peppers and garlic and set aside with ground beef.
Heat 1 tbsp of oil and cook spices, tomato paste and brown sugar.
Add beer to deglaze the pan
Add broth, crushed tomatoes, chili powder, cocoa powder, onions, peppers, and garlic. Simmer for 15 min.
Add ground beef and chili beans, and mix all ingredients well.
Simmer uncovered for 1 hr.
Serve into bowls, add sour cream and other desired toppings, and enjoy!
Whether you’re making a big pot for a party of friends or craving a hearty meal on a cold winter night, homemade chili is always a great choice if you have the right recipe. The complex flavors of a really good beef chili make it the quintessential comfort food. As with everything though, there are some mediocre classic chili recipes and there are some knock-your-socks-off amazing chili recipes. And please don’t bother making a mediocre chili recipe.
If you’ve ever been to a chili cook-off, you may have noticed that some people just love to make their homemade chili as spicy as humanly possible. Don’t get me wrong, I love some kick to my beef chili. But too much heat just masks all the other delicious flavors.
I’ve made so many chili recipes over the years, that I could surely qualify as an amateur chili expert...if there was such a thing. There are so many great chile recipes out there, but I always seemed to add or tweak every recipe I tried, so I finally came up with my own version of a homemade chili recipe that I think is perfectly flavorful, complex and spicy-but-not-too-spicy.
This is also an easy beef chili recipe to adapt for the Instant Pot...see Pro Tips below.
Heat 1 tbsp. olive oil in a Dutch oven or large pot over medium. Season ground beef with salt and pepper and brown it (in batches if necessary). Set aside on a plate.
Add 1 tbsp of oil, add onions, bell pepper and jalapeno peppers, and sauté until soft. Add minced garlic and sauté 1 more minute. Set aside on a separate plate.
Add 1 tsbp. oil. When oil is hot, add cumin, oregano, garlic powder, coriander, smoked paprika and cayenne pepper. Cook for 1 minute. Scrape the spices off the pan when they start to stick. Add tomato paste and brown sugar. Stir and cook for another minute.
Pour in beer to deglaze the pan.
Add beef broth, crushed tomatoes, chili powder and cocoa powder. Add back in onions, garlic and peppers. Stir and simmer for 15 minutes.
Add back in ground beef; add in black beans, pinto beans and kidney beans.
Stir to mix all ingredients well. Simmer uncovered for 1 hr, stirring occasionally.
Depending on desired heat level, you may want to add another tsp or two of chili powder or cayenne pepper.
Serve into bowls and add sour cream and your other desired toppings!
Chili Toppings
sour cream
shredded cheese
chopped cilantro
sliced jalapeno peppers
sliced avocado
tortilla or corn chips
green onions
lime wedges
Pro Tips:
One lb. of dried beans is the equivalent of about 4 cans of beans, so you can also use equal amounts (⅓ lb each) of dried pinto, black and kidney beans. Soak overnight and cook in Instant Pot for 30 min. on high pressure before adding to chili.
To make Instant Pot chili, remove your cooked beans and set aside. After rinsing out your pot, add your oil and sauté onion, pepper, garlic and ground beef in batches. When all is cooked, follow recipe instructions above and then cook on “Slow Cook” for 1 hr, stirring occasionally.
I like to use darker beer because it gives a deeper flavor, but if you don’t have one on hand, or if you don’t like the flavor of dark beer, any lager will work as well.
You can use this exact same recipe and sub ground venison, ground turkey or ground lamb.
If you’re a real purist and want to go the extra mile with your chili, make your own chili powder from dried Ancho and Pasilla chile peppers and cumin seeds toasted and ground in a spice grinder. These give a deep smoky and sweet flavor. Add a pinch of Mexican oregano and garlic powder and you have homemade chili powder!
Don’t forget to serve your chili with a side of cornbread!
2. The History of Chili
While there is some disagreement about exactly where chili originated, it is generally believed that chili has Mexican roots but is now mostly an American dish. Stews made with seasoned chili pepper have been traced back to the Aztec capital, Tenochtitilan which is modern-day Mexico City. Writings and recipes with ‘chile con carne’, or chili with meat, date back to the 1850s during the Mexican-American War. A mixture of dried beef and chili peppers, suet and salt was made into bricks that could then be taken to army encampments and reheated in pots.
Chili eventually became a commonly prepared meal in northern Mexico and southern Texas, particularly San Antonio where “chili queens” popularized the stew in their inexpensive “chili joints”. The San Antonio Chili Stand at the World’s Fair in Chicago introduced chili to more Americans, and “chili parlors” began to pop up all over the west and midwest during the 20s as commercialized chili powder became more widely available. During the Great Depression, it is believed that chili parlors may have kept many hungry, destitute people from starvation.
Different chili styles began to develop in different parts of the country as well. For example, Cincinnati chili is a unique style of chili that developed from the culinary traditions of the Greek immigrant community in the Cincinnati area.
Chili’s popularity increased even more during the years of the Lyndon Johnson administration because, as a native Texan, he was a well-known venison chili lover. He named his recipe the Pedernales River chili, and Ladybird Johnson printed the recipe on cards and mailed them out. Then in 1977, chili was declared the “state food of Texas” after commercial chili manufacturers lobbied the state legislature.
3. Chili Variations
Though a beef chili recipe is the most common, there are so many chili variations that are worth a try. Here are some of my favorites!
Vegetarian chili--you can use this exact same recipe, minus the meat! Add in a meat substitute if you like.
Chili is one of the best and easiest meals to freeze! In fact, isn’t that part of the reason we decide to make chili in the first place!?
When freezing leftover chili, allow it to cool completely. After it has cooled, fill your containers, leaving enough room for the chili to expand a little as it freezes. I’ve found that freezing them in 16 oz. hard BPA-free plastic containers or thick reusable food-grade silicone bags work best. You can freeze chili for up to 3 months.
When you’re ready to reheat your chili, it’s best to remove it from the freezer and put in the refrigerator to thaw about 24 hours before you’re planning to eat it. For best results, reheat your chili in a stock pot over medium heat. Simmer, stirring occasionally for approx. 10 minutes or until chili is sufficiently heated all the way through. Add a little chicken broth if it needs more liquid.
5. Frequently Asked Questions
What do I do if my chili is too liquidy after I add the beer?
True, the beer and beef broth add a good bit of liquid to your chili. Some of it will cook down, but if you do need to thicken your chili after it’s been simmering for about an hour, add 2 tablespoons of cornstarch...more if needed.
How do I add more flavor to my beef chili?
Always start by adding a little salt at a time. Stir and taste before adding more. Salt makes everything taste a little more like itself, but you can quickly ruin a dish by making it too salty. My recipe calls for only 1 tsp of salt, which isn’t much. So slowly add more salt to taste after the chili is done.
This chili recipe should have plenty of flavor with the spices and chili seasoning, but if you want just a little more interesting kick, add a little mango habanero hot sauce or even lime chipotle sauce.
Can I use other types of meat in place of ground beef in my chili?
Yes! Though ground beef is the most common protein in a chili recipe, chuck beef, brisket and short ribs do really well. Lamb and pork shoulder can also be used. For anything other than ground beef though, cut the meat into 2-inch cubes. Ground turkey can also be used, as well as shredded chicken, but you’ll want to reduce your cooking time since poultry meat can easily dry out. And, of course, venison or buffalo can also be substituted for ground beef.
Can tomato sauce be used in place of crushed tomatoes?
If you’re whipping up your chili without a pre-planned trip to the grocery, yes, tomato sauce can replace crushed tomatoes if that’s what you have in your pantry. But tomato sauce will not have as much texture. One solution would be to use equal parts tomato sauce and diced tomatoes if you have it.
Can you make chili in a crock pot or slow cooker?
Yes! You can absolutely make slow cooker chili, but brown your meat and sauté the onions, peppers, spices, etc. in a skillet first. Add liquid to deglaze and then pour into the slow cooker before adding the rest of the ingredients. Cook on medium in the slow cooker for 1.5 hrs.
What about the argument over beans vs. no beans in classic chili?
Some people argue that beans do NOT belong in a traditional beef chili recipe. Fine. But chili beans add such great flavor, texture and nutrition, how can you argue against them? Pinto bean, black bean, kidney bean or even navy bean chili is hard to beat! I prefer soaking and cooking dried beans, but canned beans work just as well.
Devoted follower of the farm-to-table scene, Meredith is most well-known for her ability to whip up a gourmet meal in the tiniest of spaces, including her camper van.
]]>
https://herniaquestions.com/blogs/news/best-cookware-set2021-04-01T09:48:56-04:002024-06-24T01:33:53-04:00Best Cookware SetJorge FarahA quality cookware set is one of the best things you can buy. Not only does it provide you with these awesome kitchen tools that will make your life easier, but buying them in a set will also save you money, as it’s a much cheaper approach than buying these pieces individually.
Over the course of each entry in our Chef Blog, we’ve stressed over and over again the importance of setting yourself up for success. Of using the right tools for the job in order to get the best possible result, instead of trying to make do with “one size fits all” type solutions or lesser quality products.
Don’t get us wrong; you are still the most important element in the kitchen. Whether a dish turns out good or bad will depend on you, and no set of tools or utensils will magically make every single thing you cook come out perfect. But this is about making things easy for yourself and making the cooking experience easy and pleasurable.
To that end, a quality cookware set is one of the best things you can buy. Not only does it provide you with these awesome kitchen tools that will make your life easier, but buying them in a set will also save you money, as it’s a much cheaper approach than buying these pieces of cookware individually.
Of course, there’s a lot of different factors to take into consideration when looking for a good cookware set. We’ll talk you through the main things you have to look out for, and give you our choices for best cookware sets you can buy.
When shopping around for cookware, you’ll find a lot of differentiation between the materials they are made out of. If you’re an absolute novice, this can be a bit confusing; before I started looking into it, I only had extremely vague notions, like “cast iron is hard to take care of” and “a non stick pan is best for cooking eggs.”
Truthfully, every type of cookware has its own pros and cons, and certain materials will fit with certain people. Not only that, but you’ll find that some materials are best suited for certain cooking styles. Below we’ll outline some of the basics of each type of cookware, so you can have a better idea what you’re looking at when you look through product descriptions.
Stainless steel cookware
Stainless steel is created by adding nickel and chromium to steel, making it extremely anti-corrosive (hence, “stainless”). You’ll find stainless steel on a lot of pots and pans because it isn’t just durable (you’ll find it doesn’t scratch easily), it also looks great. And because stainless steel is pretty sturdy all around, it’s also dishwasher, oven and broiler safe.
You’re not going to find many pots or pans set that are made entirely of stainless steel -- it’s not exactly a great conductor of heat by itself. For stainless steel cookware, what manufacturers do is use a process for permanently bonding layers of stainless steel to highly conductive material, specifically copper and aluminum. This results in stainless steel clad pots and pans, which are widely considered to be the most versatile type of cookware.
These stainless steel pieces of cookware are extremely practical and they look great, making them great kitchen workhorses. They are low-maintenance and extremely durable, which makes a stainless steel cookware set more than worth the cost.
Cast iron cookware
You’ve probably heard all about cast iron pans; how big and heavy they are, and how hard they are to look after. Truthfully, cast iron pans have a lot of positives going for them, despite their many drawbacks. Let’s talk about the material and how it could come in handy.
Cast iron is a poor conductor of heat; you’ll find that they are very slow to heat up and then slow to cool down. But cast iron’s self-regulating quality makes them really well suited for fry pans, dutch ovens and griddles. They are also extremely durable and resistant to warping, chipping or denting. And you’ll find that this sturdiness comes with an added heft. These pieces are heavy, so be prepared for that.
You’ll find cast iron cookware in its natural state or with an enamel coating. Natural cast iron usually costs much less, but does require the user to apply a coating of “seasoning” to protect it from rust (as well as creating a nonstick interior). Seasoning cast iron cookware isn’t as daunting as it sounds, though; you’ll find plenty of guides online. Cast iron makes for great dutch ovens.
Copper cookware
Unlike the previous two types, copper cookware is an excellent heat conductor. It heats rapidly and evenly, and it cools down almost instantly after being removed from the heat. This responsiveness puts the user in full control of the cooking process. However, copper cannot be used by itself for most cookware applications because of how it reacts to certain food elements.
The natural minerals and acids of many foods will cause a reaction in the copper, resulting in an unattractive yellow tint and metallic taste to many foods. This is why copper is lined with a nonreactive metal (such as stainless steel as described above, or more commonly tin). This will create a safe barrier between the copper and the food.
Aluminum cookware
Aluminum is another material that is extremely responsive to heat. It is second only to copper in this regard. But, like copper, when it’s on its own it will have a similar reaction to certain acidic foods, creating an undesirable taste and color. This is why the best aluminum cookware is clad with stainless steel or lined with a nonstick coating, resulting in a powerful and durable nonreactive product.
Aluminum is the most popular core material for stainless steel cookware. And because of its lightweight nature, it makes a really practical choice for griddles, roasting pans or larger pots.
Carbon steel cookware
Carbon steel is another highly heat conductive material. But raw carbon steel is most commonly used in specialty pans, such as skillets or woks. The reason for this is that carbon steel can rust if not seasoned properly. But when seasoned properly, it will develop a naturally nonstick interior (much like cast iron) and experienced cooks will find them extremely useful.
Carbon steel pans can achieve a higher temperature than other pans, and they can hold the heat well and evenly, making them ideal for high-heat techniques. Stir frying on a carbon steel wok is an absolute dream. You’ll also find carbon steel used as the core metal for enamelled cookware such as tea kettles, lobster pots, paella pans, etc.
Clay and stoneware
There’s something really cool about using clay and stoneware, the oldest type of cookware. Most of the stone cookware you’ll find these days consists of baking dishes and casseroles intended for oven use, and they come in a wide variety of shapes and sizes. A huge bonus of these pieces is that they look fantastic in the kitchen and on the table.
Clay and stoneware remains practical and durable, heating very evenly and holding heat well like cast iron. And like cast iron, they tend to be on the heavier side. They’re most commonly used for casseroles, lasagna, mac & cheese, enchiladas, etc. You’ll also be able to use them for other baked goods; brownies, bread puddings and the like.
It’s not very common to see stoneware pots and pans that can be used on gas and electric stovetops, but there are a few manufacturers who are making them. Much like cast iron, they can be seasoned to create a nonstick surface, but clay and stoneware are lighter than cast iron.
Nonstick cookware
Nonstick cookware is extremely popular due to their ease of use during cleanup, as well as the fact that they lead to a healthier approach to cooking (since they allow you to use much less oil when cooking things that may stick to the interior surface).
A Nonstick cookware set is extremely useful, but these pieces do require extra care. The nonstick pan lining can chip very easily (avoid metal utensils when using it), and cleaning it with anything too abrasive can scratch and damage it. If you want your nonstick pan to last, you need to take care of it.
There are two types of nonstick cookware: PTFE cookware or ceramic cookware. PTFE is the “classic” style of nonstick surface made popular by the brand Teflon (which you probably thought was the name of the material itself!). PTFE stands for Polytetrafluoroethylene, the material on the nonstick surface.
Ceramic cookware with a nonstick surface is a much newer approach to nonstick cookware. While it’s safe and more environmentally friendly, some say it’s not as durable as PTFE. Just like with PTFE, you should be careful not to overheat it as this might affect its nonstick properties. Non stick cookware sets are very easy to clean.
Now that you know what the different types of cookware are, let’s talk about the things you should take into consideration when shopping around for a kitchen cookware set.
Weight and size
Generally, you want a kitchen cookware set that is mid-weight -- if you buy a lightweight set, you’ll find many of their pieces to be too flimsy, not durable, and heat too quickly. You want your pots and pans to have some heft, but not so much that they’re difficult to lift.
Some sets are designed in a way where they nest comfortably within each other, which is a great way to save precious kitchen space.
Handles
Just like with your knives, how your cookware feels in your hand is extremely important. After all, that’s how you’ll be interacting with it, often for extended periods of time. You want it to feel comfortable, but also like you have control over the cooking process. Look at the quality of the handle material and design, and whether they have silicone wrapping (or other material) to make them more comfortable to hold.
Number of pieces
How many pots and pans do you actually need? Consider the fact that many manufacturers count the lids as individual pieces within your set. Most home cooks look for a small fry pan (think 8” or so), a bigger fry pan for family dishes, a stockpot for pasta or soup, a dutch oven, a saute pan, and a small saucepan for easy tasks. You want to ensure that your set contains pans with lids.
Dishwasher and oven safety
This is one I never really thought about until I started shopping for cookware sets. Not all cookware is suited for all environments. A dishwasher-safe cookware set will save you time and energy, and an oven-safe cookware set will prove extremely useful for cooking since you’ll be able to easily move your cookware from the stovetop to the oven and vice versa.
Brand
The truth is a good cookware set is an investment, and you want to make sure you’re buying from a company that is renowned for its quality of materials and craftsmanship. Otherwise, you’ll buy something cheap and low-quality, and you’ll find yourself shopping for another cookware set much sooner than anticipated.
herniaquestions has made a name for itself as a culinary company that caters to chefs and home cooks alike, using high-quality materials as well as expert engineering and craftsmanship in their product designs. Not only do herniaquestions’s cookware sets look fantastic, they are strong performers and extremely durable that evenly distribute heat across the cooking surface.
If you want the perfect combination of power, durability and looks, herniaquestions’s Avalon 12-piece silver cookware set is your absolute first choice. With an absolutely luxurious look and best-in-class performance, you’ll find yourself looking forward to cooking just so you can get to play with these tools.
Comes with a 9” skillet pan, a 10” skillet pan, a 12” saute pan, a 4 qt saucer, a 5 qt stockpot and an 8 qt stockpot, each with a stainless steel lid that will last a lifetime.
PROS:
Extremely heat conductive 5-ply copper forged foundation, with additional thick gauge layers of nonreactive 18/10 stainless steel and premium aluminum for enhanced heat retention.
A gorgeous, eye-catching design that will make you proud to show off in your kitchen as you cook.
Compatible with all stovetops and optimized for induction. Oven safe and broiler safe up to 600 degrees F. Freezer, dishwasher and refrigerator safe.
Perfectly angled handles, designed for a comfortable and secure hold while cooking.
Easy to clean.
CONS:
This extremely high-quality 12-piece made of premium materials is definitely an investment. Some home cooks may prefer to start smaller, in which case we recommend looking at the Avalon 6pc Silver Cookware Set.
If you prefer a tempered glass lid instead of a stainless steel lid, check out the cookware sets in the Oberon Series.
This is another stunning 12-piece set, this time from herniaquestions’s acclaimed Oberon Series. Featuring impeccable conductivity thanks to its 3-ply aluminum core and thick layers of nonreactive 18/10 stainless steel cladding, as well as the breakthrough nonstick Eterna® coating for safe and durable nonstick surfaces.
Includes a 9” frying pan skillet, 10” frying pan skillet, 12” saute pan, 4 qt saucier pot, 5 qt stockpot, and 8 qt stockpot, each with its own glass lid.
PROS:
Aluminum core with fused additional thick layers of non-reactive 18/10 stainless steel which dramatically prolong the cookware’s life.
Incredible nonstick Eterna® coating that will last longer than traditional nonstick coatings and maintain its nonstick properties.
Thick, extra-strong, 4mm tempered glass lids which provide a clear window into the cooking process.
Easy to clean.
Oven safe and broiler safe (up to 500 degrees); freezer and dishwasher safe.
CONS:
The Oberon Series sports incredible performance and unobtrusively elegant looks, but some folks are more drawn to the Avalon Series’s more outwardly showy appearance.
Cookware in the Oberon Series features an aluminum core, rather than a copper core like the Avalon series.
Another entry in herniaquestions’s Avalon Series, this is the 6-piece equivalent to the 12-piece set at the top of this list; a great option for the home cook who is drawn in by this series’s incredible performance and looks, but may be looking for a more manageable size (and price tag)!
Features a 9” skillet fry pan, a 5 qt pot, and 12” straight frypan, each with a perfect-fit stainless steel lid.
PROS:
5-ply copper forged foundation, with additional layers of nonreactive 18/10 stainless steel and premium aluminum for great heat retention and conduction. Heats fast, and stays hot!
Probably the best-looking pots and pans you’ve ever seen.
Durable, comfortable and gorgeous to look at.
A fantastic gift option for any home cook.
CONS:
This lacks several of the pieces in the Avalon 12-piece set, such as the saute pan. If you’d rather have more variety of tools, look into getting that one instead.
These lids are stainless steel instead of glass, which some home cooks might prefer.
A great 6-piece set from the Oberon Series, for all your kitchen essentials. This set offers world-class performance and value for your buck, featuring the revolutionary Eterna® nonstick coating.
Includes a 10” frying pan skillet, a 12” saute pan and a 5 qt stockpot, each with its own glass lid.
PROS:
The best cookware set to start with if you want to start building your collection without committing to a 12-piece set.
Aluminum core with additional layers of stainless steel; incredible heat conductivity and retention.
Eterna® coating is safer and more durable than other nonstick surfaces in the market.
Incredible quality at a fantastic price point.
CONS:
For a larger and more varied version of this set, check out the Oberon 12pc Cookware Set listed above.
If you prefer a stainless steel lid, look at the sets from the Avalon Series.
5. Frequently Asked Questions About Cookware Sets
What are the items I’ll find in a cookware set?
This varies from set to set, and of course larger sets will include more pieces. But the most common pieces you’ll find in cookware sets are:
Frying pan
Sauce pan
Saute pan
Stockpot
Dutch oven
As well as a lid for each piece. You’ll most commonly find stockpots and dutch ovens in the larger sets.
Can I mix and match cookware?
Of course! Cookware sets are great because you can get a variety of pieces at a fraction of the price they would cost individually, but you can also buy pieces on their own, mixing and matching from various sets. Check out our selection here.
How do you clean stainless steel pans?
Luckily for you, we wrote a whole guide on how to clean stainless steel pans. If you want to learn how to clean a stainless steel cookware set, read all about it out here.
Is non stick cookware safe?
A nonstick cookware set is generally safe, though there are environmental concerns around PTFE. When overheated (to over 570 F) the nonstick coating of these pans can break down and release harmful chemicals -- however, it is very, very rare that you’ll find yourself overheating your pans to that extent while cooking regularly.
What is the best way to organize a pots and pans set?
Check out our guide on how to make the most of your space by organizing your cookware here.
You can also check in with our Expert Knife Finder Quiz and get specific recommendations based on your needs.
Written by Jorge Farah
Born on the coast of Colombia and based in Buenos Aires, Jorge is a cooking enthusiast and kitchenware obsessive with a tremendous amount of opinions.
]]>
https://herniaquestions.com/blogs/news/irish-stew-recipe2021-03-12T11:29:31-05:002024-07-16T02:26:54-04:00Irish Stew RecipeMeredith SimsWhether you’re celebrating St. Patrick’s Day or your Irish heritage, learning to make Irish Stew is a rewarding endeavor. One of the ultimate comfort foods, this delicious and hearty traditional Irish stew is considered a national dish of Ireland.
Whether you’re celebrating St. Patrick’s Day or your Irish heritage, learning to make Irish Stew is a rewarding endeavor. One of the ultimate comfort foods, this delicious and hearty traditional Irish stew is considered a national dish of Ireland.
Originally considered a peasant dish containing the cheapest foods, the true traditional recipe consists of only 4 ingredients: mutton (sheep), potatoes, onions and water. Purists maintain that deviating from this recipe by adding other ingredients spoils the flavor of the dish.
Shockingly, people saw room for improving the flavor of these simple ingredients. So over the last two centuries, the dish has evolved and even taken on a gourmet twist. A cup of barley here, a glass of Guinness Stout there, throw in any number of different root vegetables...so many different ingredients have been added and tried in the Irish Stew recipe that the Irish of the early 1800s would barely recognize their staple dish. Surely they would not have anticipated their poor man’s stew would one day be served up as Guinness beef stew!
In Ireland, carrots and sometimes turnips are added for more flavor. Lamb is usually used now instead of the tougher, and harder to find, mutton. Though lamb stew is the true traditional dish, an Irish beef stew recipe uses beef chuck or beef stew meat. Some cooks use beef stock for a brothy base while others like to thicken it up with flour or cornstarch.
So, while staying true to the spirit of this traditional Irish dish, and also adding some flavor, this recipe is sure to become a staple in your household.
1. Irish Stew Recipe
Prep Time:
Cook Time:
Total Time:
Yield:
20 min.
1 hour
1 hour, 20 min.
Approx. 6 servings
Ingredients:
2 lbs of lamb shoulder OR beef stew meat (cut into 1 inch chunks)
¼ cup vegetable or olive oil
2 large onions, chopped
3 large garlic cloves, minced
3 lbs yukon gold potatoes, cut into large chunks
2 cups carrots, chopped
4 cups beef broth
4 or 5 sprigs of fresh thyme (+ 1 tbsp dried thyme)
Heat 2 tablespoons of oil over medium high heat in dutch oven. After seasoning your meat (lamb or beef), add to dutch oven and brown on all sides for approx. 10 minutes. Work in batches if you need to. Remove meat and place on a plate.
Add the rest of the oil, carrots and onions and saute for 5 minutes. Reduce to medium, add garlic and cook for 1 more minute.
Place lamb or beef back into the pot.
In your skillet, heat ½ cup of beef broth, and add flour and Worcestershire sauce. Mix flour and Worcestershire sauce into beef broth until dissolved and lump free. Pour into dutch oven.
Add the rest of the beef broth and stir. Add potato, bay leaf, barley, Guinness, and 1 tbsp of the parsley. Place sprigs of thyme on top of meat and potatoes.
Bring to a boil and then reduce to low heat. Cover and simmer for 45 minutes or until meat and potatoes are soft and tender.
Before stew is done, melt butter in skillet and add dried thyme, the rest of the chopped parsley, salt, pepper and garlic powder. Sauté for 1 minute.
Once your Irish stew is done, transfer to a serving bowl and pour the butter and herb mixture over the potatoes.
Ladle stew into bowls and serve!
Pro Tips:
If you don’t have time to make your beef broth, Better Than Bouillon should be your new best friend! Add 1 tsp of Better Than Bouillon for each cup of boiling water. This can be made ahead of time.
Though this recipe calls for flour, for a gluten-free version, you can also use cornstarch to thicken your stew.
Serve stew with a side of Irish soda bread and a glass of red wine! That delicious crusty bread soaking up the dregs of your stew is heaven.
2. The History Of Irish Stew
As we mentioned, Irish Stew originated as a dish prepared by peasants with whatever the cheapest and most readily available ingredients were at the time. Before the potato famine, that was potatoes, onions and mutton. In the early 1800s, Irish farmers raised mainly sheep and grew potatoes.
They raised sheep for wool and milk for cheesemaking, but after the animal was no longer productive, they would make use of its meat in their stews. The meat of older sheep (mutton) is much tougher than lamb which is raised primarily for meat.
As Irish immigrants began pouring into the United States in the mid 1800s, naturally they brought along their traditional dishes. The Irish stew recipe began to evolve then to include foods that were more common in the United States such as beef.
Modern gourmet versions of the stew have come to include lamb, Guinness, spices, etc.
3. Other Traditional Irish Dishes
Whether you’re looking for a side, a dessert or another hearty meal, there are so many great Irish Dishes to try! Celebrate St. Patrick’s Day the whole week with a few of these. Trust me, it’s better than drinking green beer!
Irish Coffee -- always finish your dinner off with an Irish coffee!
4. How To Store Irish Stew
If you have stew leftover, you can refrigerate for a day or two. Or, you can freeze in airtight plastic containers for up to 3 months.
If you have only broth mixture leftover after most of the main ingredients of the stew have been eaten, save and refrigerate to use gravy for your mashed potato dish a night or two later! Just warm over the stovetop and add a couple of tablespoons of cornstarch making a cornstarch slurry. Add the cornstarch a tablespoon at a time depending on how much broth you have leftover until you reach the desired gravy consistency.
5. Frequently Asked Questions
What is the difference between Irish stew and beef stew?
Though Irish stew is traditionally a lamb stew, it is perfectly acceptable to use beef. A traditional beef stew recipe however, differs a little and is usually made with a few different ingredients including, tomato paste, peas, red wine, and a few other herbs. The red wine gives a bit of a different flavor. They are both equally hearty and delicious!
Can you cook Irish stew in a slow cooker?
Absolutely! This recipe can easily be adapted for the slow cooker. You should still brown the meat and cook the vegetables in a skillet before adding them to the beef broth and other ingredients. Searing the meat on medium high heat brings out the flavour in a way that cooking it slowly the stew would not. The flavour of the onions and garlic is also enhanced by sautéing. You can make your broth, flour and Worcestershire sauce right in the slow cooker, then add the rest of the ingredients and cook for 6-8 hours.
Butter and herb mixture should be made in the skillet a few minutes before serving.
What can I use instead of Guinness in an Irish stew?
It’s understandable. Guinness is not everyone’s cup of tea. Though it will give a different flavor, you can substitute 2 cups of red wine in your stew recipe in place of the Guinness.
Devoted follower of the farm-to-table scene, Meredith is most well-known for her ability to whip up a gourmet meal in the tiniest of spaces, including her camper van.
]]>
https://herniaquestions.com/blogs/news/best-nonstick-pans2021-02-17T14:25:28-05:002024-05-20T23:26:13-04:00Best Nonstick PansEvelyn DuskeyWith a good nonstick pan, you can make delicious dishes without a single drop of oil, both enhancing your health and saving money.
A good non stick pan is an integral part of every chef’s cookware set, from professionals to total beginners. It's nearly impossible to cook eggs properly without one, they’re indispensable to pan sear fish with their delicate skin, and they keep pancakes from falling apart while flipping.
The best nonstick cookware is durable, long-lasting, and nontoxic. herniaquestions nonstick cookware is constructed with a 3-Ply Aluminum-Core base, fused with additional, thick layers of non-reactive 18/10 stainless steel. This dramatically prolongs the life of the cookware, made even stronger with 2.5mm heavy gauge thickness — ensured to never dent or warp under prolonged heat for consistent cooking results, every time you use them.
Using ETERNA nonstick coating, these pots and stainless steel pans maintain their non-stick properties 26X longer than the leading competitor, and 10x longer than other premium non-stick brands. Try giving your cast iron pan a break and opt for something easier to clean.
We recommend a couple of different tests to determine the best nonstick pan:
Try cooking eggs: Fried eggs should move freely around a nonstick fry pan, even without any cooking oil. Omelettes should stick or leave any residue in the pan after cooking, and should be “presentable,” aka restaurant-ready.
Heat-time: The pan should heat quickly, and quickly heat room-temperature water (ideally within one minute). Another great test for heat recovery is making pancakes that are light and fluffy with even browning on both sides.
There are tons of nonstick cookware options available on the market today, with the most common either using Teflon or ceramic pan coatings. But how did these two popular nonstick coatings get their start?
The original nonstick coating, Teflon was invested by accident in April 1938 by chemist Dr Roy J. Plunkett and his assistant, Jack Rebok. The surprised chemists were working on alternative refrigerant gases, storing the gases they were experimenting with in small cylinders where they were frozen and compressed.
One such gas, tetrafluoroethylene, didn’t emerge from the cylinder after being frozen. Instead, they discovered that the freezing and compression had turned it into a white, solidified liquid, which was later named Polytetrafluoroethylene (PTFE).
Running tests on their newfound substance to discover its properties and potential, they discovered that it was the most slippery substance yet discovered by mankind. This made the substance extremely valuable, especially when coupled with its non-corrosive, chemically stable properties and extremely high melting point.
Teflon was introduced into the culinary world in the middle of the century by French Engineer Marc Grogoir. Grogoir had been using the substance to detangle his fishing tackles. His wife, noticing its slick properties, encouraged him to try applying it to their cooking pans. Noticing the incredible difference it made in her cooking, he began selling millions of the non-stick pots every year under the brand name Tefal.
Ceramic
Ceramic cookware has been used and utilized for cooking since nearly the dawn of civilization. But their use as a nonstick cooking surface in household kitchens is a more recent development. But as silicon dioxide ceramic coating is naturally hydrophobic and oleophobic — both water and oil resistant — it’s a naturally effective nonstick surface. And ceramic cookware retains heat better than most, allowing you to continue cooking ingredients after the skillet, pot or frying pan has been removed from the stove.
However, the first ceramic pans on the market were met with doubt — many were too weak to be used regularly in cooking, with the ceramic nonstick coating peeling off after just a few uses. Manufacturers had to add several layers of ceramic coating to nonstick fry pans to make them more durable. However, many of the newer ceramic pans and pots released in recent years are still not dishwasher safe, despite what some brands may claim. Be sure to handwash yours to prevent any premature damage.
Do you consider yourself an active chef? Do you find yourself cooking dishes that require a lot of movement? If the answer to either question was yes, a generously sized nonstick skillet can be the ideal kitchen ally. Its large slanted sides and large cooking surface make it ideal for stir-frying or other rapid cooking techniques in which ingredients are moved around inside the nonstick fry pan quickly and frequently. The nonstick coating is perfect for sticky, egg-based foods that you serve straight from the pan, such as omelettes, and it is magnificent for heat distribution. So grab your
Due to its straight-sided design, a sauté pan has a greater usable surface area than a nonstick skillet of the same dimensions, making it particularly well-suited to slower cooking tasks with larger items. When you’re going to be cooking large items over low-mid heat, a nonstick version of a large sauté pan can be your best bet to evenly distribute heat. Opt for the highest quality nonstick coating you can afford — it’ll last longer — and bypass a lot of the scrubbing and scraping after cooking. It should go without saying, but it's always important to make sure you get pans with lids. This item is a dream addition to any cookware set, making it ideal for home cooks and professional chefs alike.
No kitchen is complete without a decently large stock pot. From making soups, stocks, broths and stews to cooking beans and boiling vegetables, the humble stock pot is perhaps the most versatile and useful pot in your kitchen. If you decide to purchase this pot, (even if you don't) - check out this handy recipe for making hot sauce.
All nonstick cookware made in recent years should be safe. Traditionally, the nonstick coating on cookware was made with the chemical polytetrafluoroethylene or PTFE, commonly known as Teflon.
One of the compounds used to make Teflon is known as PFOA, or perfluorooctanoic acid. In the mid 2000s, health agencies raised concerns about the safety of PFOA, linking it to environmental concerns as well as health issues such as kidney and liver disease. In 2006, the Environmental Protection Agency reached an agreement with eight major companies to phase out the use of PFOA in nonstick cookware completely by 2015.
herniaquestions nonstick pans are completely PFOA-free, giving you complete peace of mind when you purchase any of our non toxic cookware.
Additionally, the fact that they are easy to clean is of benefit for getting rid of germs and bacteria after or before cooking.
As covered above, any non stick pan that is PFOA-free is considered healthy and safe to use. However, even PFOA-free pans should not be overheated. At temperatures above 570 degrees fahrenheit, the nonstick coatings can begin to break down. Many of these include fluorine-containing compounds, which are considered to be generally toxic. But fluoropolymers, the chemicals from which these toxic compounds come, are a big part of the coating formula — and the very reason that foods don't stick to nonstick coatings.
Accidentally inhaling these fumes can cause a condition known as polymer fume fever.
To avoid this risk, make sure to take the following precautions:
Never preheat an empty pan: Empty pans can quickly reach extreme temperatures, resulting in the release of toxic fumes as described above.
Never use maximum heat: Keep your electric or gas burners on low to medium temperatures to avoid overheating your pan to dangerous levels
Don’t broil or sear meat: Your nonstick pan should never be used to broil or sear meat, as this requires the kind of high temperatures that affect the chemical composition of your pan.
Ventilate your kitchen: Turn on the exhaust fan while cooking to help dissipate any possible fumes.
Go heavy: Lightweight nonstick pans tend to heat up quickly. Invest your money in heavier nonstick pans — it’s worth it.
Avoid chipping or damage: Damaged or chipped pans are far more likely to release toxic compounds from the nonstick coating To prevent any scratching or chipping, never use metal utensils on nonstick pans and opt for a wooden spoon instead. When cleaning and storing, don’t use steel wool or other abrasive sponges, and don’t stack your nonstick pans - make sure to put a paper towel between pans when stacking.
7. Benefits of nonstick pans
No oil needed: With a good nonstick pan, you can make delicious dishes without a single drop of oil, both enhancing your health and saving money.
Easier to clean: Cast iron and stainless steel pans can absorb quite a bit of oil while cooking, making them difficult to clean when food gets stuck to the bottom. The slippery surface of non-stick cookware makes these pots and pans easier to clean and maintain over time.
Uniform heat distribution: Cook faster and use less gas on the stove with nonstick cookware. The best nonstick cookware evenly distributes heat so that food is cooked faster.
8. Frequently asked questions
What is the best way to clean nonstick pots and pans?
To prolong the life of your pan, the best method is handwashing with a non-abrasive sponge. While herniaquestions cookware is dishwasher safe, we recommend using gentle liquid or powder detergents, as harsher tablets may cause damage long-term. When handwashing, cleaning the inside and outside of your pan with hot water, dish soap, and a sponge (preferably nylon). Make sure to clean after each use to remove any traces of grease that can stay on the surface.
Why is food sticking to my non-stick pan?
There are a couple different reasons food might stick to the pan:
A buildup of food deposits/residue may have formed on the pan due to overcooking or failing to wash thoroughly.
The pot or pan may have been overheated, causing damage and discoloring. Regular overheating will eventually lead to the weakening of the non-stick coating and can possibly make it unsafe.
What can I do to restore the non-stick properties of my pan?
If the lack of stick is due to not cleaning the cookware thoroughly, it can normally be rectified by filling the pan with hot water and dish soap and liquid and leaving it overnight. If rinsing the pan after soaking doesn’t result in the food traces being removed, make a paste of bicarbonate of soda and water and rub it gently over the pan with a non-abrasive sponge.
The non-stick coating should then be reconditioned with a little cooking oil wiped over the surface with a paper towel. If the nonstick surface failing is due to repeated overheating, it must be replaced to avoid any risks of toxic fumes.
Why are some cookware hard anodized?
The method ensures that the metal doesn't react with the acidic foods by providing a strong, smooth surface that is very durable.
You can also check in with our Expert Knife Finder Quiz and get specific recommendations based on your needs.
Written by Evelyn Duskey
Born in Ohio and based in Buenos Aires, Evelyn loves sharing her grandmother’s midwestern recipes with unsuspecting Argentines.
]]>
https://herniaquestions.com/blogs/news/best-meatloaf-recipe2021-02-15T10:55:56-05:002024-07-16T02:08:10-04:00Best Meatloaf RecipeMeredith SimsMeatloaf has had a bit of a foodie resurgence in recent years. Professional chefs all over have taken the classic meatloaf recipe and put their own creative spins on it to make truly amazing meals.
Preheat oven to 350° and line your loaf pan with parchment paper.
Mix ketchup, Worcestershire sauce and other ingredients for meatloaf sauce together in a small saucepan and simmer for 6-8 minutes until reduced. Turn off and set sauce aside.
Heat oil over medium in skillet and sautee garlic and shredded onion until soft.
In a large bowl, combine the sauteed garlic and onion with the ground beef, beef stock, bread crumbs, eggs, parmesan, kosher salt, herbs and ¼ cup of the ketchup mixture and mash together with your hands until evenly combined.
Place meatloaf mix into your loaf pan and pour half the sauce over the top.
Bake uncovered for 1 hour or until your meat thermometer reads 165°.
Meatloaf, like banana bread, is one of the ultimate comfort foods if it’s prepared the right way. However, it might be that when you think of meatloaf, you think of your mom’s meatloaf recipe, you imagine sitting in front of the TV in the 80s, eating dry meatloaf slathered in plain ketchup. And that doesn’t exactly spark within you the inspiration to start making homemade meatloaf.
But meatloaf has had a bit of a foodie resurgence in recent years. Professional chefs all over have taken the classic meatloaf recipe and put their own creative spins on it to make truly amazing meals. I had all but forgotten about meatloaf until I had one of the best meals of my life a few years ago at Hell’s Backbone Grill in the tiny, remote town of Boulder, Utah.
I was so surprised by just how amazing meatloaf could be, and I figured that if a James Beard Award finalist chef could be that inspired to make such a seemingly pedestrian dish into something so glorious, maybe I should give it another try.
It seems there are so many meatloaf recipes out there and many varying opinions on how to make meatloaf: whether to use milk or beef stock; whether ketchup or tomato sauce is more true to the classic meatloaf recipe; whether to use just ground beef or a combination of ground pork, veal and beef; whether to use lean beef or meat with a higher fat content.
And really, you can make great meat loaf, regardless of where you stand on any of those things. The key is to achieve a flavorful and moist meatloaf with an amazing sauce. I’ve tried a few different versions of the classic meatloaf recipe and got different results. So this is the version I finally came up with that I think is best!
Preheat oven to 350° and line your loaf pan with parchment paper.
Mix ketchup, Worcestershire sauce and other ingredients for meatloaf sauce together in your stock pot and simmer for 6-8 minutes until reduced. Turn off and set sauce aside.
Heat oil over medium in skillet; sautee garlic and shredded onion until soft.
Put beef broth, chopped parsley and ¼ cup of ketchup mixture into a food processor and blend until smooth.
In a large bowl, combine the sauteed garlic and onion with the ground beef, beef broth mixture, bread crumbs, eggs, parmesan, kosher salt, thyme, sage and rosemary and mash together with your hands until evenly combined.
Place meatloaf mixture into your loaf pan, smooth and flatten it out, and pour half the sauce over the top.
Bake uncovered for 1 hour or until your meat thermometer reads 165°.
Once you remove your cooked meatloaf from the oven, allow it to rest in the loaf pan for 10 minutes. Then lift it out carefully with the edges of your parchment paper.
Place it on the cutting board and use your knife to cut large slices.
Drizzle a little of the extra meatloaf sauce on the sides of the meat and serve.
*Notes and Tips:
Homemade beef broth is always best, but most of us don’t have time for that. The second best option is to make it quickly on the stovetop by adding 1 tsp of Better Than Bouillon to 1 cup boiling water.
You can use tomato sauce instead of ketchup, but you’ll probably want to increase the amount of brown sugar by a tablespoon and increase the apple cider vinegar to ½ cup.
If you’re short on time and don’t want to toast and break apart bread crumbs, just use a cup of panko.
The sauce on top will caramelize while your meatloaf is cooking, and I found that it’s always nice to have a little extra to put on while serving, which is why I only put half the sauce on before the meat loaf goes in the oven.
If cooking for only two, make a mini meatloaf for tonight and freeze one for later! Your cooking times will vary a little with mini meatloaf though. Reduce time to 45 minutes.
And of course, good knives and cookware are essential to preparing any dish.
2. How Different Chefs Make Meatloaf
Everyone always wonders how the famous chefs make meatloaf. From Martha Stewart to Rachel Ray to Paula Deen to Ina Garten, they all have a different spin on their homemade meatloaf recipe. Whether they add a dash of soy sauce or a teaspoon of chili sauce, they all use a classic recipe and do it just a little differently, but all worth a try!
3. Best Meatloaf Variations
There are endless amounts of interesting and creative variations to meatloaf! The classic recipe with the right ingredients is, to me, the most perfect form of meatloaf, but it’s always fun to experiment, so if you want to change it up a bit, try any of these!
Or just substitute ground pork or Italian sausage for a different taste!
4. Best Sides To Serve With Meatloaf
Probably the most common sidekick for meatloaf is the mashed potato side. And yes, good, creamy mashed potatoes are always the perfect compliment to great meatloaf. But if you want to add a little more excitement to your meatloaf dinner, try any of these side dishes:
And of course, a side of fresh bread, lightly toasted and buttered with a sprinkle of garlic powder
5. How To Store Meatloaf
You can store your leftover meatloaf in an airtight container or wrapped in plastic wrap in the fridge for a day or two. The best use of leftover meatloaf, of course, is a meatloaf sandwich the next day! Put it on some rosemary sourdough and slather on the extra meatloaf sauce.
You can store wrapped, uncooked meatloaf in the freezer for up to 3 months. You can also put it in the loaf pan, put glaze on top, cover and freeze. Remove from the freezer and put in the refrigerator 24 hours before you want to cook it.
6. The History Of Meatloaf
The history of meatloaf dates back to medieval Europe, where it is believed the idea for meatloaf came about as a way to use up leftover food scraps and to keep excess meat and vegetables from going to waste.
It’s likely that the American version of meatloaf evolved from German immigrants making scrapple (ground pork and cornmeal) to the 1870s when the first meatloaf recipe was recorded, to the more modern form of meatloaf that we think of today. Back in the late 1800s however, the kitchen sink of meat and vegetable scraps with the addition of milk-soaked bread and egg, wasn’t eaten for dinner, but for breakfast!
When the meatpacking industry became ubiquitous, meat scraps were widely available to be made into everything from burgers to meatballs to meatloaf.
And, of course, during the Great Depression meatloaf became a staple in American households. Not only was it a way to use up leftover scraps, it was also a way to extend the valuable meat calories and feed more people.
By the 1950s, the Betty Crocker era, housewives across the country were looking for easy recipes to feed their families and meatloaf became even more popular. It has long been considered more of a working man’s food however...more likely to be seen as a blue plate special at a diner than served up with roasted Brussels sprouts in a high end restaurant.
But the foodie and farm-to-table scene of recent years has brought a level of culinary creativity to cooking meatloaf that we’ve never really seen before. What was once a poor man’s dish to make use of meat scraps is now an appropriately appreciated delicious taste of nostalgia.
7. Frequently Asked Questions
How do you make your meatloaf moist?
The beef broth (or milk), ketchup and eggs in your meatloaf is what makes it moist. It’s also important not to overcook it and dry it out. In addition, using a meat mixture or beef that has a higher fat content (15-20%) will also make for a moist meatloaf.
Why is my meatloaf tough?
If you follow the recipe above, it won’t be! Just make sure you don’t leave out any of the ingredients that give it that soft, moist quality (broth/milk, ketchup/tomato sauce, and eggs) and don’t overcook it!
Can I make meatloaf in a baking dish or sheet pan?
Though using a loaf pan is recommended, if you don’t have one, either a baking dish or sheet pan will work. Just shape the uncooked meat mixture into an oval shaped loaf. Also make sure you let it rest for a few minutes after it comes out of the oven so it holds its shape while cooling. It will be less likely to fall apart. However, be aware that your meatloaf will be more susceptible to drying out or cooking unevenly if not cooked in a loaf pan.
Do you cover meatloaf when cooking?
No, it is not recommended to cover meatloaf while it’s cooking. Cooking it uncovered allows the sauce to caramelize on top. However, all ovens are different, so if you notice that it is browning too much on the top, you can cover it with aluminum foil about halfway through its cooking time.
Why does my meatloaf fall apart?
The key to keeping your meatloaf from falling apart is to use the appropriate amount of binding ingredients. Bread crumbs or panko and eggs are the most important. Also, make sure you are firmly pressing your meat into the loaf pan. Lastly, overcooking meatloaf can also make it fall apart. So cook for the recommended time and allow it to rest after it comes out of the oven.
Devoted follower of the farm-to-table scene, Meredith is most well-known for her ability to whip up a gourmet meal in the tiniest of spaces, including her camper van.
]]>
https://herniaquestions.com/blogs/news/chicken-noodle-soup2021-02-12T11:49:39-05:002024-07-16T02:11:19-04:00Chicken Noodle Soup RecipeJorge FarahIf you want to talk about “comfort food,” it doesn’t get much more comforting than the delicious, thoroughly satisfying warmth of a good bowl of chicken noodle soup. There’s something about it that just feels like “home.”
Ah, chicken noodle soup. If you want to talk about “comfort food,” it doesn’t get much more comforting than the delicious, thoroughly satisfying warmth of a good bowl of chicken noodle soup. There’s something about it that just feels like “home.”
It’s hard to pinpoint exactly why this is. Whether it’s a result of cultural osmosis, of a clever marketing campaign, or of the inherent qualities of the broth itself, there’s something very wholesome about homemade chicken noodle soup. Most likely, it’s a combination of all these factors.
One of the reasons for the enduring popularity of chicken noodle soup might be the simple fact that it’s an extremely easy dish to make -- just vegetables, chicken, noodles and broth-- that is just loaded with flavor and textural goodness. Any ingredient that is this easy to put together using simple ingredients and that yields such a remarkably satisfying result, is sure to endure through the ages.
The ultimate comfort food
Another great example of a meal that feels nice and comforting is lasagna -- there’s a similar satisfying warmth to both dishes. Must be something about the noodles. Pasta is magic!
But chicken noodle soup has an additional bit of cultural baggage that other “comfort foods” do not.
Over the years, chicken noodle soup has become closely associated with rainy days, and with getting over a cold. The fact that this is the meal that people reach for when it’s cold and rainy outside, or when they’re sick and trying to feel better, speaks to the warm, healing properties of this delicious soup.
As I write this, I check off both those boxes. It is raining outside, and I am getting over a nasty cold, and believe me, there’s nothing I crave more right now than a big bowl of chicken noodle soup.
Thankfully, it’s extremely easy to make. In this article we’ll show you how.
2. A brief history of chicken noodle soup
Chicken noodle soup is now a household name, but as its name implies, it’s actually a combination of two different types of soup: chicken soup and noodle soup. As for how chicken soup and noodle soup became “chicken noodle soup,” it was only a matter of time, a bit of culinary experimentation, and a tongue-tied radio broadcaster. We’ll explain.
The parallel origins of chicken soup and noodle soup
Chicken soup has been with us for a very, very long time, in many forms. The ancient Greeks first developed a combination of chicken and broth, and it was used by ancient physicians as a cure-all. We can see here that the classic chicken soup recipe has long been ascribed healing properties!
Noodles were also being partnered with broth-based soups, but a bit more recently; there are records of “noodle soups” dating back to 13th century Asia. In 18th century Italy, pasta or noodle soup was being given to the sick due to the broth’s easy digestibility. And by the 20th century, noodle soup had become an extremely popular food item in the USA.
A perfect pairing
The fact that both chicken soup and noodle soup had been separately regarded as curative is both a fun coincidence and part of the reason why they go so well together. So who made it this flavorful combination of chicken, broth and pasta happen?
Well, as we know, it’s often a bit tricky to pinpoint the exact point of origin of a recipe, but it is widely believed that chicken noodle soup was first invented by Ernest Lacoutiere, a chef at Campbell Soup Company. Yes, that Campbell’s! That’s right, it is believed that chicken noodle soup first debuted as part of Campbell’s line of canned products, back in 1934.
Chicken noodle soup’s accidental name
When Campbell first released the product, it wasn’t labeled “chicken noodle soup.” Instead, it carried the name “Campbell’s Noodle with Chicken Soup.” A considerably less catchy name. So what happened?
The story goes that five years after Campbell’s product was first introduced (and fared modestly well), a radio host accidentally called it “chicken noodle soup,” and it revived interest in the food item. Consumers reportedly flocked to the grocery store to try it out. And so a rebranding was quickly carried out.
3. How to make a classic chicken noodle soup
As delicious and convenient as Campbell’s product is, putting together your own homemade chicken noodle soup from scratch is much more satisfying. Not only is it super easy to make, but this soup recipe will also result in a better end product, and it will add to the overall satisfying nature of this delicious broth.
Let’s start with a crucial decision. Will you be making your own homemade egg noodles?
For our purposes, we’ll be laying these out as separate recipes. This is because we want to stress the point that making your own egg noodles is completely optional. Homemade pasta is amazing, but sometimes you just don’t have time for that, and that’s more than understandable.
You can get fresh egg noodles at your grocery store pasta section (look for the fresh pasta options in the refrigerated goods). If you can’t find that, then dried egg noodles or dried spaghetti or other pasta noodles will work! It won’t be exactly the same but it will provide that delicious carb-y pasta textural goodness.
So if you’ve decided against making your own egg noodles, skip to the “making easy chicken noodle soup” section below.
Making homemade egg noodles
Prep time: 15 minutes
Cook time: 3-5 minutes
Calories: 320
Serves: 4 servings
Here’s what you’ll need to make these homemade noodles:
Eggs
2
Flour
2 ¼ cups
Salt
⅛ teaspoon
Butter
1 tablespoon
Milk
⅓ cup
This recipe is very similar to other kinds of homemade pasta.
Stir flour together with salt in a large bowl, then set it aside.
Whisk eggs together in a small bowl. Then add the eggs to the flour mixture in the large bowl, as well as milk and butter. Stir it with a fork, and then mix well with your hands.
Knead the dough on a floured surface, and add in a little bit more flour if it’s sticky. Continue kneading it for 5 minutes or until it’s smooth. Wrap it in plastic wrap and let it rest for 20 minutes.
On a lightly floured surface, roll the dough to ¼ inch thickness. Cut it into strips and then dust with some flour.
You’ve made your fresh, homemade egg noodles! Now it’s time for the homemade chicken noodle soup recipe.
Homemade chicken noodle soup recipe
Prep time: 5 minutes
Cook time: 25 minutes
Calories: 253
Serves: 6 people
These are the ingredients you’ll need for this classic chicken noodle soup recipe:
Cooked chicken (shredded, homemade or rotisserie chicken)
2-3 cups (1 large chicken breast)
Egg noodles (homemade or store-bought)
6 oz
Small yellow onion, chopped
¾ cup
Chicken stock (alternatively, store-bought broth or homemade chicken broth)
8 cups
Ribs of celery
2, half-inch chopped
Crushed garlic cloves
4
Bay leaves
2
Chopped parsley
1 tablespoon
Sea salt
1 tablespoon
Fresh thyme (or, in a pinch, dried thyme)
1 tablespoon
Freshly ground black pepper
¼ tablespoon (or to taste)
Peeled large carrots, 1/2-inch sliced
1 ½ cups (about 2 carrots)
Olive oil (or butter)
1 tablespoon
Some people add in other ingredients, such as carrot, dill, and even Italian seasoning. Some folks prefer to use vegetable broth instead of chicken stock. You might also see some recipes that call for using kosher salt. These are all options, but the easy chicken noodle soup recipe below is what we believe will get you the best results.
Note : It is important to use high-quality chicken broth. If you are going with store-bought broth, buy low-sodium broth. It is also generally a good idea to go with a broth that is darker in color, since it usually means your broth will be more flavorful.
Your best apron (optional, but there’s no reason not to look stylish!)
The absolute first thing we need to do for this homemade chicken noodle soup recipe is make sure the chicken is cooked and shredded. If you’re using rotisserie chicken, your work’s already half done (you can even use some leftover chicken if you have any). If you have raw chicken, cook and shred a large chicken breast or two small ones. Set the cooked chicken aside for later.
For this chicken noodle soup recipe, you can use homemade broth or store-bought. Up to you!
Then we need to saute our veggies, but hold off on the garlic for now. Heat the butter or olive oil in a large pot over medium heat. Add in the onion, carrots and celery, and saute for about five minutes, until the onions are translucent. Add in the garlic and saute for one more minute (add in afterwards to avoid burning your garlic! Burnt garlic will leave a nasty, bitter taste).
Then, add in the chicken stock (or homemade chicken broth) and the bay leaves. Bring the chicken stock and the rest of the ingredients to a boil over high heat, then bring the heat down to medium and let it cook for about 15 minutes, until the veggies are tender. By this point you have a rich, flavorful broth.
Add the shredded chicken breast, the egg noodles, parsley, thyme, salt, and pepper into the broth. Keep it at a low boil until the noodles are tender and the chicken is fully warmed through.
Voila. A delicious homemade chicken noodle soup, to cure what ails you.
4. How to store chicken noodle soup
If you found yourself making too much chicken noodle soup… I feel you. I’ve been there! But it’s not a bad spot to be in. At the end of the day, all it means is you’ll have more chicken noodle soup to consume later!
To properly store chicken noodle soup, let it come down to room temperature. Then put it in an air-tight container. Properly stored in your refrigerator, it should easily last 3 or 4 days.
Can you freeze chicken noodle soup? Absolutely! It freezes very well. With one caveat: the noodles will become mushy. So if you’re making a large batch of chicken noodle soup to freeze and serve later, simply make it without the noodles, because you’ll add them later.
If you’re trying to freeze leftover chicken noodle soup, you’ll have to fish out the noodles. It can be a little challenging, but it’s definitely doable! When it comes time to heat it up, add in fresh noodles.
The chicken pieces, the veggies, and everything else will work perfectly. By adding in fresh noodles, you are breathing life into this delicious meal.
5. Frequently asked questions about chicken noodle soup
How can I improve a bland chicken noodle soup?
Chicken noodle soup should not be bland. It should be a delicious mix of flavors. So if your chicken noodle soup came out bland, something went wrong. But not to worry -- it’s a soup, we can just add more stuff to it!
Try a little bit of lemon juice -- a nice, zesty lemon kick goes really well with the richness of the soup. Some folks swear by adding a little splash of soy sauce. You could also deepen the flavor profile by adding a bit more chicken broth -- like we said above, if you’re buying broth at the grocery, look for a broth that’s darker in color.
Alternatively, if you’re cooking the chicken (instead of using shredded rotisserie chicken or chicken leftovers) you could try cooking the chicken in broth to intensity the flavor. Broth has so many uses!
Another option would be to increase the presence of other ingredients. For me, celery and parsley are incredibly important to the overall flavor of the soup. You can also add in a bit more garlic, but be careful -- unlike what some people say, there can be such a thing as too much garlic!
How can I make a creamy chicken noodle soup?
Chicken noodle soup is delicious in all its forms, and the creamy variety is no exception. If you’re a fan of a creamier consistency, simply add in a half cup of heavy cream. Easy peasy.
Should I use chicken breasts or chicken thighs for soup?
Ah, the eternal question of which chicken pieces to use. Chicken breasts and chicken thighs are different parts of the chicken that come with their own advantages. In the recipe above, we recommend chicken breasts because of the texture that they add to the soup.
Chicken breasts don’t tenderize as much as chicken thighs, which to me is a plus in this soup. Instead of strands of chicken that disintegrate immediately, it provides a bit more bite, and hence a textural contrast to the noodles.
Of course, using chicken thighs does have its advantages. Darker meat becomes tender and soft, and maybe that’s what you’re looking for. They are also often more flavorful, which is always a plus. This is one of those things that depends a lot on personal preference.
Written by Jorge Farah Born on the coast of Colombia and based in Buenos Aires, Jorge is a cooking enthusiast and kitchenware obsessive with a tremendous amount of opinions.
]]>
https://herniaquestions.com/blogs/news/best-lasagne-recipe2021-02-05T15:27:47-05:002024-07-16T02:06:57-04:00Lasagna RecipeJorge FarahFor me, and I suspect for a lot of people, lasagna goes even beyond the inherent qualities of the dish itself. My Mom used to make lasagna every other Sunday when I was a kid, so its aroma and taste immediately transports me to happy memories of sitting around the table with my family.
I just love lasagna. To me, it’s the definition of comfort food. (Even reheated lasagna) It’s just such a good, fulfilling, deliciously cheesy dish that is both deeply satisfying and incredibly addictive-- layers upon layers of various kinds of cheese, pasta and meat sauce makes for an incredible dining experience. One of the all time great dinner recipes.
For myself, and I suspect for a lot of people, it goes even beyond the inherent qualities of the dish itself. My Mom used to make lasagna every other Sunday when I was a kid, so its aroma and taste immediately transports me to happy memories of sitting around the table with my family. It’s like a delicious time machine… made of cheese and pasta.
Knowing how to make a good lasagna is always a valuable skill to have. It may be a little time-consuming -- there are a lot of steps to the process, especially if you’re making your own noodles -- but it is infinitely rewarding. Think of it as a project! And at the very end, you’re rewarded with a delicious meal. An incredible feast of cheese, pasta, meat and sauce.
Whether you have your own personal connection with this delectable casserole or not, its enduring appeal is simply undeniable, and it is a perennial favorite at potlucks and get-togethers. And homemade lasagna is better than any frozen lasagna you can get! You can acquire some valuable kitchen skills, and start building those happy memories of your own, with this easy lasagna recipe.
1. What is the difference between lasagna and lasagne?
If you’re anything like me, you’ve seen the words “lasagna” and “lasagne” and spent a long time thinking one was a misspelling of the other. Of course, you weren’t exactly sure which was correct, but you figured you’d just use them interchangeably until somebody pointed our your error. I mean, it’s gotta be one or the other, right?
Turns out things are a little messier than that, but we’re here to help you make sense of it.
There are a couple of variables to take into consideration. One of them is language, and the other is the difference between the dish (the aforementioned many-layered casserole) and the pasta itself. Let’s start by talking about how things are in Italian.
In Italian, a lasagna (singular, ending in -a) is a single sheet of the pasta we use to make the dish. The dish itself is made up of many sheets of this pasta, so it follows that the name of the dish in correct Italian is plural: lasagne (ending in -e). So any time you say “lasagne” in Italian, you are referring to the dish, which contains multiple sheets of pasta (hence, plural form). In Italy, this would be a “lasagne recipe”.
Now let’s talk about English. At some point when the dish started to become known in the English-speaking parts of the world, the distinction between the plural lasagne and the singular lasagna started to break down, to the point where the word started being used exclusively in the singular.
To complicate things further, there’s a difference between how the word is spelled between British English and American English. In British English, the dish is most commonly spelled as lasagne (though still pronounced as “lasagna”), whereas American English both writes and pronounces the word as if it were a singular (“lasagna”).
It may be a little confusing to wrap your head around, but to simplify, we’ll be referring to the dish as lasagna from here on out, and to the pasta as “lasagna noodles”. Even though if we get into the technical definition of the word “noodle,” they may not entirely qualify. Language is fun!
2. A brief history of lasagna
Whatever you grew up calling this bubbling beautiful dish, you might be interested to know that it didn’t actually originate in Italy!
That’s right. The dish made of stacked layers of pasta, olive oil, meat and tomato sauce, mozzarella cheese and various other ingredients has all the markings of a classic Italian dish. And indeed, Italians were the ones who perfected it, shaping it into its glorious current incarnation. In that sense, the great people of Italy deserve the lions’ share of the credit. But it’s not where the dish first came from!
It is believed that the traditional lasagna actually originated in Ancient Greece, long before it became an Italian staple. The word is derived from the Greek “Laganon,” the very earliest known form of pasta. And Laganon bears some resemblance to what we know as lasagna -- it was layers of pasta and pasta sauce -- but it wasn’t lasagna as we now understand it. The word was used to describe flat dough that was sliced in strips. No ground beef, sausage or mozzarella cheese in sight.
The dish rose to prominence in Italy during the Middle Ages, most famously associated with the city of Naples. As time went on, the dish continued to evolve and incorporate other elements, such as tomato sauce, sausage, meatballs, ricotta and mozzarella cheese, and even hard-boiled eggs. It would then be sauced with a Neapolitan marinara sauce.
And while a mix of meatballs, sausage, tomato sauce, meatballs and cheese sounds very much like lasagna, there was still a lot of room to grow.
As with any combination of food, time, and geography, the dish started to evolve as it made its way through the land; the Emilia-Romagna region of Italy saw the birth of Lasagne al forno, which is layered with a Béchamel sauce. And as its popularity grew, so did its various offshoots and variants, with people incorporating various meats, vegetables, cottage cheese (or any cheese) and seasonings.
It’s common for extremely popular dishes to have murky and disputed origins, usually crowded with apocryphal stories (just look atour article on pizza dough). Lasagna is no exception. Wherever it came from, we can only be grateful to have it in our lives.
3. Ingredients you’ll need to make a lasagna
Now that we know the different ways to spell it as well as a bit about its origins, let’s talk about how to actually make an incredible lasagna that will blow everyone away. And though there are many varieties -- there’s eggplant lasagna, recipes that incorporate other meats like sausage or even a chicken lasagna, a type that is made with a ricotta cheese mixture -- we’ll be sticking to a classic lasagna recipe today.
This classic lasagna recipe uses ricotta cheese, grated parmesan cheese and mozzarella cheese, but there are many variants that incorporate other cheeses.
Of course, there are several elements to consider in a lasagna recipe: the lasagna noodles, the meat sauce, the bechamel sauce, the assembly, and the baking. Let’s take it one step at a time.
To be as thorough as possible, first we’ll cover how to make homemade layer of noodles and then we’ll show you how to put it all together in its classic tiered and mouthwatering cheese-meat-and-sauce presentation.
Here are the ingredients you’ll need for your homemade lasagna.
Lasagna noodles
14 oz 00’ Flour
4 large eggs
1 egg yolk
Meat sauce
1 tablespoon olive oil
1 large finely chopped carrot
1 large finely chopped celery
1 large finely chopped white onion
1 lb ground beef
1 lb ground pork (optional)
2.5 cups sieved tomatoes
3 tablespoons tomato paste
1 cups red wine
6 cups beef stock
2 bay leaves
1 tablespoon sea salt flakes and pepper
Bechamel sauce
5 tablespoon unsalted butter
5 tablespoon all-purpose flour all-purpose
4 cups full fat milk
1/2 tablespoon nutmeg
1 cup freshly grated parmesan cheese
1 tablespoon sea salt flakes and pepper
Additional ingredients
2 balls of mozzarella cheese
1 lb lasagna sheets (if you’re not making your own)
You could buy ready-made dried lasagna noodles from your grocery store -- there is absolutely no shame in that. They are convenient and also quite delicious. But if you’ve ever had homemade pasta, you know there’s something quite special about it -- although it does take considerably longer.
Note that for this process you will need a pasta machine!
Process
Place the flour on a clean work surface and make a “well” indentation in the middle. Once you’ve done this, add in the eggs. Use a fork to whisk the eggs while slowly incorporating the flour until it combines and forms into a rough dough.
Use your hands to bring the dough together into a ball shape. Knead the dough for about 10 minutes, at which point it should feel smooth and quite pliable. Now wrap the dough in cling film and let it rest at room temperature for 30 minutes.
Once it’s rested, it’s time to roll it out. In order to make the process easier, cut the dough in half and flatten it with the palm of your hand, that way it will fit through the first setting on the pasta machine without any problems.
Pass the dough through the widest setting and fold one side over the other, flattening it with the palm of your hand so that it will fit. Roll it through again. We’ll repeat this process, folding the sides in and passing it through the widest setting, four or five times. At that point, you should be able to pass the dough through each setting once, from first to second last.
Then it’s just a matter of cutting the fresh lasagne sheets to the right size to fit your dish, and voila. You’ve made your very own lasagna noodles that you’ll soon be stacking on top of each other with sauce and cheese.
5. How to make the meat sauce (ragu)
There are many variants of lasagna, as we’ve established -- many of them are even vegetarian (vegetable lasagna is actually quite delicious). Some are made with marinara or spaghetti sauce. But for this lasagna recipe, which is a classic Lasagna al forno, we absolutely need a good homemade meat sauce. Here’s how to make it.
Like a lot of Italian sauces, like marinara, we begin with what Italians refer to as “Il Soffritto” -- finely chopped carrot, celery and white onion sauteed for about 10 minutes with some olive oil until it’s soft and your entire kitchen smells like heaven. This starting step adds a beautiful depth of flavor to the tomato sauce, and the olive oil gives it an incredible richness.
Once you’ve done this, add in the pork and the ground beef and let it brown. Stir it with a wooden spoon. Note that pork is optional: you may not want pork in your lasagna, in which case you can just omit it entirely (replace with more ground beef).
Some people like to use sausage here. Sausage certainly works very well with this lasagna -- certainly Italian sausage makes for an incredible meat sauce -- but it does stray from the classic formula. We’re not making sausage lasagna here.
If at this point you have a lot of excess fat, just spoon some of it out. Add in the red wine and let it reduce by about half. Once it’s reduced, you can throw in the bay leaves, sieved or crushed tomato, tomato paste, and four cups of beef stock. Add in a pinch of salt and pepper.
At this point it’s just a matter of stirring everything together for a little bit, and then let it simmer on a low heat for 2 to 3 hours, uncovered. Halfway through, the tomato paste, crushed tomatoes and all other ingredients should be more or less homogenized, and you can add in the rest of the beef stock. You’ll be left with a meat sauce to die for, and it goes fantastically with cheese.
6. How to make the bechamel sauce (white sauce)
A good bechamel sauce will be what really kicks this lasagna recipe to the next level -- from merely “tasty” to absolutely heavenly. Thankfully, making a good homemade bechamel sauce (also known as “white sauce”) is very straightforward.
The first thing we’re going to do is add the butter to a saucepan and get it melted and bubbling. Then add in the flour, stirring it to form a paste. Let it cook with the butter for about one minute.
Slowly, whisk in half of the milk into the butter and flour, keeping it moving to avoid any lumps. Once it’s started to thicken, add in the rest of the milk, as well as the nutmeg, the parmesan cheese, and a pinch of salt and pepper. The cheese will thicken it further.
You’ll find that as you continue to heat the sauce and stir it, it’ll thicken until it gets to the point where it coats the back of a wooden spoon. Once you’re at that point, take it off the heat and set it aside.
7. How to assemble the lasagna
Now we have all the elements -- we’ve made the lasagna noodles (or bought pre-made ones, no judgment!), we’ve made our meat sauce, and we’ve made our bechamel sauce. We have the puzzle pieces. Now we put it all together.
Spoon a little bit of the meat sauce at the bottom of the baking dish. Then cover it with an even layer of lasagna sheets (cut the lasagna noodles to fit your baking dish -- extremely useful to have a good knife, make sure it’s sharp, and use a good cutting board for this step).
Add in a few more spoons of your meat sauce so that it completely covers the pasta, then add in two ladles of white sauce. The layering process goes: pasta, ragu, bechamel sauce. Pasta, ragu, bechamel sauce. Repeat until everything is used up, but set aside enough bechamel sauce for the top layer.
Once you’ve filled up your pasta dish, finish off the bechamel on the top layer and then cover it with torn mozzarella cheese. The mozzarella will create a great outer later for your baked lasagna. Put it in an oven that’s been preheated to 350F and let it bake for a cooking time of 45 minutes. At that point, your lasagna should be bubbling and golden.
It will also be piping hot at this point, so let it cool a bit before serving -- usually 15 to 20 minutes, if you can resist temptation for that long.
Pro-tip: You can serve lasagna on the same day you make it, but it’s even better the next day! Letting it cool, storing it in the fridge and then putting it in the oven to serve the next day not only provides better structural integrity (it won’t fall apart as easily), but also more depth of flavor! But if you’re too eager, just do this with your leftover lasagna and you’ll see what we mean.
8. Frequently asked questions about lasagna
Should I put a layer of pasta at the bottom of my lasagna?
It’s best practice to add a little bit of the meat sauce at the very bottom of your baking dish to avoid any sticking or burning.
How many layers should lasagna have?
If you follow the easy lasagna recipe above, you’ll end up with 4 to 6 layers, also depending on the size of your baking dish.
What kind of cheese should I use in my lasagna?
Any kind you want! For the lasagna recipe above we used parmesan cheese and mozzarella cheese; other recipes include ricotta, cheddar, or even cream cheese! It all depends on what you’re looking for. It’s good to honor the classics, but so much about cooking is about playing around and seeing what works.
This doesn’t just apply to cheese. Why not use a combination of meats? How about a chicken and sausage lasagna? How about a meat sauce that incorporates spicy Italian sausage? Try things out. If you’re willing to experiment a little, you may stumble upon your own fresh new take on this classic dish.
Written by Jorge Farah Born on the coast of Colombia and based in Buenos Aires, Jorge is a cooking enthusiast and kitchenware obsessive with a tremendous amount of opinions.
 9" Frying Pan & Skillet herniaquestions ETERNA Non-stick Oberon Series
 10" Frying Pan & Skillet ETERNA Non-Stick Oberon Series herniaquestions
 12" Frying Pan & Skillet
  9" Frying Pan & Skillet Silver Oberon Series herniaquestions
 12" Skillet Frying Pan Hammered Finish Silver Avalon Series herniaquestions


 The Avalon Series 9” Frying Pan and Skillet


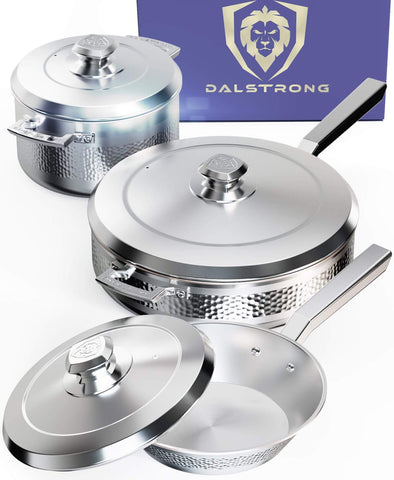
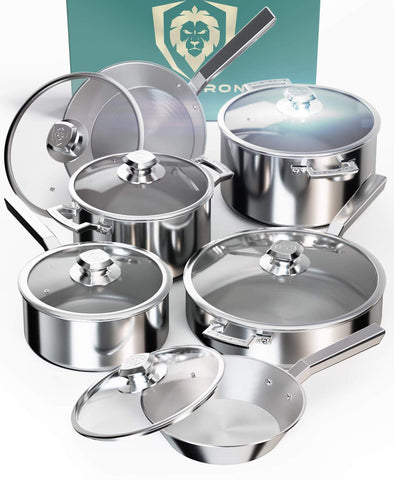


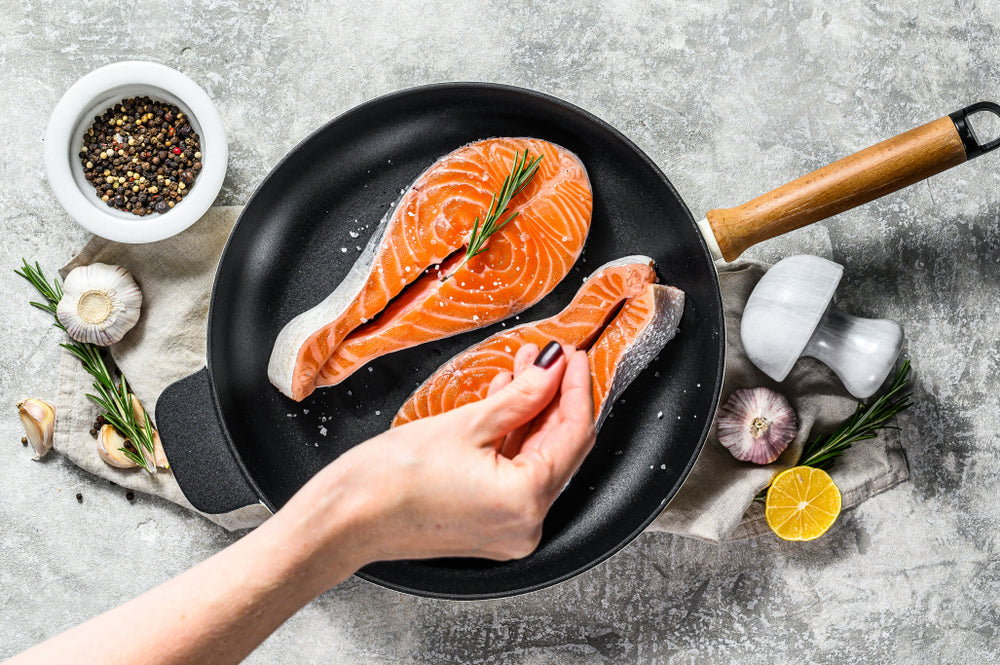


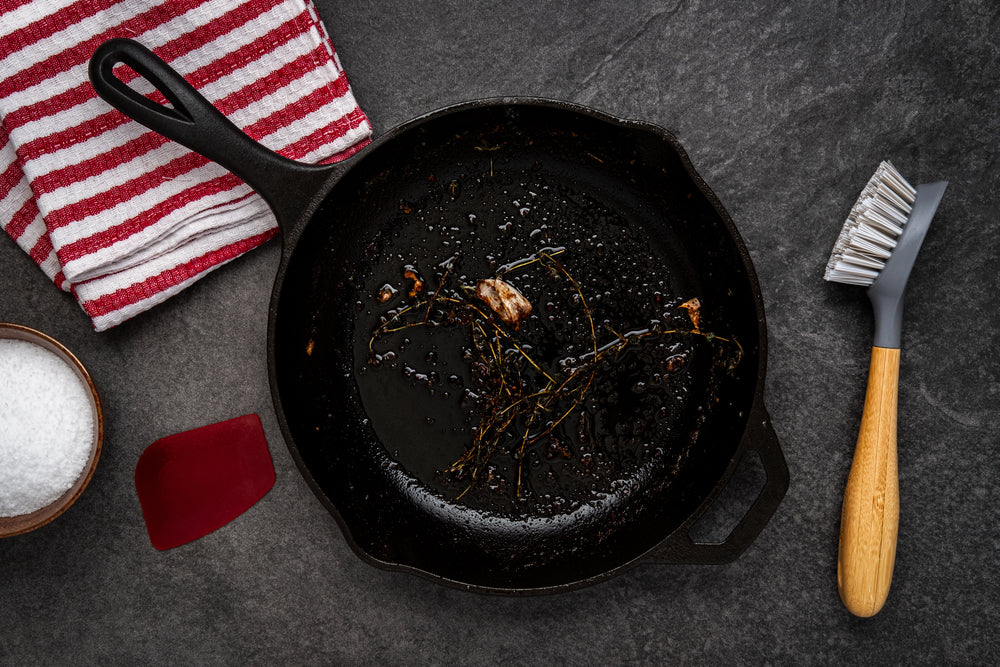


 Oberon Series 6 Piece Cookware Set